PCA9306 Logic Level Translator Hookup Guide (v2)
Introduction
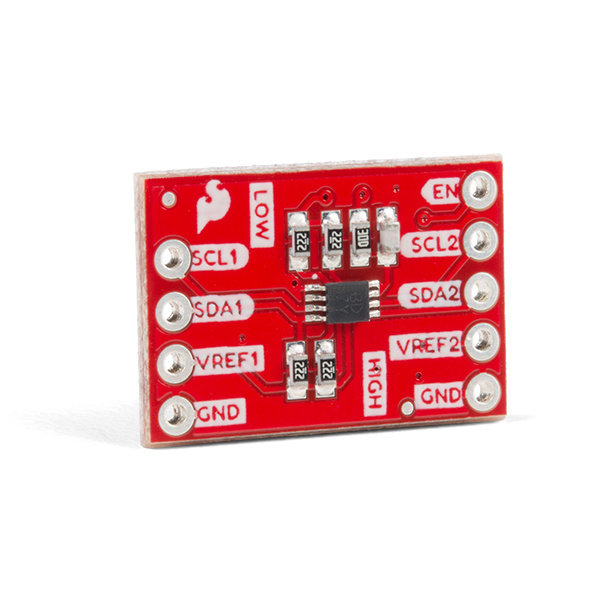
The PCA9306 is a dual bi-directional voltage translator for the I2C-bus and SMBus. It works at a range of voltages between 1.2V and 5.0V and doesn't require a direction pin to function. This is a great board for shifting voltages between sensors and your microcontroller.
Required Materials
To follow along with this tutorial, you will need the following materials. You may not need everything though depending on what you have. Add it to your cart, read through the guide, and adjust the cart as necessary.
Tools
You will need a soldering iron, solder, and general soldering accessories.
Suggested Reading
These level converters are pretty easy to start using, but you may want to check out some of the additional reading material below if you are unfamiliar with logic level shifting or haven't worked with Arduino boards prior to this.
How to Solder: Through-Hole Soldering
What is an Arduino?
Logic Levels
I2C
Hardware Overview
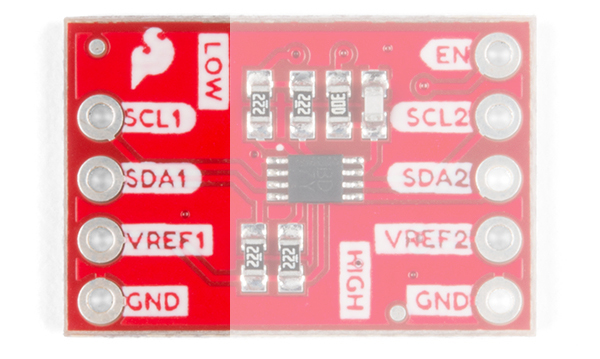
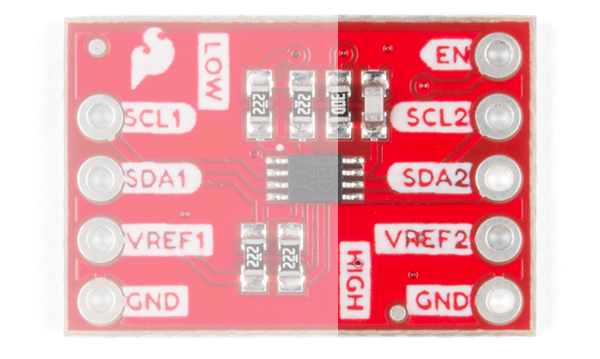
Power and I2C Sides
At a minimum, the breakout board has seven pins that need to be connected to function properly. VREF1, SCL1, and SDA1 all connect to your lower voltage side.
VREF2, SCL2, and SDA2 connect to your higher voltage side. One of the GND pins on either side needs to be connected to ground in your system.
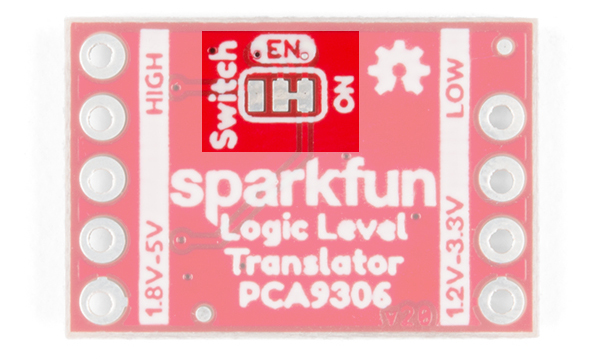
What's that extra through-hole on the board labeled as EN? Well, it can be connected to an I/O pin to toggle the PC9306 from the high side. You'll need to adjust the jumper in the back to be able to use this feature. Check below for more information.
Allowable Voltage Level Translation
For most of the products listed in the catalog, usually you will be translating voltages between 3.3V and 5V. However, the datasheet for the PCA9306 states that it can be used to translate lower voltages if you need. Below are the acceptable voltages on the low and high sides.
| VREF1 (i.e. Low Side) | VREF2 (i.e. High Side) |
|---|---|
| 1.2V | 1.8, 2.5V, 3.3V, 5V |
| 1.8V | 2.5V, 3.3V, 5V |
| 2.5V | 3.3V, 5V |
| 3.3V | 5V |
Jumpers
There is a jumpers on the underside of this board to turn on and off the PCA9306. By cutting the trace and adding a solder jumper toward the pad labeled as "Switch," you can toggle the logic level translator with your microcontroller.
Enable Feature
It's possible to use the PCA9306 as an I²C switch. First, as mentioned above, you'll want to cut the ON trace and solder the Switch trace. To use the feature you'll attach the high side VREF2 to you're high side voltage as you normally would, and then attach the EN (enable) pin, to a digital Pin. Now when you want to enable I²C communication, pull the line HIGH.
Hardware Assembly
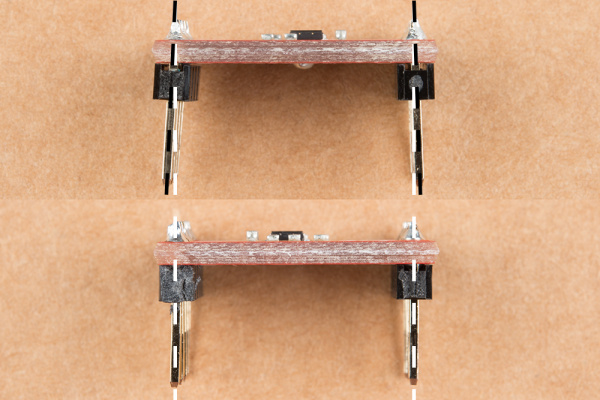
To connect the board, you will need to solder headers into the through-holes, and use jumper wires to connect between devices when prototyping. Make sure to place it on a breadboard before soldering to test. You will need to make sure that the headers on each side of the PCA9306 breakout board are soldered at an angle in order for it to sit securely on a breadboard. The board shown at the top of the image shows how the pins are offset and soldered at a small angle. The board shown at the bottom of the image shows pins flush with the board. You will want to make sure that you soldered the pins like the board shown at the top of the image.
You could also just solder some hookup wire or add a protoshield to connect all of your boards together securely for a project.
Hardware Hookup
For this example, we are going to use an Arduino Uno to connect to an MMA8452 accelerometer breakout board, which runs at 3.3V and communicates over I2C.
| 3.3V Device (i.e. MMA8452) | PCA9306 (Low Side) | PCA9306 (High Side) | 5V Device (i.e. Arduino Uno w/ ATmega328P) |
|---|---|---|---|
| 3.3V | VREF1 | 3.3V | |
| VREF2 | 5V | ||
| SCL | SCL1 | SCL2 | A5 |
| SDA | SDA1 | SDA2 | A4 |
| GND | GND | GND | GND |
| EN | Any I/O Pin If Jumper is Adjusted |
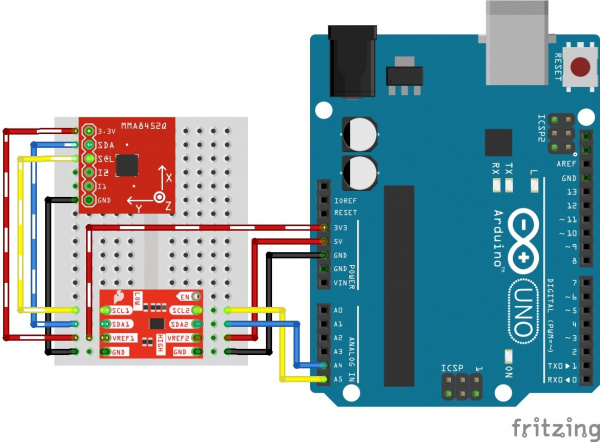
Here is a Fritizing diagram showing the actual connections between the MMA8452, the PCA9306 breakout and the Arduino Uno.
You'll need to connect power for the Arduino via the barrel jack, VIN, or USB connector. In this case, we'll simply use power from the USB cable to provide 5V to the high side. The diagram shows the MMA8452 running off the Arduino Uno's 3.3V rail. Keep in mind your power supplies could be different, but you will still need to have a power supply for the lower voltage side of the system and a separate supply for the higher voltage side.
Once you have the boards physically connected, you are good to go! You don't need to use any special code with the PCA9306 board, and you can simply use any example sketch available for your sensors. In this case, we are using the example MMA8452 from the hookup guide. Head over to the tutorial to finishing programing your Arduino to start using the accelerometer!
MMA8452Q Accelerometer Breakout Hookup Guide
Resources and Going Further
Now that you know how to use the logic level shifter, it's time to go and use this in your own project! Check out the additional resources below if you have any questions, or leave us feedback on the tutorial itself. Best of luck interfacing with all of your sensors!
Looking to shift the logic levels for a different sensor with the Arduino? Try modifying a Qwiic cable before shifting the logic levels of your I2C device for a Qwiic enabled product.
