Lumenati Alien Garden
 Dia
Dia 
Introduction
I recently visited one of Disney World’s newest parks: Pandora - The World of Avatar. Instead of souvenirs, I brought home a hankering for my own alien garden. This tutorial will show how to use Lumenati LED boards to light up a variety of succulent plants in your own alien garden.

Required Materials
To follow along with this tutorial, you will need the following materials:
Suggested Reading
If you have not worked with the Lumenati boards before, we suggest looking at the following guide:
Lumenati Hookup Guide
Hardware Hookup
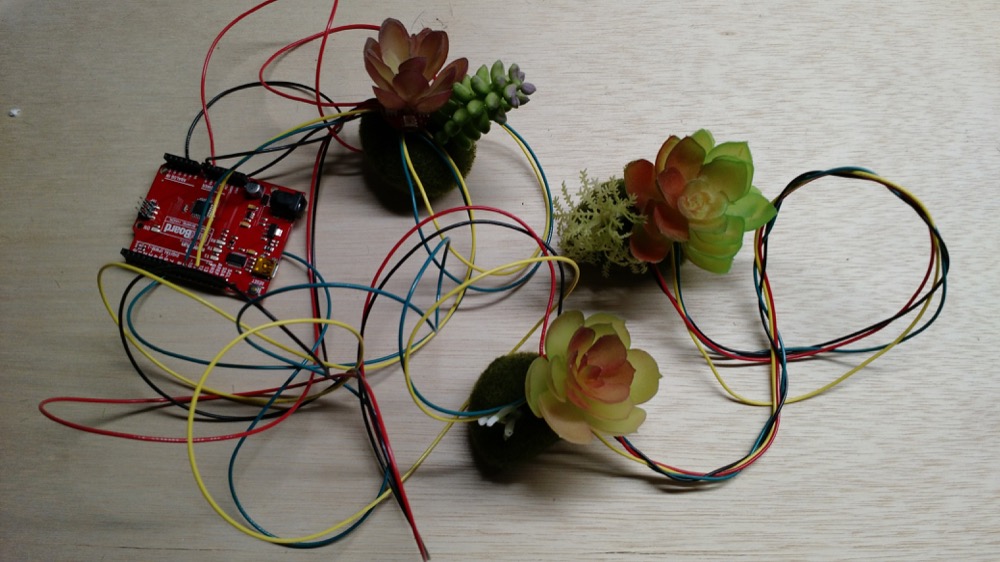
Before you can begin building the garden, you'll want to wire and solder all the boards. Measure how far apart you want all the plants to be and cut wire lengths accordingly.
Start by connecting your first Lumenati board to the SparkFun Redboard or whichever microcontroller you've chosen. Wire the first board as shown in the table below. There are two sets of 5V and GND pins; make sure that you leave one set open to make the next step easy!
| RedBoard | First Lumenati Board |
|---|---|
| GND | GND |
| 5V | 5V |
| 13 | CI |
| 11 | DI |
Next, connect your first and second Lumenati boards. You want to connect CO on the first board to CI on the second, and DO to DI. Use the second set of 5V and GND pins on the first board to connect to the second board. Once again, leave one set of 5V and GND open on the newest board!
| First Lumenati Board | Second Lumenati Board |
|---|---|
| GND | GND |
| 5V | 5V |
| CO | CI |
| DO | DI |
Repeat this process from the second board to the third. If you have more plants, you can continue adding boards this way. Ensure you have a power supply that can supply enough current if you decide to add more boards!
| Second Lumenati Board | Third Lumenati Board |
|---|---|
| GND | GND |
| 5V | 5V |
| CO | CI |
| DO | DI |
Once the wiring is complete, it's a good idea to upload code to the RedBoard and test everything out before installing into the garden. See the next section for the code.

Upload the Code
Plug the RedBoard or microcontroller of choice into your computer. Open the Arduino IDE, copy the sketch below, and upload the code to the board. Please note that this example uses the FastLED library. You will need to have it installed for this sketch to work. You can find the latest version here. Alternatively, you can search for the 'fastled' in the Library Manger and install it that way.
language:c
#include "FastLED.h"

//Number of LEDs; edit this if you've added more boards or changed the sizes
#define NUM_LEDS 16

//Define our clock and data lines
#define DATA_PIN 11
#define CLOCK_PIN 13

//Create the LED array
CRGB leds[NUM_LEDS];

void setup() {

      //Tell FastLED what we're using. Note "BGR" where you might normally find "RGB".
      //This is just to rearrange the order to make all the colors work right.
      FastLED.addLeds<APA102, DATA_PIN, CLOCK_PIN, BGR>(leds, NUM_LEDS);


      //Set colors for all of the LEDs; Fast LED has a HUGE selection of colors, so
      //browse through them and find the best matches for your plants.
      leds[0] = CRGB::DeepPink;          //  First Flower
      leds[1] = CRGB::Teal;              //
      leds[2] = CRGB::DeepPink;          //
      leds[3] = CRGB::Teal;              //
      leds[4] = CRGB::Purple;            // Second Flower
      leds[5] = CRGB::Green;             //
      leds[6] = CRGB::Purple;            //
      leds[7] = CRGB::DarkGreen;         //
      leds[8] = CRGB::Blue;              // Third Flower
      leds[9] = CRGB::Green;             //
      leds[10] = CRGB::Purple;           //
      leds[11] = CRGB::DarkGreen;        //
      leds[12] = CRGB::Purple;           //
      leds[13] = CRGB::Green;            //
      leds[14] = CRGB::Purple;           //
      leds[15] = CRGB::DarkGreen;        //


      //Set global brightness
      FastLED.setBrightness(50);
      FastLED.show();

}

void loop() {

  // set the length for delays and initial brightness for each flower
  uint8_t x;
  uint16_t wait = 50;
  uint8_t flower1 = 75;
  uint8_t flower2 = 255;
  uint8_t flower3 = 75;


    //To bring them to life, I'm dimming and brightening the LEDs to make them "pulse"
    //a little bit. Flower1 will get progressively brighter, while Flower2 gets dimmer.
    while (flower1 < 255)
      {
        flower1++;
        flower2--;
        leds[0].setHSV( 192, 255 , flower1 );
        leds[1].setHSV( 96, 255 , flower1 );
        leds[2].setHSV( 192, 255 , flower1 );
        leds[3].setHSV( 96, 255 , flower1 );
        leds[4].setHSV( 192, 255 , flower2 );
        leds[5].setHSV( 96, 255 , flower2 );
        leds[6].setHSV( 192, 255 , flower2 );
        leds[7].setHSV( 96, 255 , flower2 );
        FastLED.show();
        delay (wait);
      }


    //Once flower1 is at max brightness, they'll reverse, and flower1 will grow dimmer
    //while flower2 grows brighter.
     while (flower1 > 75)
      {
        flower1--;
        flower2++;
        leds[0].setHSV( 192, 255 , flower1 );
        leds[1].setHSV( 96, 255 , flower1 );
        leds[2].setHSV( 192, 255 , flower1 );
        leds[3].setHSV( 96, 255 , flower1 );
        leds[4].setHSV( 192, 255 , flower2 );
        leds[5].setHSV( 96, 255 , flower2 );
        leds[6].setHSV( 192, 255 , flower2 );
        leds[7].setHSV( 96, 255 , flower2 );
        FastLED.show();
        delay (wait);
      }


  FastLED.show();
  delay(wait);

}
Building the Garden
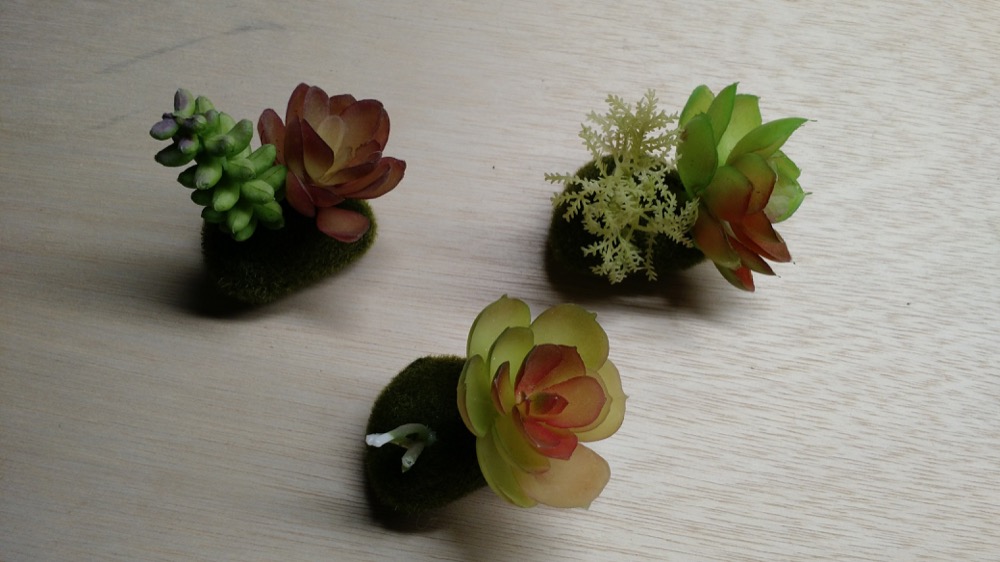
Now to integrate the lights into your plants! I went through a couple of types of silk plants, and even tried making a few by hand out of Polymorph, before deciding that plastic succulents diffused the lights best. Start with an array of small fake plants. Mine are mounted on mossy rocks, but small pots will work well and offer a place to hide the electronics. I’ll be tucking mine into some rocks in a cubby built into my home.
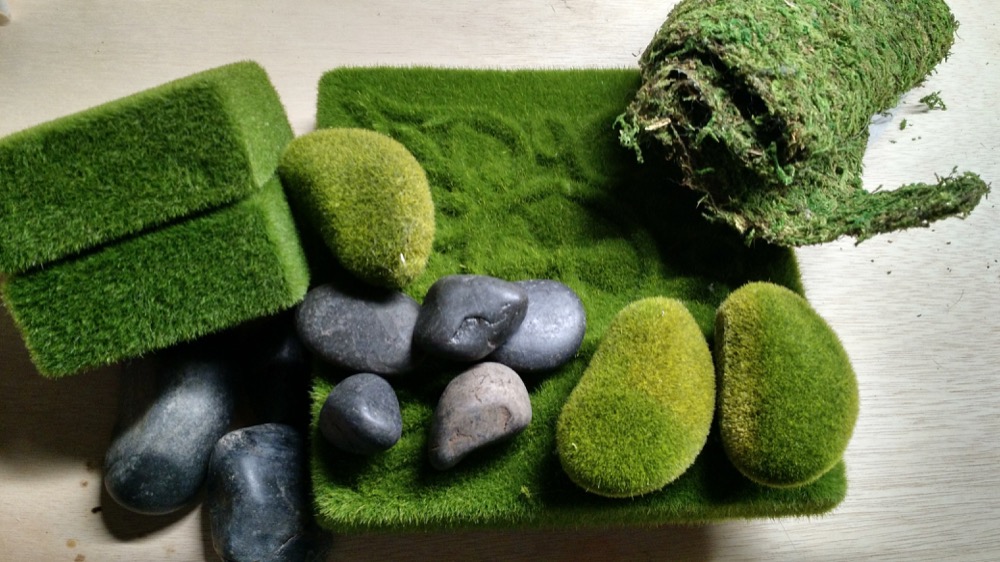
I also picked up some mossy tiles, more mossy rocks, and some real stones. The extra materials will help you to hide the wires.
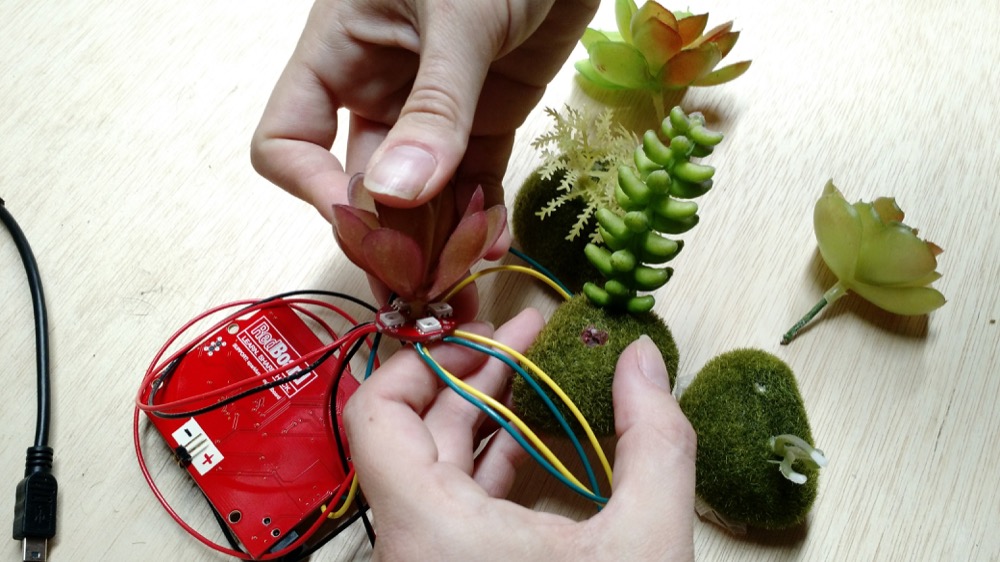
Whether your plants are in pots, rocks, or just bare, they should be on a pick. Give them a tug to pull them out of what they’ve been mounted on, revealing the pick.
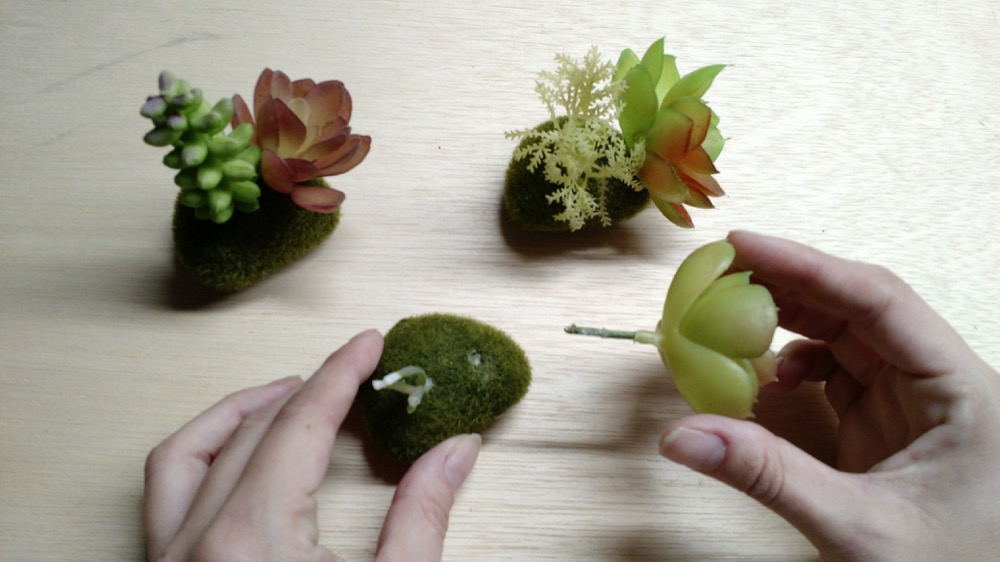
Note that pick sizes can vary dramatically.
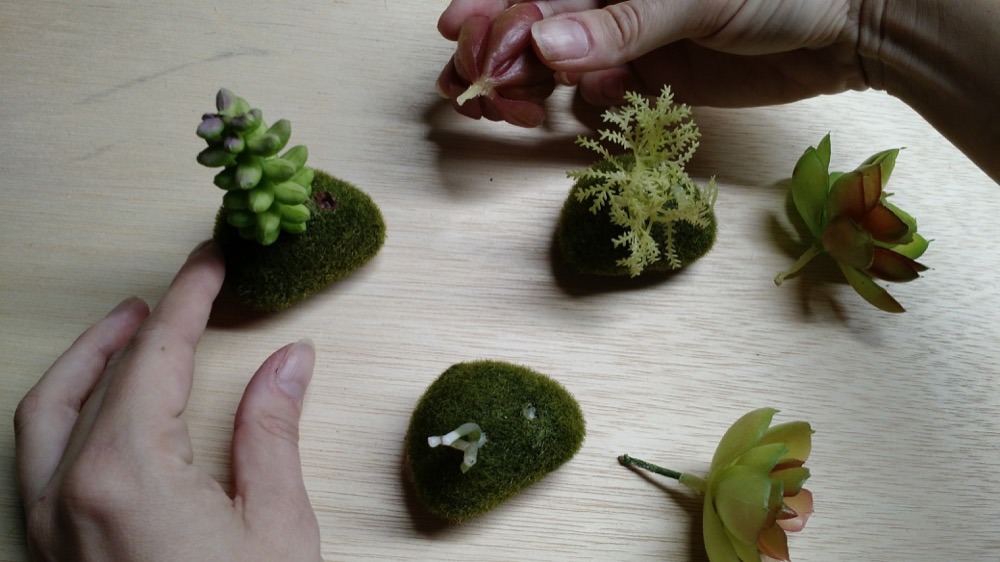
Slide each pick through one of the Lumenati board standoff holes, then back into the mounting. Given the natural variations in pick size, it may be necessary to use a hobby knife to shave it down to fit. If necessary, add a dot of glue to hold each pick in place.
Repeat for both Lumenati 4-packs.
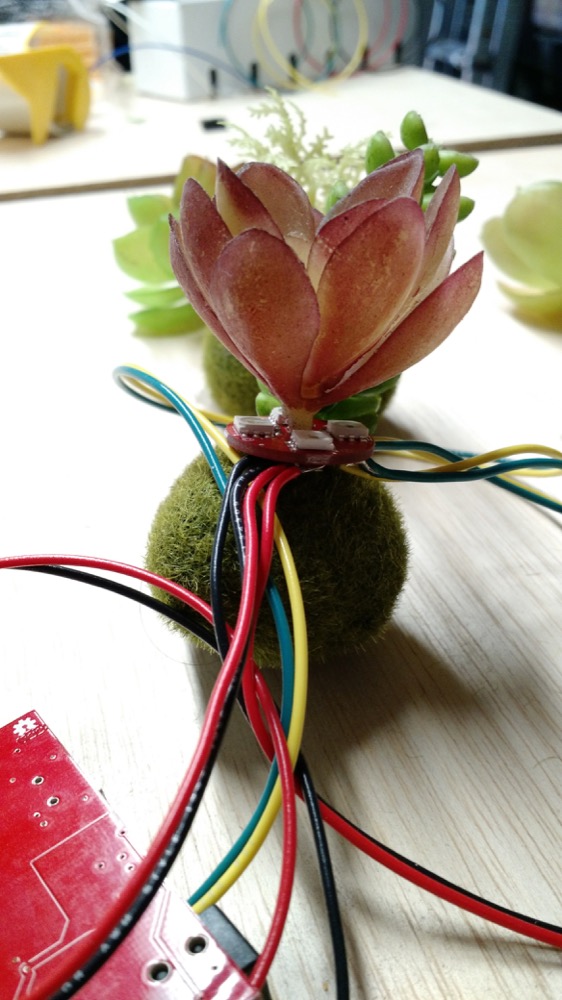
And, for the Lumenati 8pack.
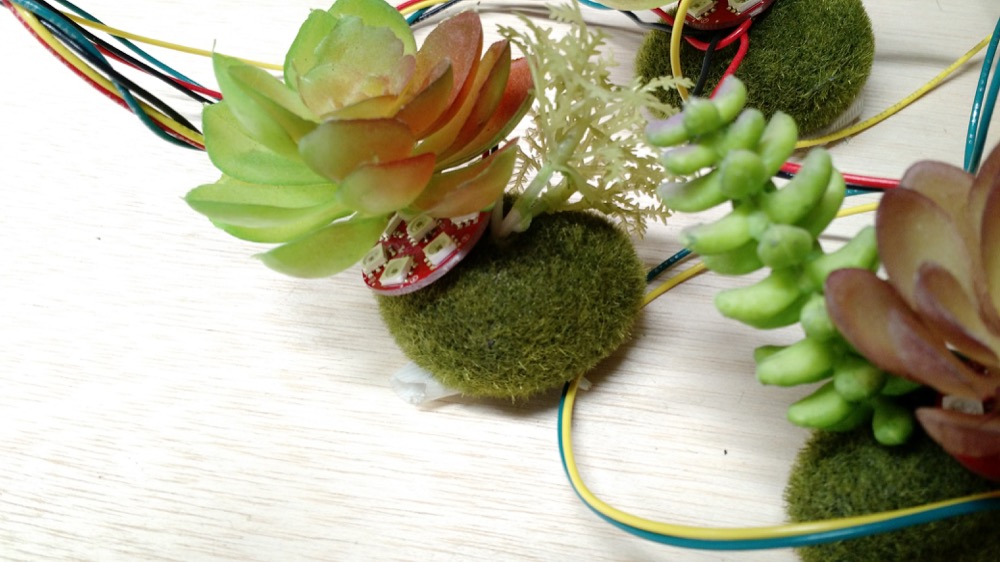
When all of your plants have the LEDs implanted, you’re ready to place them!
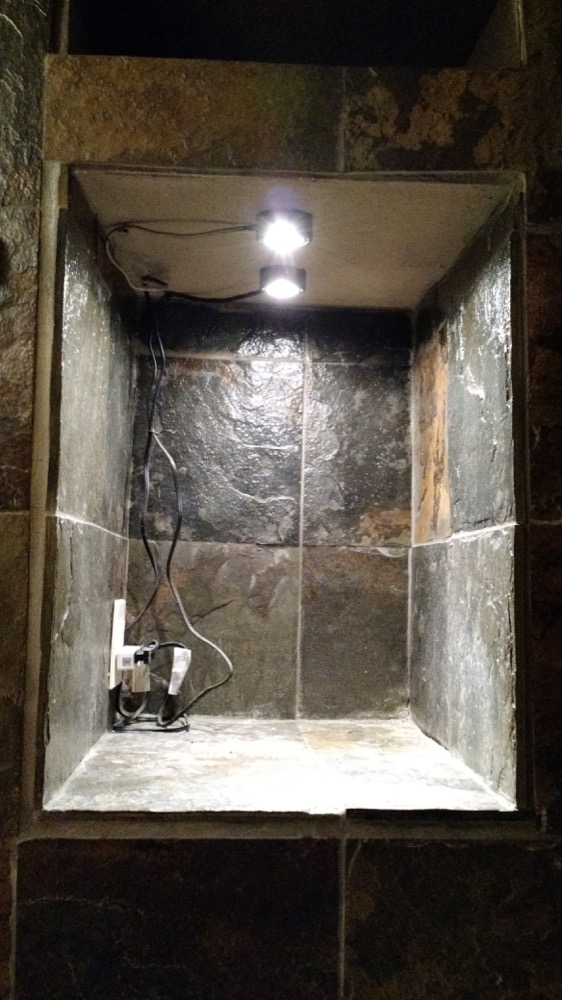
I’m using a small grotto that’s been in my house since I moved in, just waiting for some decorations. There is lots of control over the light level in here, so it’s a great spot! This will also work well in a flower pot, planter, or pretty much anywhere you might want plants.
Here’s my grotto before anything goes in:
First I installed a fountain and the larger moss tiles to fill some space and add some movement. I also added a power strip with USB outlets to make sure there’s somewhere to plug in everything.
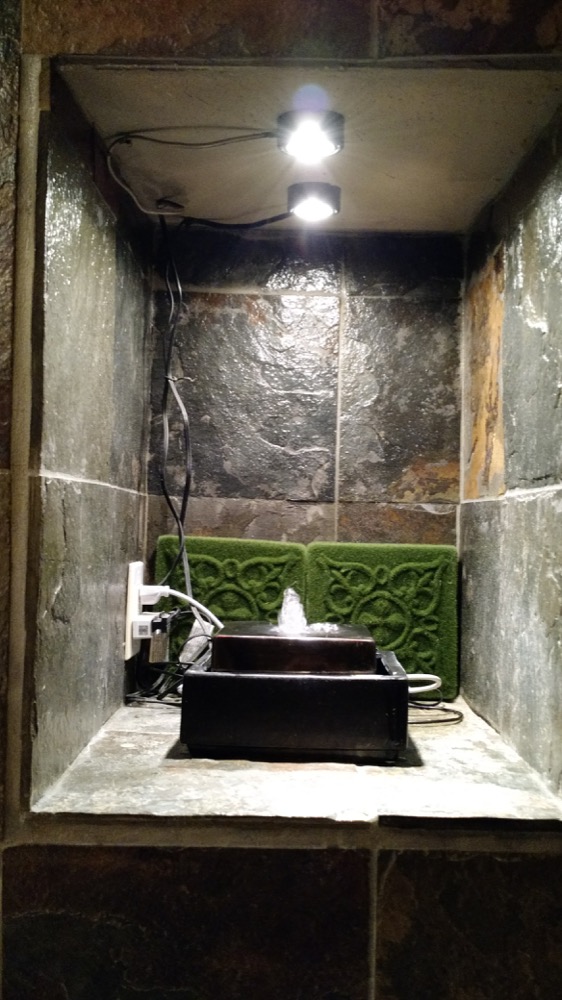
I added a couple more moss blocks and a potted fern to the back corner, to help cover the outlet, then tucked my succulents into place around the fountain.
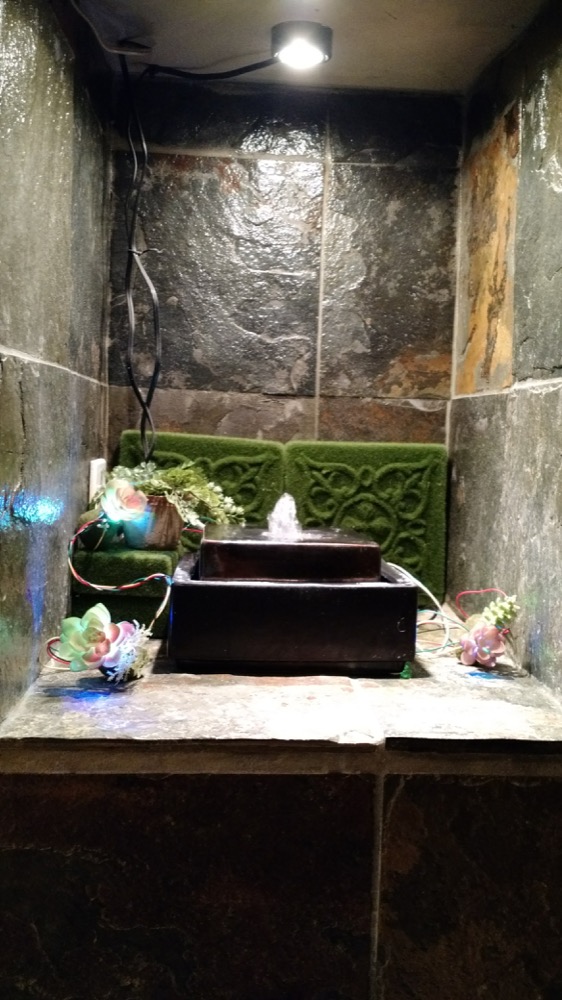
Using the heavier real stones to hold the wires down and out of the way, fill the remaining space with the rest of your plants and materials. Cover any remaining wires with styrofoam moss rocks.
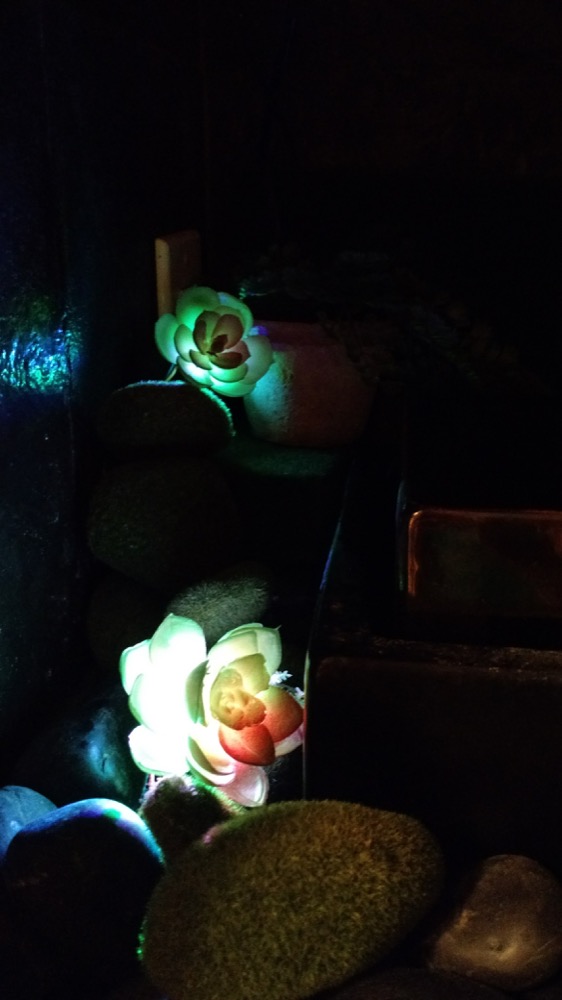
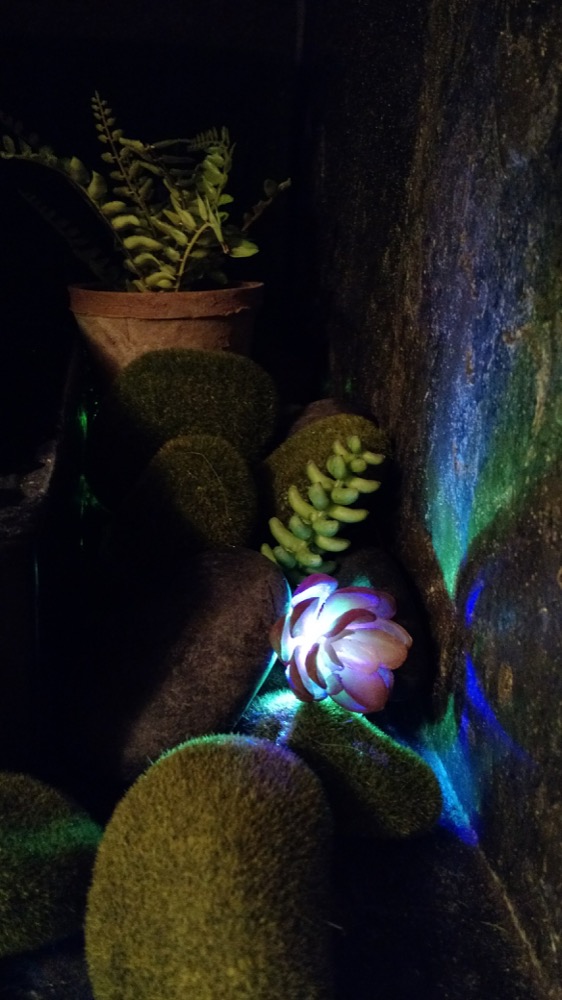
Turn off the overhead lights for a more dramatic effect:
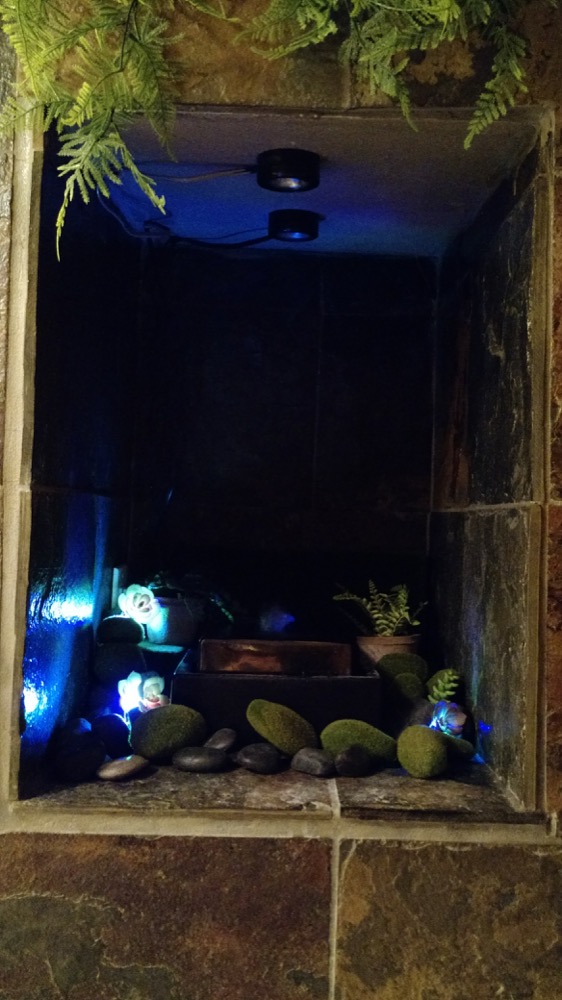
Closeups of my alien flowers:
Resources and Going Further
Need some inspiration for your next LED project? Check out these other great SparkFun tutorials.