LiPo USB Charger Hookup Guide
 jimblom
Inputs and Outputs
On this page, we'll dissect the USB charger, examining all of the inputs, outputs, and specifications of the board.
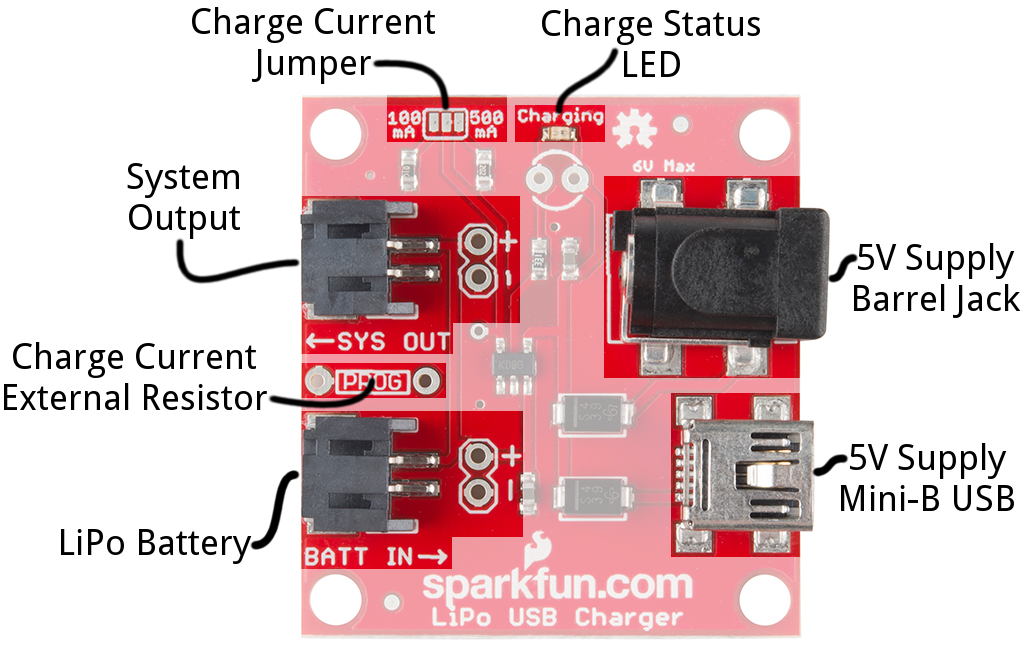
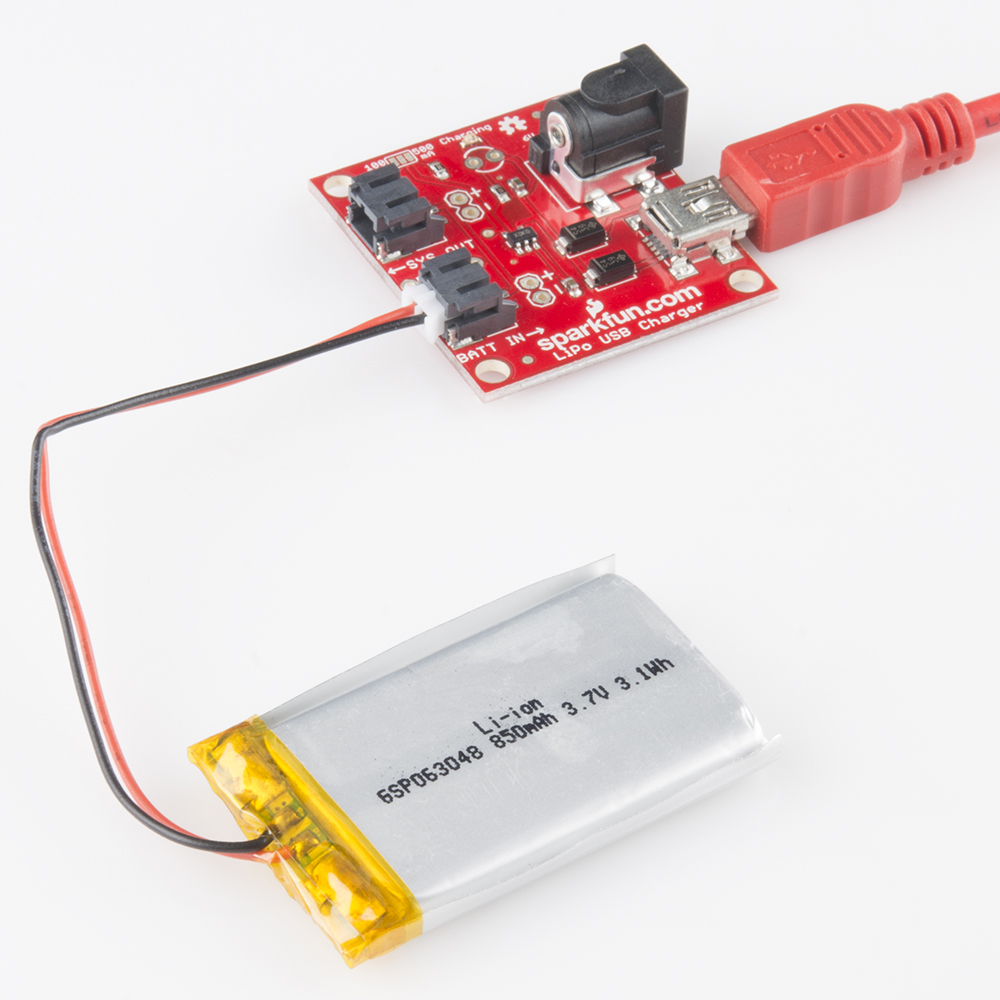
Charger Input -- Power Supply
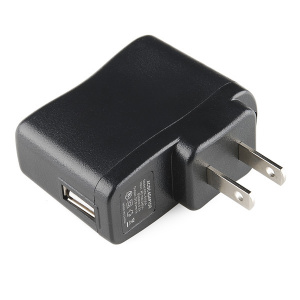
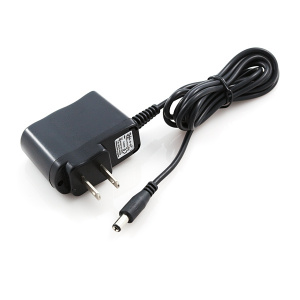
First, you'll need something to supply power to the charger, so it can regulate power to the battery. Connect your power supply to one of these two inputs: a barrel jack (5.5mm outer diameter, 2.1mm center pole, center-positive) or a mini-B USB connector.
Your power supply voltage should be between 4.75 and 6V. A 5V USB supply -- from a mini-B cable connected to either a computer USB port or wall adapter -- makes for a perfect power source. Or, if you want to use the barrel jack input, we recommend the 5V wall adapter.
The current requirements of the supply will depend on how you've set the charge current on the board. By default, the charge current is set to 500mA, so make sure your supply can handle that. Computer and laptop USB ports are most suspect here; 500mA is the defined max a port can supply, and oftentimes they're set to have an even lower output than that (e.g. 100mA).
You can safely attach both a 5V wall-wart and USB supply to the board. There is some protection (diodes!) on-board to prevent reverse current. The higher-voltage supply will source power to the chip.
Charger Output -- Single-Cell LiPo Battery
Once you've connected a power supply to your charger, the next step is to connect a battery. This board will only charge a very specific battery, make sure it meets these requirements:
- Single-Cell Batteries Only -- Your LiPo should have a nominal voltage output of about 3.7V, and get up to around 4.2V at a full charge. That means single-cell LiPo's only. If you have a multi-cell battery -- something with a nominal voltage of 7.4V or more -- this isn't the charger for you.
- Battery Chemistry -- The charger will only work with Lithium-Polymer or Lithium-Ion batteries.
- Capacity Considerations -- To avoid explosions (which are only very briefly fun), you shouldn't charge these LiPos at a current over 1C. That means a 500mAh battery shouldn't be given a charge current over 500mA, a 100mAh shouldn't be charged higher than 100mA. This board is designed to charge at 500mA out-of-the-box, but it's easy enough to change that rate. See the next page if your battery's capacity is under 500mAh.
All of our compatible batteries are terminated with a white JST connector, which you can plug directly into the mating black connector next to the BATT IN→ label. If your battery is terminated with some, weird, non-JST connector, you can also use the un-populated 0.1"-pitch header directly behind the JST connector. Wires or other connectors can be soldered to this header, if desired.
System Output
The LiPo USB Charger is designed to be easily embeddable inside a project. The ←SYS OUT connector allows you to connect your battery output to the remaining parts of your project.
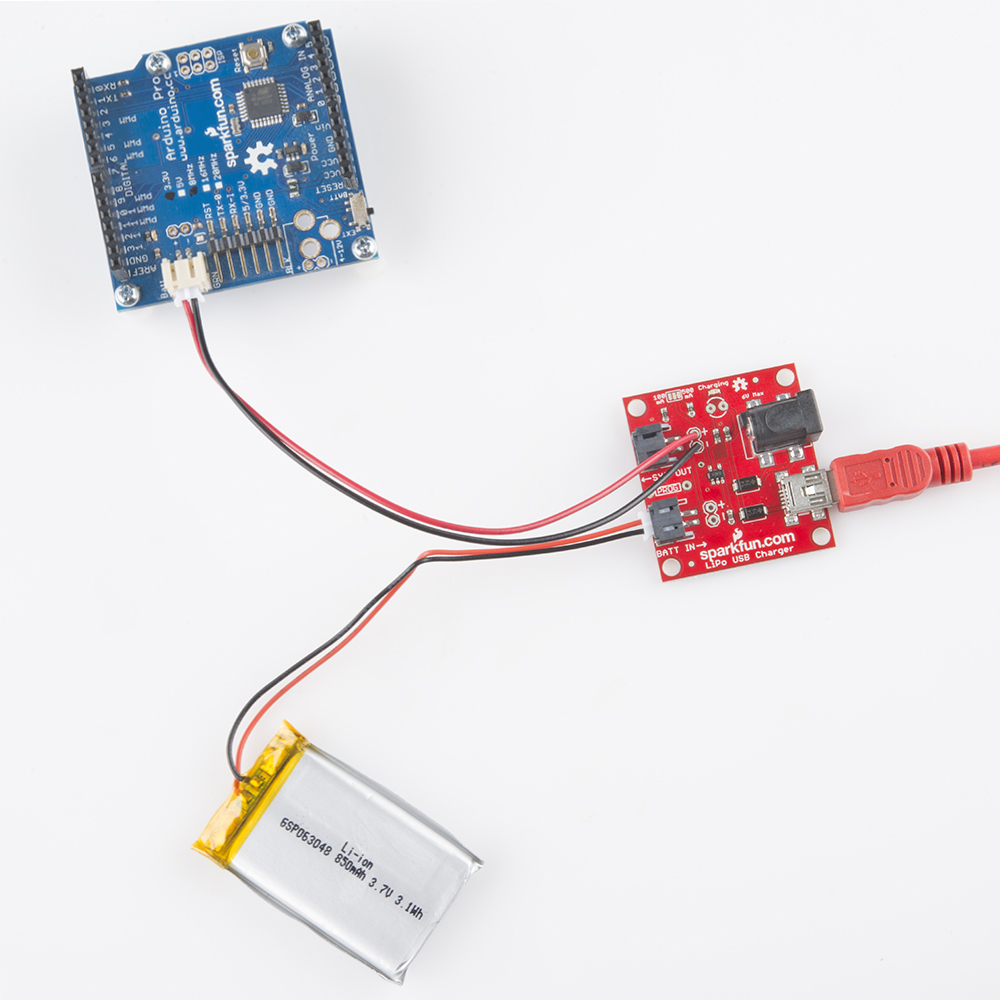
As with the battery connection, you can use either the JST connector or the nearby 0.1"-pitch header to connect your project.
The SYS OUT output will connect your project directly to your battery. That means the battery supply voltage (somewhere between 3.6 and 4.2V) will power your project. Make sure you regulate that as necessary.
Charge Status LED
The on-board red Charging LED can be used to get an indication of the charge status of your battery.
| Charge State | LED status |
|---|---|
| No Battery | Floating (should be OFF, but may flicker) |
| Shutdown | Floating (should be OFF, but may flicker) |
| Charging | ON |
| Charge Complete | OFF |
If you want to add your own, larger LED, there's an unpopulated footprint where you can solder either a 3mm or 5mm LED in the tiny (but bright!) red LED's stead. Make sure you get the polarity right, though.