LiPo USB Charger Hookup Guide
 jimblom
Setting the Charge Current
Before you plug a battery into the charger, you should be aware of your battery's capacity and the charge current supplied by the charger. To be safe*, you should keep the charge current at or below 1C of your battery. That means you should charge your 850mAh battery at 850mA or less, and a 100mAh battery at 100mA or less.
The charge current controls how fast your battery will charge. If you have a 1000mAh battery, charging at 1000mA will fully charge that battery in 1 hour. Charging it at 500mA will mean a full charge takes twice as long -- 2 hours. So more charge current is better...as long as it doesn't exceed your battery's specifications.
The featured component on the LiPo USB Charger board -- an MCP73831 -- has a programmable charge current feature. It can be set to deliver anywhere between 15mA and 500mA to a battery. To program that value, a resistor is connected from the PROG pin to ground. There are already two resistors on-board, which can set the charge current to either 500mA and 100mA. A small jumper is used to select between those. You can also add your own resistor, to set a custom charge current.
Jumper-Selecting
Next to the charge-status LED there are three bare pads that form a two-way jumper. The center pad connects to the MCP73831's PROG pin, and the outer two pads connect to a pair of resistors. The labels next to those outer pads indicate the charge current that they set.
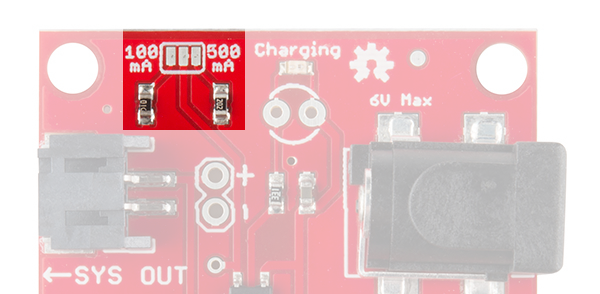
If you look really closely at that jumper, you may see a small trace connecting the middle pad to the 500mA-labeled outer pad. As such, this board is configured to deliver a 500mA current by default.
To change the charge current to 100mA, you'll need to cut that small trace between the pads (a hobby knife is recommended), and apply a solder blob to connect the 100mA-labeled pin to the center pad.
Custom Charge Current
If neither 100mA or 500mA will work for you, there is an unpopulated resistor footprint to allow you to set a custom charge current.
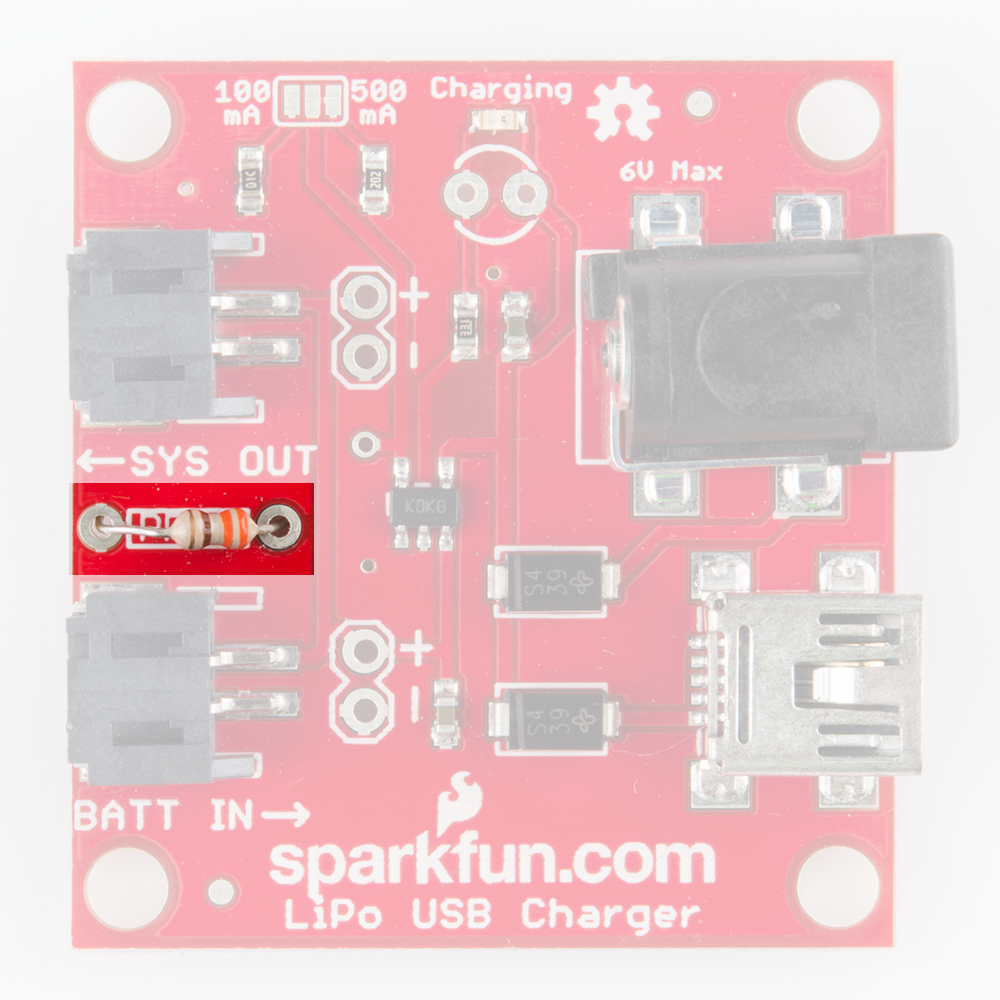
Before adding the resistor, disconnect both jumpers discussed in the section above. Then use this equation to select your resistor:

For example, if you want to charge a 400mAh battery at exactly 400mA, solder in a 2.5kΩ resistor (you may have to series a 2.2k and 330).
* Most batteries include over-current protection -- implemented on the little circuit board under the yellow tape -- which will keep the battery from blowing up if you supply too much current. But it's best to not rely on that circuit: you'll save power and your sanity.