LDK Experiment 5: Make Your Own Switch
 Dia
Dia 
Introduction
Welcome to experiment 5 of the LilyPad Design Kit, where you’ll learn to create your own easy, inexpensive switch using textile components!
Suggested Reading
Before we begin, here are a few resources you might find helpful:
Previous LDK Tutorials
- LDK Experiment 1: Lighting Up a Basic Circuit
- LDK Experiment 2: Multiple LED Circuits
- LDK Experiment 3: Buttons and Switches
- LDK Experiment 4: Make Your Own Button
Other Relevant Tutorials
Gather Materials
These are the parts you’ll need to construct this circuit. If you’re using the LilyPad Design Kit, you’ve already got them all.
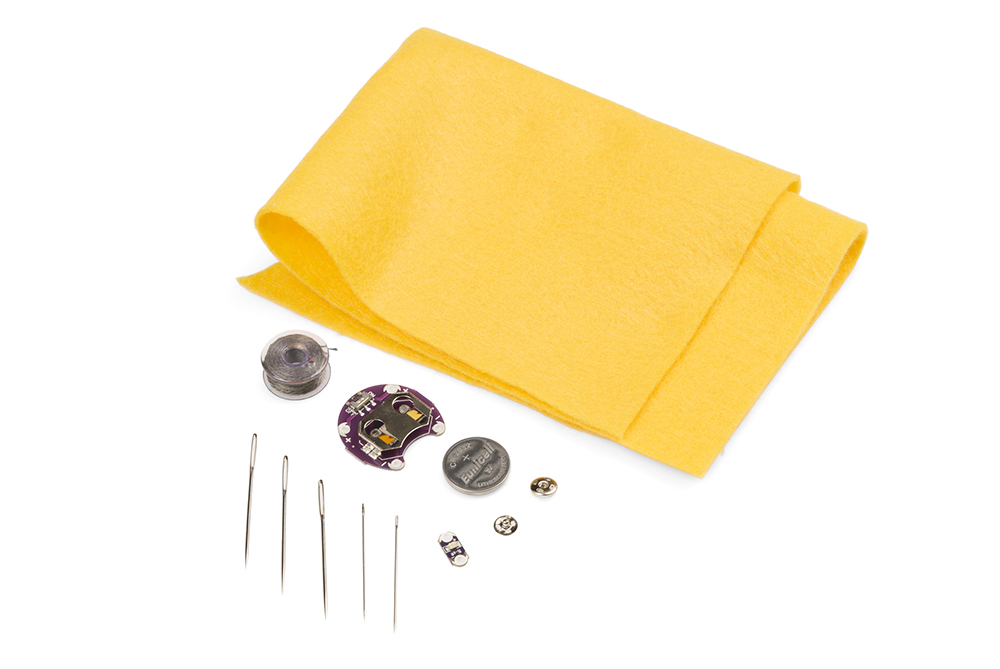
You’ll also want to have felt (included in the kit), scissors, fabric, an embroidery hoop, and possibly a needle threader.
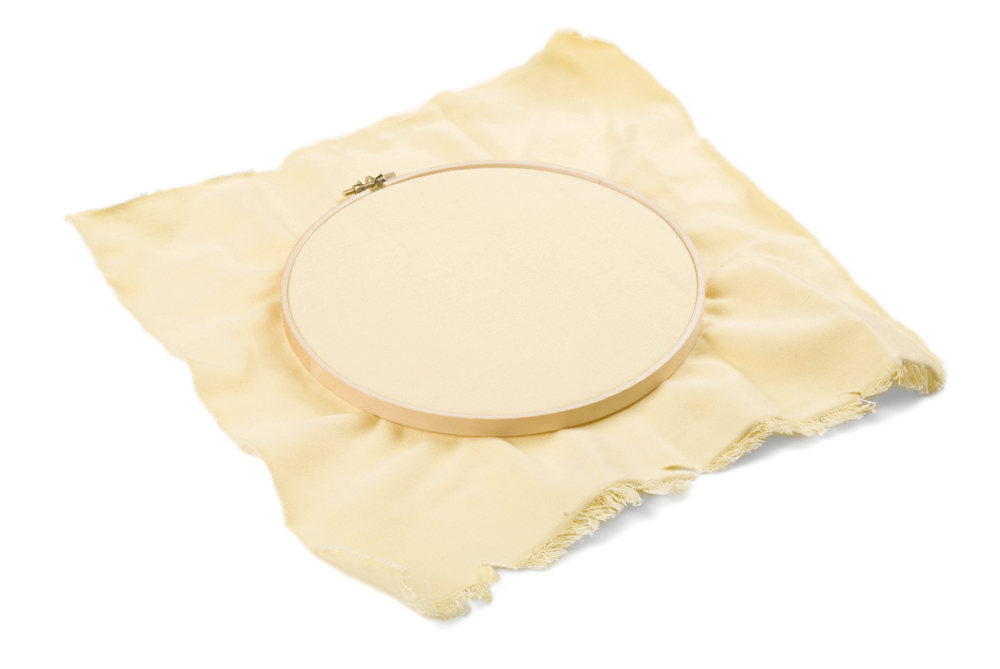
Go ahead and get your fabric prepped on the embroidery hoop and your needle threaded.
Positive trace
In making a switch, we’re trying to create a connection that we can engage that will stay engaged until we disengage it. Much like a light switch, we will turn it on, and it will stay on until we turn it off.
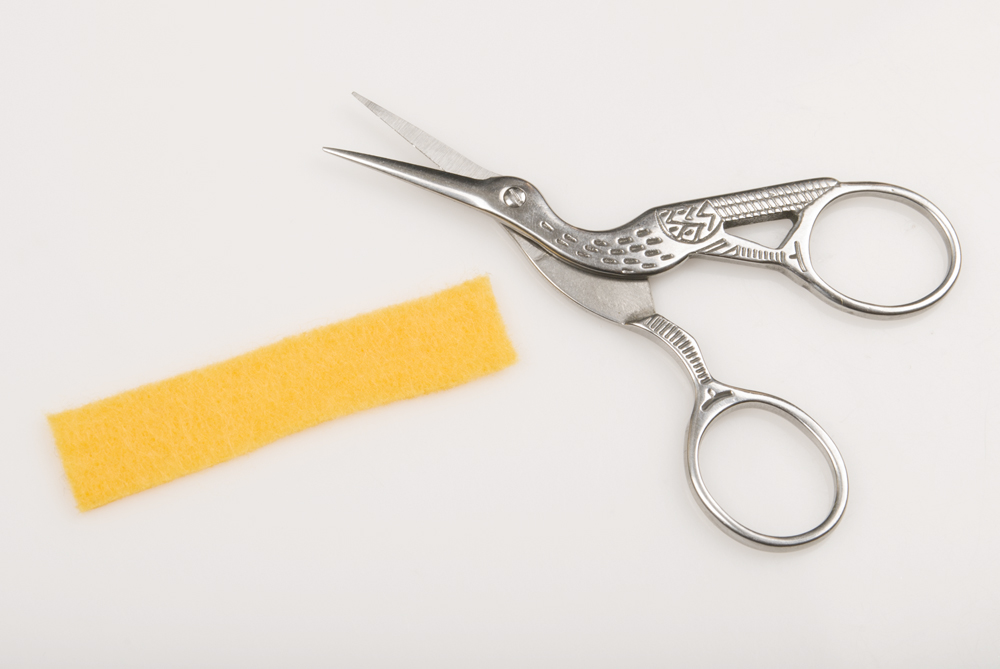
Start by cutting a small strip off of your felt, about half an inch wide and 2-3 inches long.
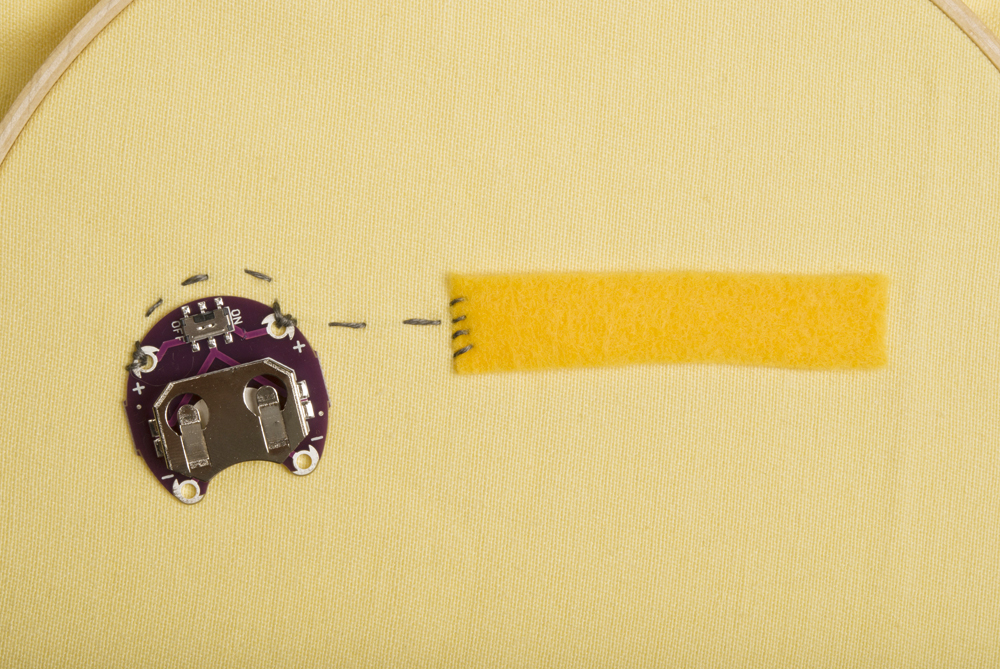
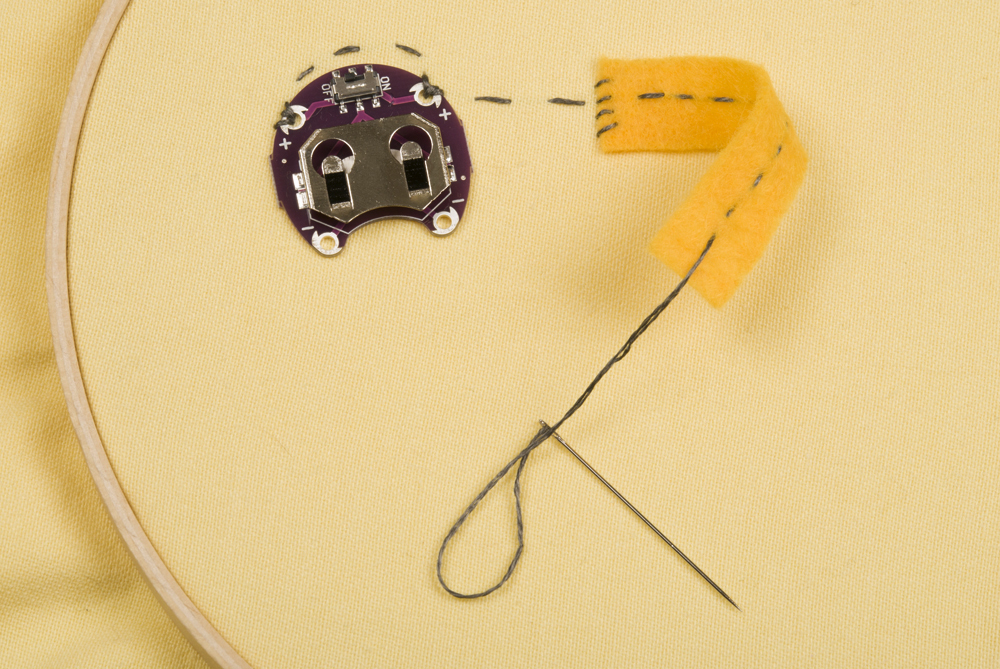
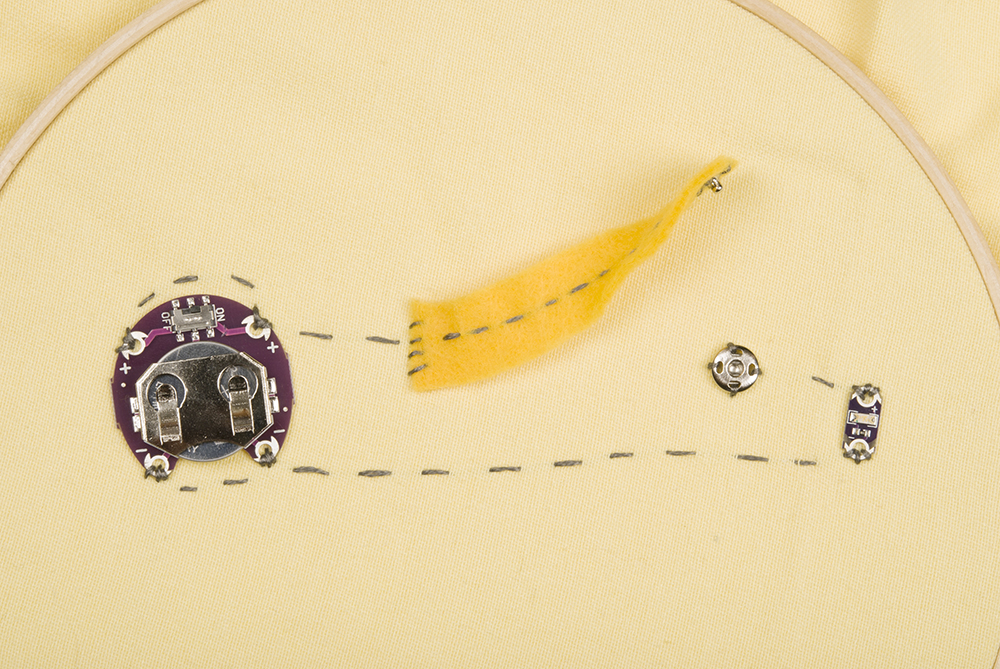
Place your battery holder where you’d like it, and stitch the positive pins to the fabric and each other with conductive thread. Continue the trace another inch or so in the direction you’d like your LED to go. Lay down the strip of felt you cut with one thin end next to your trace and the other thin end pointing towards your planned LED location. Sew a few stitches around the close edge of the felt, attaching it firmly to the fabric.
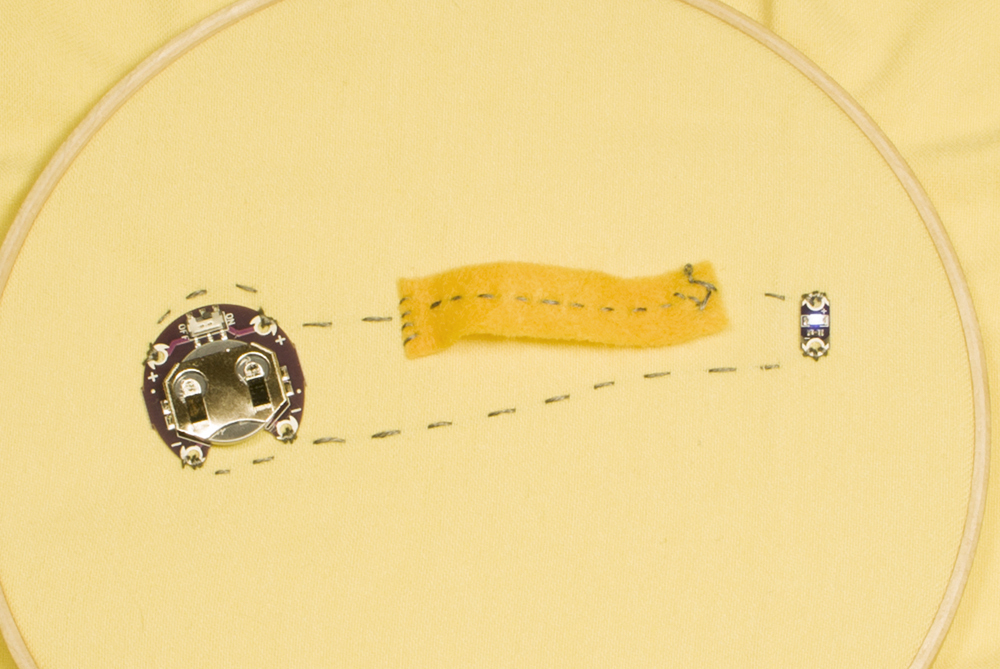
Continue the trace up the length of the felt, no longer stitching through the fabric. This should result in a strip of felt attached at one end to the fabric, free along the rest of its length, with a trace of conductive thread all the way up.
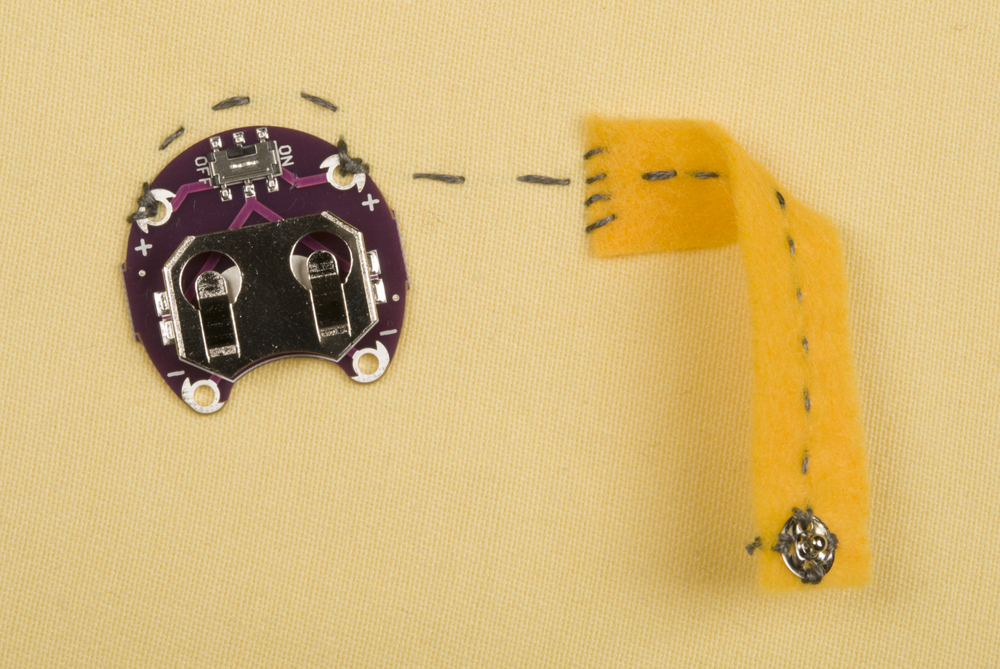
At the detached edge, where your trace stops, stitch the male (the one with the bump sticking out) side of the snap to the bottom of the felt strip. The bump should point towards the fabric. There are small holes around the edge of the snap to allow it to be sewn down. When it’s firmly attached, knot and cut the thread.
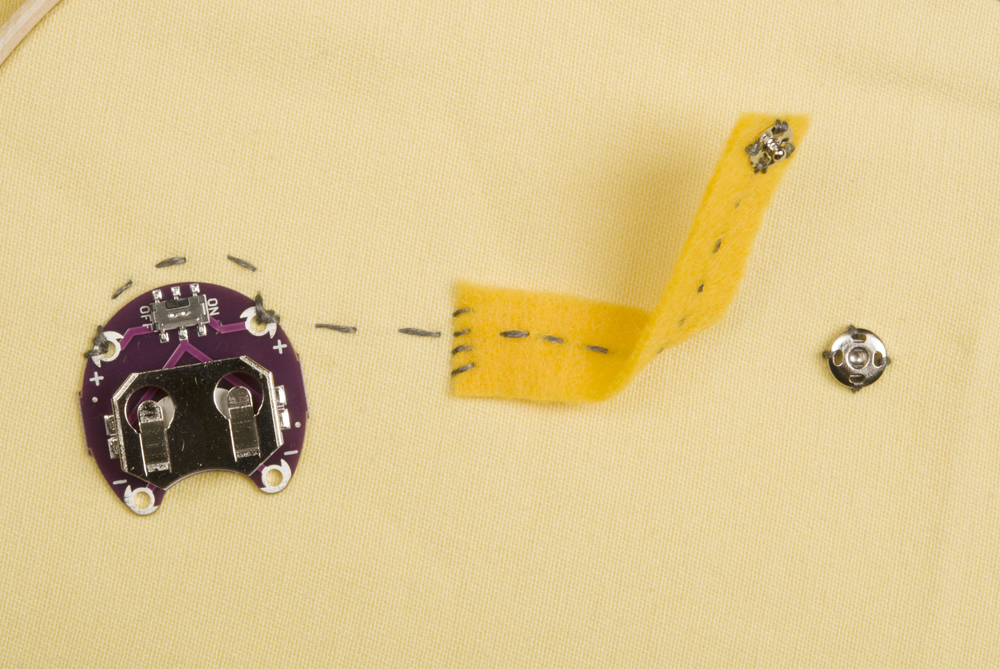
Beginning a new trace, sew the female side of the snap, with the hole facing up, to the fabric below the male side. This should allow the two snaps to mate when the felt strip is at full extension.

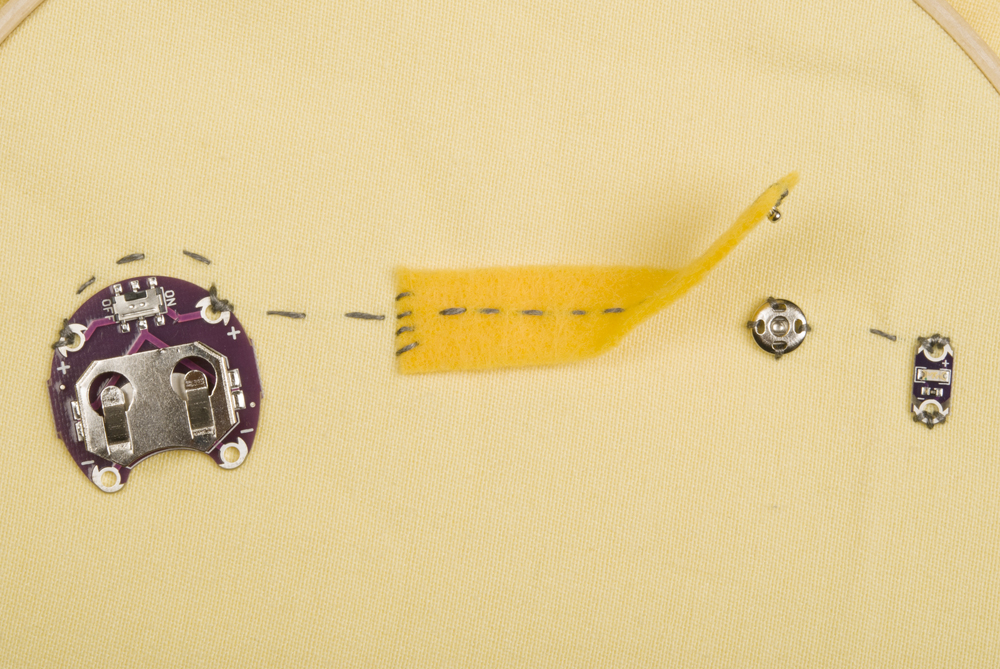
Stitch from the snap to where you’d like the positive pin of the LED to be, and sew the LED down. Knot and cut your thread.
Negative trace
Beginning with a new thread, sew down the negative pin of the LED.
From here, sew a trace back to the negative pins of the battery pack and stitch those down as well.
That’s it! Slide your battery into the battery holder, positive side up, and turn on the switch on the battery pack. Try snapping and unsnapping your felt switch a few times. When it’s snapped, the light will turn on, unsnapped, it will turn off!
Resources and Going Further
Want more? Check out LDK Experiment 6 for more e-textile fun.
Want to try some more complex e-textiles projects, or experiment with other e-textile switches? Check out these other great tutorials.
- My Drunk Kitchen Talking Harto Apron
- LED Feelings Pizza
- Textile Bow Switch
- Soft Circuit Merit Badge
- Wireless Glove Controller
- ProtoSnap LilyPad Development Simple Hookup Guide
Or check out this blog post.