How to Use a Multimeter
This Tutorial is Retired!
This tutorial covers concepts or technologies that are no longer current. It's still here for you to read and enjoy, but may not be as useful as our newest tutorials.
 Nate
Nate 
Measuring Current
Reading current is one of the trickiest and most insightful readings in the world of embedded electronics. It's tricky because you have to measure current in series. Where voltage is measure by poking at VCC and GND (in parallel), to measure current you have to physically interrupt the flow of current and put the meter in-line. To demonstrate this, we'll use the same circuit we used in the measuring voltage section.
The first thing we'll need is an extra piece of wire. As mentioned, we'll need to physically interrupt the circuit to measure the current. Said another way, pull out the VCC wire going to the resistor, add a wire where that wire was connected, and then probe from the power pin on the power supply to the resistor. This effectively "breaks" power to the circuit. We then insert the multimeter in-line so that it can measure the current as it "flows" through to the multimeter into the bread board.
For these pictures, we cheated and used alligator clips. When measuring current, it's often good to watch what your system does over time, for a few seconds or minutes. While you might want to stand there and hold the probes to the system, sometimes it's easier to free up your hands. These alligator clip probes can come in handy. Note that almost all multimeters have the same sized jacks (they're called "banana plugs") so if you're in a pinch, you can use your friend's probes.

With the multimeter connected, we can now set the dial to the proper setting and measure some current. Measuring current works the same as voltage and resistance -- you have to get the correct range. Set the multimeter to 200mA, and work from there. The current consumption for many breadboard projects is usually under 200mA. Make sure the red probe is plugged into the 200mA fused port. On our favorite multimeter, the 200mA hole is the same port/hole as voltage and resistance reading (the port is labeled mAVΩ). This means you can keep the red probe in the same port to measure current, voltage, or resistance. However, if you suspect that your circuit will be using close to or more than 200mA, switch your probe to the 10A side, just to be safe. Overloading the current can result in a blown fuse rather than just an overload display. More on that in a bit.
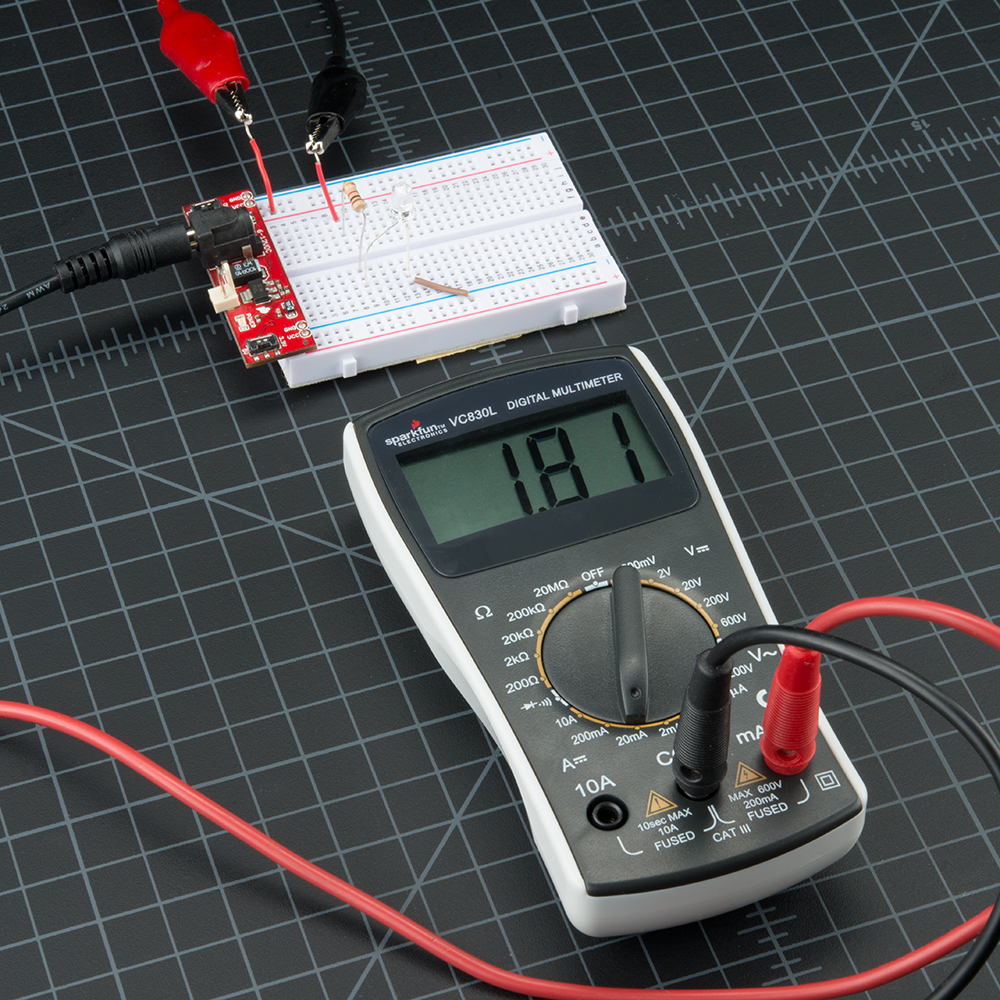
Realize that the multimeter is acting as a piece of wire -- you've now completed the circuit, and the circuit will power on. This is important because as time goes on the LED, microcontroller, sensor, or whatever device being measured may change its power consumption (such as turning on an LED can resulting in a 20mA increase for a second, then decrease for a second when it turns off). On the multimeter display you should see the instantaneous current reading. All multimeters take readings over time and then give you the average, so expect the reading to fluctuate. In general, cheaper meters will average more harshly and respond more slowly, so take each reading with a grain of salt. In your head, take an average range such as 7 to 8mA under normal 5V conditions (not 7.48mA).
Similar to the other measurements, when measuring current, the color of the probes does not matter. What happens if we switch probes? Nothing bad happens! It simply causes the current reading to become negative:
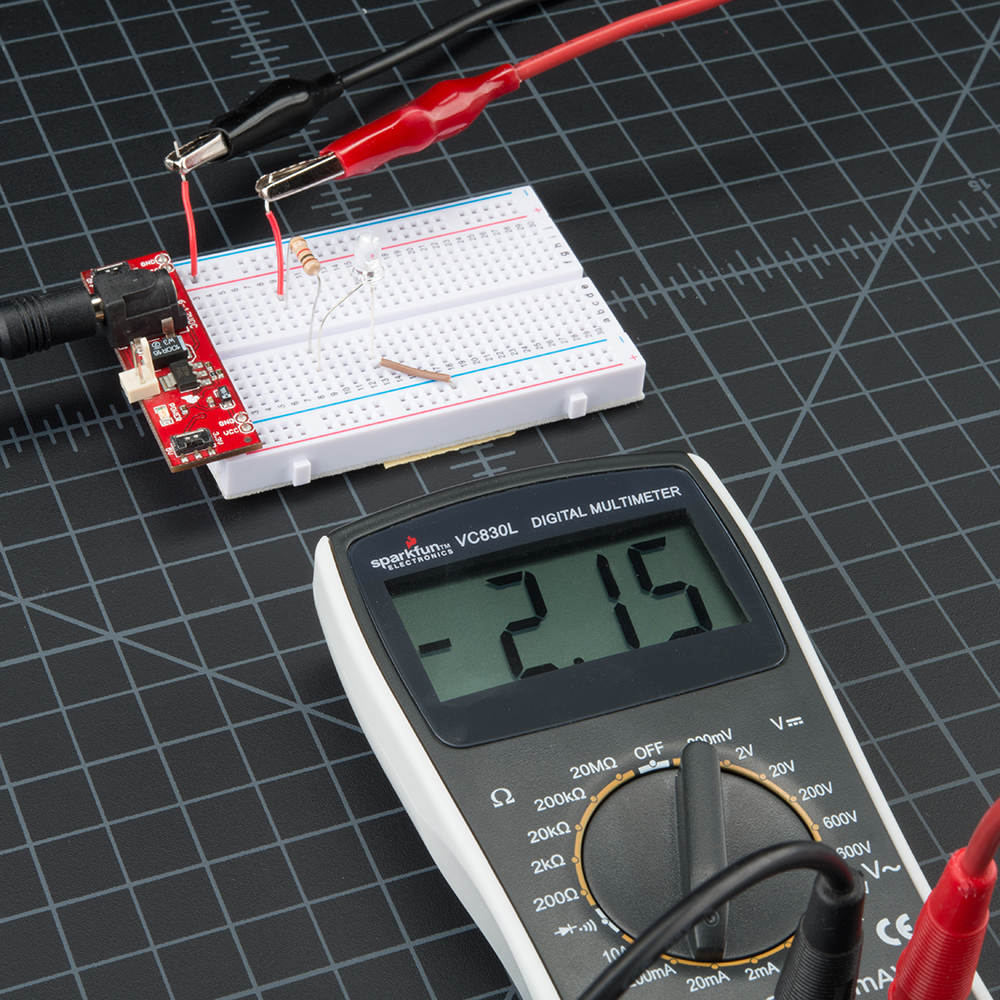
Current is still flowing through the system, you've just changed your perspective and now the meter reads negative.
Measuring current can be tricky the first couple of times. Don't worry if you blow the fuse - we've done it dozens of times! We'll show you how to replace the fuse in a later section.