If you need an intermediate GPS project to tickle your fancy, we've got one ready to go. In a previous tutorial, we slapped some boards together to see our GPS locations on an OLED Screen. It was a great learning experience, but we need something more. Today we'll do some more good 'ol board slappin', and we'll save multiple coordinates in a KML file and take over the world! Okay, not take over, but we can easily see collections of coordinates all over the world with Google Earth.
If you aren't familiar with the Qwiic system, we recommend reading here for an overview.
| Qwiic Connect System |
We would also recommend taking a look at the following tutorials if you aren't familiar with them.
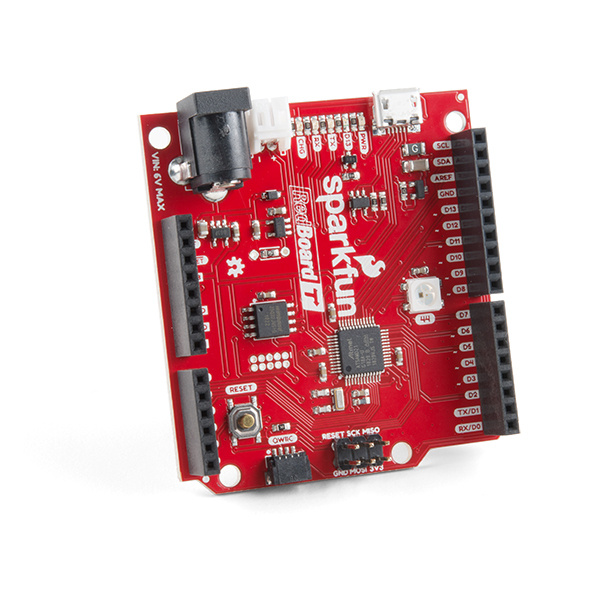
If you followed along with the last GPS tutorial, you'll have an idea of where we're going. However, since we're packing more stuff into a small module, we'll need more power. Unfortunately, the 5 libraries we'll be using pushes the original RedBoard to its limits. So to make up the gap, we'll use the SAMD21. Specifically speaking, the SparkFun RedBoard Turbo!
The Turbo is a relatively new development board, sporting the versatile ATSAMD21G18 ARM Cortex-M0+ microcontroller. It's also carrying an RTC Crystal, WS2812 addressable RGB LED, and a LiPo battery connector with charging capabilities. It's almost TOO powerful for our purposes, but it conveniently has everything we need.
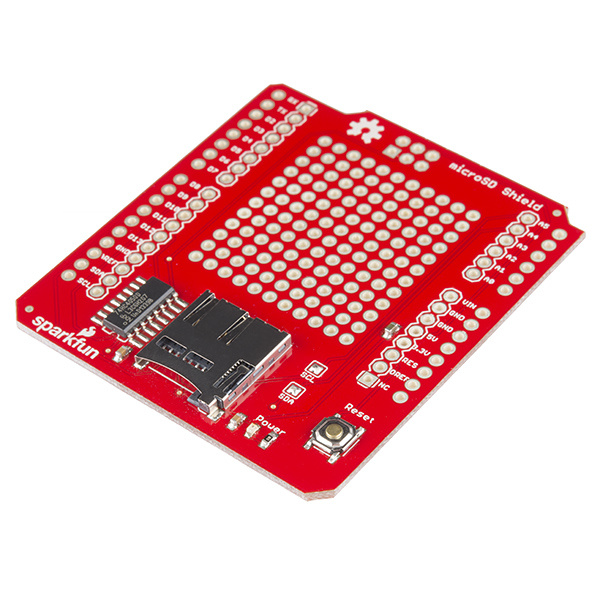
The microSD shield is an Arduino Uno layout compatible memory shield. We'll interact with the microSD shield using the SPI bus through the shield's on board hex converter. Quick note, since the microSD shield is an older component than the Turbo there are some communication bugs, but we'll get to that a little later.
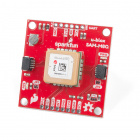
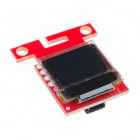
It's worth mentioning once more the components carried across from the last tutorial. The SAM-M8Q Chip Antenna GPS provides simple and powerful GPS capabilities from Ublox's GPS systems. Those coordinates are then displayed to the user on the easy to wire, and no solder required, Qwiic Micro OLED screen.
This part of the build will require some assembly (but that's what we're all really here for anyway). Since most of our components carry over from the simple push button GPS tracker tutorial, we only have a few additional parts to assemble. Now, if you're fresh to the GPS tracker projects you don't have to worry. We'll run through all of it again anyway.
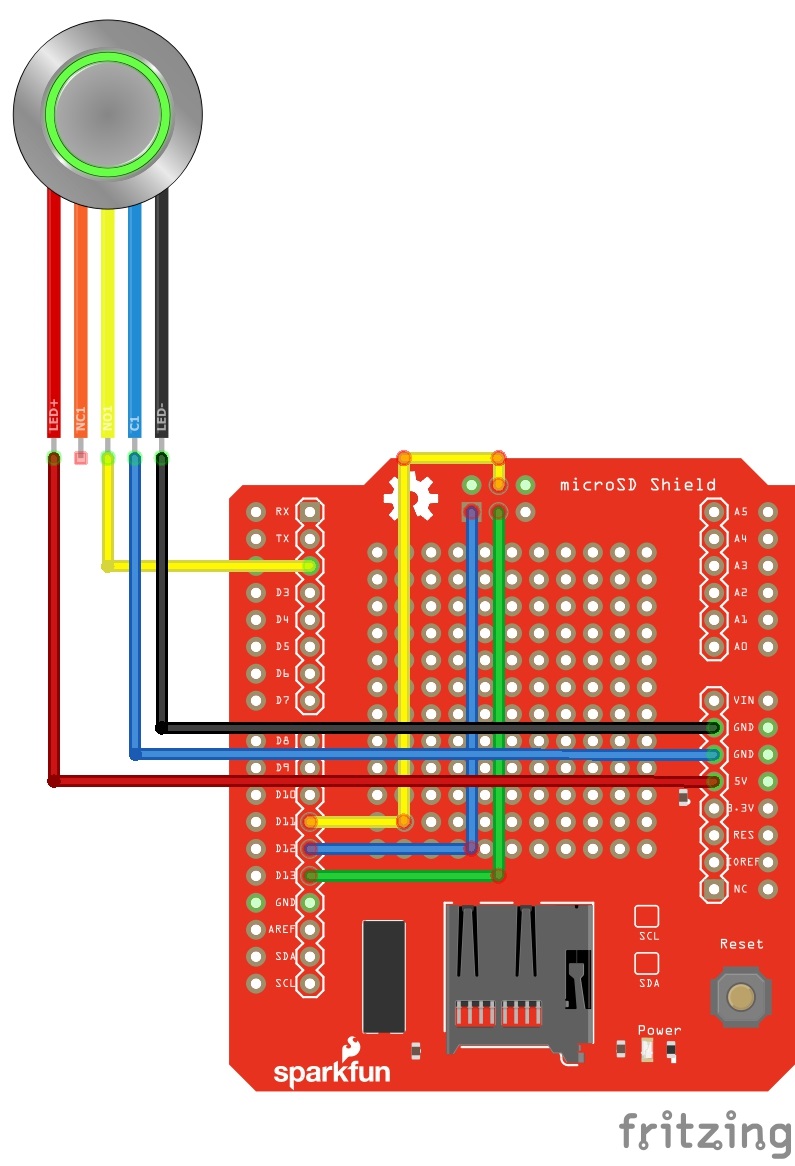
Our push button will be rather straightforward. The table below shows the connections between the button and our Turbo via the microSD shield.
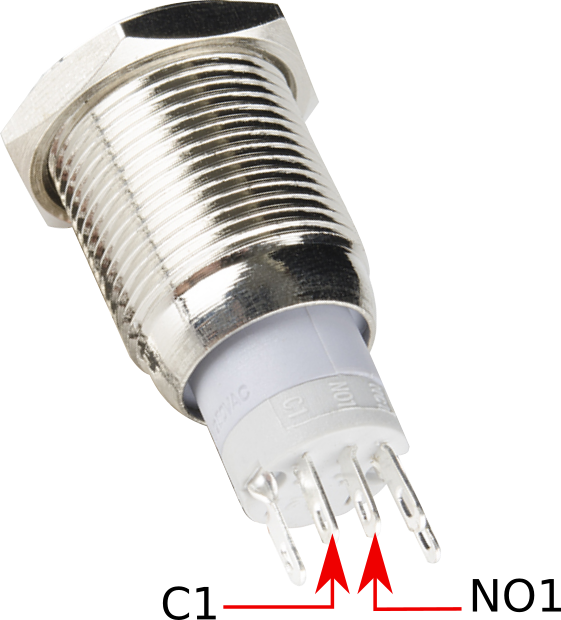
| Button Pin | RedBoard Pin |
|---|---|
| + | 5V |
| - | GND |
| C1 | GND |
| NO1 | Digital Pin 2 |
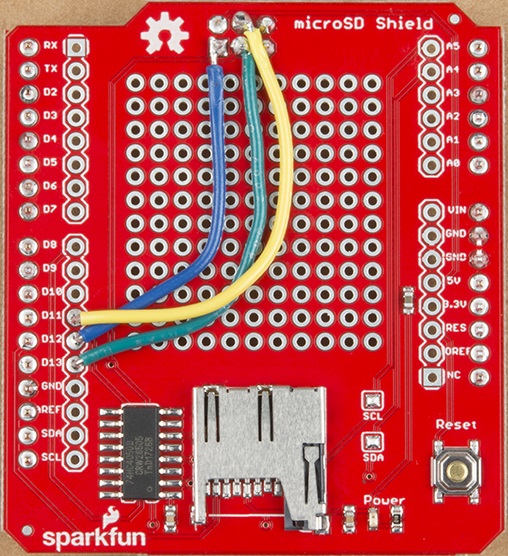
The first step would be to solder our break away headers to the pins aligning with the Redboard Turbo female headers. We also need to solder the 2x3 Female ISP connector to the bottom of the microSD shield. We'll use that ISP header for a modification needed for communication.
I mentioned earlier that there was a special note for communication between the Turbo and our microSD shield. The best explanation currently is there is a naming difference in libraries and the SERCOM tools used on the Turbo. We can easily circumvent the issue by hardwiring our Digital Pins (13 -11) to the ISP header found on all our Redboards.
I discovered this issue when I was running a simple datalogger sketch and I kept getting a false return from the SD.begin() call. After making these hotwiring corrections, I got correct functionality.
Once we're done with the headers, we can move on to connecting our pushbutton. Following the table mentioned earlier, we need to solder our wires to the microSD shield. There are PTH holes alongside all the header holes to solder to. We're looking for these specific pins:
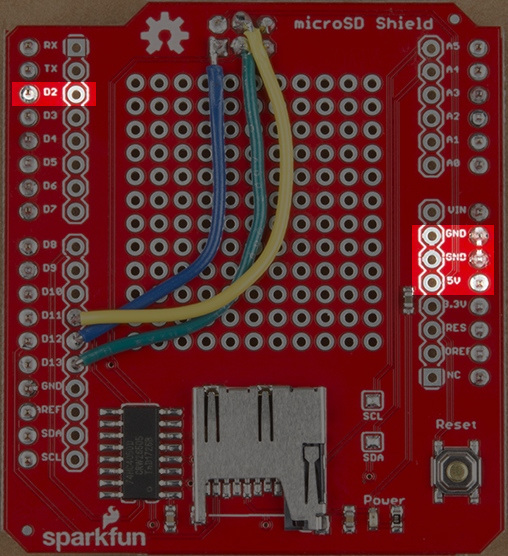
| Button Pin | microSD Shield Pin |
|---|---|
| + | 5V |
| - | GND |
| C1 | GND |
| NO1 | Digital Pin 2 |

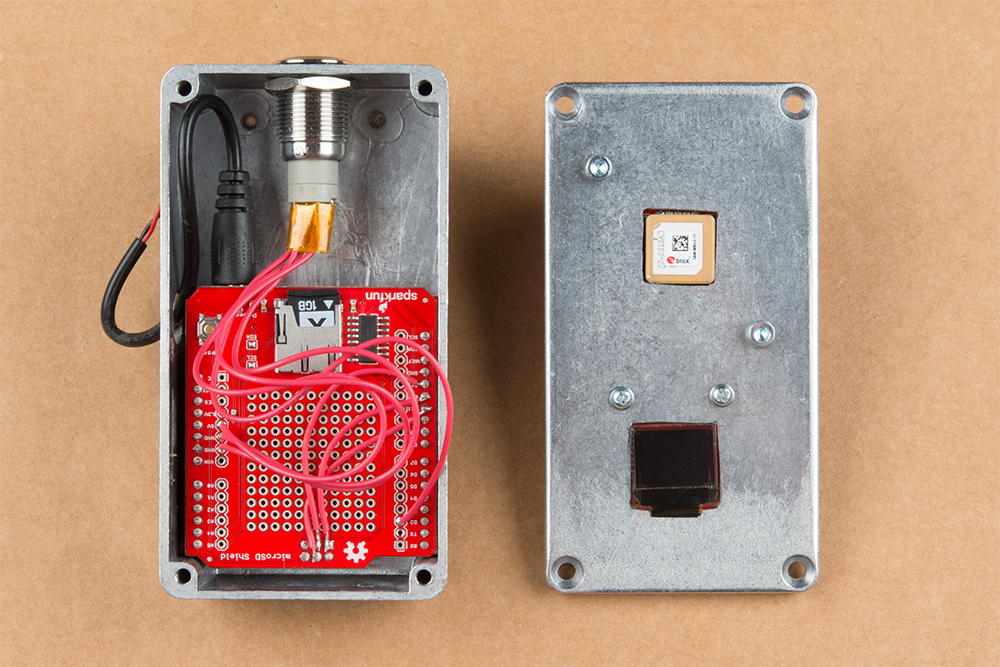
We do have an aluminum case added to the required materials list. While it is optional, it provides a sturdy case for practical application purposes. If you purchase the case then you'll have to make extra modifications. We'll need to drill screw holes and protuding areas for our OLED screen and GPS chip antenna.
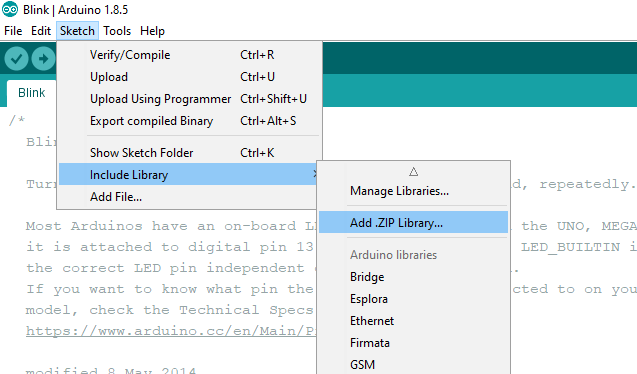
First let's start with the two libraries for our Qwiic Micro OLED Breakout and SAM-M8Q Chip Antenna GPS Module.
Add these libraries using the Include Library option under the Arduino IDE option "Sketch".
The Turbo does require some extras before we can program. Those are all done through the SAMD Arduino Libraries. Open Tools -> Board: " " -> Boards Manager... and find the following:
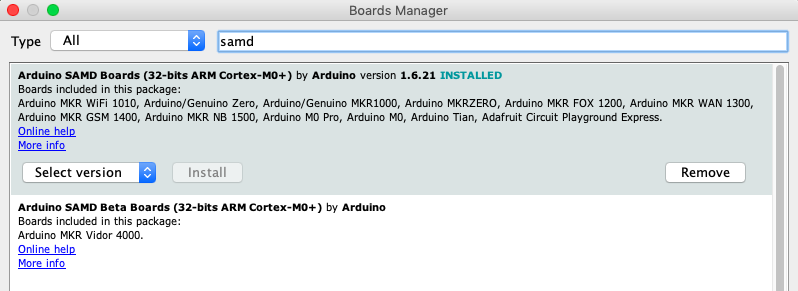
After the main Arduino board files are installed, we'll need the Sparkfun specific boards. For those we'll need to copy and paste the following in our Arduino "Additional Boards Manager URLs" preferences. Copy and paste:
https://raw.githubusercontent.com/sparkfun/Arduino_Boards/master/IDE_Board_Manager/package_sparkfun_index.json

If you need reminders for what you're looking for later down the road, the code in the next section will have all required software components listed in the comments.
Off the bat, if you need to download Google Earth. See you in a minute, no worries.
With that out of the way, KML is starkly different from the Arduino C or MicroPython we usually see here. It’s very similar to HTML used for websites. If you’re not familiar with the Hyper Text Markup Language, don’t worry because I’ll give you a rough (and I mean rough) overview of what we’re trying to achieve with it.
HTML mostly is a file with text (or images, or videos, or whatever black magic websites use nowadays) that is formatted using sectioning tags. Tags act like boxes, what’s in a box is owned by the box.
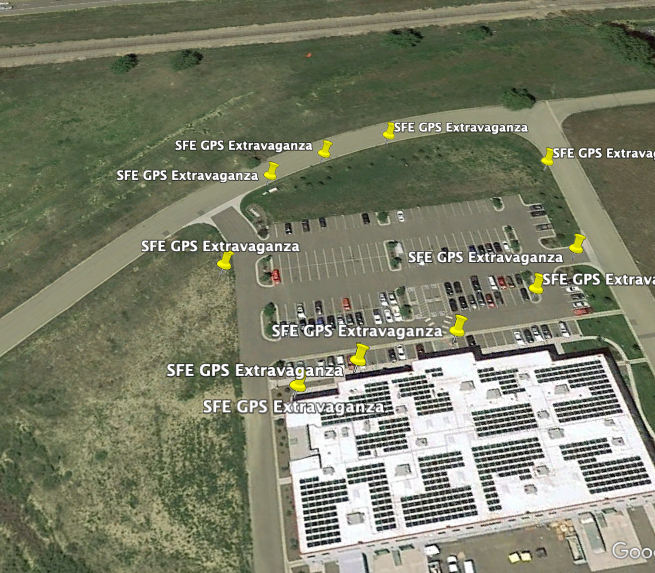
For example, in our code, we’ll see a tag called Placemark. In Google Earth, we will see our placemarks as yellow pins on the globe. If we save a placemark as follows:
12.345678, 123.456789
Then we’ve made a box called placemark with the GPS values inside. When Google Earth reads this a yellow pin will be placed on that exact coordinate. There are many more useful tags and tools for KML files. If you want to dive deeper, please feel free to visit the Google Developers page for KML. All of that is, in essence, what we’re trying to achieve.
The code below is nothing fancy and doesn't have clever algorithms. There are many places within that can be improved for performance and efficiency. My hope was to allow a novice programmer to read and understand the big picture of what we're trying to do. From there improvements can and should be made!
Feel free to download the code from the GitHub location, or by clicking on the button below:
Alternatively, you can copy and paste the code from here:
language:c
/******************************************************************************
Google Earth KML GPS Position Logger v1.7
brandon.williams@sparkfun.com
May 6, 2019

The user will press a momentary button to log a GPS location into a KML file,
a file that's stored on a microSD card in the microSD shield. If the user holds
the button for 5 seconds, the program will effectively "end" with an infinite
while loop after safely closing the file. The user can then remove the memory
card to retrive the file and open using Google Earth.

** Significant changes and improvements can be made, please enjoy mod-ing! **

Resources:
SFE MicroOLED library: SFE_MicroOLED.h
SFE u-blox GNSS library: //http://librarymanager/All#SparkFun_u-blox_GNSS
Arduino SD required libraries: SPI.h & SD.h

Download Google Earth: https://www.google.com/earth/versions/

Development environment specifics:
Arduino IDE 1.8.9
Board Definition Packages:
  Arduino SAMD board Boards (32-bits ARM Cortex-M0+) 1.6.21
  SFE SAMD Boards 1.6.1
******************************************************************************/
//SD Shield libraries
#include <SPI.h>
#include <SD.h>
//OLED and Ublox libraries
#include <Wire.h>
#include <SFE_MicroOLED.h>
#include <SparkFun_u-blox_GNSS_Arduino_Library.h> //http://librarymanager/All#SparkFun_u-blox_GNSS

#define PIN_RESET 9   //OLED
#define DC_JUMPER 1   //OLED

//create objects
SFE_UBLOX_GNSS myGNSS;
MicroOLED oled(PIN_RESET, DC_JUMPER);
File dataFile;

//declare global variables
const int buttonPin =  2;
const int chipSelect = 8; //Specific for SFE microSD shield, differs from Arduino SD libraries
int buttonState = 0;

void setup() {

  Wire.begin();

  //Classic SFE flame
  oled.begin();
  oled.clear(ALL);
  oled.display();
  delay(500);
  oled.clear(PAGE);
  oled.display();
  oled.setFontType(0);
  oled.setCursor(0,0);

  pinMode(buttonPin, INPUT_PULLUP);

  pinMode(chipSelect,OUTPUT);

  if(!SD.begin(chipSelect)){
    //If the SD card can't be initiallized/found just freeze with a loop
    oled.setCursor(0,0);
    oled.clear(PAGE);
    oled.print("SD, no work");
    oled.display();
    while(1);
  }
  oled.setCursor(0,0);
  oled.clear(PAGE);
      //Oh yea! don't forget the GPS shield needs to get it's first fix
  oled.print("Revving up the GPS unit, please wait");
  oled.display();
  delay(29000);
  oled.setCursor(0,0);
  oled.clear(PAGE);
  oled.print("Ready to start!");
  oled.display();
  oled.clear(PAGE);
  oled.display();

}

void loop() {
  double latitude;
  double longitude;

  // A little redundant, but simple fix to not add on to the file
  SD.remove("sparkGPS.kml");

  dataFile = SD.open("sparkGPS.kml", FILE_WRITE);

  if (dataFile){
    //Write opening tags to file
    dataFile.println("<?xml version=\"1.0\" encoding=\"UTF-8\"?>");
    dataFile.println("<kml xmlns=\"http://www.opengis.net/kml/2.2\">");
    dataFile.println("<Document>");
    int state = 0;
    myGNSS.begin();
    /* "Continous" (not quite) loop will run until user performs kill action.
     *
     *  1. Button is pushed and released, then one coordinate
     *  point will add to the file
     *
     *  2. If the button is pushed and held, one last coordinate is saved.
     *  Hold button till "Goodbye" appears to kill the loop. File is
     *  closed and it is safe to remove power
     *  and remove the SD card.
     */
    while(state < 4){
      buttonState = digitalRead(buttonPin);
      state = 0;
      if(buttonState == LOW){
        oled.setCursor(0,0);
        oled.clear(PAGE);
        oled.print("button pressed");
        oled.display();
        delay(1000);
        oled.clear(PAGE);
        oled.display();

        state = 1;
        delay(900);
        if(buttonState == LOW){

          oled.setCursor(0,0);
          oled.clear(PAGE);
          oled.print("Getting Coordinates");
          oled.display();
          delay(1000);
          oled.clear(PAGE);
          oled.display();

          float latitude = myGNSS.getLatitude();
          latitude = latitude / 10000000;

          float longitude = myGNSS.getLongitude();
          longitude = longitude / 10000000;


          dataFile.println("\t<Placemark>");
          dataFile.println("\t\t<name>SFE GPS Extravaganza</name>");
          dataFile.println("\t\t<description>Where am I?</description>");
          dataFile.println("\t\t<Point>");
          dataFile.print("\t\t\t<coordinates>");
          dataFile.print(longitude,6);
          dataFile.print(",");
          dataFile.print(latitude,6);
          dataFile.print(",0");
          dataFile.println("</coordinates>");
          dataFile.println("\t\t</Point>");
          dataFile.println("\t</Placemark>");
          //Visual coordinates for the user to see
          oled.clear(PAGE);
          oled.setCursor(0,0);
          oled.print("Lat:");
          oled.print(latitude,6);
          oled.print("\nLong:");
          oled.print(longitude,6);
          oled.display();
          delay(1500);
          oled.clear(PAGE);
          oled.display();
        }
        buttonState = digitalRead(buttonPin);
        if(buttonState == LOW && state == 1){
          state = 2;
          delay(4000);
          buttonState = digitalRead(buttonPin);
          if(buttonState == LOW && state == 2){
            dataFile.println("</Document>");
            dataFile.println("</kml>");
            dataFile.close();
            oled.setCursor(0,0);
            oled.print("Goodbye");
            oled.display();
            delay(1000);
            oled.clear(PAGE);
            oled.display();
            //it is safe to remove power and remove data
            while(1); //"Ends program" more or less
          }

        }

      }
    }
  }
}
Upload the code using your Arduino IDE, and with any luck you'll start seeing coordinates across your OLED screen!
GPS is a great technology for anyone to have in their back pocket. Thanks to the size of my enclosure, I literally have it in my back pocket. In all seriousness, this was a great project. It builds on good engineering principles and processes, teaches new technologies and platforms, as well as pushes ourselves out of our comfort zones just far enough. Thank you and I hope you can track your progress as much as I have!
Need more inspiration? Check out these other GPS related tutorials!
Or check out this blog post for more ideas:
learn.sparkfun.com | CC BY-SA 3.0 | SparkFun Electronics | Niwot, Colorado