Looking to add more functionality to your paper circuits? This tutorial goes over the how to assemble the Chibi Chip programmable microcontroller with the Chibi Clip to add more functionality to your paper circuits! We will also go over how to program your Chibi Chip microcontroller board by writing code (block-based and text-based) in a browser-based code editor and then transmit code through sound to your board.
Ready? Let’s get started!
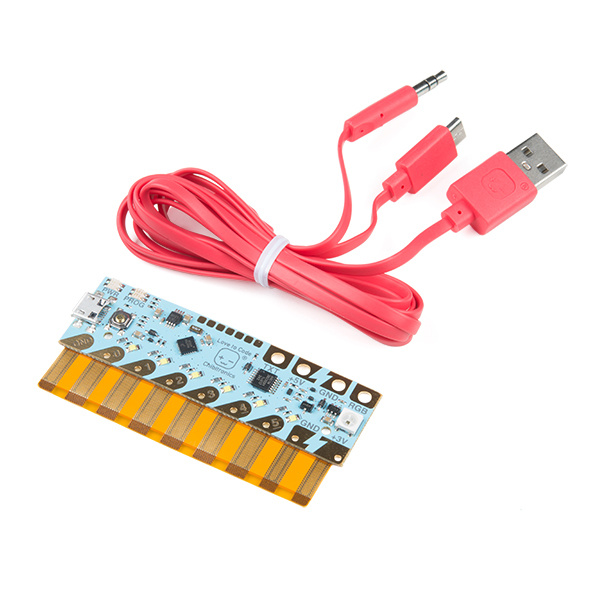
To follow along with this tutorial, you will need the following materials. You may not need everything though depending on what you have. Add it to your cart, read through the guide, and adjust the cart as necessary.
You may need to know the following concepts before working with one of these boards:
The following will show you how to connect the Chibi Chip programmable board into a reusable clip to add more functionality to your paper circuits!
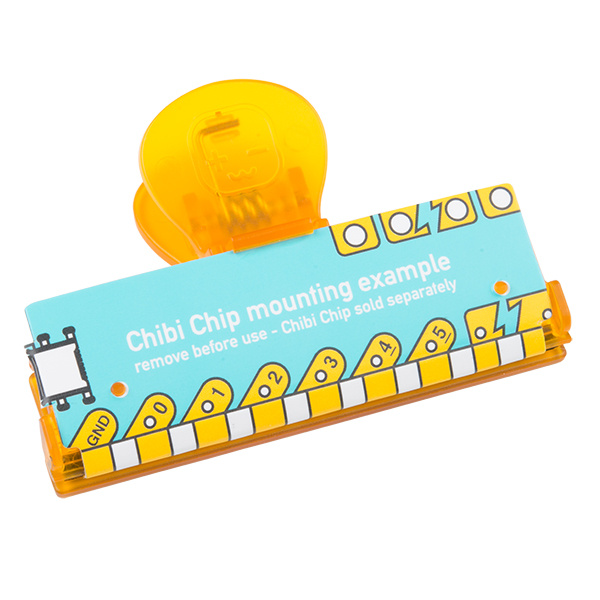
Remove example paper insert.

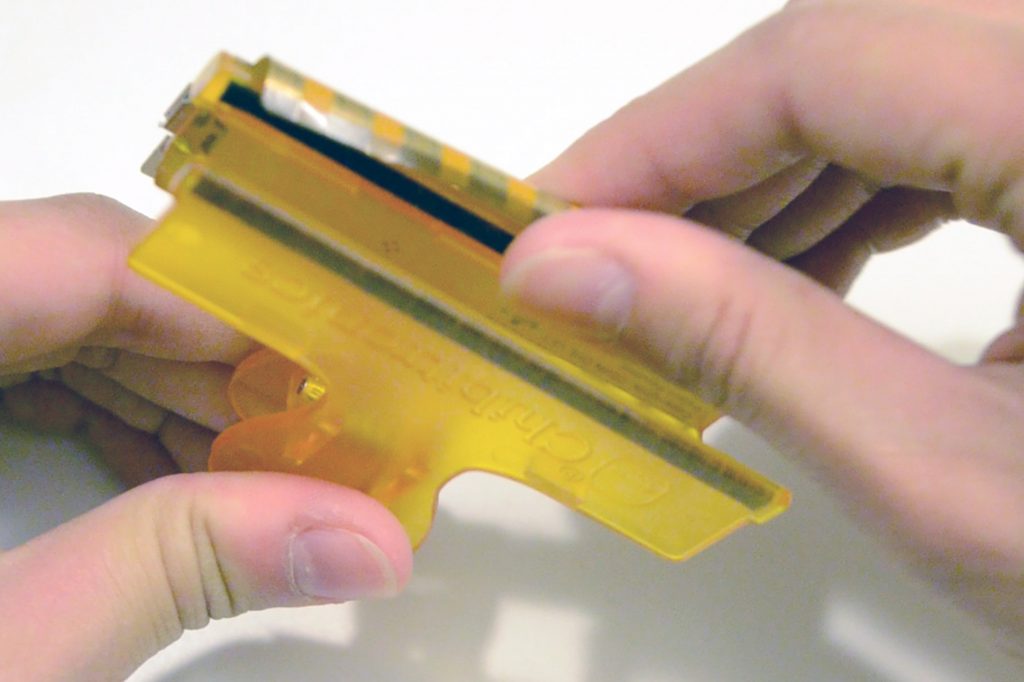
Remove the adhesive tape from your clip holder.
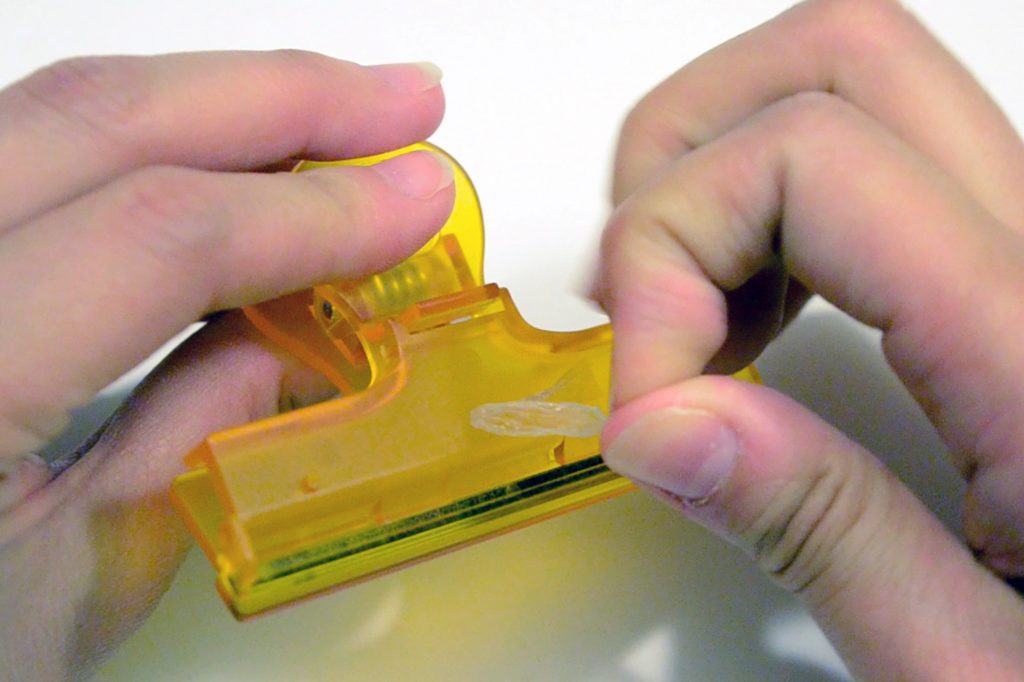
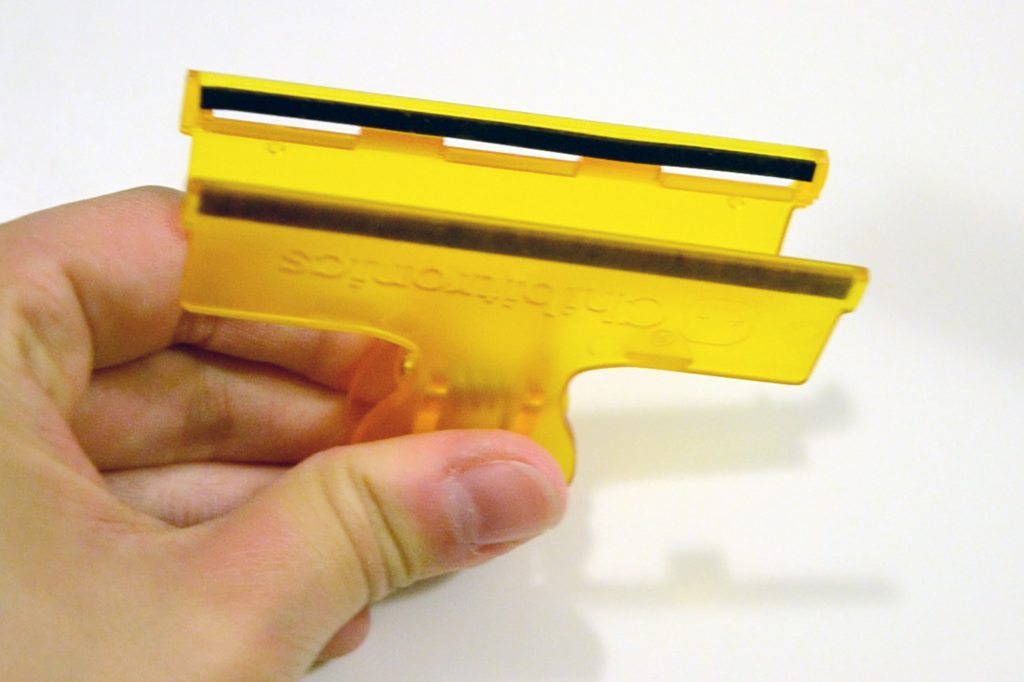
Flip the clip over so that the flat side showing “Chibitronics” faces up and open the clip.
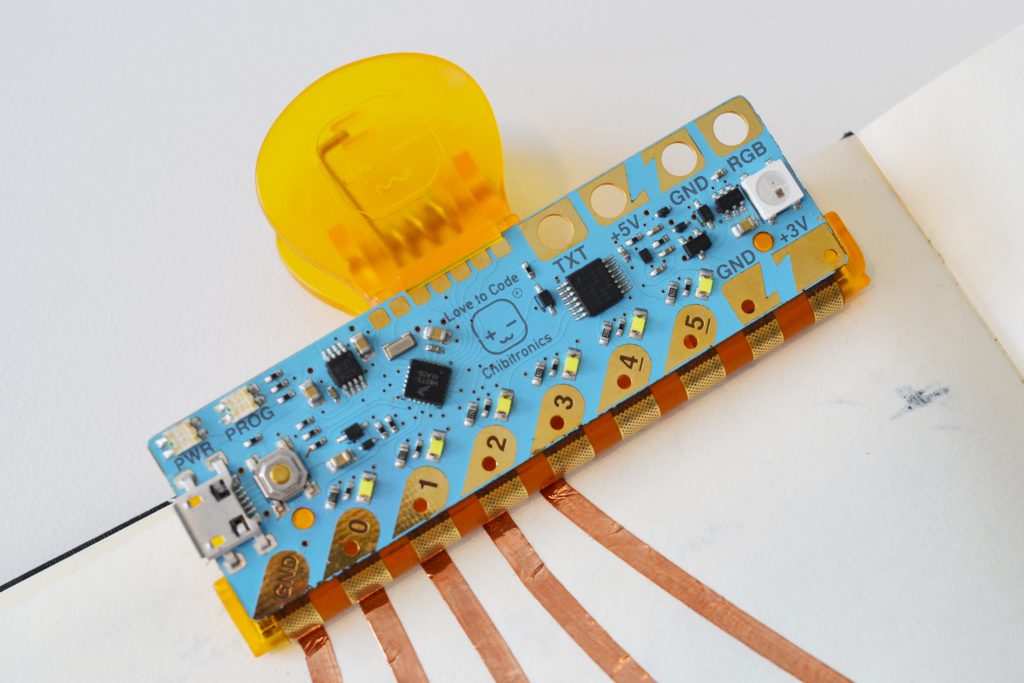
Hold your Chibi Chip with flat side facing up and insert the flexible part into the three notches on the mouth of the clip.
 |
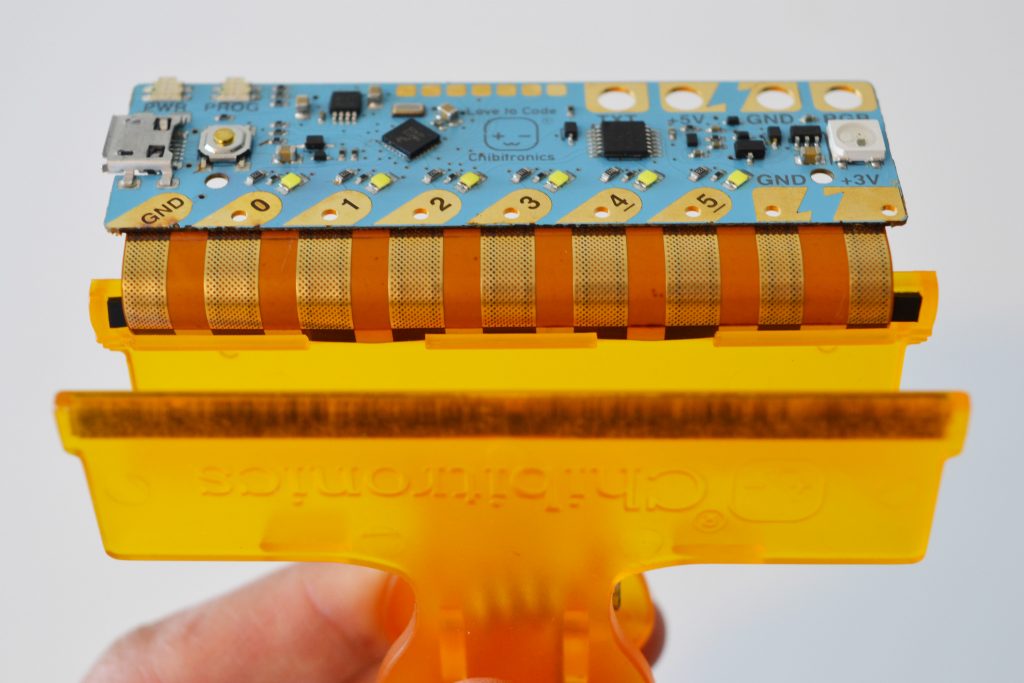 |
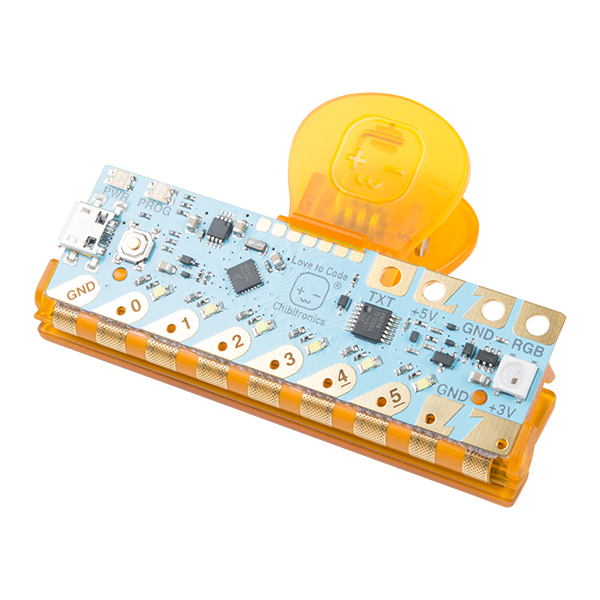
Close the clip and gently bend the board up over the clip.
Slide the rigid board into the hook at the top of your clip.
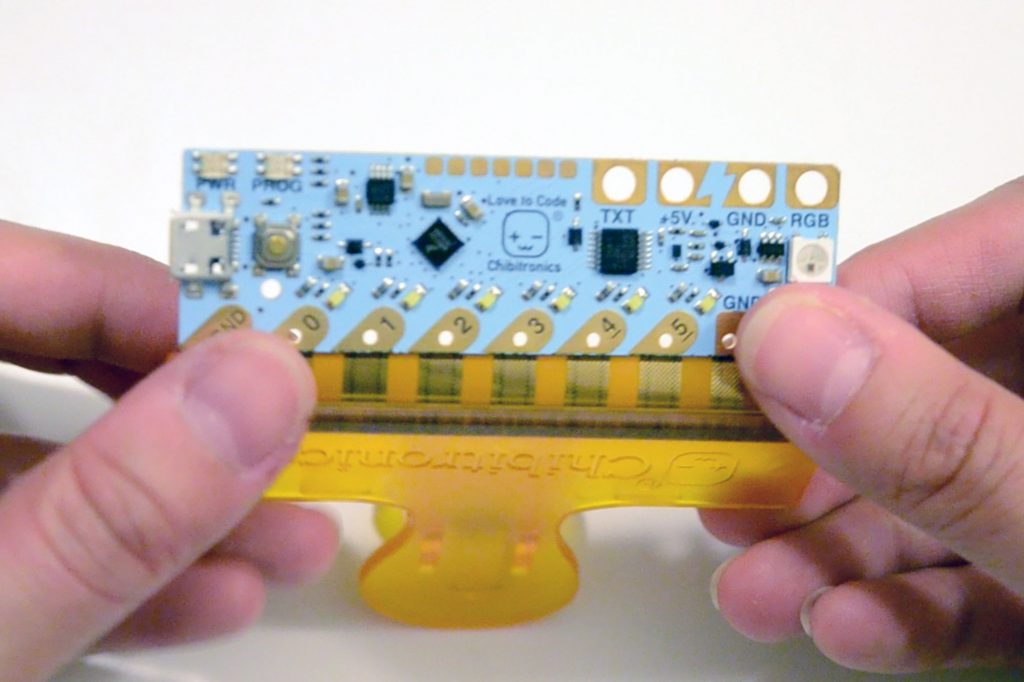
You’re done! Now you can open and close the clip with your Chibi Chip attached.
 |
 |
Try creating a simple circuit with one LED and traces that align to the Chibi Chip and clip's tabs.
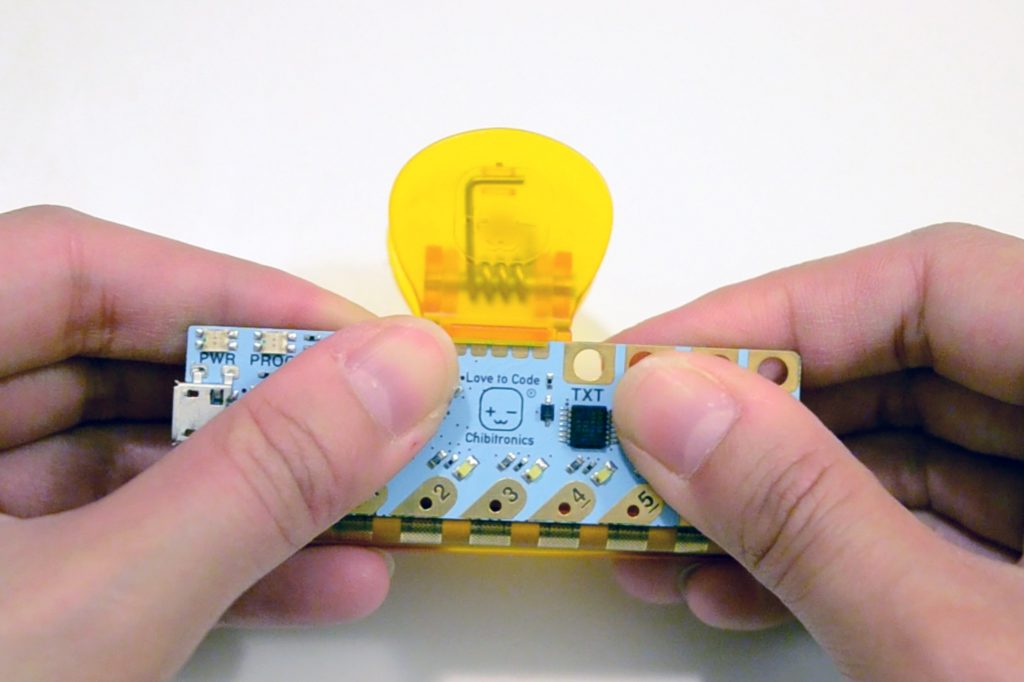
If you need to remove the Chibi Chip from your clip, slide out the flexible part from the clip and the rest of the board will slide off.
You can power your Chibi Chip with any 5V USB power supply! Here are a few examples.
If you have a Love to Code powered binder with batteries, you can plug in the USB cable directly into the binder. To turn on your binder, slide the power switch to the left like this:
Plugging in and Powering on from Chibitronics on Vimeo.
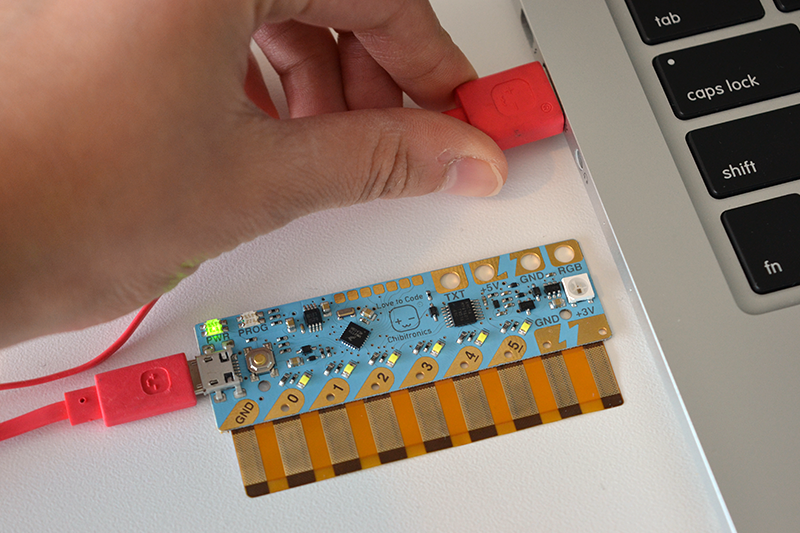
You can also use a computer or laptop USB port to power the Chibi Chip.
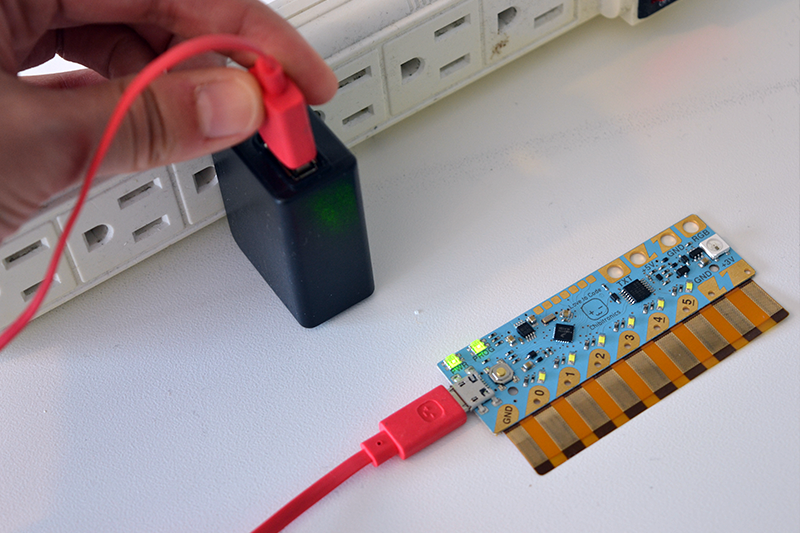
USB wall adapters also make great power supplies since you don’t need to worry about running down batteries.
Finally, USB phone charger battery packs work as a handy portable power supply! Make sure your charger battery pack has an on/off switch so that you can keep the power supply on. The Chibi Chip runs on low power so the battery pack may automatically turn off by itself.
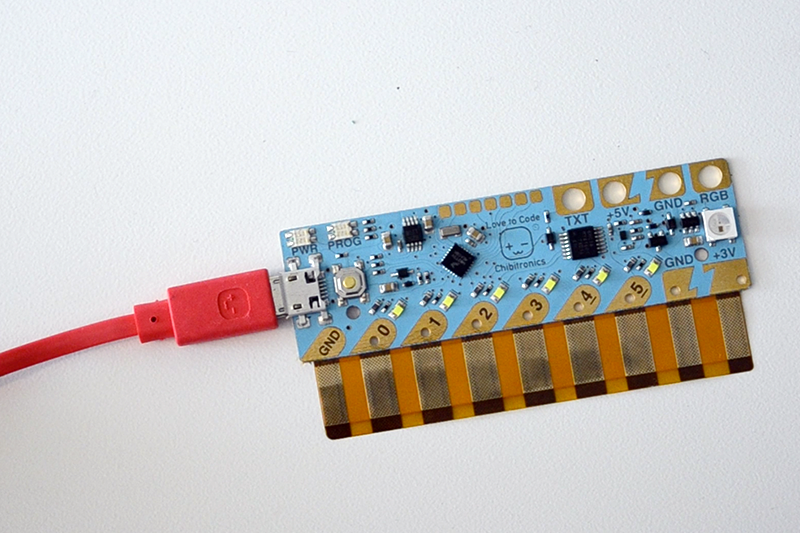
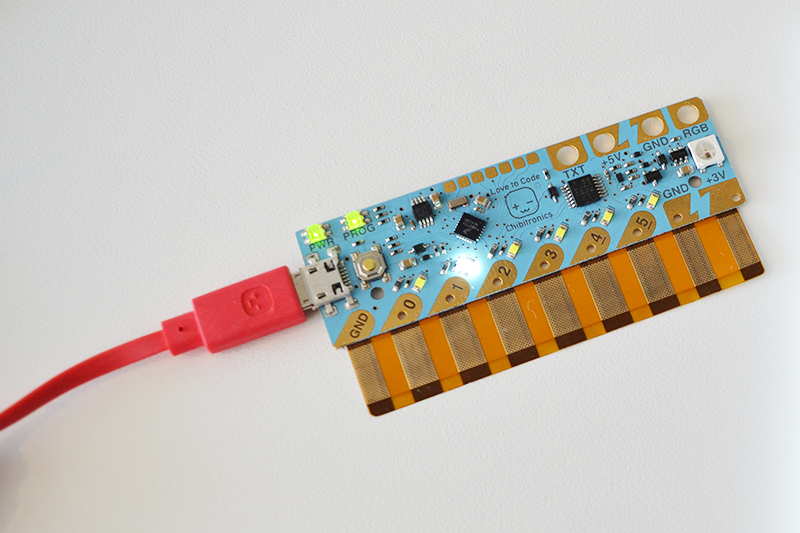
The Chibi Chip uses an audio connector to upload code! Let's go over how to make the connection.
Plug in the other end of the micro-B USB into the Chibi Chip board's USB connector.
Plug the audio cable into the audio jack of your programming device (i.e computer, phone, or tablet).
 |
 |
 |
Unmute your device and turn the volume all the way up. This will make sure the code plays to your Chibi Chip loud and clear!
Press the PROG button on the Chibi Chip and hold it until the PROG light blinks and stays red. This puts your Chibi Chip into programming mode – it’ll know to listen for code!
 |
 |
Open your programming editor of your choice and write some code! You can either go with a block-based code editor or text-based code editor.
To program the Chibi Chip, there are a two options available depending on your preference. Both require an internet connection to upload code to the microcontroller.
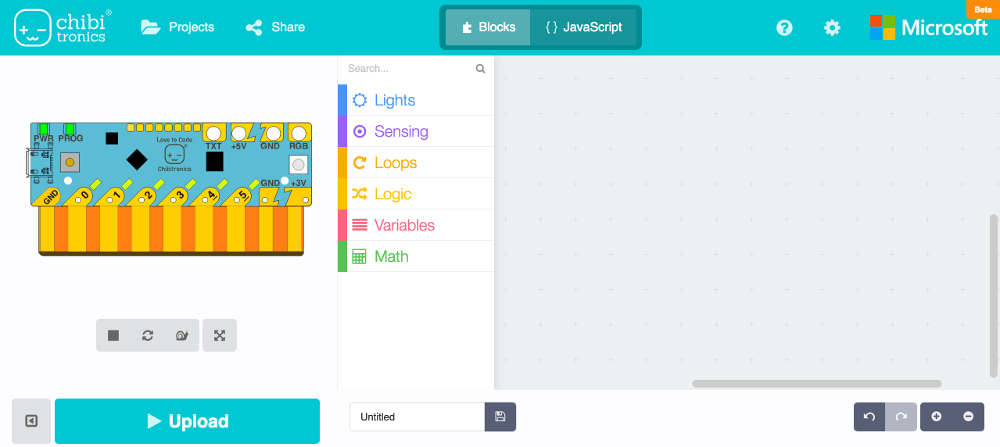
If you’re new to code, try Chibitronic's Scratch-inspired block-based code editor in Microsoft MakeCode!

To start coding in the editor, head over to https://makecode.chibitronics.com/.
Once you head over to MakeCode, click on the "+ New Project". You can also follow along by clicking on "Get Started! > Start Tutorial" to guide you this tutorial.
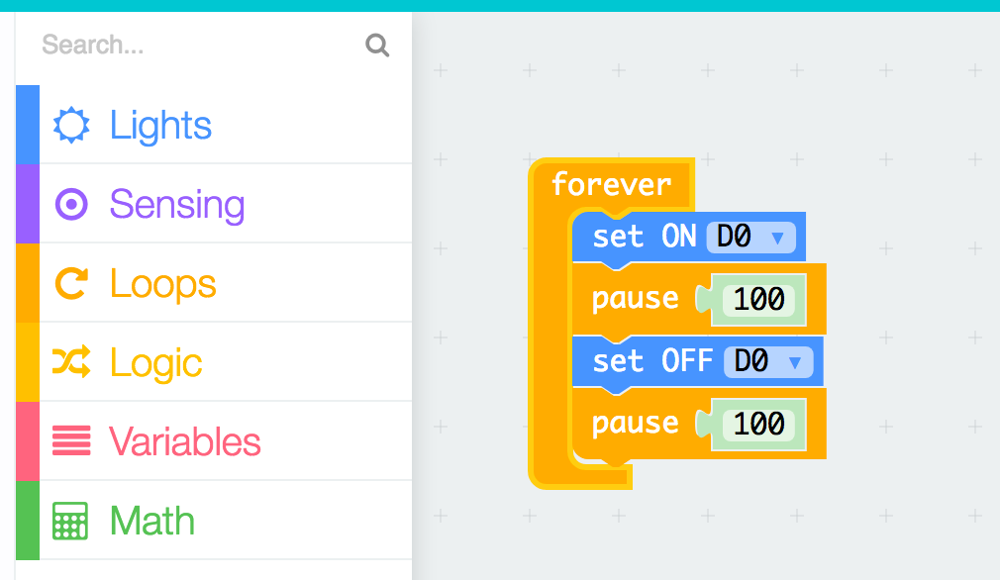
Then drag and drop the forever and pause code blocks in the Control category.
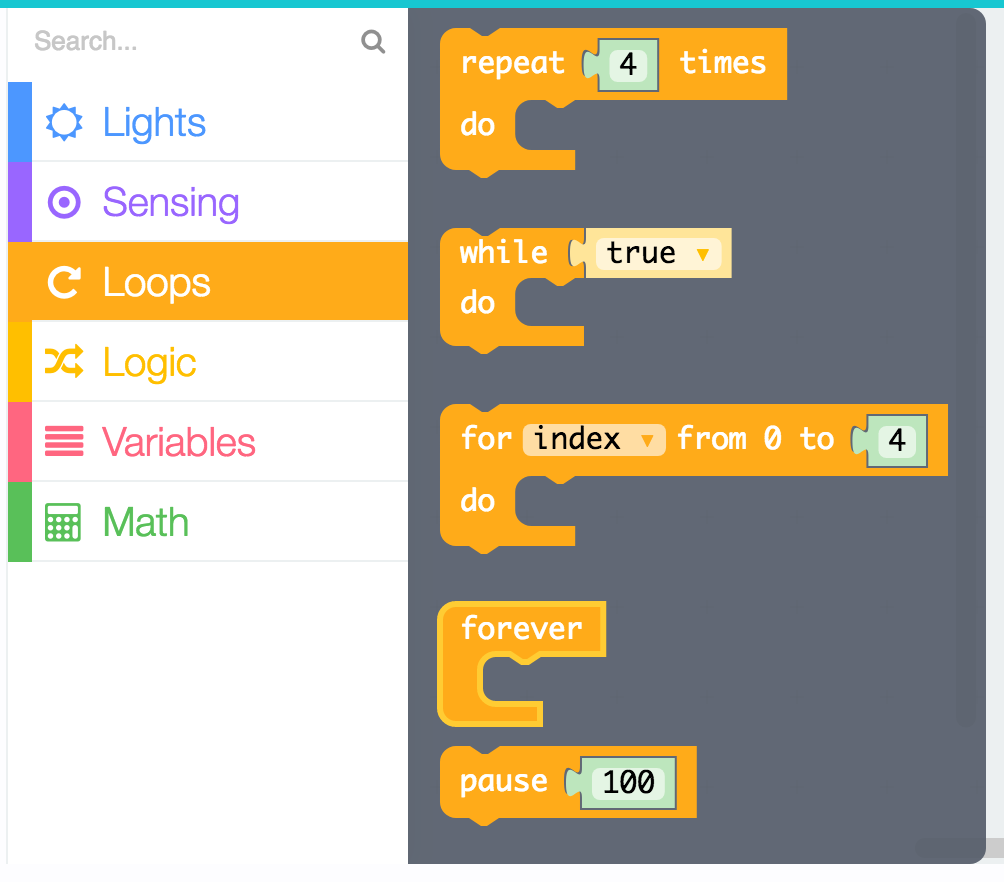
Then drag and drop two set D0 to ON blocks of the Lights category. Change one of the blocks to OFF.
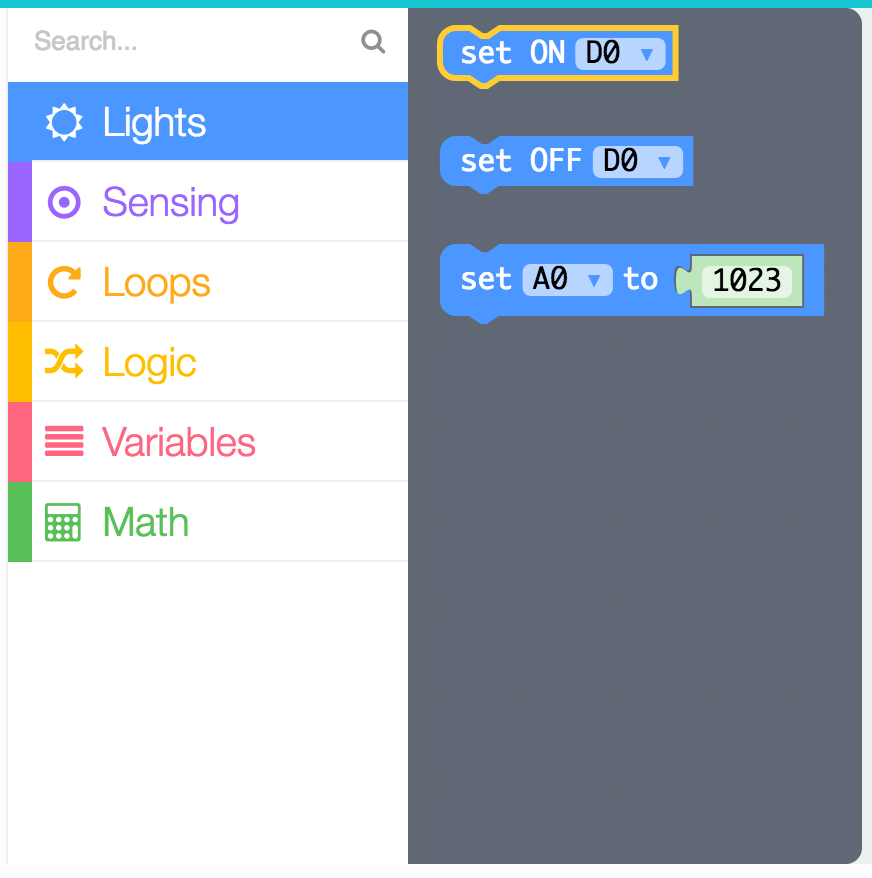
Link the blocks together to blink the LED like so.
Check to see that the PROG light on your board is red. If it isn’t, press the PROG button until the light stays red.
Then press the Upload button at the bottom of the page.
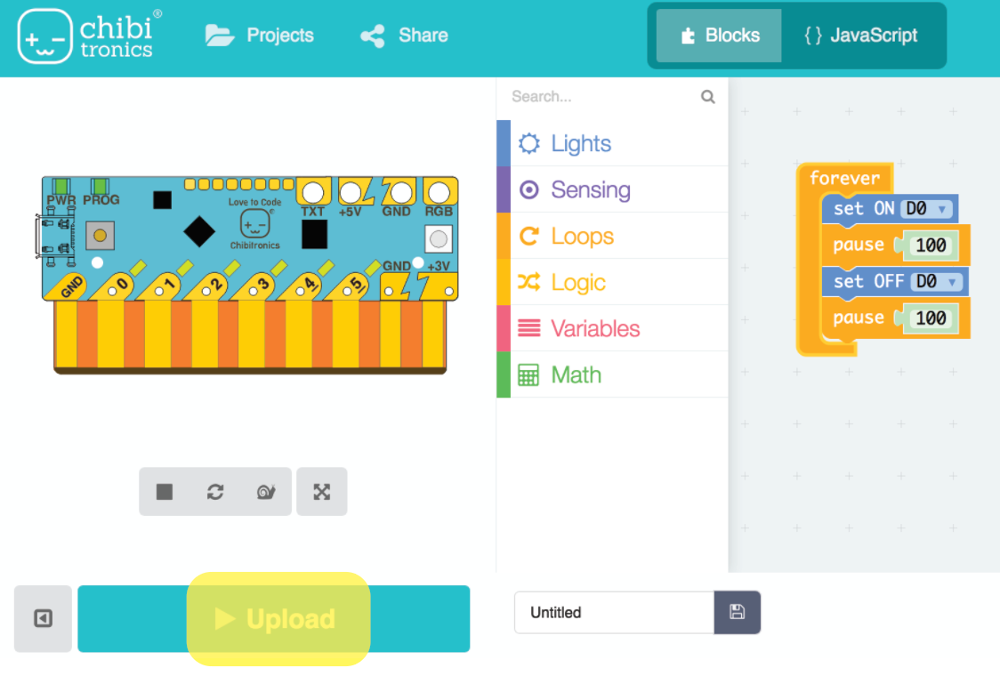
Now you should see this sound animation appear on the screen. When the sound animation stops, the code is finished uploading. Congrats! You’ve uploaded your code!
Now your board should have a blinking light.
Now that you have your first program uploaded. Try playing with the code and creating your own light and blink patterns!
If you would like to start with text-based coding, try using ChibiScript, an Arduino-based beginner-friendly coding language. You can code directly in Arduino programming language with this text-based editor!
To start coding, head over to https://ltc.chibitronics.com/.
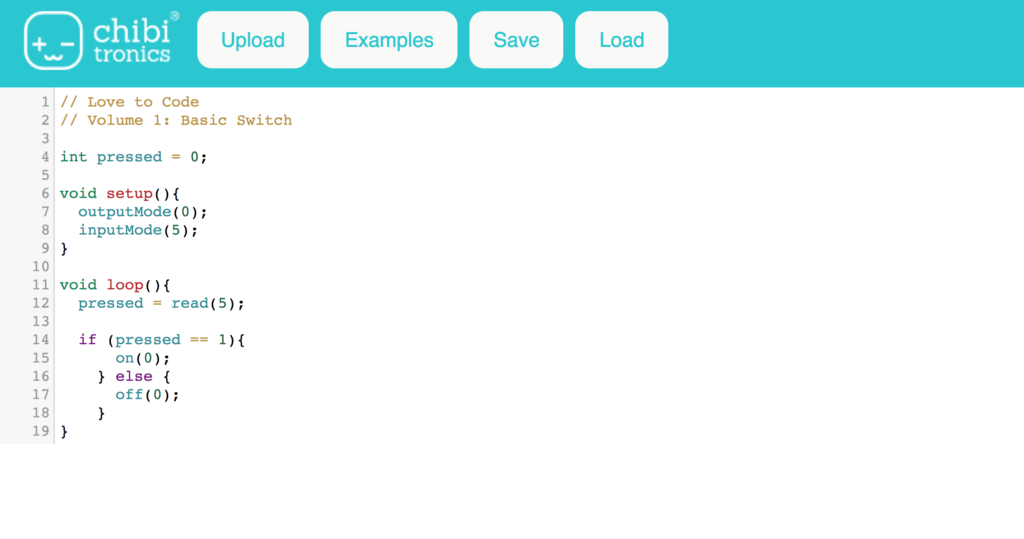
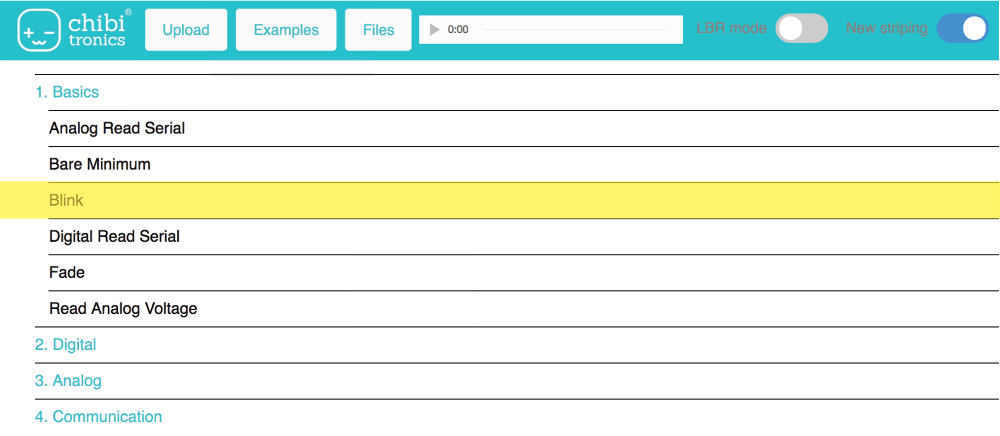
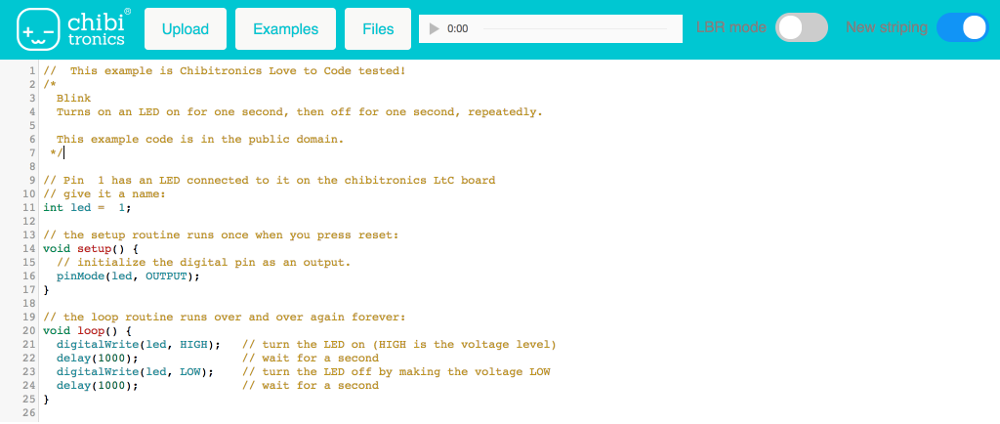
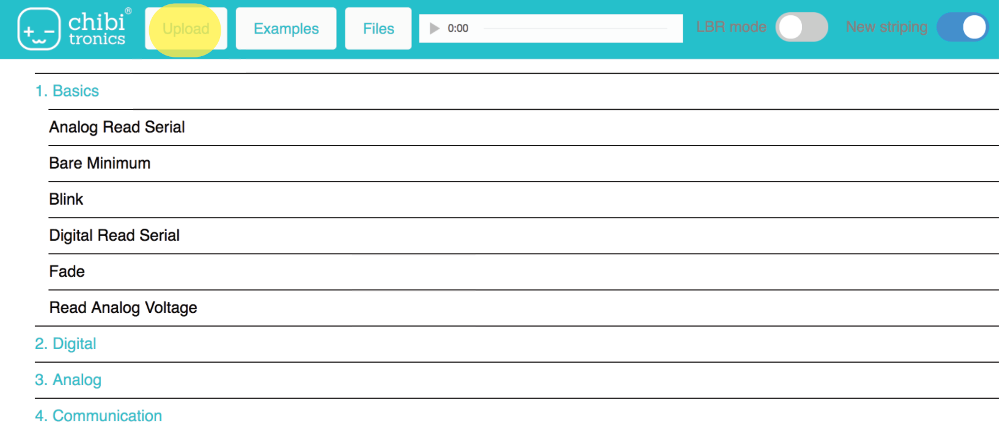
After heading to ChibiScript, click on Examples > 1. Basics > Blink to open up the blink example code. It should look similar to the image below.
Once the blink example is open, you should see an example of how to blink the LED connected to pin 0 similar to the image below. Let's change the pin by replacing "0" to "1".
Check to see that the PROG light on your board is red. If it isn’t, press the PROG button until the light stays red.
Finally, click the Upload button to play the code to your Chibi Chip!
You will see a sound animation appear on the bottom of the screen.
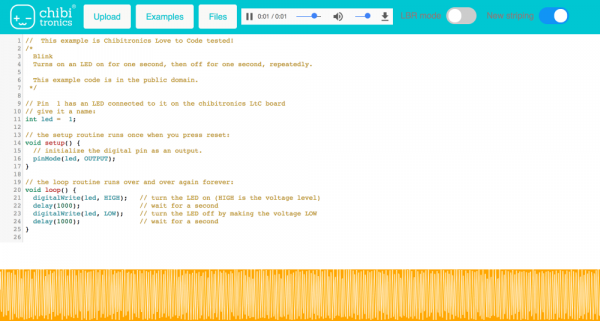
That means the code is being uploaded! When the code is done uploading, the red PROG light on your board will turn back to green to let you know that programming is done successfully. Now you should see your LED blink on the defined pin. Congrats! You’ve uploaded your code. Your Chibi Chip should now have a light blinking!
Now that you have your first program uploaded. Try playing with the code and creating your own light and blink patterns!
Check out Jie Qi's Love to Code Volume 1 for the MakeCode block-based and ChibiScript/Arduino text-based editor. You’ll learn to make LED lights shine and blink with loops and variables, craft paper switches and program them with conditional statements, and make complex light patterns with multithreaded programming. Finally, level up your coding skills with our debugging chapter, which shows you how to find and fix problems in projects.
Fern's Story from Chibitronics on Vimeo.
Both adaptations are free for download! Click on the links below based on your programming preference and download to start coding with the Chibi Chip.
") |
") |
| Love to Code Volume 1 for MakeCode (PDF) |
Love to Code Volume 1 for ChibiScript and Arduino (PDF) |
Check out the Chibitroinics demo videos to help guide you through the chapters. The following videos were filmed for the Chibiscript and Arduino code. If you are following along with the Love to Code Volume 1 MakeCode Edition, the code will be similar but in block-based code.
Walk-through of Chapter 1: Light up an LED from Chibitronics on Vimeo.
Walk-through of Chapter 2: Code a Blink! from Chibitronics on Vimeo.
Walk-through of Chapter 3: Add a Switch! (part 1) from Chibitronics on Vimeo.
Walk-through of Chapter 3: Add a Switch! (part 2) from Chibitronics on Vimeo
Walk-through of Chapter 4: Fade in and out! from Chibitronics on Vimeo.
Still having challenges? Send us a email at info@chibitronics.com.
Thanks for trying out Chibitronics Love to Code boards. They would love your feedback to make the experience even better! Do you have ideas or comments for us? Please send them our way at info@chibitronics.com. Happy making!
Now that you've successfully got your Chibi Chip up and running, it's time to incorporate it into your own project! For more information related to paper circuits and the Chibi Chip, check out the resources below:
Need some inspiration for your next project? Try crafting your own paper circuit holiday greeting card from Chibitronics!
Or check out some of these related tutorials:
learn.sparkfun.com | CC BY-SA 3.0 | SparkFun Electronics | Niwot, Colorado