Clap On Lamp
 Shawn Hymel
Hardware Assembly
Lamp Assembly
To start, we'll attach the servo to the lamp first. If you want to protect your lamp's finish, wrap some electrical tape around the post, covering about a 3-inch section.
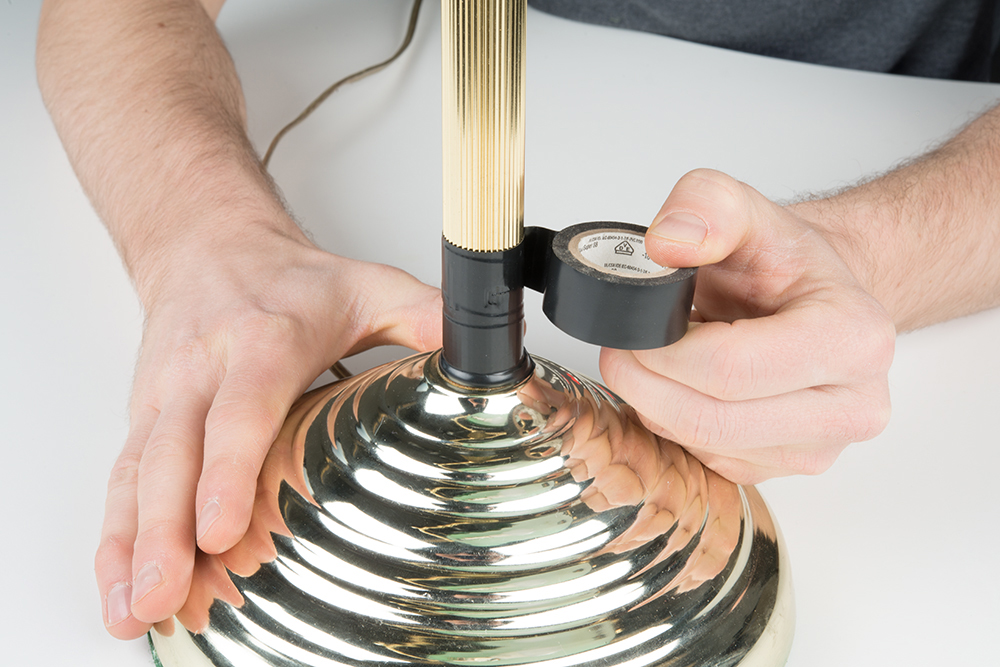
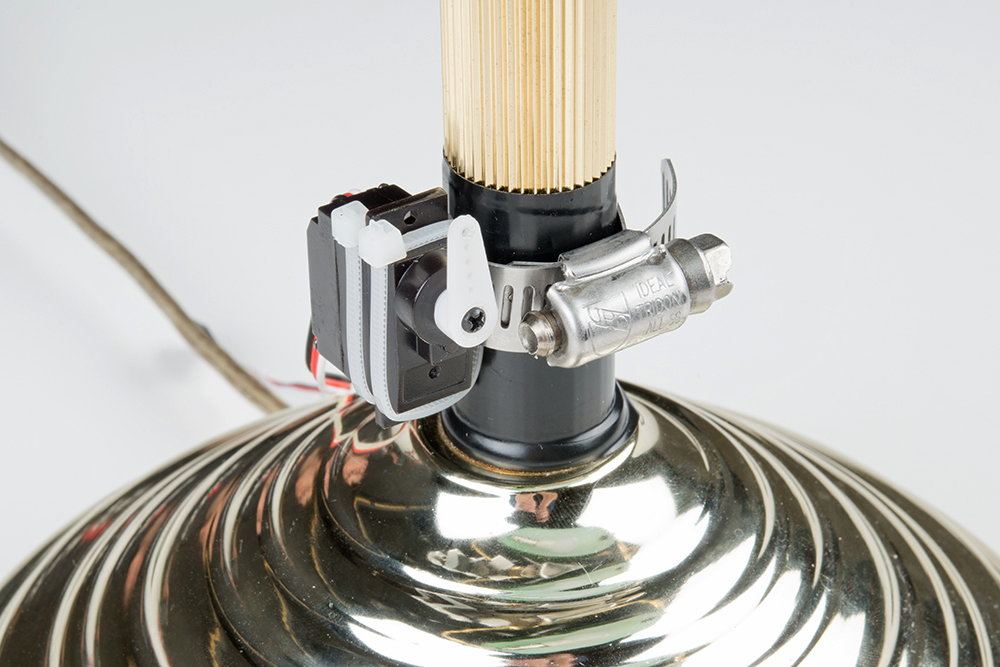
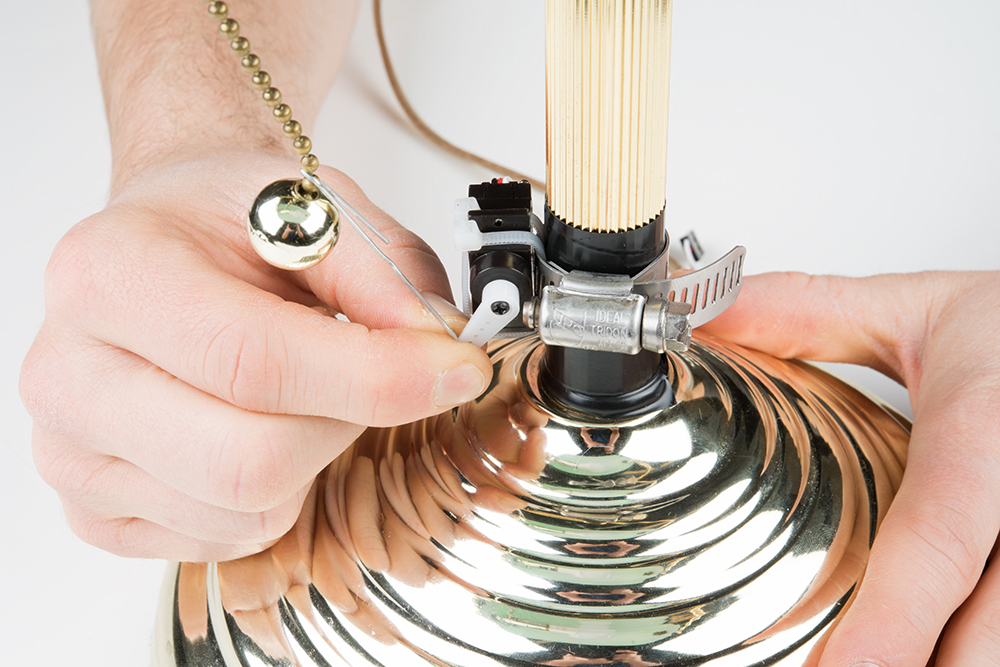
Use a screwdriver to tighten the hose clamp around the post about 1 inch above the base. Note that you may need to adjust the position of the servo later so that it can effectively pull the chain. Leave a small gap on one side.
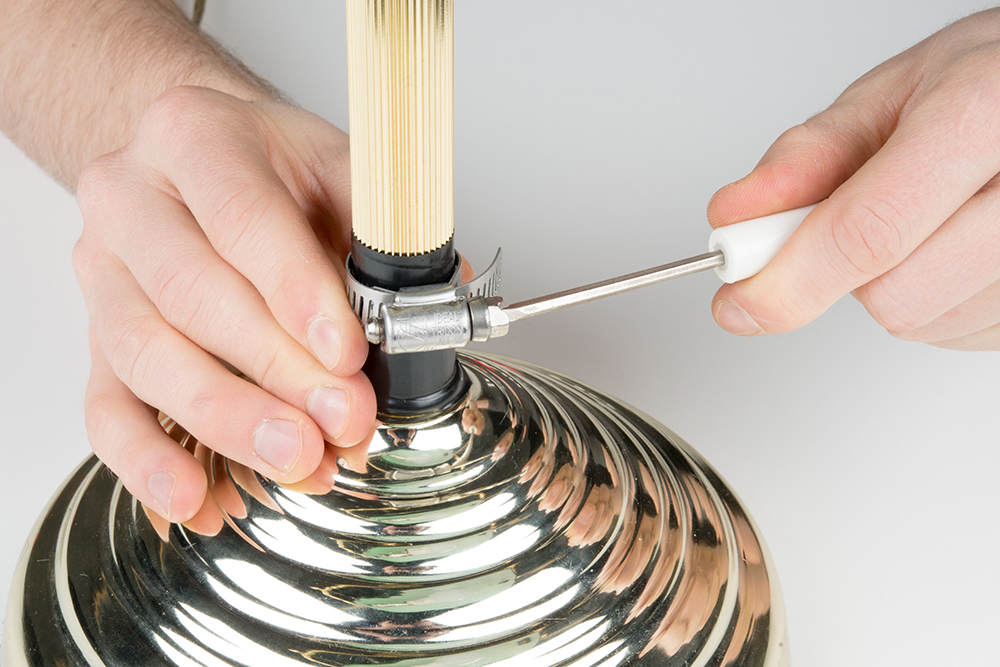
Thread two zip ties through the gap in the hose clamp
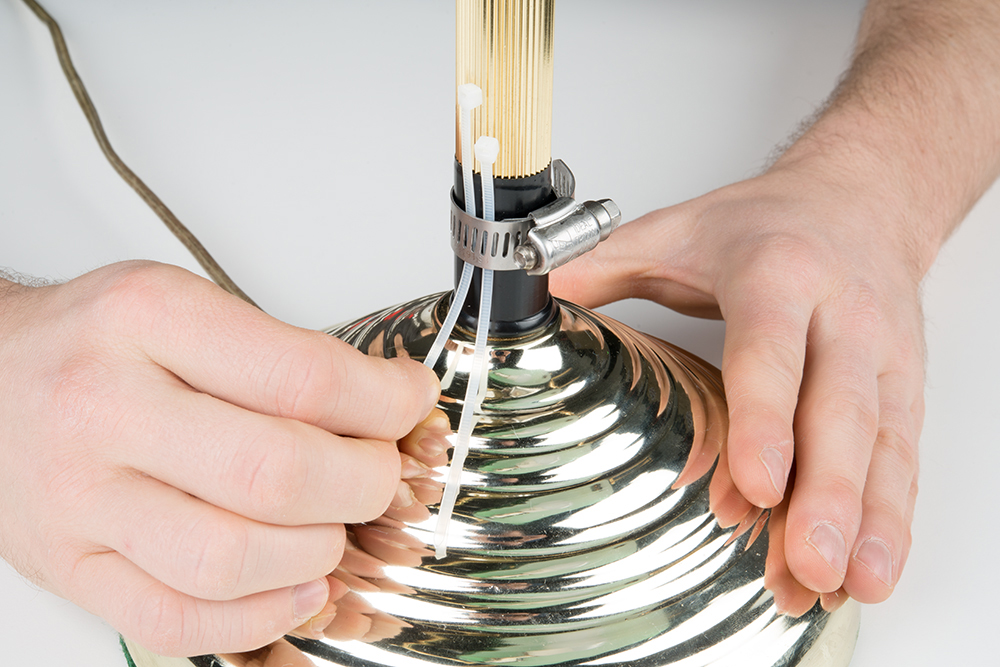
Carefully pull the zip ties around the servo on either side of the flange. Pull the zip ties tight (you may need to use a set of needle-nose pliers).
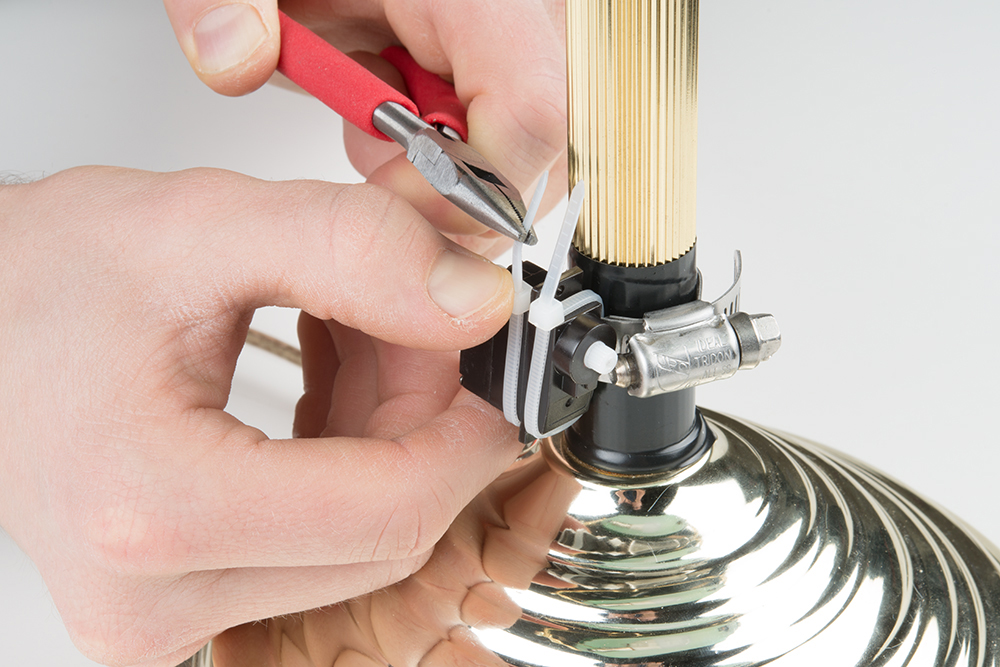
Tighten the hose clamp as needed and cut the ends of the zip ties.

Using a screw, attach a servo arm to the servo's shaft. Make sure that the arm can rotate from pointing directly up to directly down, rotating away from the lamp's post. We'll use that motion to pull the lamp's chain.
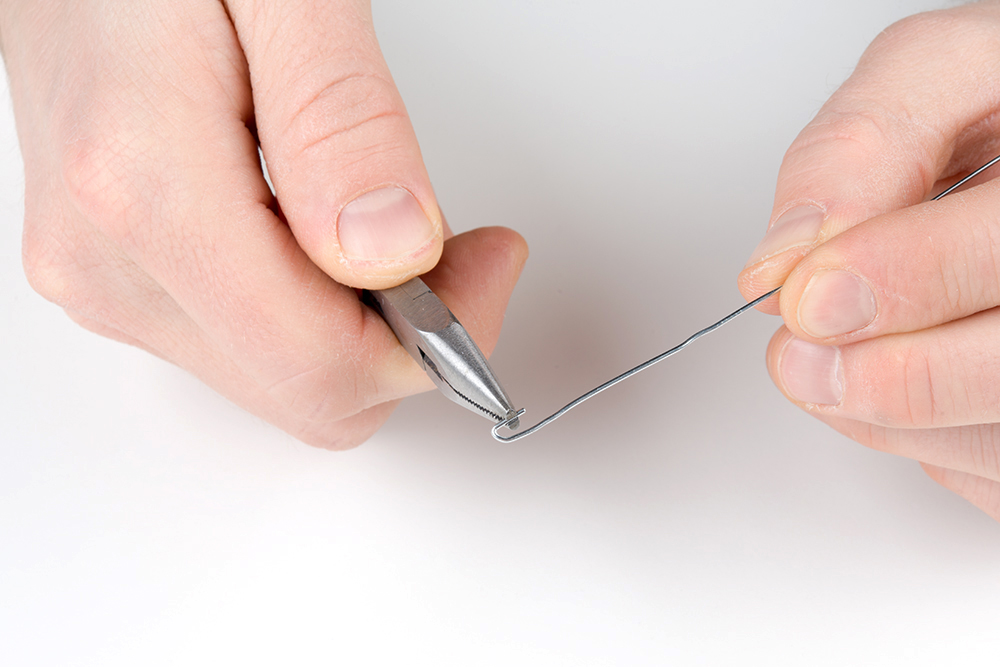
Straighten out a paper clip, and bend a hook in one end using needle-nose pliers.
With the servo arm facing up, thread the hook through the outermost hole in the servo arm. Hold the other end of the paper clip up to the chain, and bend the paper clip so that it hooks onto the chain.
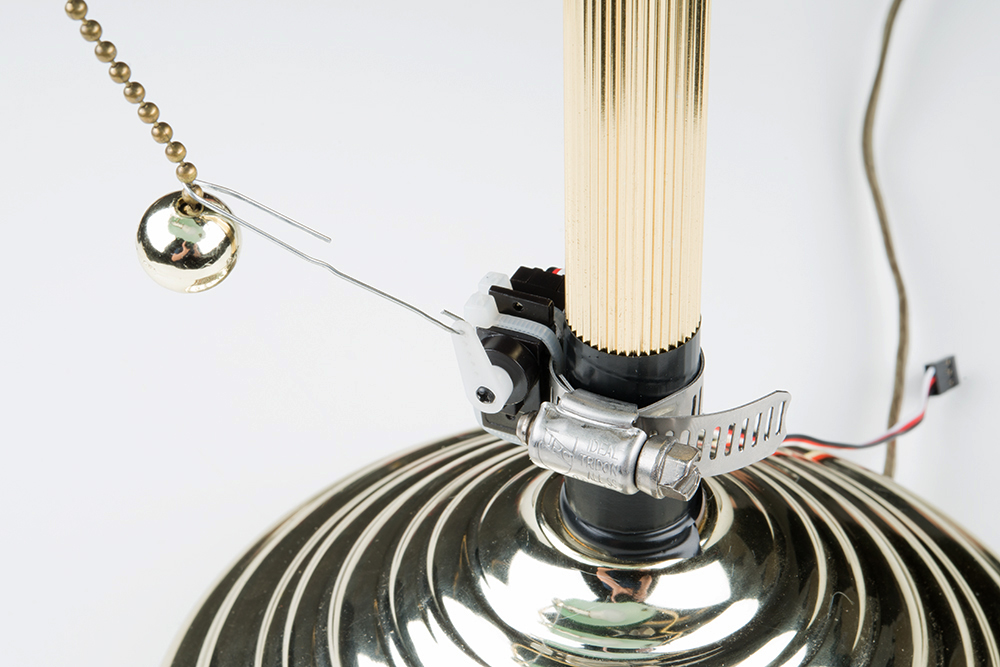
Try rotating the servo to make sure that the chain is pulled fully to switch the lamp. This may require readjusting a second paper clip hook so that the chain is pulled successfully on each rotation.
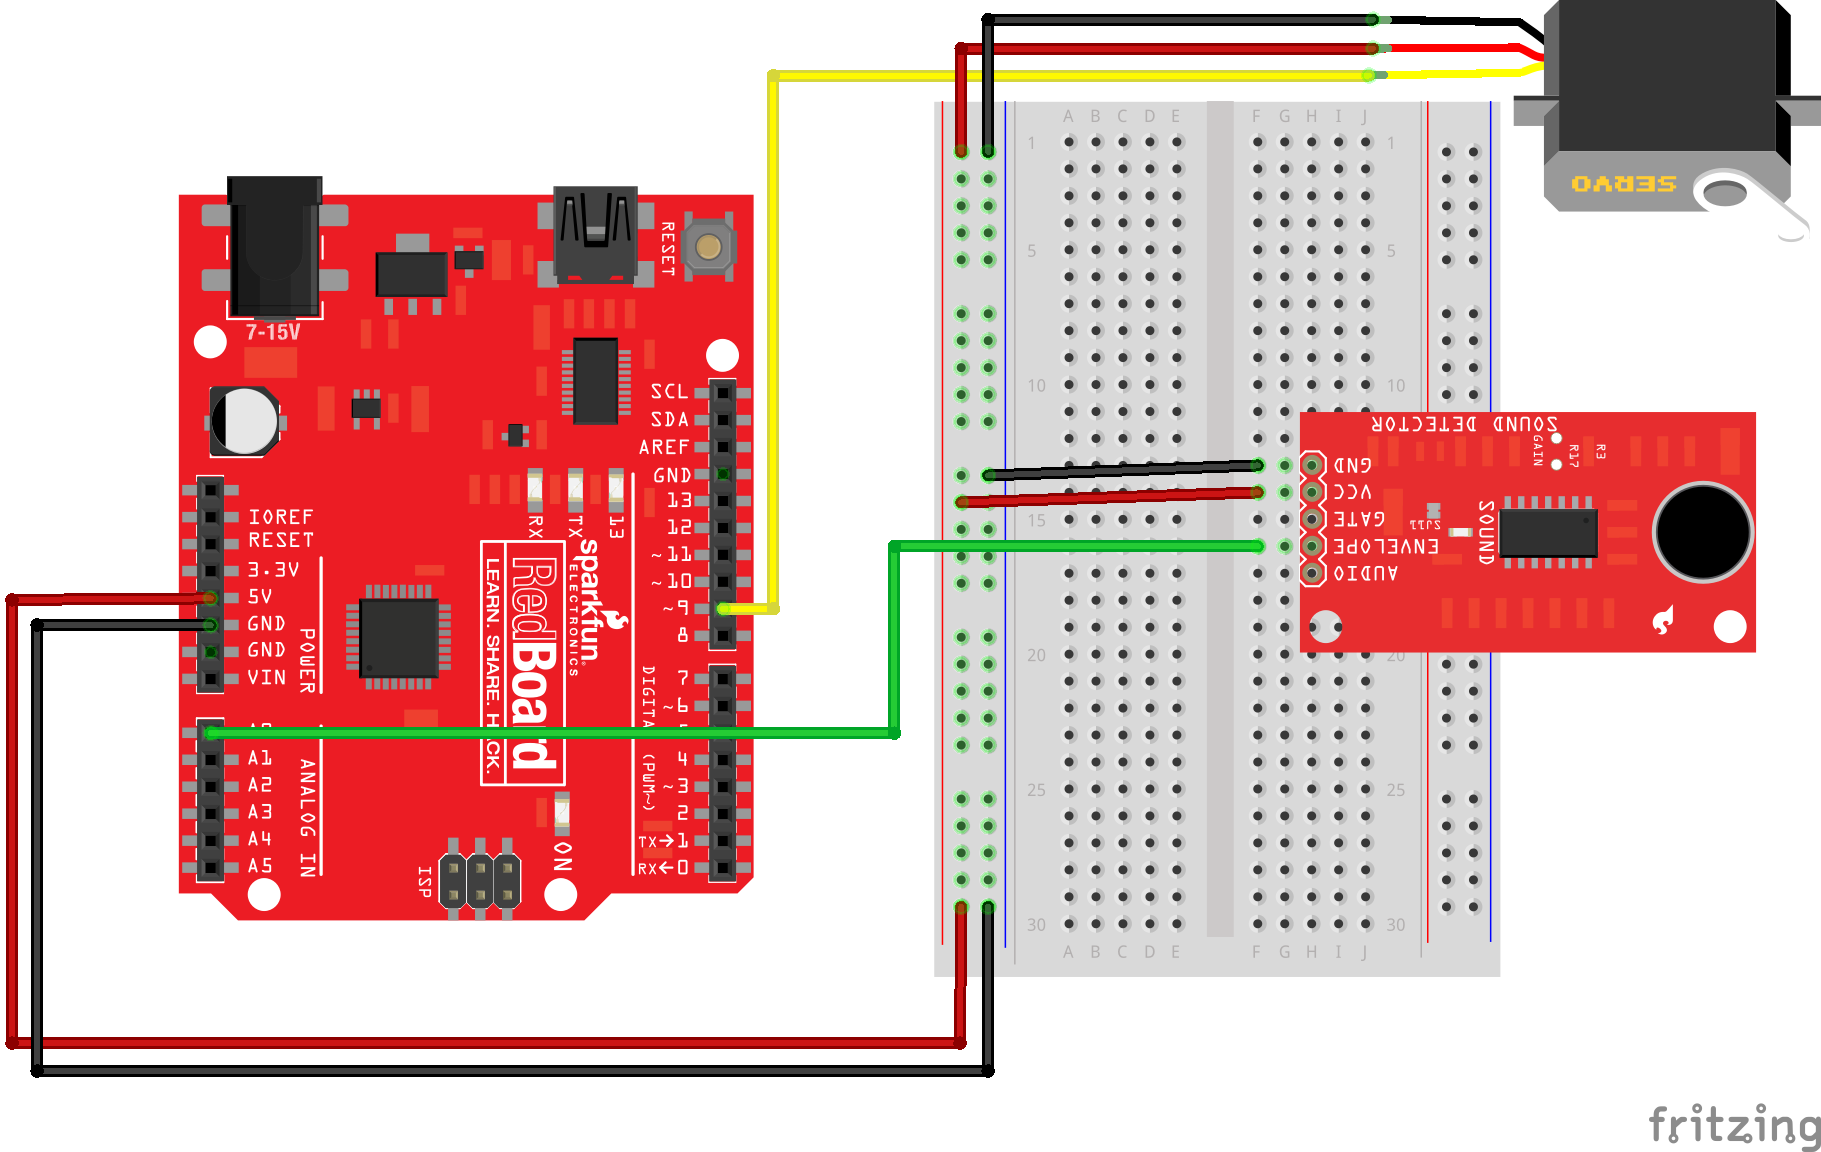
Circuit Diagram
Using jumper wires, connect the components as shown in the diagram below.