AS726X NIR/VIS Spectral Sensor Hookup Guide
 Englandsaurus
 Hardware Overview
The AS7262 detects 450, 500, 550, 570, 600, and 650nm of light each with 40nm of full-width half-max detection. The AS7263 can detect 610, 680, 730, 760, 810, and 860nm of light each with 20nm of full-width half-max detection.
Communication
The AS726X is unique as it can communicate by both an I2C interface (through the onboard Qwiic connectors, or pins at the bottom of the board) and serial interface using AT commands (pins at the top of the board).
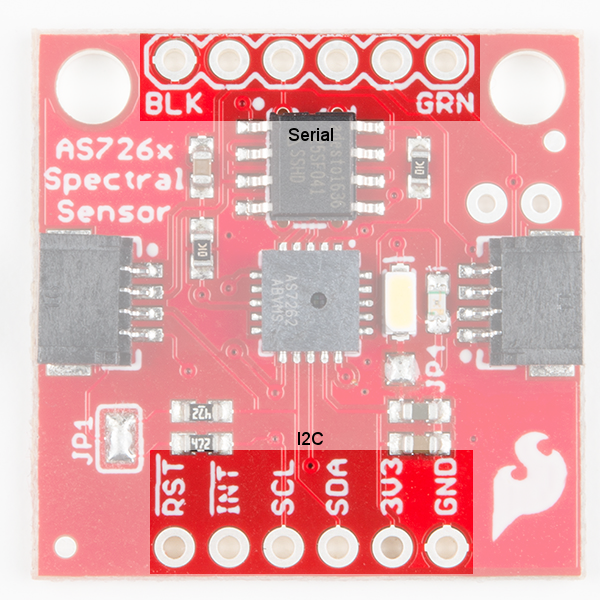
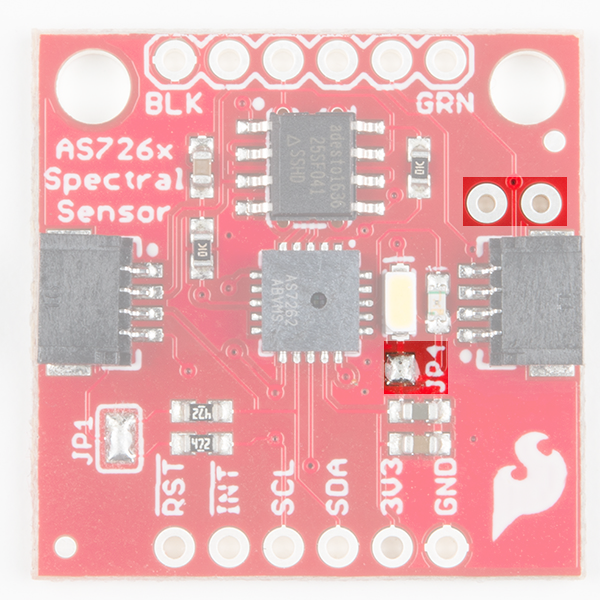
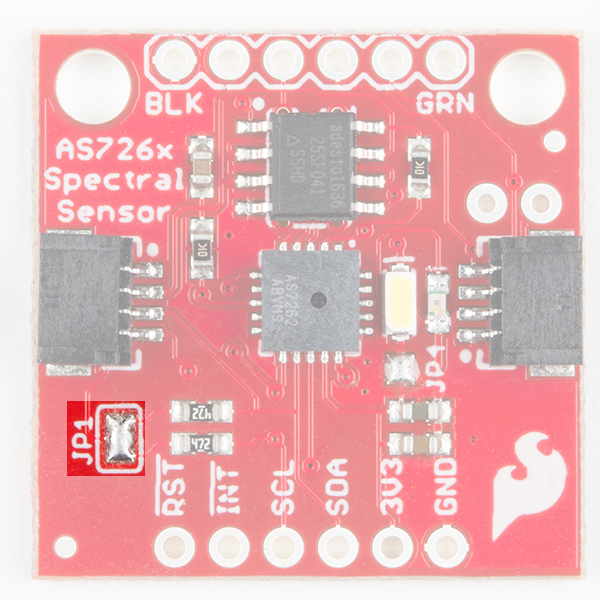
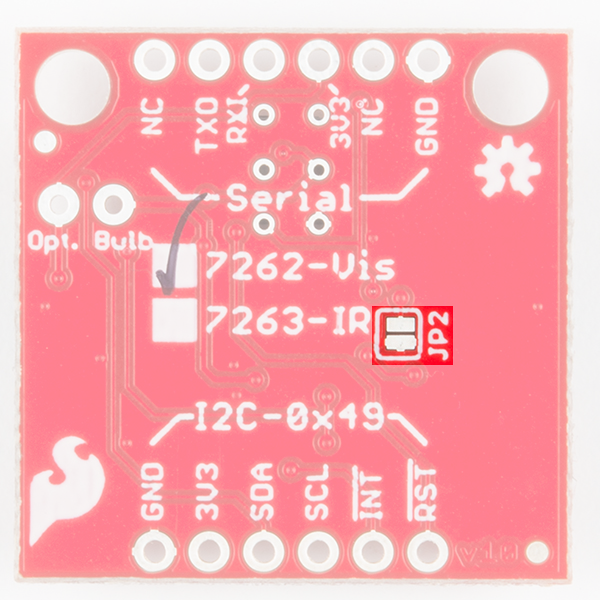
While I2C is the default setting (The default I2C address is 0x49 for both AS7262 and AS7263), serial communication via UART can be enabled by removing solder from the jumpers labeled JP1, adding solder to the jumper labeled JP2 (on the back of the board), and using Sparkfun's USB-to-Serial breakout to interface directly with the computer. JP1 also connects the I2C bus to pull-up resistors. If multiple sensors are connected to the bus with the pull-up resistors enabled, the parallel equivalent resistance will create too strong of a pull-up for the bus to operate correctly. As a general rule of thumb, disable all but one pair of pull-up resistors if multiple devices are connected to the bus. If you need to disconnect the pull up resistors they can be removed by removing the solder on jumper JP1 highlighted below.
 |
 |
LED
The board also has multiple ways for you to illuminate the object that you are trying to measure for a more accurate spectroscopy reading. There is an onboard, 5700K LED that has been picked out specifically for this task. However, if you aren't satisfied with the onboard LED, you can grab your own through hole incandescent. While you should find a bulb rated for 3.3V, a bulb rated for higher voltage, like 5V, will still work, but will not run as bright as it normally would with 5V. We've found that Mouser is a good place to look for these. If you are going to go that route and use your own bulb, be sure to disable the onboard LED by removing the solder from the JP4 jumper.