Addressable LED Neon Flex Rope Hookup Guide
Hardware Hookup w/ Arduino
For users that want to control the animations or react to input from a sensor, an Arduino microcontroller can be used to control the LED neon flex rope's segments. For a quick connection, we will use an alligator clip with pigtail and hookup wire.
Connecting to the DAT Pin
For initial testing, we will be using an alligator clip with pigtail to connect the LED Neon flex's DAT pin to the software defined control pin on the Arduino. Use the alligator clip to clamp on the DAT pin wire and then connect the other end to D5.
Additional Power Supply and GND Reference
Since the recommended input voltage via the barrel jack for the RedBoard is 15V, an additional power supply is required. For the scope of this tutorial, we will use the mini-USB connector on the Arduino to power the control circuit with 5V. A 5V USB port from a computer can be used during testing. A 5V USB wall adapter can be used when powering the Arduino in a project or installation.
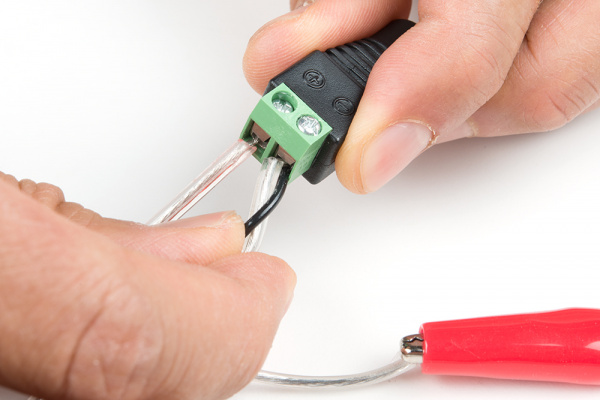
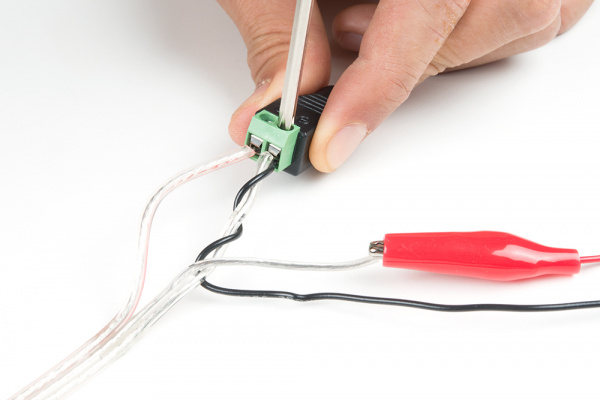
Since we are adding an additional power supply, make sure to ground the LED neon flex rope with the control circuit. Strip a piece of wire. Then connect the "-" on the DC barrel jack adapter to the Arduino's GND pin. Wrap the wires together to make a more secure connection.
 |
 |
| Insert Wire to GND for Reference | Screw In GND Wires |
Hookup Table
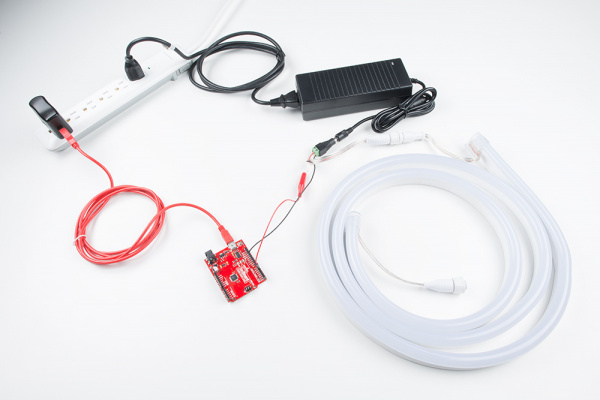
Based on the connections described above, here is a hookup table of the connections.
| 24V Power Supply | Female DC Barrel Jack Adapter | LED Neon Flex Rope Pinout | Arduino | 5V Power Supply |
|---|---|---|---|---|
| Center Positive | + | Vcc (Red striped) = 24V | ||
| 5V | 5V | |||
| Clear (middle wire) = DAT | Pin 5 (or whatever is defined) | |||
| GND | - | Clear (side) = GND | GND | GND |
The final circuit should look similar to the image below.
