Uh-Oh Battery Level Indicator Hookup Guide
 Toni_K
Introduction
Anyone running a battery-powered project knows how frustrating it can be when a battery dies or runs too low to prevent brown-out conditions. The TL431 in the Uh-Oh Battery Level Indicator Kit can help prevent these frustrations.

TL431 - Voltage Reference
COM-11078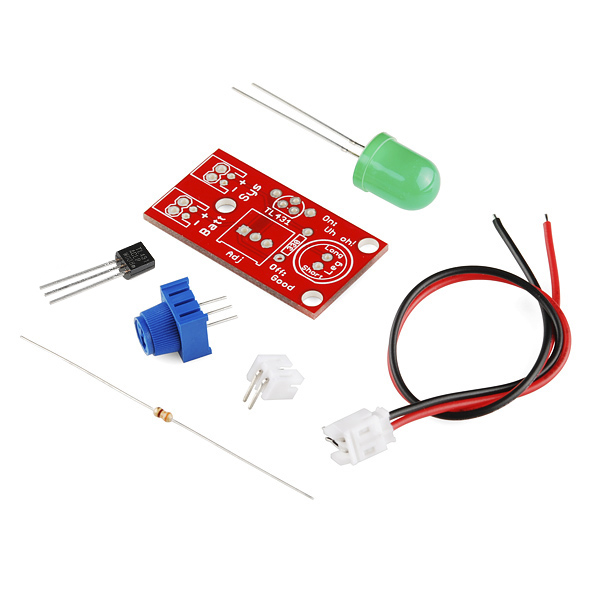
This guide will show you how to use your indicator after you have soldered it all together.
Suggested Reading
This is a pretty basic kit, but if you need a refresher on using a multimeter, soldering, or electrical characteristics, please check out the tutorials below.
How to Solder: Through-Hole Soldering
Voltage, Current, Resistance, and Ohm's Law
Battery Technologies
Voltage Dividers
Resistors
Diodes
Light-Emitting Diodes (LEDs)
Electric Power
How to Use a Multimeter
Hookup Example
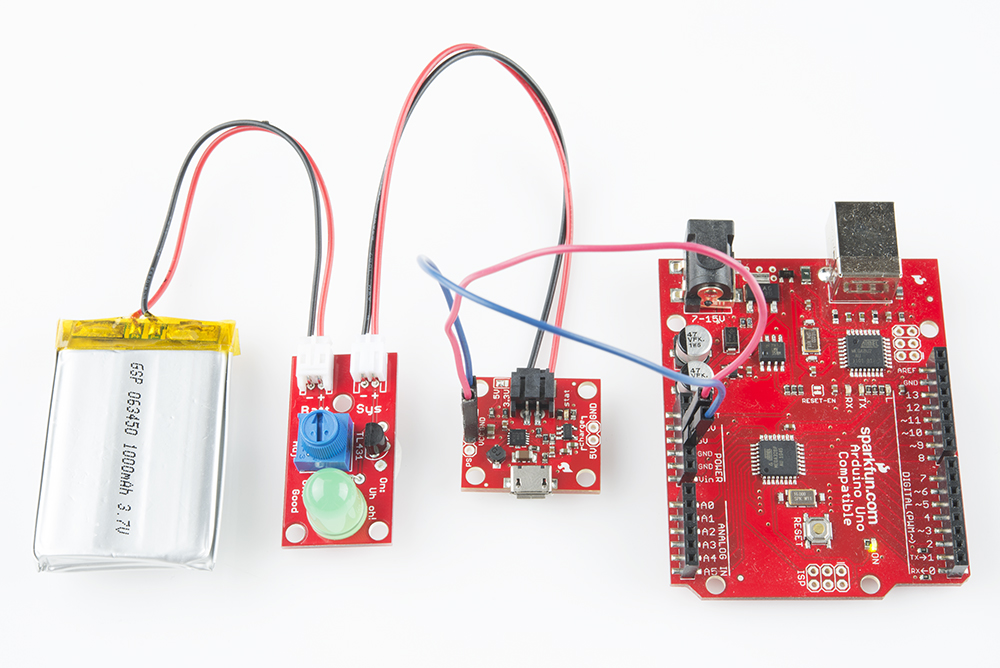
Once you have soldered your kit together, it's time to start monitoring your battery levels. For this example, we will be hooking up the indicator to a 3.7V lipo battery that is powering an Arduino Uno. We will also be including a Power Cell- LiPo Charger/Booster in the circuit, to ensure that we can recharge the battery when it reaches the low voltage limit.
Connections:
Uno → PowerCell Charger
- 5V → VCC
- GND → GND
PowerCell Charger → Uh-Oh Indicator
- PowerCell + → Sys +
- PowerCell - → Sys -
Uh-Oh Indicator → Battery
- The JST connector on the battery is notched and corresponds to the notch on the Uh-Oh Indicator.
Here is a Fritzing diagram showing the actual connections between the Uno, the PowerCell, the Uh-Oh indicator, and the battery.

Once you have everything hooked up, you will need to adjust the trimpot on the Uh-Oh indicator board to the voltage at which you would like to be notified.
Setting the Threshold
With everything hooked up correctly, it's time to fine-tune the battery indicator to your project's needs. To do this, you'll need a multimeter to read the resistance on the potentiometer, and thus set the voltage threshold at which the LED turns on.
First, if it's plugged in, unplug the battery from the indicator. We can only measure the resistance of the trimpot if there is no battery present.
There are two test points located on the board. They are label on the backside: TP1 and GND.
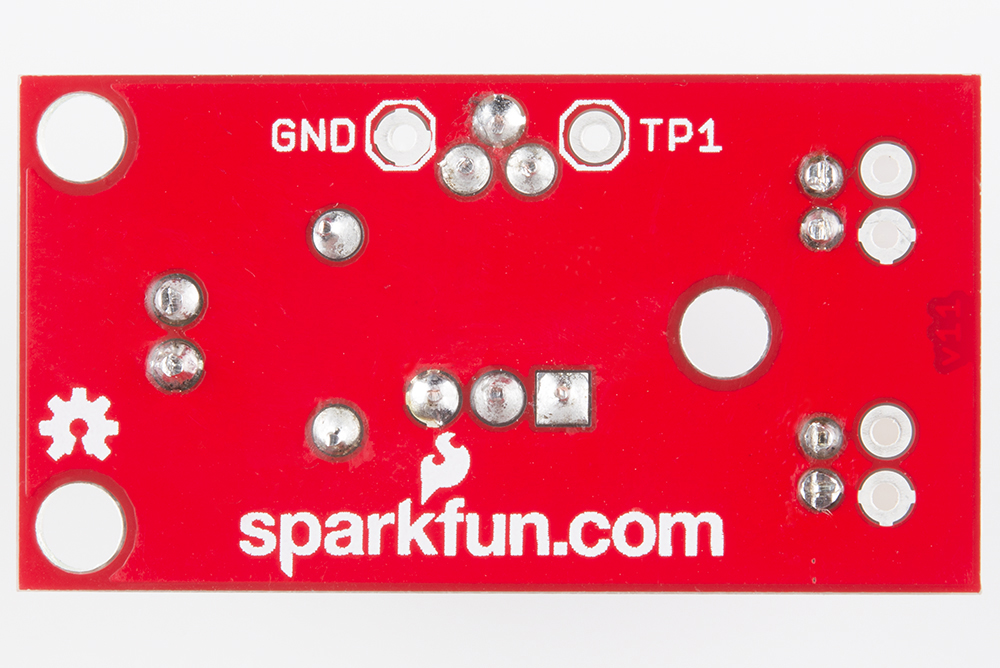
Grab your handy-dandy multimeter, and set it to read resistance. Place the positive probe on the TP1 point and the negative probe on GND.
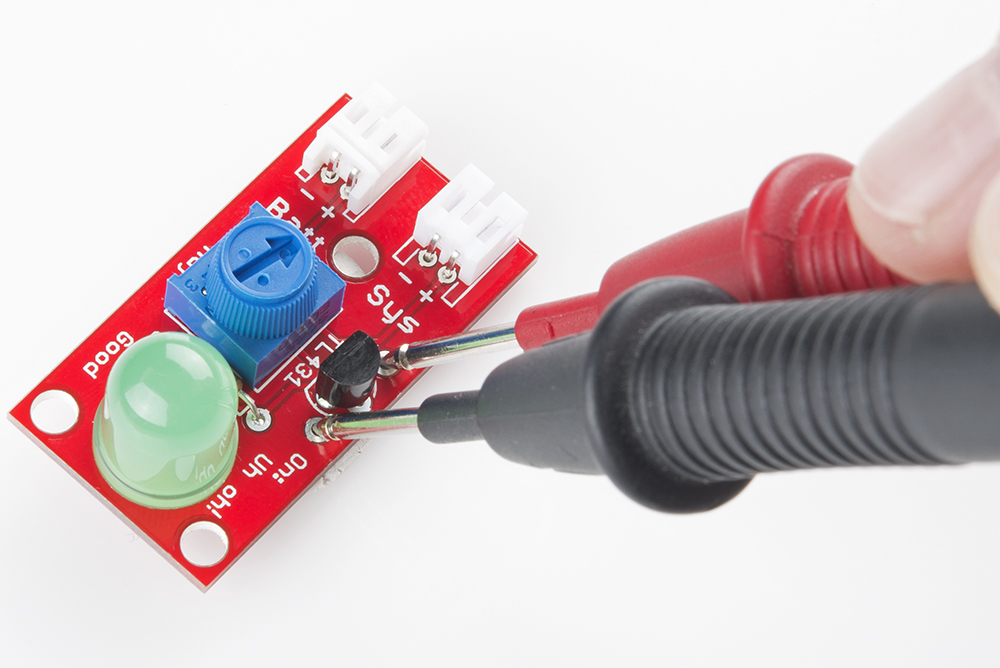
Holding both probes in one hand, use your other hand to turn the potentiometer labeled 'Adj.' Turn it until the multimeter is reading the desired resistance. Use the table below to help you find which voltage threshold you need, and thus which resistance. To calculate these values yourself or to find a value not listed on this table, visit the next section.
| Voltage Threshold | TP Resistance |
| 3.0V | 8.3kΩ |
| 3.1V | 8.0kΩ |
| 3.2V | 7.8kΩ |
| 3.3V | 7.5kΩ |
| 3.4V | 7.3kΩ |
| 3.5V | 7.1kΩ |
| 3.6V | 6.9kΩ |
| 3.7V | 6.7kΩ |
For example, if you want the LED to turn on when your LiPo battery reaches a voltage of 3.2V, then you need the resistance of the trimpot to be about 7.8kΩ.

Calculating the Threshold
If you need a value not provided on the table int he previous section or if you want to better understand how the Uh-Oh Battery Indicator works, this section will go over how the indicator works.
In order to calculate the voltage threshold, we must consult the schematic for the Uh-Oh Battery Indicator and the datasheet for the TL431. These diagrams from the datasheet are particularly helpful. They show what is happening inside the TL431.
Note that the R1 and R2 from this diagram are used in the voltage divider equation below and NOT the R1 listed on the schematic.
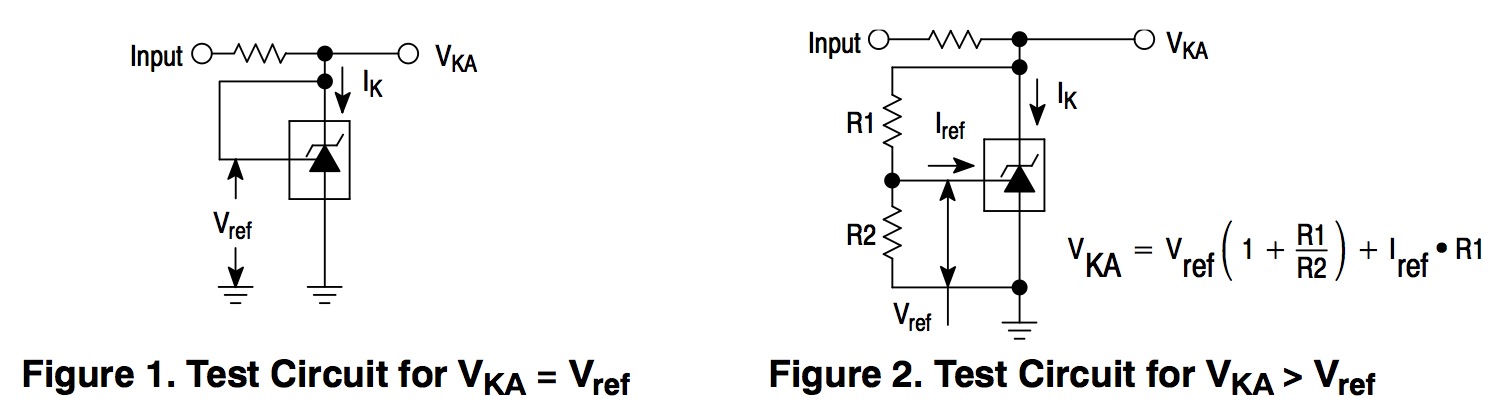
The battery indicator works as a simple voltage divider. The first bit of information needed is the forward voltage drop across the LED. In order to turn on, the LED needs at least 2.5V. This will serve as our Vout in the following voltage divider equation:
The potentiometer used on this board is 10kΩ, so we can say

Thus,

After we plug those values in, we are left with this equation:
Next, we need to figure out the Vin. This is the value of the battery's voltage at which you want to be notified. For example, if you wanted the LED to turn on when the battery reaches a voltage of 3.25V, you would plug that value in for Vin, and then solve for R2.


Using the previous section as a guide, measure and turn the trimpot until your multimeter reads about 7,692Ω.
You can use this equation to calculate any battery voltage threshold!
Resources and Going Further
Now that you know how to work with the Uh-Oh battery level indicator, you can try to hack the board to work with different ratings of batteries. Check out the ratings for the shunt regulator or consider finding a different one.