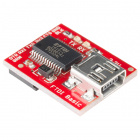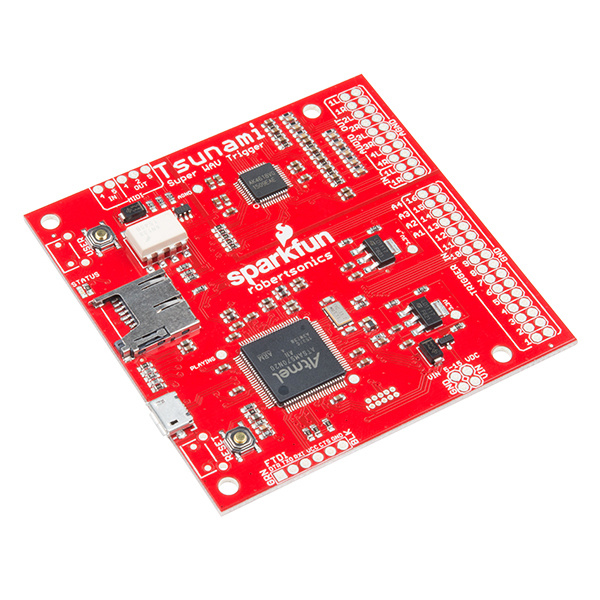
Tsunami is the next-generation SparkFun polyphonic WAV file player.
Tsunami is a bigger, better brother to the WAV Trigger. It starts with the same polyphonic WAV file playback engine, then adds a bunch of new features.
Tsunami was developed in collaboration with Robertsonics. A portion of each sale goes back to them for product support and continued development.
This guide will show you how to start using Tsunami. We'll start by putting .WAV and configuration files on a microSD card, then pop it in Tsunami, then trigger sounds across multiple outputs.
To follow along with this project tutorial, you will need the following materials:
You will also need a microSD card reader and a set of headphones or multimedia speakers.
If you aren't familiar with the following concepts, we recommend checking out these tutorials before continuing.
The Tsunami board has the following features and interfaces.
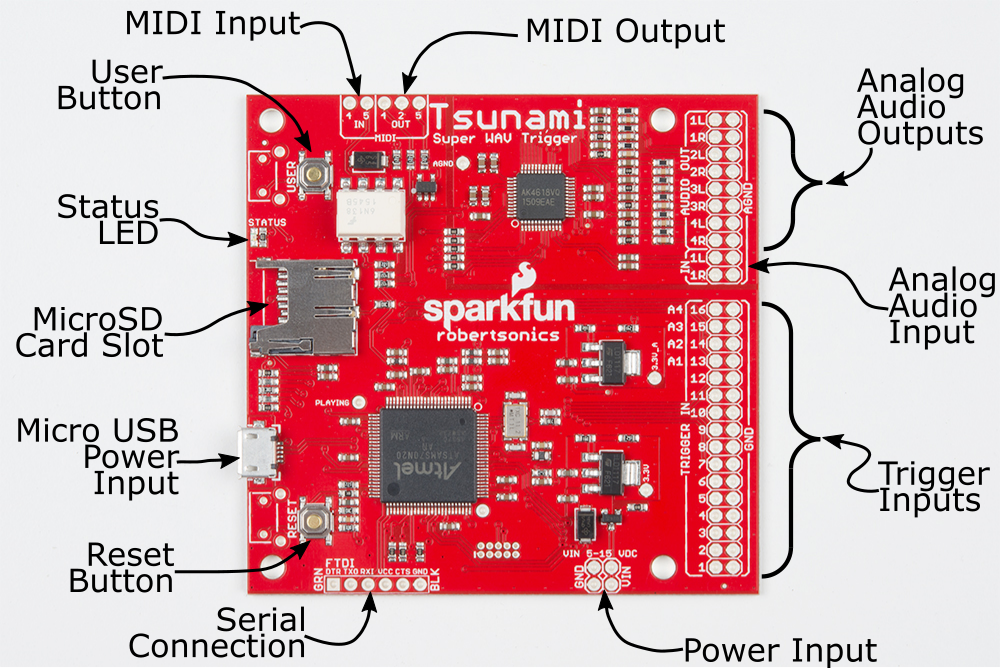
Each of these is described in more detail in the Tsunami Online User Guide.
Tsunami should be powered with between 5 and 15 VDC. Tsunami is also rather power hungry: While playing WAV files, it draws about 200 mA.
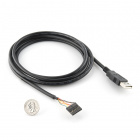
Power can be applied two ways. For convenience, Tsunami can be powered by the USB micro-B connector, from a USB port, or a micro-B terminated wall adapter. Alternatively, Tsunami can be powered more directly using the 0.1 inch header power input.

On Tsunami, the incoming voltage is regulated down to 3.3V for all of the onboard circuitry. The processor, codec and other circuitry are all powered from 3.3V.
Tsunami's digital interfaces operate at 3.3V and are not compatible with 5V logic. If you are connecting other devices to the FTDI header or trigger inputs, you need to be sure to use 3.3V devices, or a voltage translator to bridge the gap.
The one exception to this is the opto-isolated MIDI input. Being opto-isolated, it is fully compatible with regular 5V MIDI circuitry.
To show how easy it is to use Tsunami, let's hook it up and play some sounds.
For this demo, we'll be using the firmware that comes preloaded when you purchase the board. This is the stereo version, which plays stereo WAV files and treats the adjacent outputs as pairs, numbered 1 through 4. Mono file playback is supported by a different firmware image.
The contents of the microSD card are the key to Tsunami. To start this demonstration, we'll prepare a card with some prerecorded files.
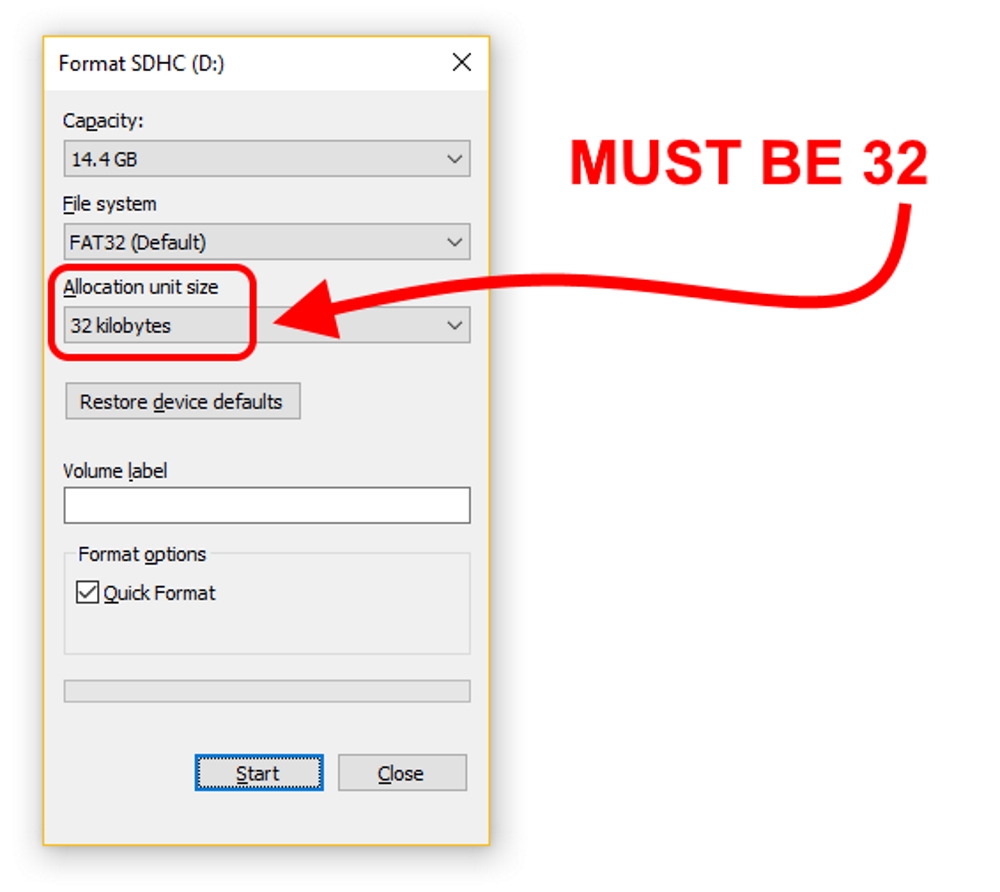
First, a quick warning about formatting your uSD card. If you need to format your card, it is very important that you use the correct settings:
Next, download the demo files. Unzip the folder and put the files on the root directory of the card.
Before we put the card in Tsunami, let's quickly examine the files.
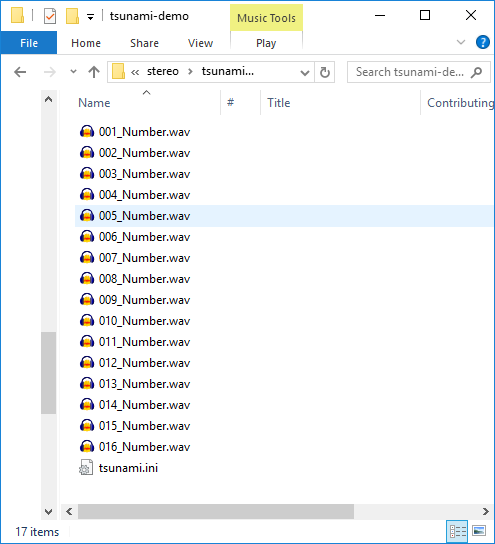
Notice that there are two types of file: 16 WAV files, and one INI file.
The WAV files are the audio content Tsunami will be playing back. These are 16 stereo WAV files, configured to play from the 16 trigger inputs.
The file names contain the trigger input mapping for the files. Each one starts with a three-digit number, which assigns it to the corresponding trigger input.
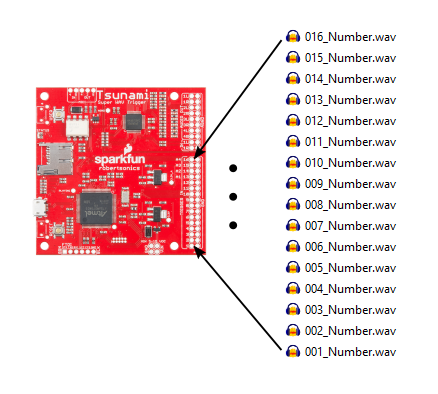
With 16 files, numbered 001 to 016, we'll be assigning a file to each of the trigger inputs.
We should also take a moment to examine the file format. Tsunami plays WAV files recorded at 16-bit resolution, with a 44.1kHz sampling rate. Different firmware images allow for the playback of stereo or mono files.
Tsunami also requires that the file not contain any additional header information. Some audio recording programs, such as Pro Tools, write additional information at the start of the file. One easy way to remove unnecessary header information is by opening the file in Audacity and exporting it as "WAV (Microsoft) signed 16-bit PCM." As part of the export process, be sure to clear out any entries in the metadata dialog (title, artist, genre, etc.). The following video gives a brief demonstration of the Audacity export process.
If you're curious about the header contents, Rail John Rogut has written the Header Investigator application, which can display Pro Tools region information and BWF time stamps. This extra data might be meaningful to DAW applications, but Tsunami doesn't use the information.
There is also an initialization file, tsunami.ini. Tsunami reads this file when it starts, to gather more details about how it should handle the trigger inputs. In this case, the triggers are constrained so that a file plays completely and can't be retriggered until it is done playing. This prevents stuttering when the trigger inputs aren't clean.
INI files are generated and edited using the Tsunami Configurator application. They are human readable ASCII text files. If you're curious about what's inside, you can open them in a text editor.
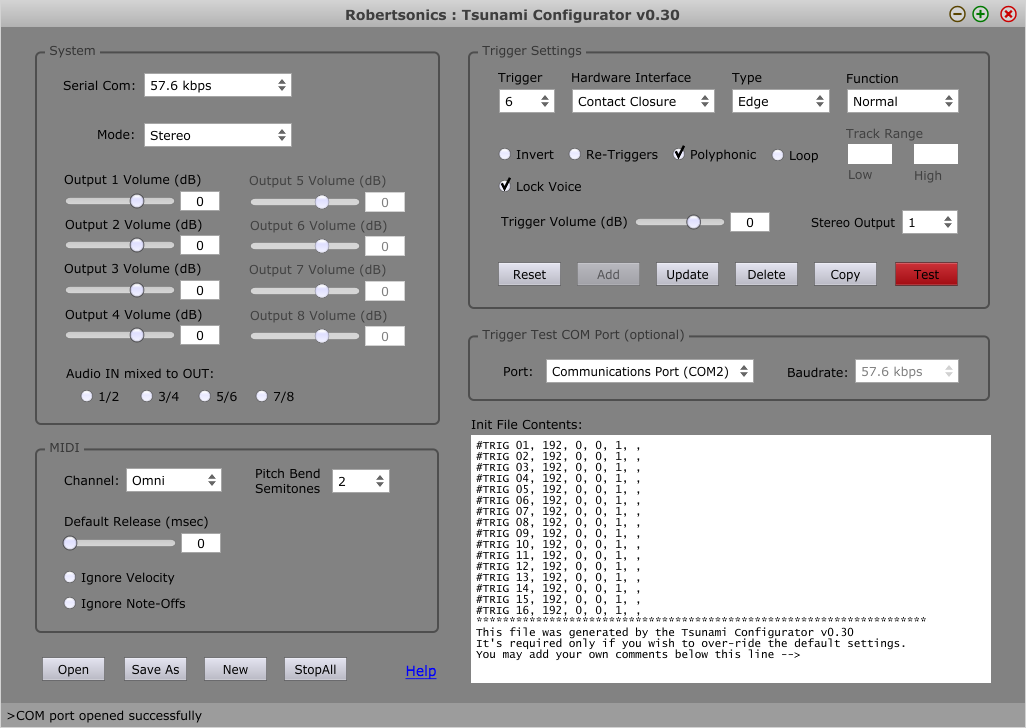
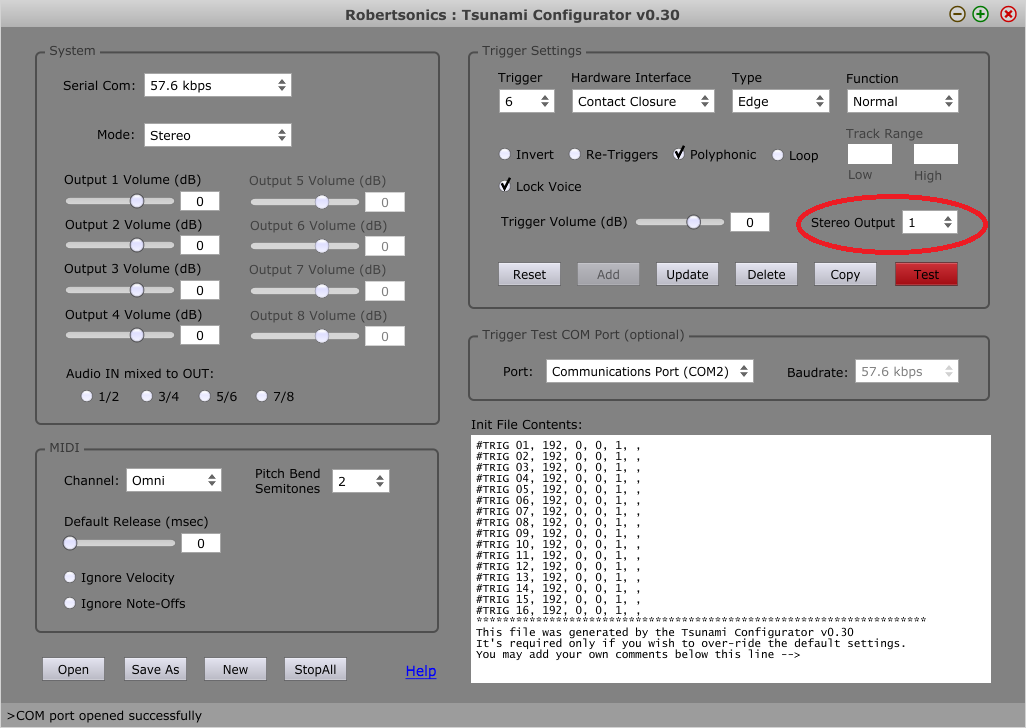
If you want to map the triggered sounds to other outputs, you can select the output number in the "Trigger Settings" portion of the app.
You can find more information about the configurator utility in the Tsunami user guide.
Now that we've looked at the contents of the card, eject the card from your computer and put it in the slot on Tsunami.
For this demo, we'll only be using the first stereo output, Output 1L and 1R.
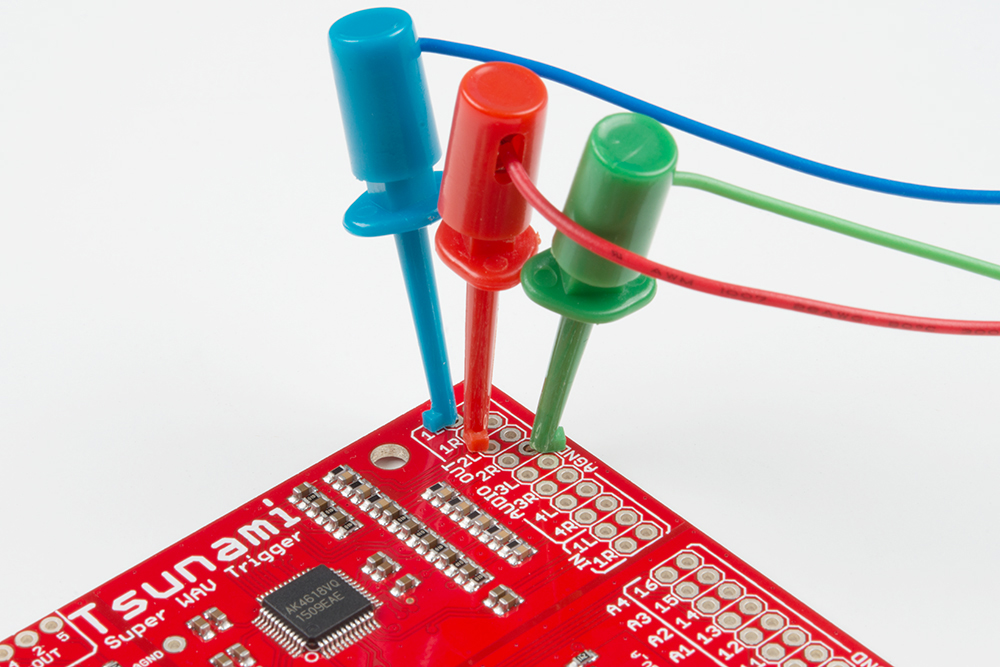
To listen to that output, we'll make a temporary adapter using a 3.5mm TRRS breakout board and some IC Hook test leads. We're using the IC Hooks so we don't have to solder them to the board, making a temporary connection for the sake of the example.
We cut three of the leads in half and soldered them to the TIP, RING1 and SLEEVE pads of the breakout, using the following connection scheme. We didn't make any connection to the RING2 pad.
| Jumper Color | Breakout Connection | Tsunami Connection |
|---|---|---|
| Blue | TIP | Output 1L |
| Red | RING1 | Output 1R |
| Green | SLEEVE | GND |
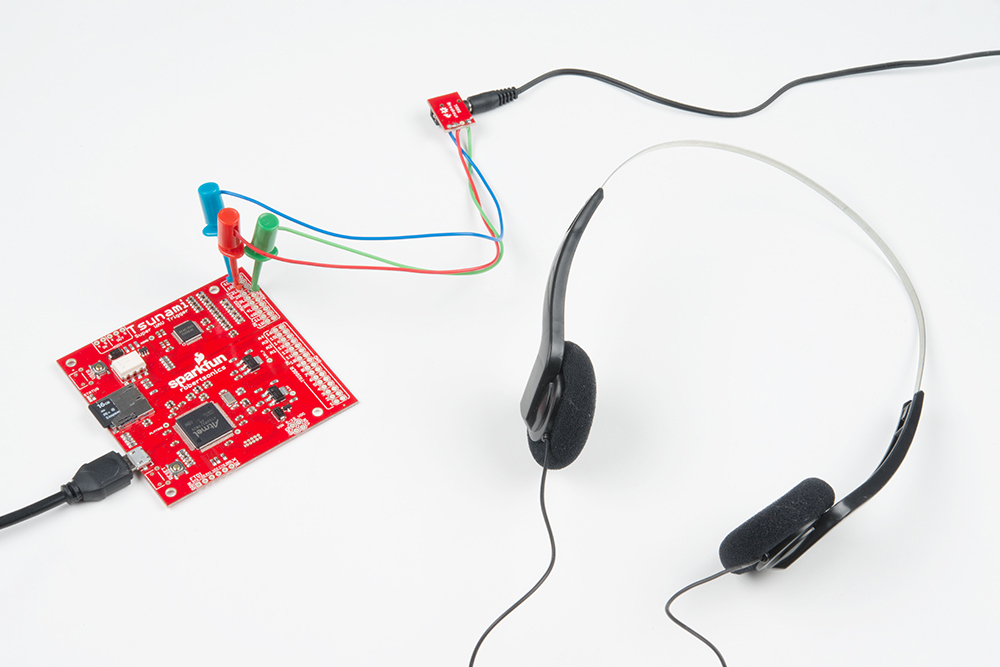
The adapter cable looks like this.

With care, you can put the ends of the IC hooks through the 0.1" pads on the PCB, connected as described in the table above.
Finally, connect your headphones, multimedia speakers, or other output device.
For this demo, we're simply powering Tsunami from the USB port on our computer.
When you apply power, the board will initialize, and indicate readiness by blinking the status LED three times. From then on, the LED pulse every few seconds, indicating that the board is alive, and waiting to be triggered.
The simplest way to drive Tsunami is by shorting the trigger inputs to ground. By default, the trigger inputs use an internal pullup resistor, and recognize when they are grounded.
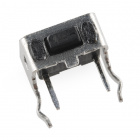
For this demo, we're going to use a short piece of wire to bridge trigger inputs to their corresponding ground pads. A more permanent application might use momentary switches, such as cherry switches, tactile switches or microswitches.
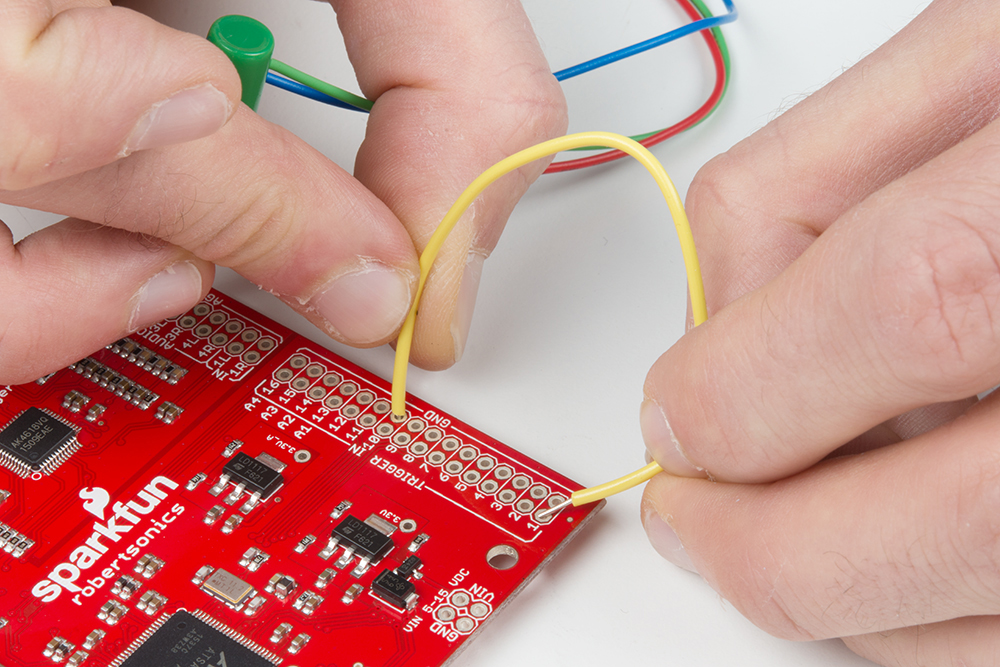
We've bent the wire into a 0.1" wide U-shape. We insert one end into a ground pad, and use the other to tap the trigger inputs.
When the wire makes contact, you should hear a sound on the output. The files on the card simply recite the number of the trigger input.
The status LED also illuminates while files are playing.
Now that you've got sound, there are a few other things you can try out.
If your application doesn't have switches that can easily short the trigger inputs to ground, there are three methods to trigger sounds.
*.INI file, you can convert to trigger inputs to respond to 3.3V active-high logic pulses, which could be sent by a microcontroller or discrete logic.Tsunami responds on all of these interfaces simultaneously.
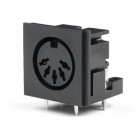
For Tsunami to receive MIDI, all you need to do is add a 5-pin DIN socket. Simply connect pins 4 and 5 to the pads with corresponding labels.
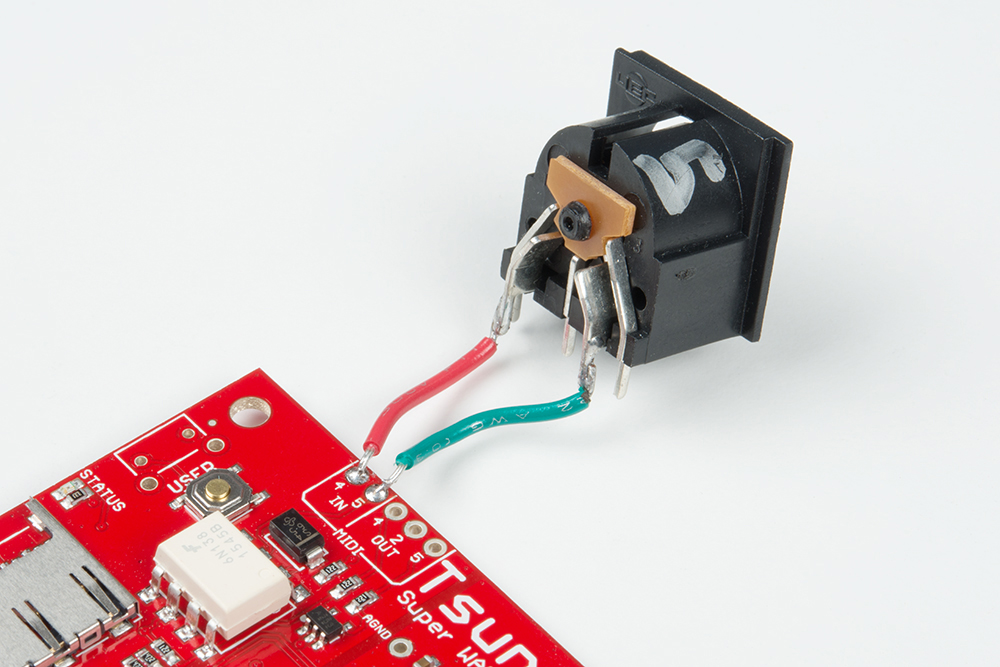
Keep in mind that the pins on a 5-pin DIN are out of order, but as a reminder, the numbers are usually embossed in the plastic of the connector.
Tsunami responds to MIDI note on and off, pitch bend, program change, and a number of continuous controller messages. By default it is in Omni-on mode, responding to messages on any channel, though the channel can be specifically assigned using the configuration file. More details about the MIDI implementation can be found in the Tsunami user guide.
To streamline this example, we've limited it to the first stereo output -- but of course, one of the best features of Tsunami is the multiple outputs. So let's take a look at a couple of ways to reassign WAV files to those outputs.
The first method of assigning files to outputs is by editing the INI file. Using the Tsunami Configurator, you can assign files to outputs in the "Trigger Settings" section. Each trigger can be assigned to a different output.
Of course, the INI file only covers the 16 trigger inputs.
If you're using MIDI to trigger Tsunami, you can assign tracks to outputs using filenames. A fully specified file name begins with a number, followed by an underscore, a letter, and another number.

first number (before the underscore) assign the file to one of the trigger inputs.underscore (_) keeps the track number from running into the output field.letter after the underscore, S or L, specifies Single-shot or L ooping playback.second number (after the underscore) assigns the file to one of the four stereo outputs.filename (remainder of the name) is not required, but might be useful to remind you what the contents of the file are.For instance, file 001_S1beep.wav will sound when trigger 1 is activated, and play on output 1. The trigger inputs are numbered 001 through 016, and the stereo outputs are 1 through 4. If you want to alter the mapping between files, trigger inputs, and audio outputs, you can simply change the numbers in the file names.
Finally, when you trigger sounds using the serial control protocol, the output is specified as part of the trigger message.
Unlike the trigger input and MIDI track assignments, the mapping can be assigned on-the-fly as sounds are triggered.
In these examples, we've been using the stereo (dual-channel) version of the Tsunami firmware. There is an alternate version of the firmware that plays monophonic (single-channel) files. It nearly doubles the maximum polyphony, from 18 to 32 simultaneous files, and the outputs become 8 individually-assignable outputs. The mono version also has an option for starting a group of tracks at the same time, mapped to sequential outputs. This allows mono mode to play stereo, quadrophonic, and surround material.
You can get the mono mode firmware from Robertsonics download page. It's easy to load from the micro SD card if you follow these instructions.
If Tsunami gets a mapping number it doesn't understand (a mapping to output #9, for instance), it usually ignores it, and uses the default setting for that parameter (9 would become 1).
Now that you've successfully got your Tsunami up and running, it's time to incorporate it into your own project!
For more information, check out the resources below:
Robertsonics support pages:
Some useful parts for building a more complete Tsunami system:
If you need additional inspiration for your Tsunami project, please check out our related tutorials below.
Or maybe add BLE to the Tsunami:
learn.sparkfun.com | CC BY-SA 3.0 | SparkFun Electronics | Niwot, Colorado