If you're looking for a way to prank your friends, coworkers, or classmates, messing with their computer is a sure bet. Changing the background or flipping the screen is so 2003. To help modernize your practical jokes, here is a USB stick that shows up as a regular mouse and moves the pointer around every 10-20 seconds. Perfect for annoying your victims.
To follow along with this project tutorial, you will need the following materials:
You will also need some 30 AWG wire to connect the breakout board to the Pro Micro.
To build this project, you will need the following tools:
If you aren't familiar with the following concepts, we recommend checking out these tutorials before continuing:
It will also help to understand how to program your Pro Micro to act as a USB Mouse.
The first thing you'll need to do is make a tiny USB type A male connector breakout board that's the same width as the Pro Micro.
I've included the KiCad files and zipped Gerbers. You can order them directly from OSH Park or mill them yourself using something like the Bantam Tools Milling Machine. To get them, click on the button to download the GitHub repository and search for the "USB_Male-gerbers.zip" file in the .../USB_Male/gerbers directory.
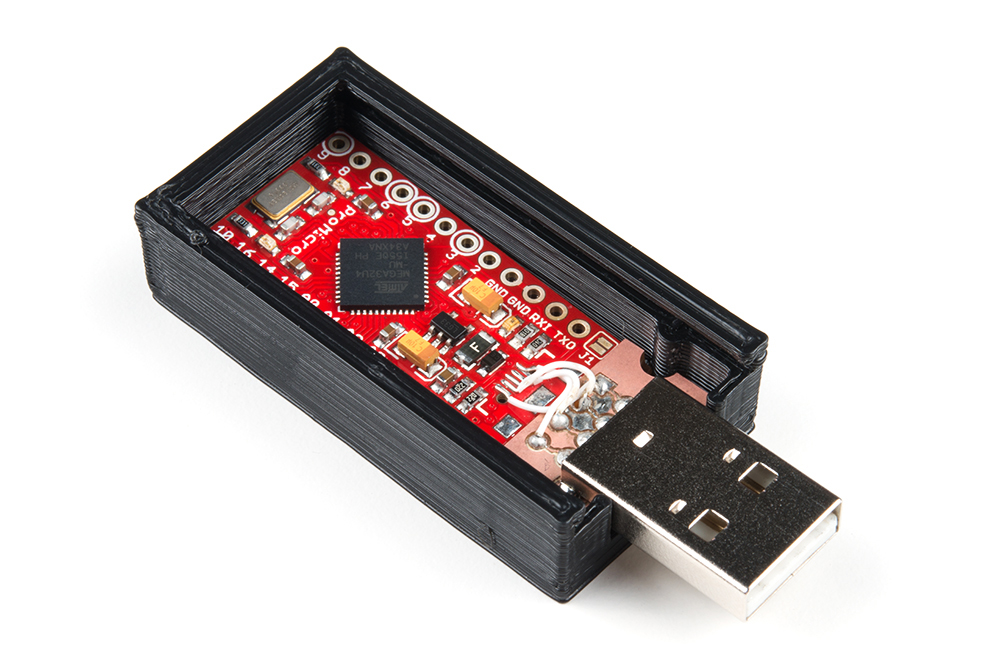
Once you have the board made, solder on the USB connector. If you make a 1-sided board like I did, you'll need to solder the connector on the top side.

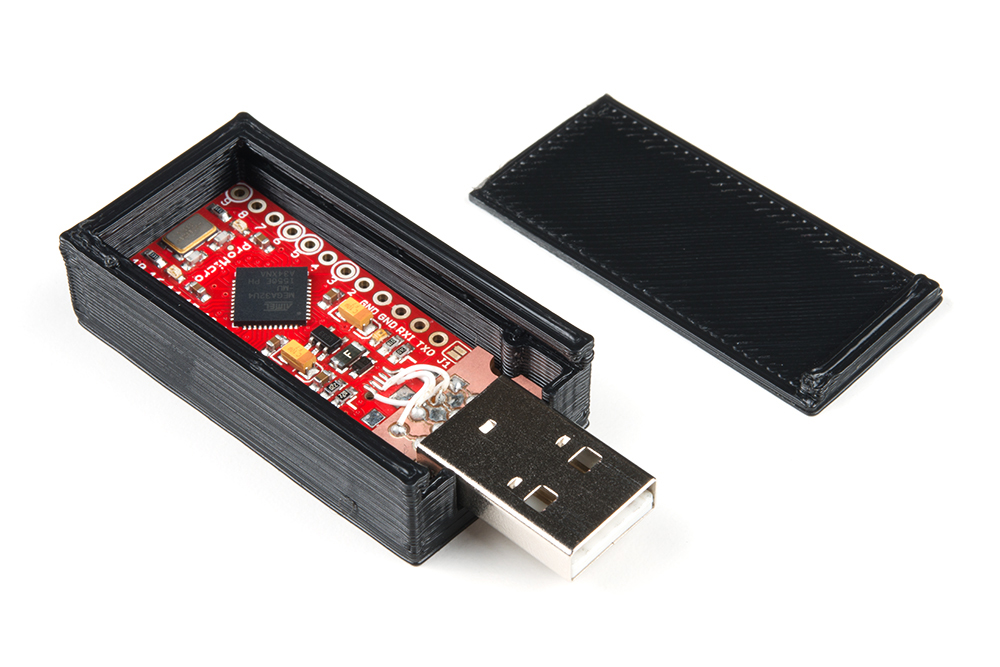
In order to hide the prank in plain sight, you will want to create a case for it that obscures the bright red board. You're welcome to wrap it in electrical tape or spray paint it (I recommend black, as it will likely hide it among most USB cables).
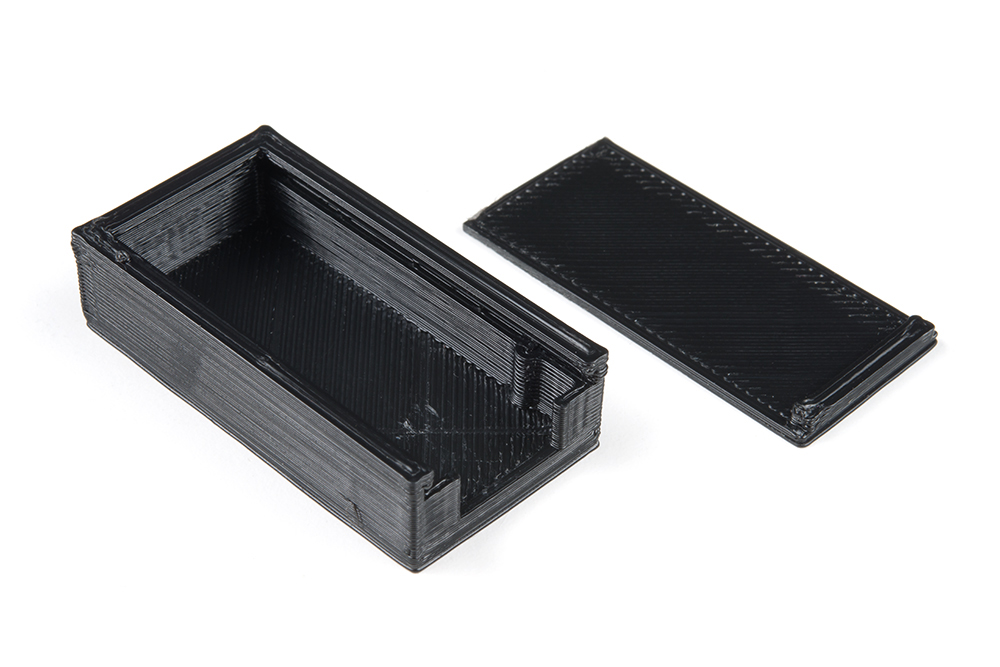
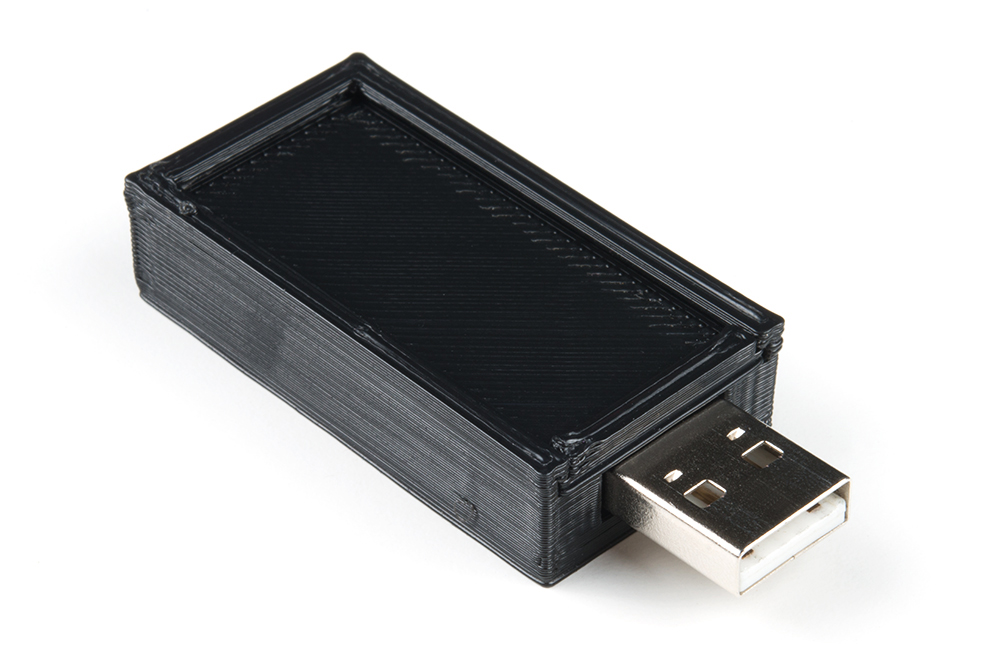
I took the extra steps and made a simple 3D printed case for it. You can find the design files on Tinkercad. Alternatively, you can download the ready-to-print files on Thingiverse or the .stl and .obj files can be found in the .../Case directory in the project repository. Simply import them into your slicer tool of choice and run the print to get an enclosure for your hardware.
To assemble the entire project, you will first want to de-solder the USB connector from the Pro Micro. Do this by applying flux to all the pads and using a hot air rework station to reflow all the joints while carefully lifting up on the connector with a set of tweezers.

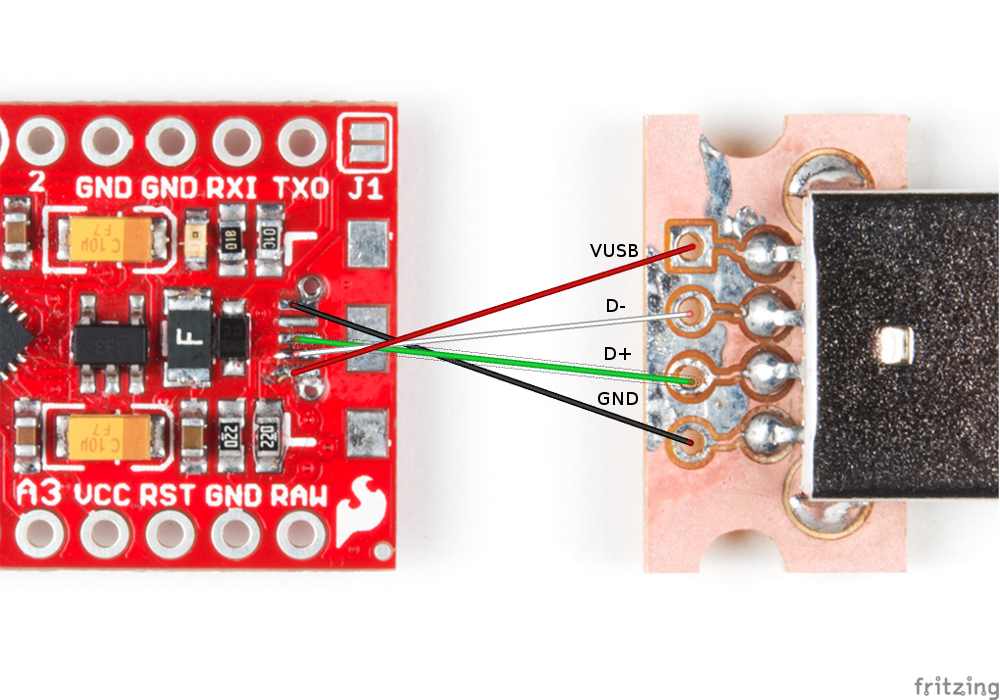
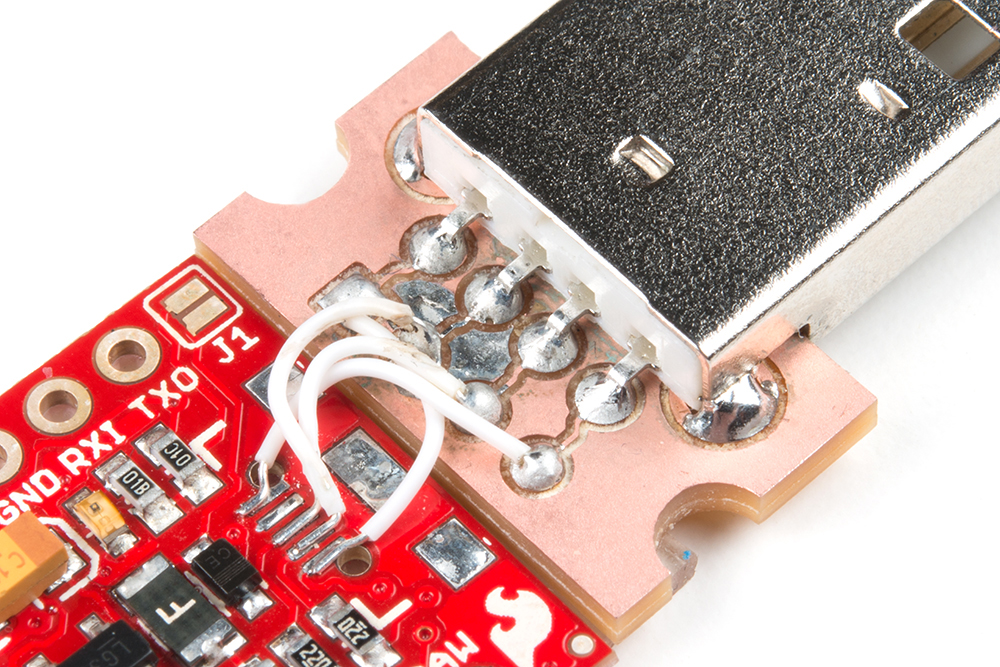
Place the USB connector breakout next to the Pro Micro, and carefully solder 30 AWG wires from the bare USB micro pads on the Pro Micro to the through holes on the breakout board. Note that you'll need to have the wires cross over each other to make sure the right connections are made (otherwise you might fry your Pro Micro, like I did on my first attempt). The connections that you need to make are found in the diagram below.
Carefully bend the wires so that the USB breakout board and Pro Micro are flush next to each other.
Apply some foam tape or servo tape to the bottom of the Pro Micro and USB board.

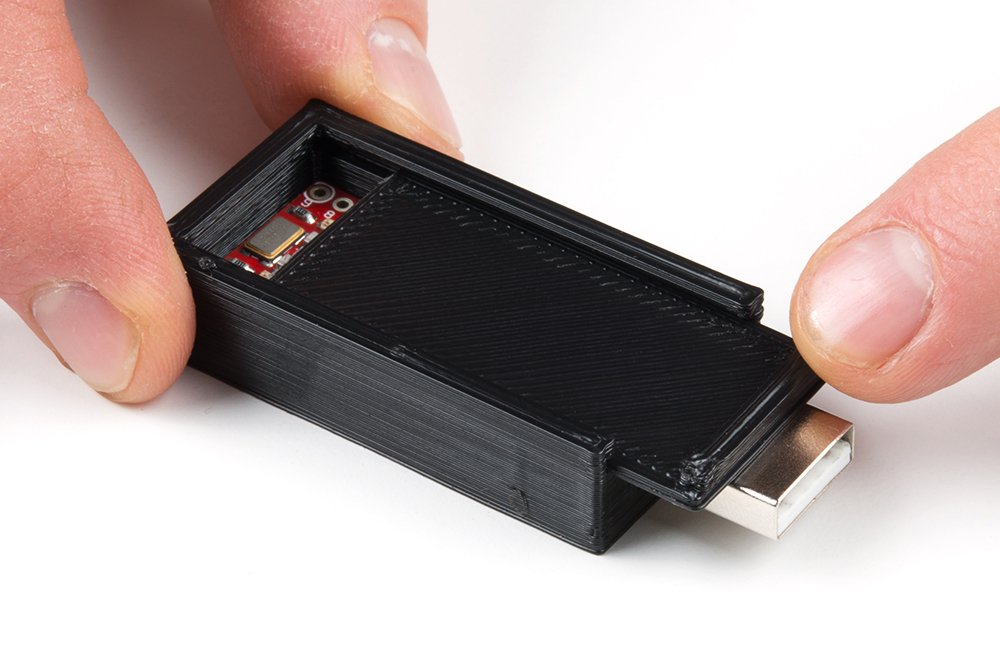
Place them inside the 3D printed case, pressing down to adhere them to the enclosure.
Slide the enclosure's top into the grooves to cover the boards.
The hardware assembly is done! You should be able to plug it into your computer like this to program it from the Arduino software.
Note: This example assumes you are using the latest version of the Arduino IDE on your desktop. If this is your first time using Arduino, please review our tutorial on installing the Arduino IDE.
Follow the instructions found in the Pro Micro Hookup Guide to ensure you can upload programs to the Pro Micro from Arduino. From there, copy the following code into Arduino and upload it to your Pro Micro:
language:c
/**
 * April Fools' Mouse Prank
 * Date: February 27, 2018
 * Author: Shawn Hymel (SparkFun Electronics)
 *
 * Upload this to a SparkFun Pro Micro, and plug it into an
 * unsuspecting computer. That's it!
 *
 * This sketch was written by SparkFun Electronics, with lots of
 * help from the Arduino community. This code is completely free
 * for any use.
 */

#include "Mouse.h"

#define DEBUG 0

// Parameters
const int NUM_STATES = 3;             // Number of possible animations
const unsigned long WAIT_MIN = 10000; // ms (inclusive)
const unsigned long WAIT_MAX = 20000; // ms (exclusive)
const unsigned long JUMP_MIN = -1000; // Pixels (inclusive)
const unsigned long JUMP_MAX = 1000;  // Pixels (exclusive)
const int DIR_MIN = 0;                // Degrees (inclusive)
const int DIR_MAX = 360;              // Degrees (exclusive)
const int SPD_MIN = 1;                // Pixels (inclusive)
const int SPD_MAX = 5;                // Pixels (exclusive)
const int LINE_ACC = 10;              // Number of times to accumulate
const int LINE_NUM_MIN = 50;          // Min number of times to move in line
const int LINE_NUM_MAX = 300;         // Max number of times to move in line
const int JITTER_MIN = -4;            // Pixels (inclusive)
const int JITTER_MAX = 5;             // Pixels (exclusive)
const int JITTER_NUM_MIN = 50;        // Min number of times to jitter
const int JITTER_NUM_MAX = 300;       // Max number of times to jitter

// Patterns
typedef enum {
  STATE_JUMP,
  STATE_LINE,
  STATE_JITTER
} mouse_states;

void setup() {
  randomSeed(analogRead(0));

#if DEBUG
  Serial.begin(9600);
#endif
}

void loop() {

  // Wait a random amount of time
  delay(random(WAIT_MIN, WAIT_MAX));

  // Pick a random state
  switch ( random(NUM_STATES) ) {
    case STATE_JUMP:
      mouseJump();
      break;
    case STATE_LINE:
      mouseLine();
      break;
    case STATE_JITTER:
      mouseJitter();
      break;
    default:
      break;
  }
}

void mouseJump() {
  Mouse.move(random(JUMP_MIN, JUMP_MAX), random(JUMP_MIN, JUMP_MAX), 0);
}

void mouseLine() {

  // Pick a random direction and speed
  int dir_deg = random(DIR_MIN, DIR_MAX);
  float dir = dir_deg * (PI / 180);
  float spd = (float)random(SPD_MIN, SPD_MAX) / LINE_ACC;
  float x = spd * cos(dir);
  float y = spd * sin(dir);
  float x_acc;
  float y_acc;
  int line_num = random(LINE_NUM_MIN, LINE_NUM_MAX);

#if DEBUG
  Serial.print("Speed: ");
  Serial.print(spd);
  Serial.print(" | Dir: ");
  Serial.print(dir_deg);
  Serial.print(" deg ");
  Serial.print(dir);
  Serial.print(" rad | x:");
  Serial.print(x);
  Serial.print(" y:");
  Serial.println(y);
#endif

  // Move mouse in a line for a random number of times
  for ( int j = 0; j < line_num; j++ ) {

    // Accumulate the motion for a few times, round it, and apply
    x_acc = 0;
    y_acc = 0;
    for ( int i = 0; i < LINE_ACC; i++ ) {
      x_acc += x;
      y_acc += y;
    }
    Mouse.move((int)(x_acc + 0.5), (int)(y_acc + 0.5), 0);

    delay(10);
  }

#if DEBUG
  Serial.print("Moving x:");
  Serial.print((int)(x_acc + 0.5));
  Serial.print(" y:");
  Serial.println((int)(y_acc + 0.5));
#endif
}

void mouseJitter() {

  int jitter_times = random(JITTER_NUM_MIN, JITTER_NUM_MAX);

  // Cause the mouse to jitter some random amount
  for ( int i = 0; i < jitter_times; i++ ) {
    Mouse.move(random(JITTER_MIN, JITTER_MAX), random(JITTER_MIN, JITTER_MAX), 0);
    delay(10);
  }
}
You are welcome to play around with the numbers in the Parameters section if you want to make the delay longer between movements or make the jumps farther.
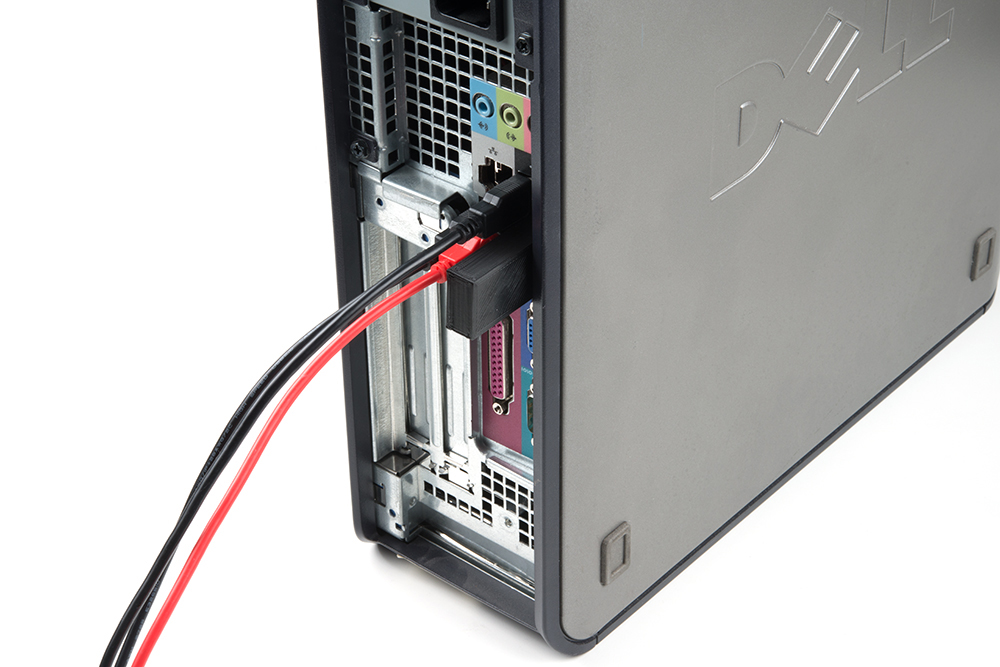
Find an unsuspecting target and plug the device into an open USB port. I highly recommend targeting someone with a desktop, as the USB ports on most laptops are quite visible. On a desktop, you have a shot at hiding the device among all the other cables:
Now, when your target comes back, their mouse pointer should randomly jump, jitter, and move once every few seconds!

If you're looking for all the design files in one place, here they are:
If you're looking for inspiration for other fun projects, check these out:
learn.sparkfun.com | CC BY-SA 3.0 | SparkFun Electronics | Niwot, Colorado