This tutorial is designed to give you a basic understanding of SD Cards and how to write different images to the SD card of your choice.
SD cards, short for Secure Digital, are everywhere you look now, from digital cameras, to phones and tablets, and even Single Board Computers (SBCs). In many cases your SBC won't come with Linux or any other operating system on it. It is up to you to provide the OS on an SD card. With the exception of Noobs for Raspberry Pi, this is usually not a drag and drop procedure.
In this tutorial, we are going to talk about different types of SD cards and readers, formatting your card to erase any data that may be lurking around, installing your image, and then how to use any left over space on the card.
To follow along with this tutorial, you will need an SD card, and a card reader (see related sections for more information on different types). The minimum card size depends on the Linux distribution. Make sure to check the image distribution that you are planning on using for your Single Board Computer before flashing. You will also need a computer and an Internet connection (if you don't have all the software and your image already on your computer). Last, you'll want your SBC or whatever device into which you are installing your card.
There is no one best place to start when it comes to single board computers. However, you may find these links useful in your SBC adventure.
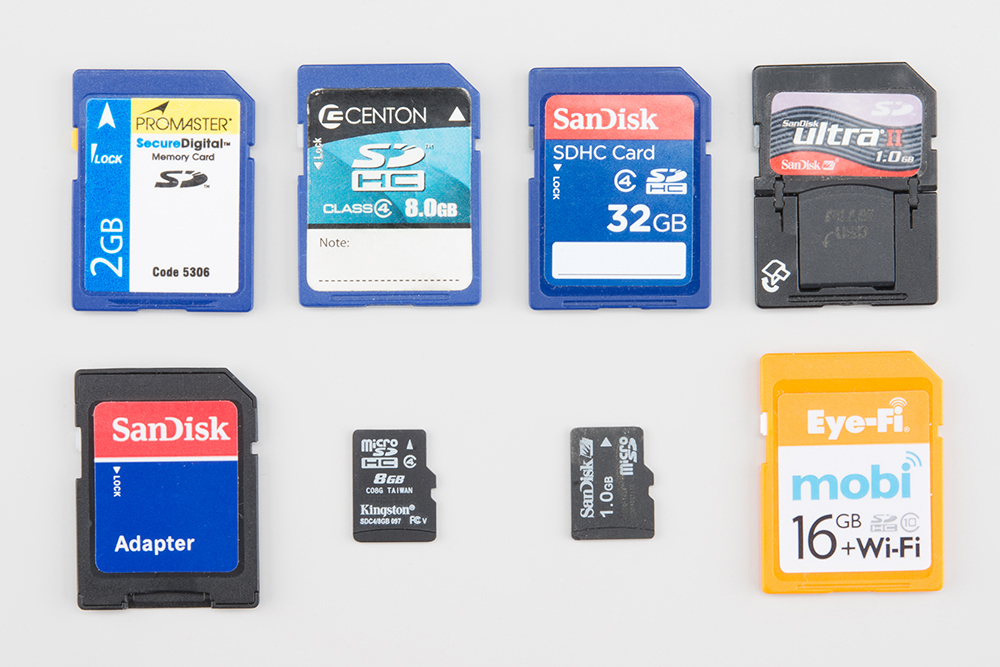
SD Cards can be found most everywhere, online, at your local store. But whats sets one apart from the rest? What makes a good SD card? Besides manufacture, the main differences between cards are physical size, capacity/standards, and speed. Here is a brief overview of each of those elements.
SD cards come in two main sizes. Full sized SD cards are used in digital cameras all over the globe, and microSD (often called µSD or uSD) cards are used in cellphones and tablets, amongst others. Electrically they are the same thing, though. Ever notice the cheap plastic adapters that come with some microSD cards? They are nothing more than a plastic shell with connectors to pass through the microSD connectors to the full size connectors. Installing images on them is the same, just make sure you have the right card (and adapter, if needed) for your device and reader.
There are actually 4 different standards of SD card, with each new version came higher capacity and often higher speeds. The 4 versions are: Standard or SD (up to 4GB), High Capacity or SDHC (up to 32GB and formatted as FAT32), Extended High Capacity or SDXC (up to 2TB and formatted as exFAT), and SDIO (has support for I/O). Any of these should work but be careful with SDXC cards; because of licensing issues, not all devices can support exFAT.
Most cards will also list a class or speed on them to distinguish how fast they can read and write. Class 2,4,6,8 and 10 are 2MB/s, 4MB/s, 6MB/s, 8MB/s, and 10MB/s, respectively. UHS Class 1 and UHS Class 3 are 10MB/s and 30MB/s, respectively. For the most part, these numbers are irrelevant; just keep in mind that there are different speeds so if things are running slower than you'd like, check the card.
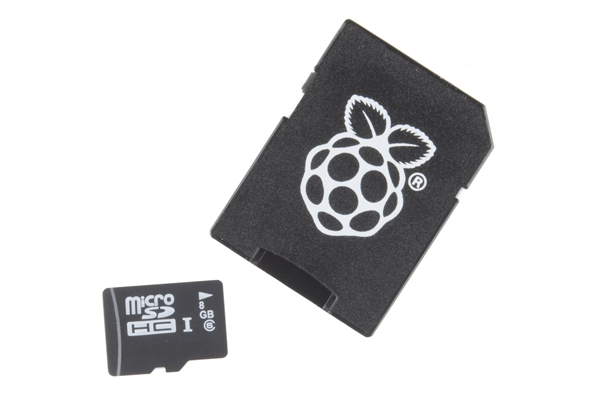
For this tutorial, any of these cards will work with. However, make sure you have the correct physical size for your device, and the the card has a high enough capacity to hold the image you want to use. This 8GB card should work for just about everything since it has an SD adapter as well as a card reader.
You can find almost as many SD card readers as SD cards but there really aren't that many differences. Your local computer store, or even conveinence store will most likely have at least one USB adapters. If your computer doesn't have one there are plenty of choices available for adapters, for the most part these will connect to your computer over USB. Some will do just uSD, uSD and SD or, a whole bunch of different card types. Any of these should work fine for our examples.
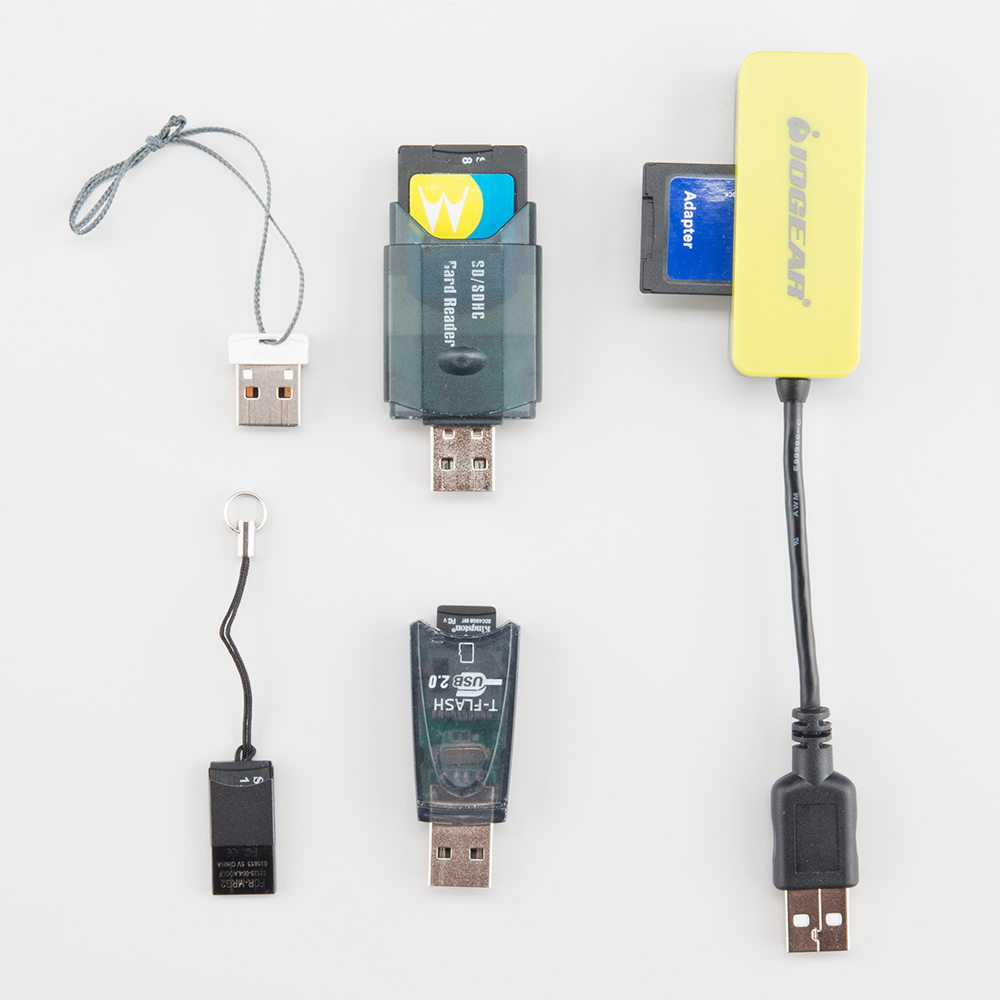
Most laptops and even some desktops now have direct slots in them to read and write SD cards. Often these are directly connected to the USB port inside your machine, making them the same as the USB adapters, but not always. These should work just fine for our examples, but if you are having problems try a USB adapter.
Most cameras now use SD cards and can be plugged into your computer via a USB cable. For the most part the data is going through the camera and not being read directly from the computer. For that reason this will not work for our examples, this is true for phones and other devices as well. Basically if your device has a name other than "SD adapter" it probably won't work.
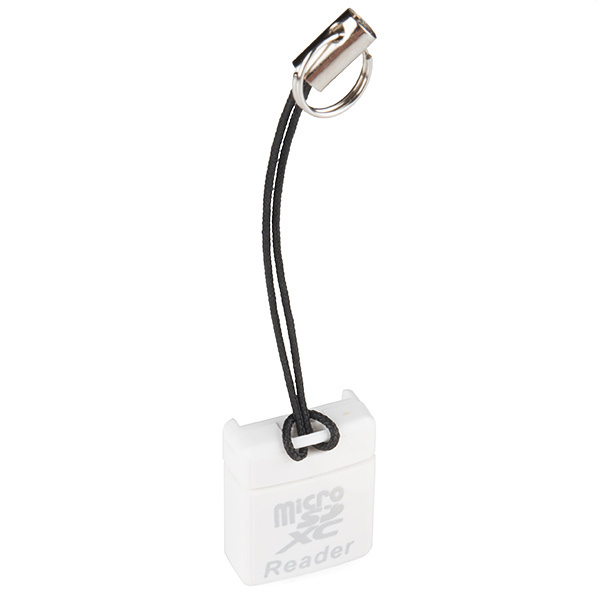
For this tutorial, you will need either an SD slot in your computer or a USB adapter. Make sure it fits the size card you have or you have the appropriate adapter. Otherwise, grab the microSD USB reader from the SparkFun catalog.
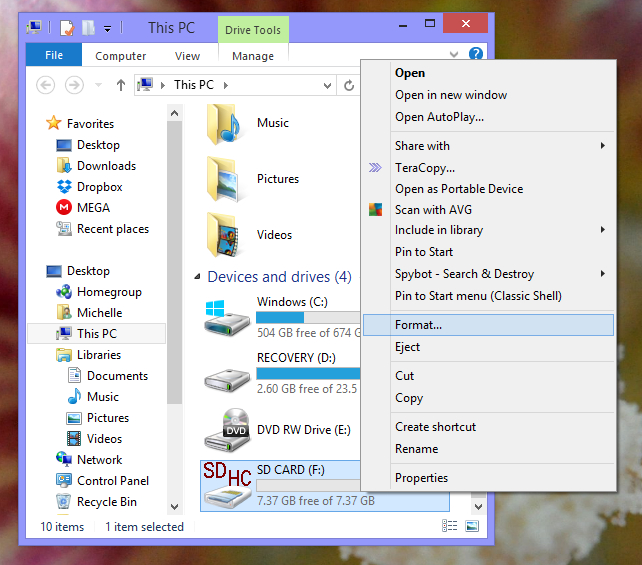
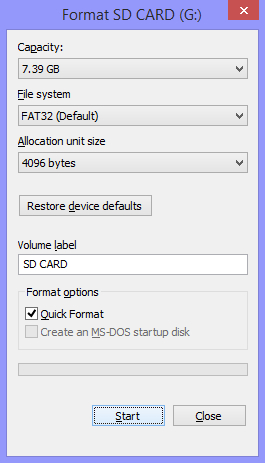
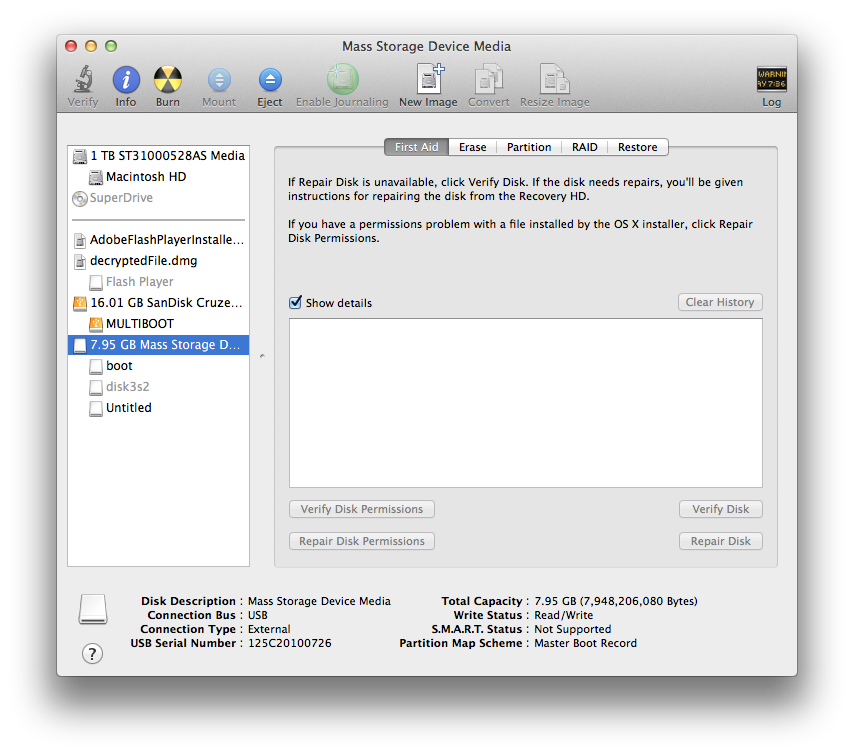
We are going to start with formatting your SD card. This step is not strictly necessary, but it does help clean off your card. In some cases if something has gone wrong this will help clean up the mess instead of bring the mess with you.
Always be careful when doing this, it will erase everything on your card, so make sure you are OK losing everything on the card. Also, make sure you select the correct drive! Alternately the tools used to change partition size will also format any card or partition. If your card has been partitioned because it already has an image on it, see the last section on resizing and deleting partitions.
The SD Association has a formatter that is designed to work with both Windows and Mac that they recommend, you can try it or use the following directions - SD Card Formatter
The SD Association has a formatter that is designed to work with both Windows and Mac that they recommend, you can try it or use the following directions - SD Card Formatter.
sudo apt-get install gparted)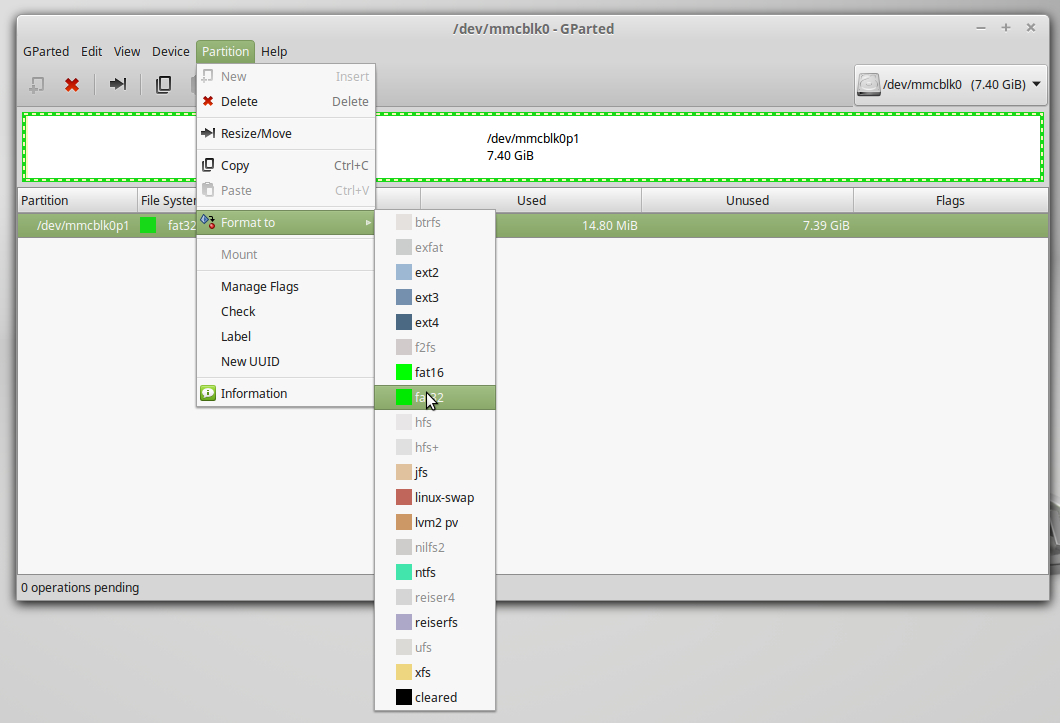
Finally, this is what we've been waiting for. So, why can't you just copy the file onto the card? When you look at the SD card you actually don't see all the bits on the card, you just see the main storage area. There are other parts that allow the card the card to be bootable, and this is what needs to be written. While you can do that by hand and then add all the files you need, generally your files are released as an image that has all the information in it. This way you can make the disk bootable and add the files all in one easy step. Just like formatting your SD card, this will erase everything on it. Make sure you want to do this and you select the correct disk.
Start by downloading the image you want to use, and don't forget to extract your image so you have a *.img file. Here are some files for a few common boards; notice there are often different downloads available. You will find different Linux distributions, Android images, and even different images depending on the display you want to use. Pick the one that best works for your application, and remember, you can always go back and pick a different one.
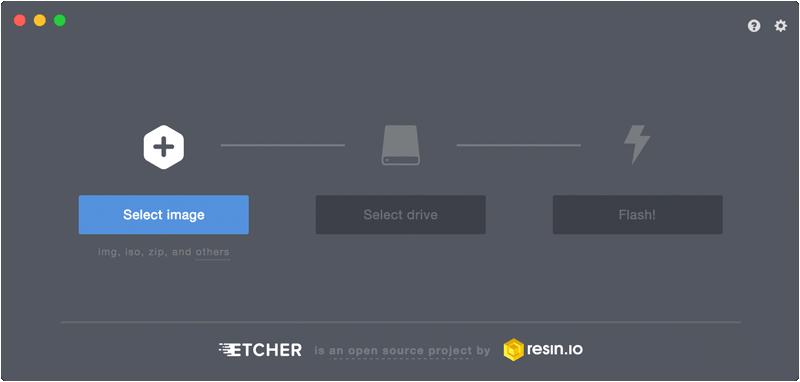
To install your own image on your card we recommend software called Etcher.
These guys have taken all the different steps needed and put them all in one piece of software to take care of everything. Download your image, then run the program, select your image, select your uSD card drive, and then hit flash. Etcher will flash the card, verify the install and unmount your card. Once it is done, remove your card and you are good to go.
diskutil list to display all disks, find the correct diskdiskutil unmountDisk /dev/disk4 to unmount the disk (replace disk4 with the correct disk)sudo dd bs=1M if=your/file/here.img of=/dev/disk4 (again replace disk4 with the correct disk, and add the correct path to your image)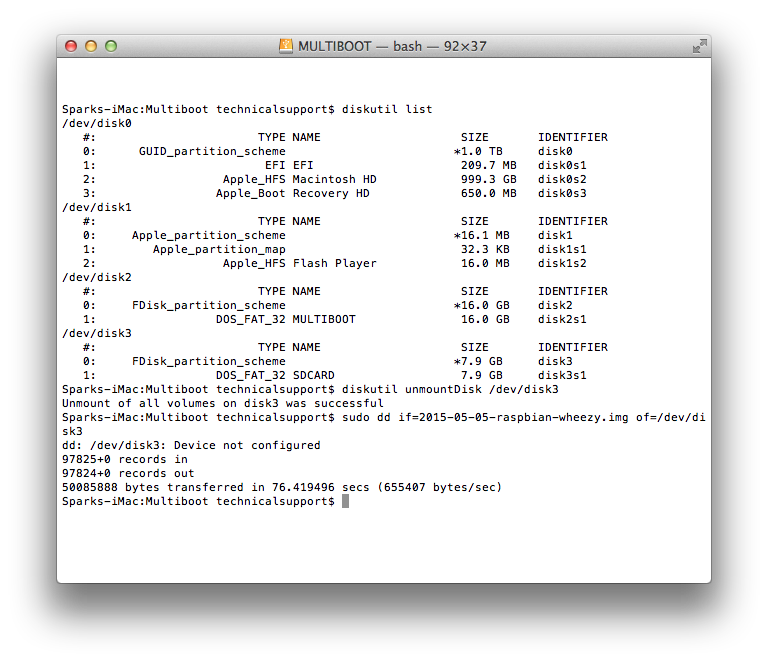
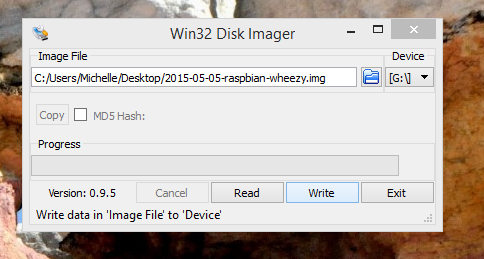
df-h to see what devies are mounted on your system, you may want to do this without the card in and then with the card in.umount /dev/sdd5 where /dev/sdd5 is the partition on your card.dd if=2015-05-05-raspbian-wheezy.img of=/dev/sdd (make sure to use the correct path to your file and your SD card)sync (this will flush the write cache, and other fancy things)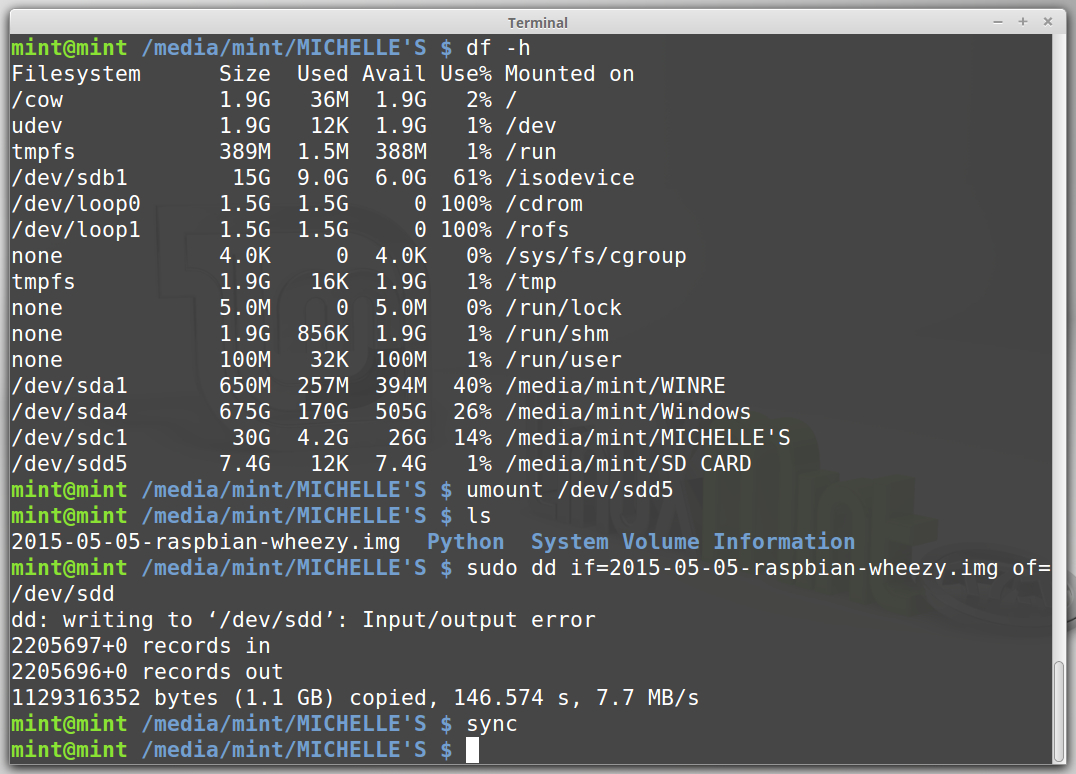
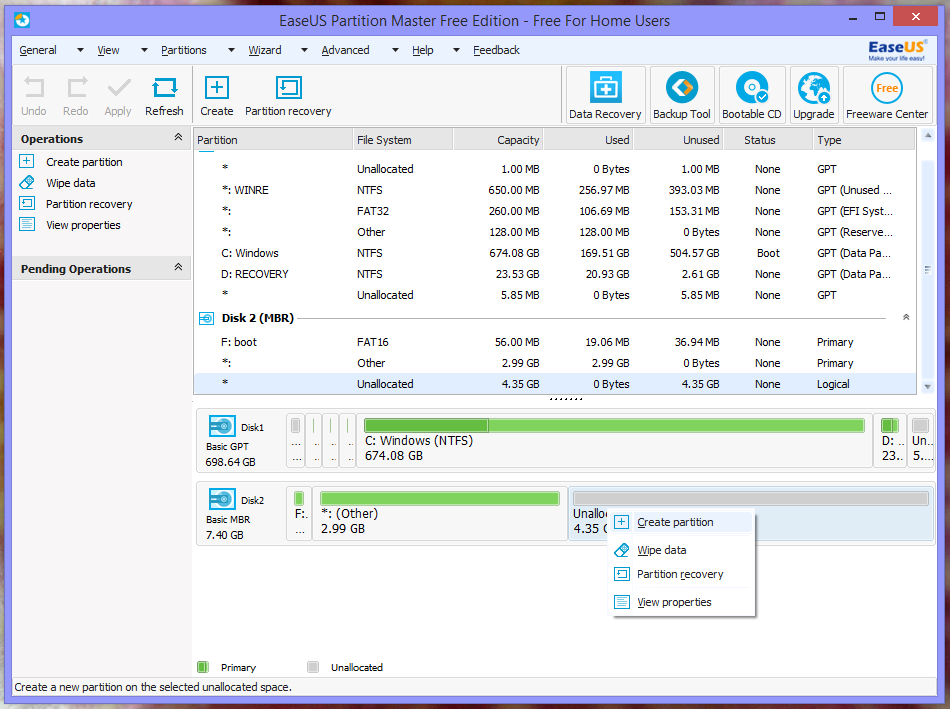
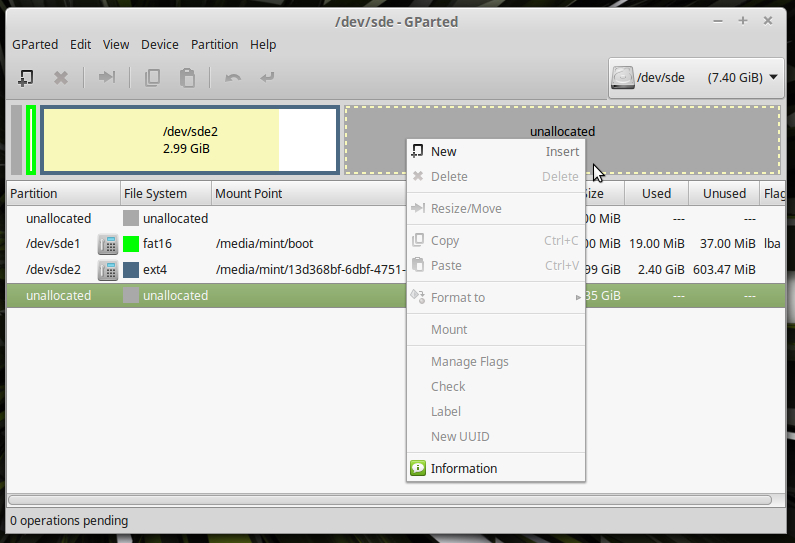
At this point you should have a working bootable SD card, feel free to stop here. Sometimes though you go grab that 16GB card you have lying around, burn a 1GB image and then think, well that's silly, I've lost 15GB of space! Now we are going to change partition sizes around so that the remainder of your card shows up as a separate partition that you can still use for storage. Before we start you may want to boot your card and take a look around, many distrobutions have a built in utility to do this. You can also use these programs to resize the partition if you'd rather.
Keep in mind that Windows can only read the first partition, so you will not be able to use this as general storage if you use a Windows device. But you can use it as storage on your Linux based Single Board Computer (SBC).
This is also a good way to get your SD card back to the original full sized partition if you no longer want to use it on your SBC. You wil need to delete all partitions, then make a new one and format it.
Most of these programs actually have very similar layout and directions, and there will be plenty of other options available online as well.
sudo apt-get install gparted)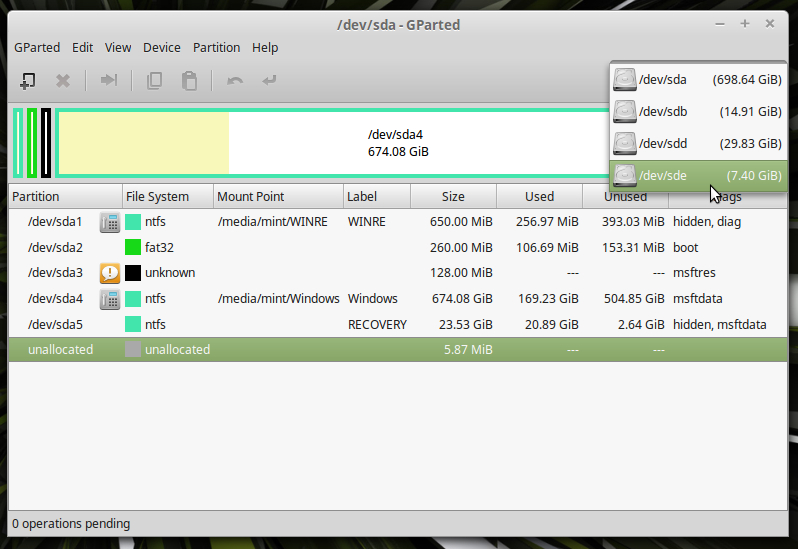
Now that you know how to install an image on an SD card, it's time to get out there and create some great SBC projects. Need some inspiration? Check out these other related tutorials from SparkFun.
If you are not flashing an image to a microSD card, check out these other SD card-related projects.
Or check out this blog post.
learn.sparkfun.com | CC BY-SA 3.0 | SparkFun Electronics | Niwot, Colorado