RETIRED - Load Cell Amplifier HX711 Breakout Hookup Guide
This Tutorial is Retired!
This tutorial covers concepts or technologies that are no longer current. It's still here for you to read and enjoy, but may not be as useful as our newest tutorials.
View the updated tutorial: Load Cell Amplifier HX711 Breakout Hookup Guide
 Sarah Al-Mutlaq
Load Cell Set Up
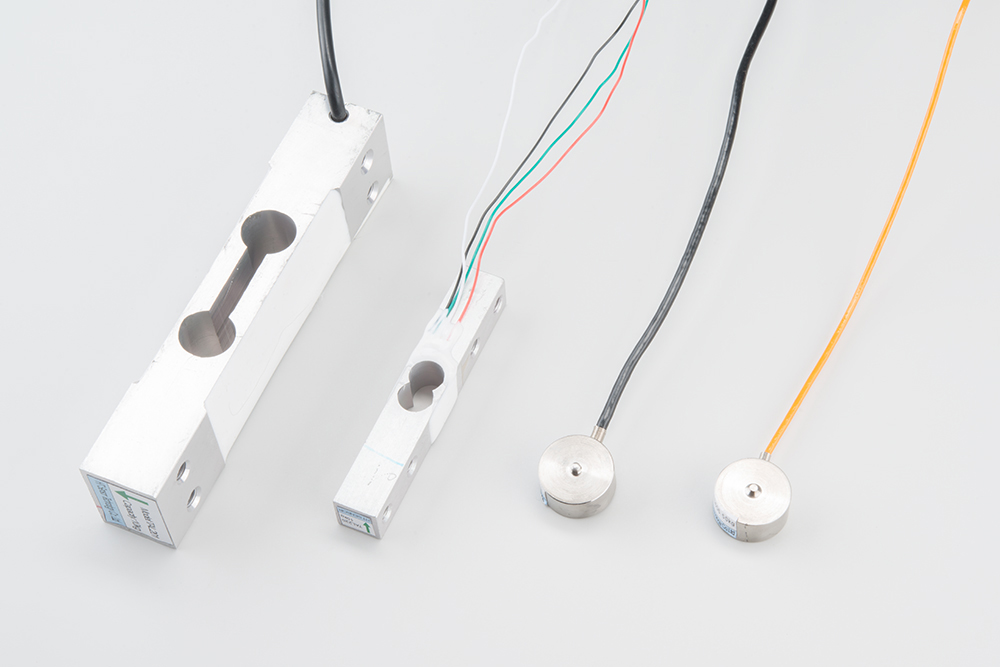
Depending on the type of load cell you are using, the configuration of how it should be hooked up to plates or surfaces will change. Below are a few different types of setups.
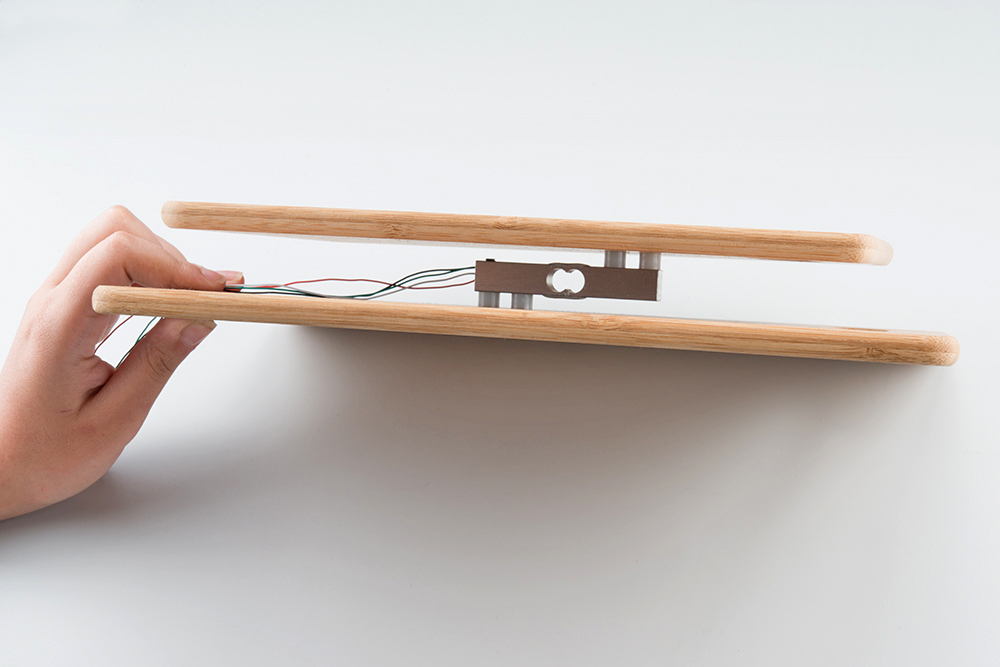
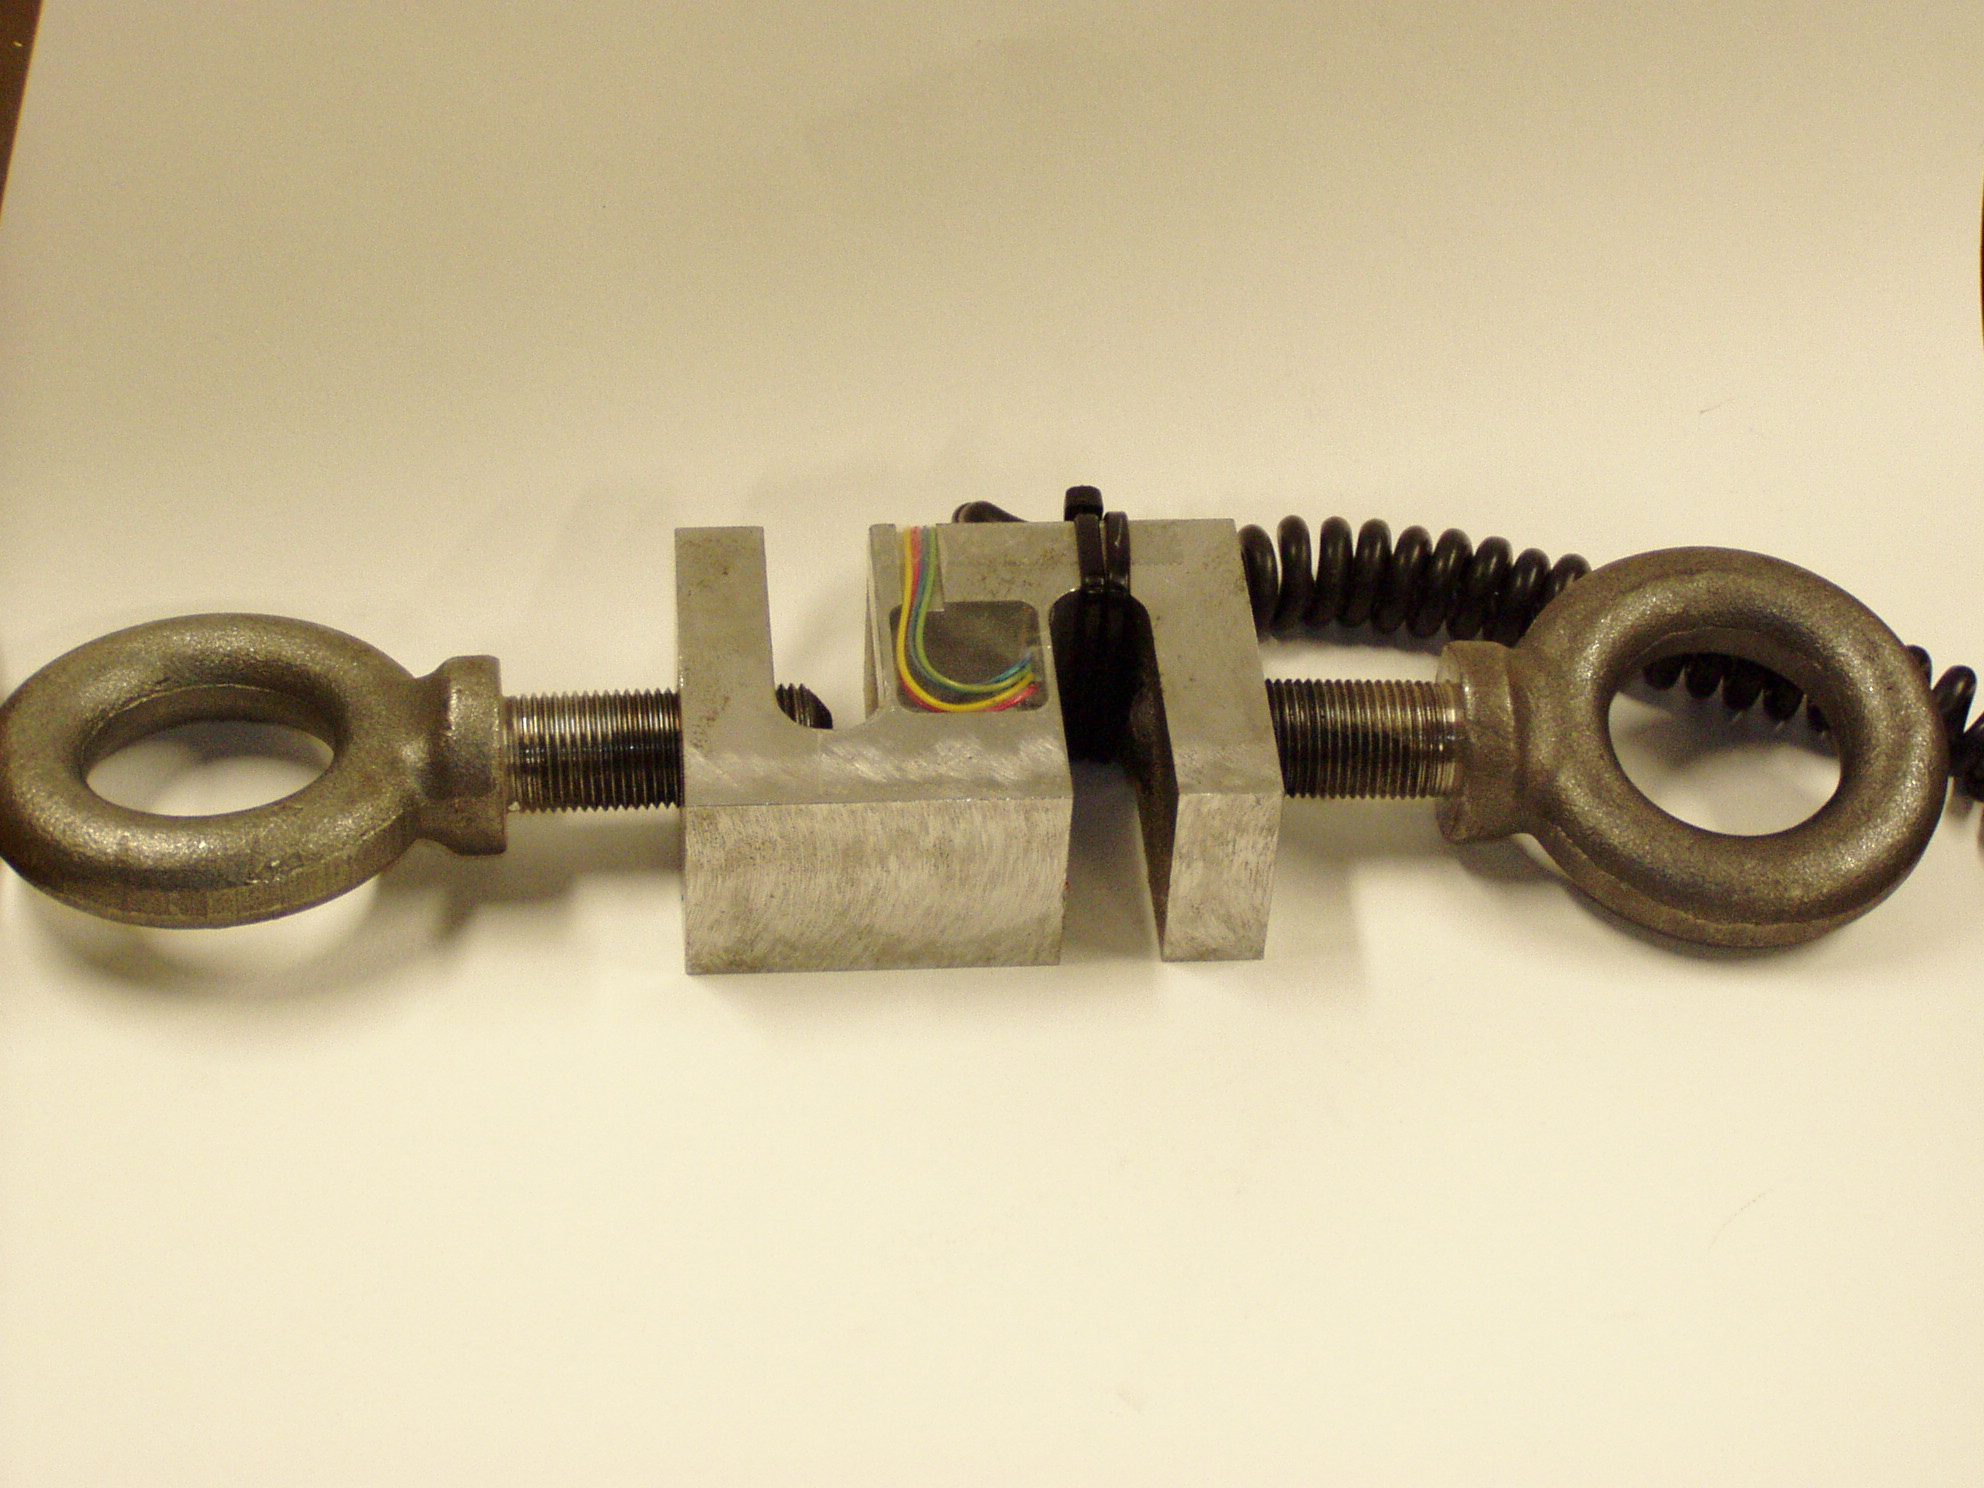

Usually with larger, non-push button bar load cells you will want to hook up the load cell between two plates in a "Z" shape, with fitting screws and spacers so that the strain can be correctly measured as shown below:
Note that only one side of the load cell is screwed into each board. This provides a moment of force, or torque, on the strain gauge rather than just compression force, which is easier to measure and much more accurate.
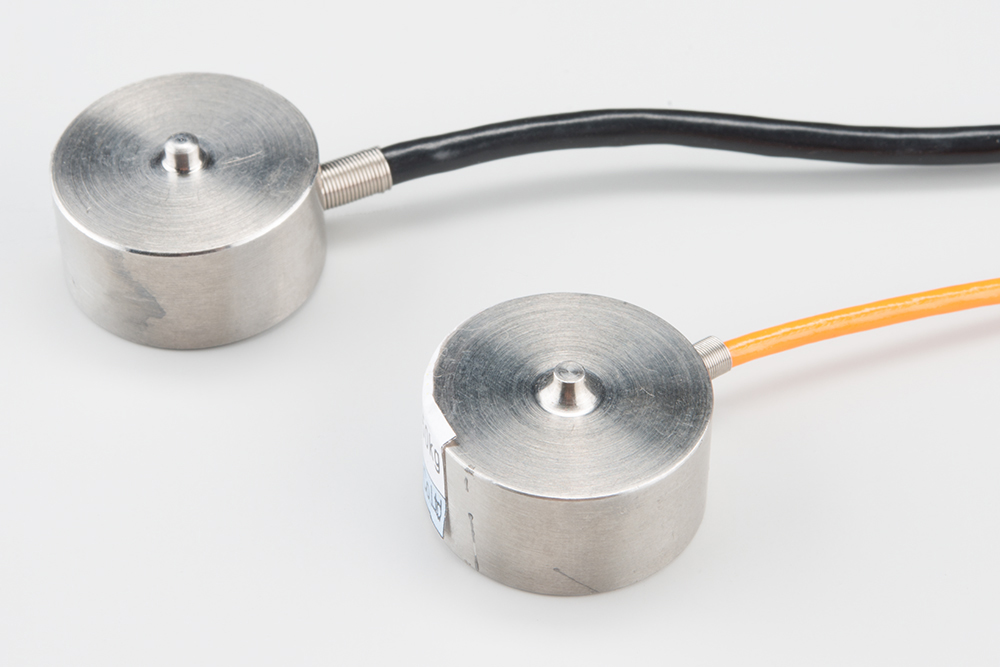
For smaller, push-button or disc load cells, you will want to make sure to screw in the disc to a bottom plate (or surface you are measuring force against), and center the beam, plate, or whatever else you are wishing to measure the force of onto the "button" on the top. Usually another plate with a hole is used to make sure whatever you are measuring is hitting the same spot on the load cell each time, but it is not necessary.
Make sure to read the datasheet for the load cell you are using and get the correct screws to fit into it.
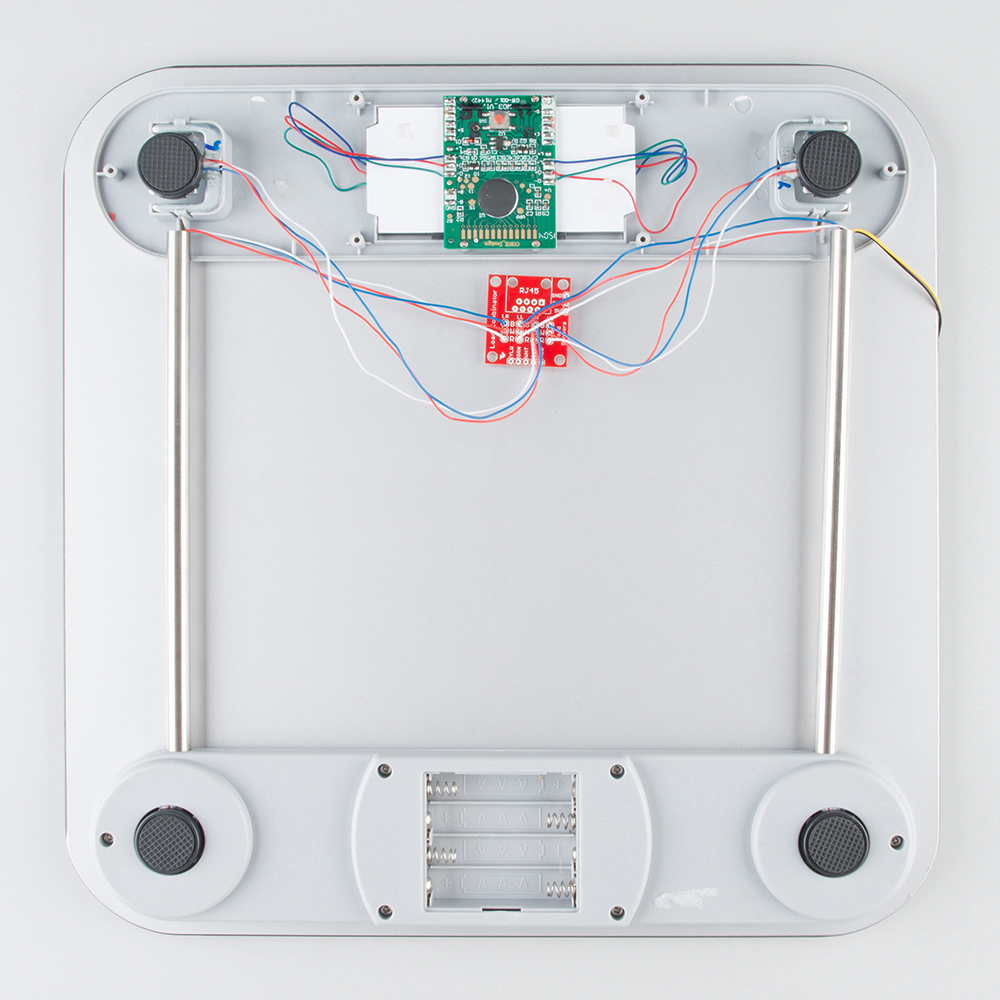
- Note: If you are hooking together four of the SparkFun Load Sensors using the Combinator board, you should position the four load sensors equidistant from each other, just like the bathroom scales shown in this tutorial.
Load cell measurements can be off by +/- 5% due to a range of things including temperature, creep, vibration, drift, and other electrical and mechanical interferences. Before you install your scale, take a moment and design your system to allow for easy calibration or be able to adjust the code parameters to account for these variations.