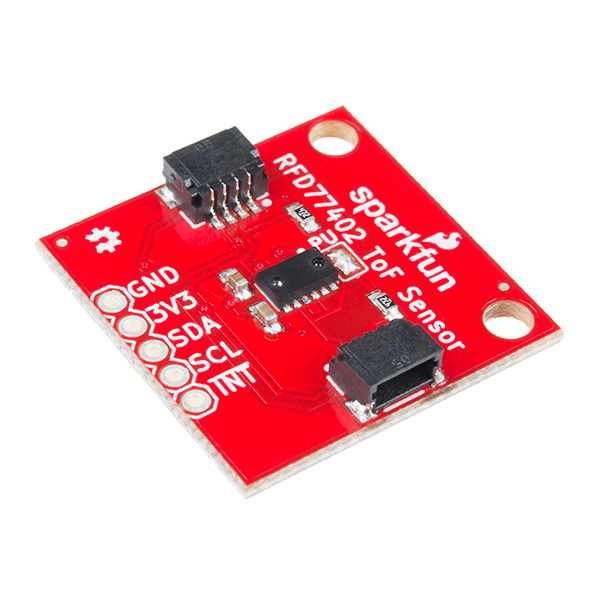
The RFD77402 uses an infrared VCSEL (Vertical Cavity Surface Emitting Laser) TOF (Time of Flight) module capable of millimeter precision distance readings up to 2 meters. It's also part of SparkFun's Qwiic system, so you won't have to do any soldering to figure out how far away things are.
In this hookup guide, we'll first get started with some basic distance readings, then we'll add in a confidence value to ensure the sensor isn't returning "garbage" data. Finally, we'll increase our sample rate to obtain readings as fast as we can.
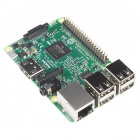
To get started, you'll need a microcontroller to, well, control everything.

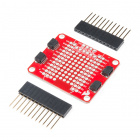
Now to get into the Qwiic ecosystem, the key will be one of the following Qwiic shields to match your preference of microcontroller:
You will also need a Qwiic cable to connect the shield to your distance sensor, choose a length that suits your needs.


If you aren't familiar with the Qwiic system, we recommend reading here for an overview.
| Qwiic Connect System |
We would also recommend taking a look at the following tutorials if you aren't familiar with them.
Let's first check out some of the characteristics of the RFD77402 sensor we're dealing with, so we know what to expect out of the board.
| Characteristic | Range |
|---|---|
| Operating Voltage | 3.3V |
| Current | 7 mA average at 10Hz |
| Measurement Range | ~50mm to 2,000mm |
| Precision | +/-10% |
| Light Source | 850nm VCSEL |
| I2C Address | 0x4C |
| Field of View | 55° |
| Field of Illumination | 23° |
| Max Read Rate | 10Hz (We've seen up to 20Hz in practice) |
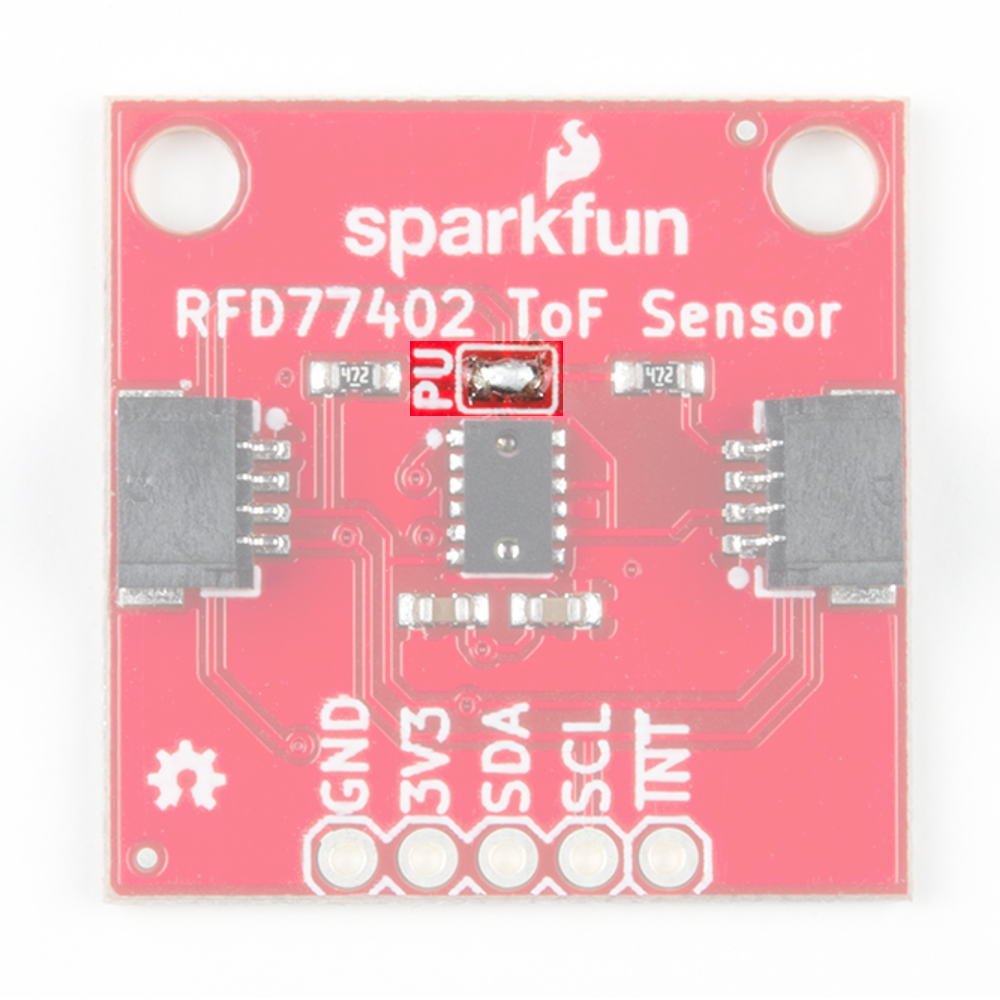
The following table lists all of the RFD77402's pins and their functionality.
| Pin | Description | Direction |
|---|---|---|
| GND | Ground | In |
| 3.3V | Power | In |
| SDA | Data | In |
| SCL | Clock | In |
| INT | Interrupt, goes low when data is ready. | Out |
The RFD77402 breakout has onboard I2C pull up resistors; if multiple sensors are connected to the bus with the pull-up resistors enabled, the parallel equivalent resistance will create too strong of a pull-up for the bus to operate correctly. As a general rule of thumb, disable all but one pair of pull-up resistors if multiple devices are connected to the bus. If you need to disconnect the pull up resistors they can be removed by removing the solder on the corresponding jumpers highlighted below.
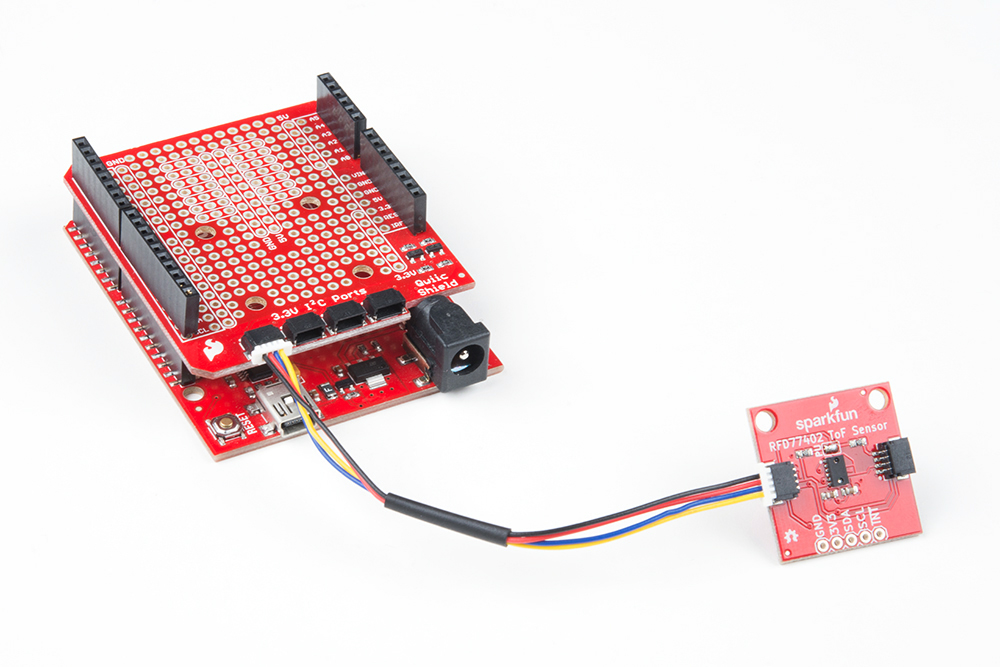
If you haven't yet assembled your Qwiic Shield, now would be the time to head on over to that tutorial. With the shield assembled, Sparkfun's new Qwiic environment means that connecting the sensor could not be easier. Just plug one end of the Qwiic cable into the RFD77402 breakout, the other into the Qwiic Shield and you'll be ready to upload a sketch and figure out how far away you are from that thing over there. It seems like it's too easy too use, but that's why we made it that way!
Note: This example assumes you are using the latest version of the Arduino IDE on your desktop. If this is your first time using Arduino, please review our tutorial on installing the Arduino IDE. If you have not previously installed an Arduino library, please check out our installation guide.
First, you'll need to download SparkFun's RFD77402 Library. This can be done by using the below button or by utilizing the Arduino library manager. You can also grab the latest, greatest version over on the library's GitHub repository.
Before getting started, let's check out the publicly available functions of our library.
boolean begin(TwoWire &wirePort = Wire, uint32_t i2cSpeed = I2C_SPEED_STANDARD); --- Initializes the RFD77402 sensor on a given I2C bus, with a given I2C speed. This function will default to the primary I2C bus and standard I2C speed if called without any arguments.uint8_t takeMeasurement(); --- Takes a single measurement and sets the global variables with new data.uint16_t getDistance(); --- Returns the local variable distance to the caller.uint8_t getValidPixels(); --- Returns the number of valid pixels found when taking measurement.uint16_t getConfidenceValue(); --- Returns the qualitative value representing how confident the sensor is about its reported distance.uint8_t getMode(); --- Read the command opcode and convert to the corresponding mode.boolean goToStandbyMode(); --- Tell MCPU to go to standby mode. Return true if successful.boolean goToOffMode(); --- Tell MCPU to go to off state. Return true if successful.boolean goToOnMode(); --- Tell MCPU to go to on state. Return true if successful.boolean goToMeasurementMode(); --- Tell MCPU to go to measurement mode. Takes a measurement. If measurement data is ready, return true.uint8_t getPeak(); --- Returns the VCSEL peak 4-bit value.void setPeak(uint8_t peakValue); --- Sets the VCSEL peak 4-bit value.uint8_t getThreshold(); --- Returns the VCSEL Threshold 4-bit value.void setThreshold(uint8_t threshold); --- Sets the VCSEL Threshold 4-bit value.uint8_t getFrequency(); --- Returns the VCSEL Frequency 4-bit value.void setFrequency(uint8_t threshold); --- Sets the VCSEL Frequency 4-bit value.uint16_t getMailbox(); --- Gets whatever is in the 'MCPU to Host' mailbox. Check Interrupt Control Status Register bit 5 before reading.void reset(); --- Software reset the deviceuint16_t getChipID(); --- Returns the chip ID. Should be 0xAD01 or higher.boolean getCalibrationData(); --- Retrieves 2 sets of 27 bytes from MCPU for computation of calibration parameters. 54 bytes are read into the calibration array, true is returned if new calibration data is loaded successfully.uint16_t readRegister16(uint8_t addr); --- Reads two bytes from a given location from the RFD77402.uint8_t readRegister(uint8_t addr); --- Reads from a given location from the RFD77402.void writeRegister16(uint8_t addr, uint16_t val); --- Write a 16 bit value to a spot in the RFD77402.void writeRegister(uint8_t addr, uint8_t val); --- Write a value to a spot in the RFD77402.You should have downloaded the SparkFun RFD77402 Library in the previous step, if not, go back to the previous step and go ahead and download it as you'll be needing it shortly. This hookup guide goes over the 3 examples contained within the library.
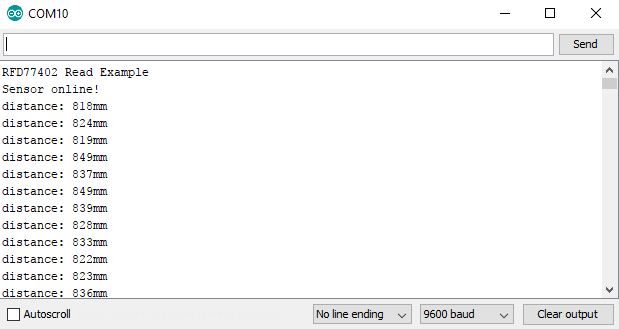
Example 1 gets us started taking some basic distance readings from the sensor. Simply upload the example code below, open your serial monitor with a baud rate of 9600 and start getting readings!
language:c
#include <SparkFun_RFD77402_Arduino_Library.h> //Use Library Manager or download here: https://github.com/sparkfun/SparkFun_RFD77402_Arduino_Library
RFD77402 myDistance; //Hook object to the library

void setup()
{
  Serial.begin(9600); //Begins Serial communication
  while (!Serial);
  Serial.println("RFD77402 Read Example");

  if (myDistance.begin() == false) //Initializes the sensor. Tells the user if initialization has failed.
  {
    Serial.println("Sensor failed to initialize. Check wiring.");
    while (1); //Freeze!
  }
  Serial.println("Sensor online!");
}

void loop()
{
  myDistance.takeMeasurement(); //Tell sensor to take measurement and populate distance variable with measurement value

  unsigned int distance = myDistance.getDistance(); //Retrieve the distance value

  Serial.print("distance: "); //Print the distance
  Serial.print(distance);
  Serial.print("mm");
  Serial.println();
}
The first example simply outputs distances one after another, the output should look something like the image below.
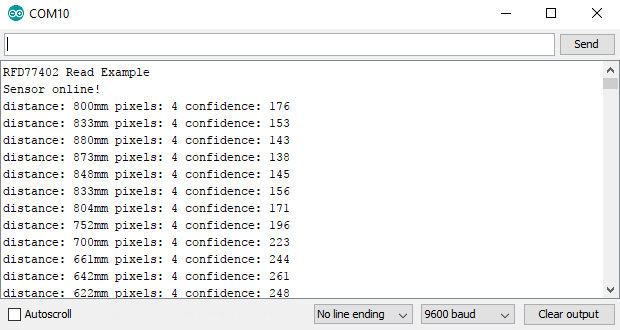
The second example gets us going on rejecting or accepting our data as a successful reading (i.e. the sensor is not maxed out). This is done simply by using the getConfidenceValue() function, which returns a value anywhere between 0 and 2047, with 2047 being the "most confident". In other words, a confidence value of 2047 means that the sensor is getting a very strong, clean, TOF flight reading. This is a great way to ignore any data that is out of the sensors range. The below example code will get you started taking these confidence readings. This sketch will also check the distance value against error codes to see if the sensor is giving us an error, and if so, which one.
language:c
#include <SparkFun_RFD77402_Arduino_Library.h> //Use Library Manager or download here: https://github.com/sparkfun/SparkFun_RFD77402_Arduino_Library
RFD77402 myDistance; //Hook object to the library

void setup()
{
  Serial.begin(9600);
  while (!Serial);
  Serial.println("RFD77402 Read Example");

  if (myDistance.begin() == false)
  {
    Serial.println("Sensor failed to initialize. Check wiring.");
    while (1); //Freeze!
  }
  Serial.println("Sensor online!");
}

void loop()
{

  byte errorCode = myDistance.takeMeasurement();
  if (errorCode == CODE_VALID_DATA) //Checks to see that data is not any of the error codes
  {
    unsigned int distance = myDistance.getDistance();
    byte pixels = myDistance.getValidPixels();
    unsigned int confidence = myDistance.getConfidenceValue(); //Pulls the confidence value from the sensor

    Serial.print("distance: ");
    Serial.print(distance);
    Serial.print("mm pixels: ");
    Serial.print(pixels);
    Serial.print(" confidence: ");
    Serial.print(confidence);

//Error Codes are outlined below

    if(distance > 2000) Serial.print(" Nothing sensed");
  }
  else if (errorCode == CODE_FAILED_PIXELS)
  {
    Serial.print("Not enough pixels valid");
  }
  else if (errorCode == CODE_FAILED_SIGNAL)
  {
    Serial.print("Not enough signal");
  }
  else if (errorCode == CODE_FAILED_SATURATED)
  {
    Serial.print("Sensor pixels saturated");
  }
  else if (errorCode == CODE_FAILED_NOT_NEW)
  {
    Serial.print("New measurement failed");
  }
  else if (errorCode == CODE_FAILED_TIMEOUT)
  {
    Serial.print("Sensors timed out");
  }

  Serial.println();
}
Opening the serial monitor to 9600 baud should yield an output similar to the one shown earlier.
The following example allows you to use your distance sensor not only to measure distance but time in between samples as well. Enabling a faster I2C speed cuts down on the time where we are talking to the sensor, so we are able to accurately guage time in between readings. This allows the user to compute velocity and even acceleration if they'd like. Check out the Equations of Motion for a little bit better explanation if you're new to physics.
In the below example, make note of two things, the first is in the setup() function. Notice how we call a non-default begin() function that initializes the sensor with I2C_SPEED_FAST, which increases the clock speed on the I2C bus. The second thing to make note of are the three lines at the beginning of our void loop(), which starts the timer function and allows us to know the time in between readings.
language:c
#include <SparkFun_RFD77402_Arduino_Library.h> //Use Library Manager or download here: https://github.com/sparkfun/SparkFun_RFD77402_Arduino_Library
RFD77402 myDistance; //Hook object to the library

void setup()
{
  Serial.begin(115200);
  while (!Serial);
  Serial.println("RFD77402 Read Example");

  //Initialize sensor. Tell it use the Wire port (Wire1, Wire2, softWire, etc) and at 400kHz (I2C_SPEED_FAST or _NORMAL)
  if (myDistance.begin(Wire, I2C_SPEED_FAST) == false)
  {
    Serial.println("Sensor failed to initialize. Check wiring.");
    while (1); //Freeze!
  }
  Serial.println("Sensor online!");
}

void loop()
{
  long startTimer = millis();
  byte errorCode = myDistance.takeMeasurement();
  long timeDelta = millis() - startTimer;

  if (errorCode == CODE_VALID_DATA)
  {
    unsigned int distance = myDistance.getDistance();
    byte pixels = myDistance.getValidPixels();
    unsigned int confidence = myDistance.getConfidenceValue();

    Serial.print("distance: ");
    Serial.print(distance);
    Serial.print("mm timeDelta: ");
    Serial.print(timeDelta);

    if(distance > 2000) Serial.print(" Nothing sensed");
  }
  else if (errorCode == CODE_FAILED_PIXELS)
  {
    Serial.print("Not enough pixels valid");
  }
  else if (errorCode == CODE_FAILED_SIGNAL)
  {
    Serial.print("Not enough signal");
  }
  else if (errorCode == CODE_FAILED_SATURATED)
  {
    Serial.print("Sensor pixels saturated");
  }
  else if (errorCode == CODE_FAILED_NOT_NEW)
  {
    Serial.print("New measurement failed");
  }
  else if (errorCode == CODE_FAILED_TIMEOUT)
  {
    Serial.print("Sensors timed out");
  }

  Serial.println();
}
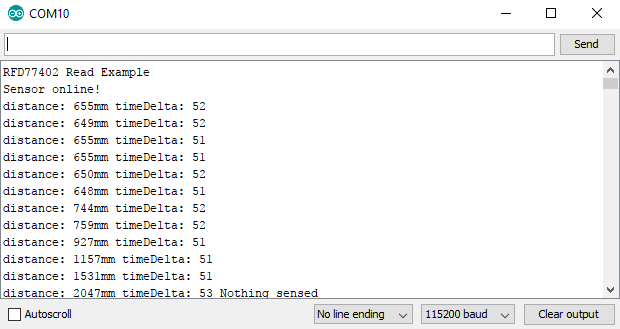
Opening the serial monitor to 115200 baud should yield something like the below image.
Now that you know exactly how far away that thing is, it's time to incorporate it into your own project! For more on the Qwiic Distance Sensor (RFD77402), check out the links below:
Need some inspiration for your next project? Check out some of these related tutorials:
learn.sparkfun.com | CC BY-SA 3.0 | SparkFun Electronics | Niwot, Colorado