Pyboard Hookup Guide
 LightningHawk
Introduction
The pyboard is a powerful microcontroller board designed to run MicroPython code that also happens to be conveniently compact. There is a pyboard can be sold without headers and with headers.
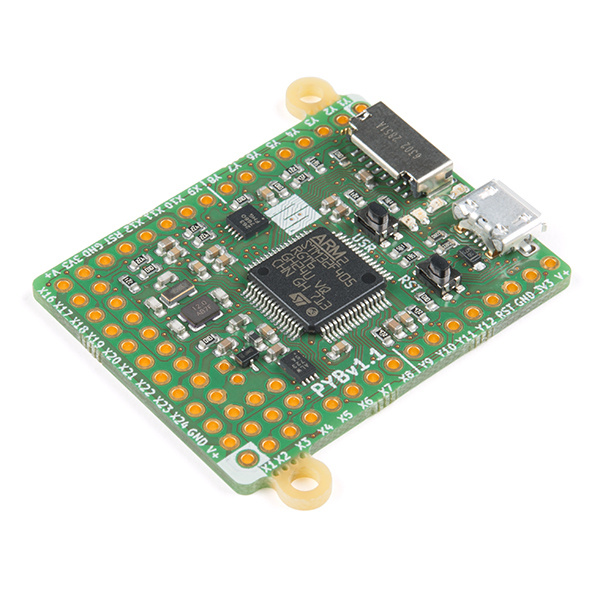
MicroPython pyboard v1.1
DEV-14412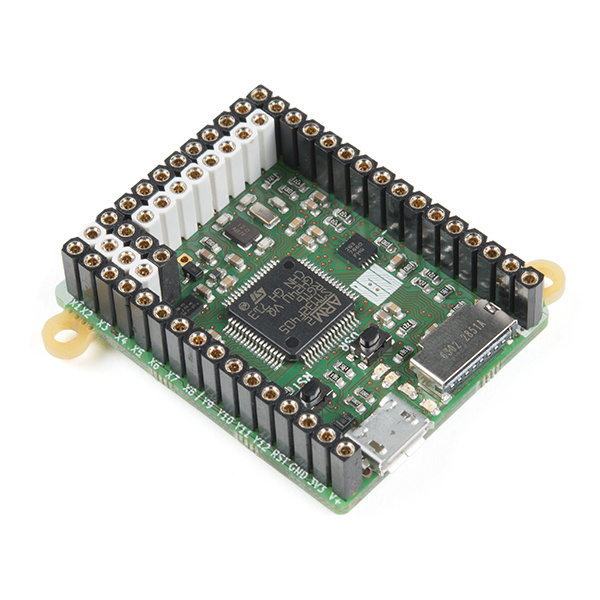
MicroPython pyboard v1.1 (with Headers)
DEV-14413Materials Required
- A Computer
- Windows(XP, Vista, 7, 8, 8.1) Not Windows 10
- Mac OS X
- Linux
- A Micro-B USB cable
- Your favorite text editor
<div class="well well-sm"> sudo apt-get install vim</div>
* [Gedit](https://help.gnome.org/users/gedit/stable/)
<div class="well well-sm"> sudo apt-get install gedit</div>
- Your Favorite Serial Terminal
Suggested Reading and Viewing
Here is great video tutorial from MicroPython on getting started with your pyboard:
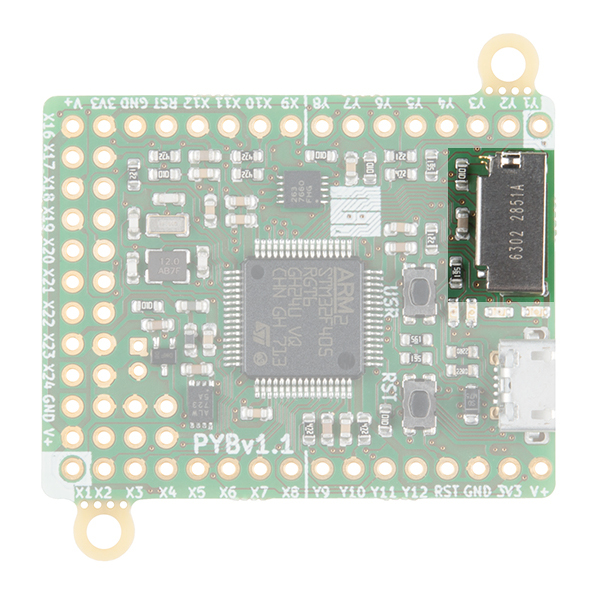
Hardware Overview
Pyboard comes fully loaded with hardware features:
- STM32F405RG microcontroller
- 168 MHz Cortex M4 CPU with hardware floating point
- 1024KiB flash ROM and 192KiB RAM
- Micro USB connector for power and serial communication
- Micro SD card slot, supporting standard and high capacity SD cards
- 3-axis accelerometer (MMA7660)
- Real time clock with optional battery backup
- 31 GPIO
- 3x 12-bit analog to digital converters, available on 16 pins, 4 with analog ground shielding
- 2x 12-bit digital to analog (DAC) converters, available on pins X5 and X6
- 4 LEDs
- 1 reset and 1 user switch
- On-board 3.3V LDO voltage regulator, capable of supplying up to 250mA, input voltage range 3.6V to 16V
- DFU bootloader in ROM for easy upgrading of firmware
Easily control the following peripherals using the the pyb module's built-in classes for:
- ADC
- SPI
- I2C
- DAC
- SD Card storage
- UART

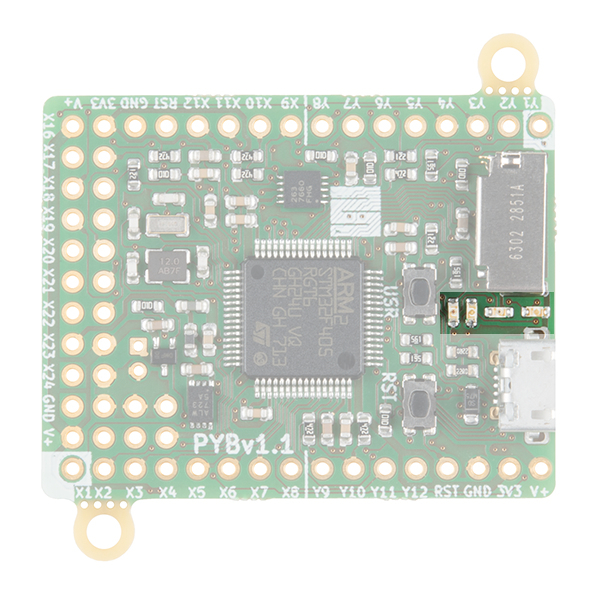
LEDs
The pyboard has four LEDs. We are going to use the REPL to interactively determine how these LEDs are numbered and what color they are. The LEDs are also indicators for the current state of the board. Here are some examples of what you might see:
- The red and green LEDs flash alternatively: main.py has an error use the REPL to debug
- All four LEDs cycle on and off: You must perform a hard reset of the board.
- Only the Red LED is on: You may just tried to save main.py to the drive. Do not eject the flash drive before the red LED turns off!
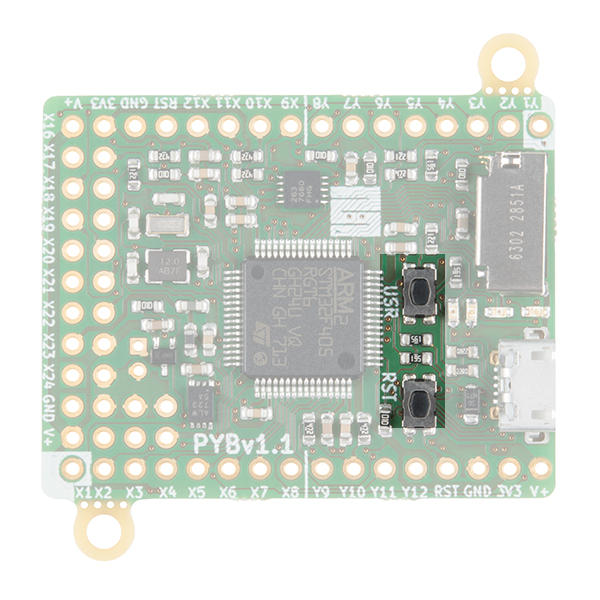
Switches
There are two switches, one labeled "USR" for user and the other "RST" for reset. Micropython handles switch input very easily on this board and we will use the USR switch to prove it. The Switch class has three methods that allow you obtain the switch state or register when there has been a change in the switch state.
MicroSD Socket
There is a drive on the pyboard called /flash. When an microSD card is inserted this drive becomes available as /sd.
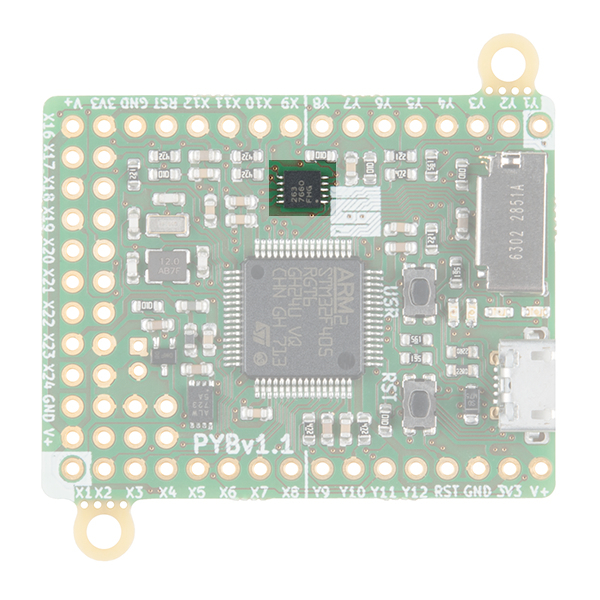
Accelerometer
The pyboard has an accelerometer-MMA766FC that can be used to detect the angle and motion of the board. The Accel class of the pyb module has five methods which allow you get the x, y, z axis info, access the tilt register, and a 3-tuple of x,y,z values.
Getting Started with MicroPython for Pyboard
You can control your pyboard in two ways:
- One from loading Python scripts in your favorite text editor, editing main.py, and saving it via the pyboard drive.
- Or through a serial terminal using REPL (Note: To use the use REPL you need to install drivers. Depending on your system, the install varies.)
For more information on these methods, check out the sections below!
MicroPython Programming Examples
A cool feature of the pyboard is that you can write Python scripts in any text editor and save the file directly to the pyboard drive. No IDE is required! Let's explore the pyboard, control some peripheral, and do some experiments.
LED On
Let's start with some code. We are going to turn on all the onboard LEDS one by one and figure out which one is which.
Connect the pyboard to a computer's COM port using a USB cable. Navigate to the drive called "PYBFLASH". Open main.py in a text editor of your choice. Once opened you should see this:
language:python
# main.py -- put your code here!
Let's turn on LED 1 and make a note of its color and location.
language:python
# main.py -- put your code here!

import pyb
pyb.LED(1).on()
Save the file to the drive - don't change the name. For the script to run you must first reset the board. It is recommended you safely remove the hardware first by ejecting the drive from your computer and then press the RST button. Which LED is on and what color is it?
Now run through that same code three more times but change the number within the parenthesis after LED.
Toggling LEDs
In this example, we will toggle each of the onboard LEDs! Go to the PYBFLASH and open main.py in a text editor. Copy the code below.
language:python
# main.py -- put your code here!
# This code has been adapted from http://docs.micropython.org/en/latest/pyboard/pyboard/tutorial/leds.html

import pyb

#create an leds array with 4 LED objects
leds = [pyb.LED(i) for i in range(1,5)]

#turn off all 4 LEDs
for l in leds:
    l.off()

n = 3

#try and finally - https://docs.python.org/2.5/whatsnew/pep-341.html
try:
    while True:
        #get the remainders 1-4 by using modulus function
        #Use 0-3 to toggle each LED on and off - note that
        #leds[0] is the same as pyb.LED(1)
        n = (n + 1) % 4
        leds[n].toggle()
        pyb.delay(500)
finally:
    for l in leds:
        l.off()
Save main.py in the PYBFLASH drive. The red LED will be on while the program loads. After the LED is turned off, eject the PYBFLASH and then press the RST button. Your program will now execute. This is the process for loading a new script.
PWM and LED 4: The Blue One is Special
LED 4 is the blue LED towards the edge of the pyboard. This LED can be controlled through PWM. In the pyb module LED class, there is a method called intensity. When called it looks like pyb.LED.intensity([value]) where value is a number between 0-255.
In this example, we will change the intensity of the LED. Go to the PYBFLASH and open main.py in a text editor. Copy the code below.
language:python
# main.py -- put your code here!
# This script has been adapted from
# http://docs.micropython.org/en/latest/pyboard/pyboard/tutorial/leds.html

import pyb

led = pyb.LED(4)
#start the LED  intensity value with 0.
intensity = 254
try:
    while True:
        intensity = (intensity + 1) % 255
        led.intensity(intensity)
        #show the effect quickly with a shorter delay
        pyb.delay(15)
finally:
    # once 255 is reached turn off the LED
    pyb.LED(4).off()
Attaching a Servo
There are four dedicated 3-pin headers labeled X1, X2, X3, & X4. You can drive up to four hobby servo motors. At the top of the row is GND, the middle of the row is VCC and the bottom row are the 4 PWM signal lines. Once you've got a servo hooked up, we can look at what we can do within the Servo Class.
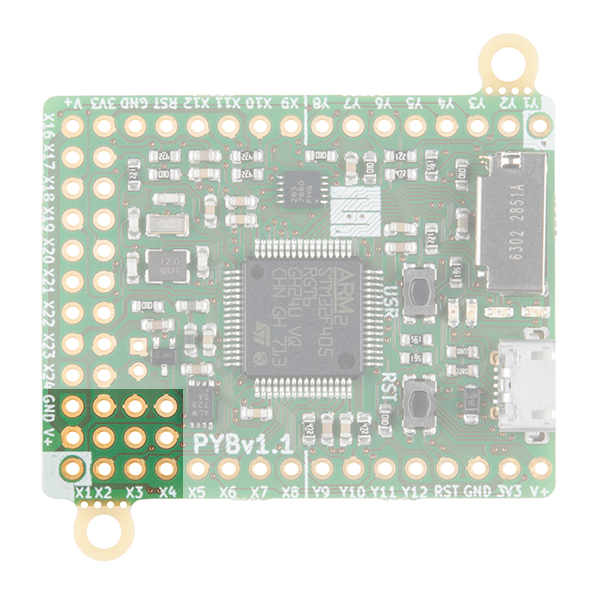
For this example, we will be using a generic sub-micro hobby servo and some jumper wire with pins. Assuming that headers are soldered on the board, connect the servo to the respective pins.
| pyboard |
Generic Sub-Micro Servo |
|---|---|
| GND | GND (Black) |
| V+ | Vcc (Red) |
| X1 | Control Signal (White) |
Follow the steps to load the python script again using the code below.
language:python
# main.py -- put your code here!
# This script has been adapted from
# http://docs.micropython.org/en/latest/pyboard/library/pyb.Servo.html

import pyb
#Create a Servo object at position X1
#if you connected the servo to X2, X3 or X4
#use the corresponding number in your servo object
myServo = pyb.Servo(1)
myServo.angle(0)
#Sweep the angle of the servo to 90 degrees taking 1250ms
myServo.angle(90, 1250)
Once the script is loaded, the servo connected to pin X1 will sweep between two positions and stop.
Using the REPL
Another method of controlling the pyboard is using the REPL. REPL stands for Read Evaluate Print Loop. It is an interactive command prompt from a serial terminal that allows access to your pyboard. It is an easy way to iteratively write and test code. Once you've got your code hammered out, you can copy it into main.py to run without a computer. Before we are able to use the REPL, we must install the drivers for your operating system.
Windows Install
This process has worked best on a computer with Windows 7. Unfortunately, it doesn't seem there is support for Windows 10 yet.
To install this driver you need to go to your computer's Device Manager, find the pyboard USB in the list of ports (it should have a warning sign next to it because it’s not working yet), right click on the device, select Properties, then Install Driver. You need to then select the option to find the driver manually (don’t use Windows auto update), navigate to the pyboard’s USB drive, and select that. It should then install.
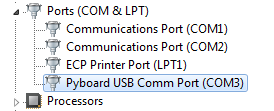
After installing, go back to the Device Manager to find the installed pyboard, and see which COM port it is (e.g. COM3). More comprehensive instructions can be found in the Guide for pyboard on Windows. Please consult this guide if you are having problems installing the driver.
Mac OS X
Simply open a terminal and run:
minicom /dev/tty.usbmodem*
When you are finished type "CTRL -A CTRL-\" to exit.
Linux
Open a terminal and run: screen /dev/ttyACM0
The 0 at the end there may need to be updated to 1 or higher and you may need the correct permissions to access this device. So try Sudo.
REPL via Serial Terminal
Now that you have installed the drivers we can start working with the pyboard within an interactive serial terminal. In this example, we will be using Putty on a Windows OS. To connect the pyboard to the right port, open Device Manager and look under "Ports".
Open your favorite serial terminal and configure the settings to connect. Make sure on the "Serial line" you specify the correct port.

Once Putty has been configured, click on the Open button.
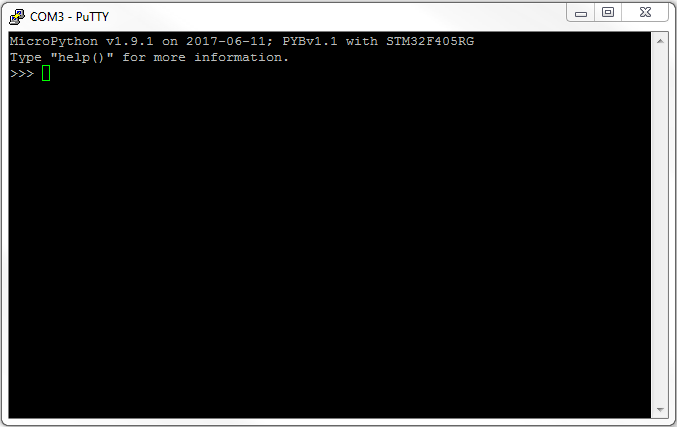
As a good first step, let explore the help() menu. Type the command into the serial terminal and hit enter.
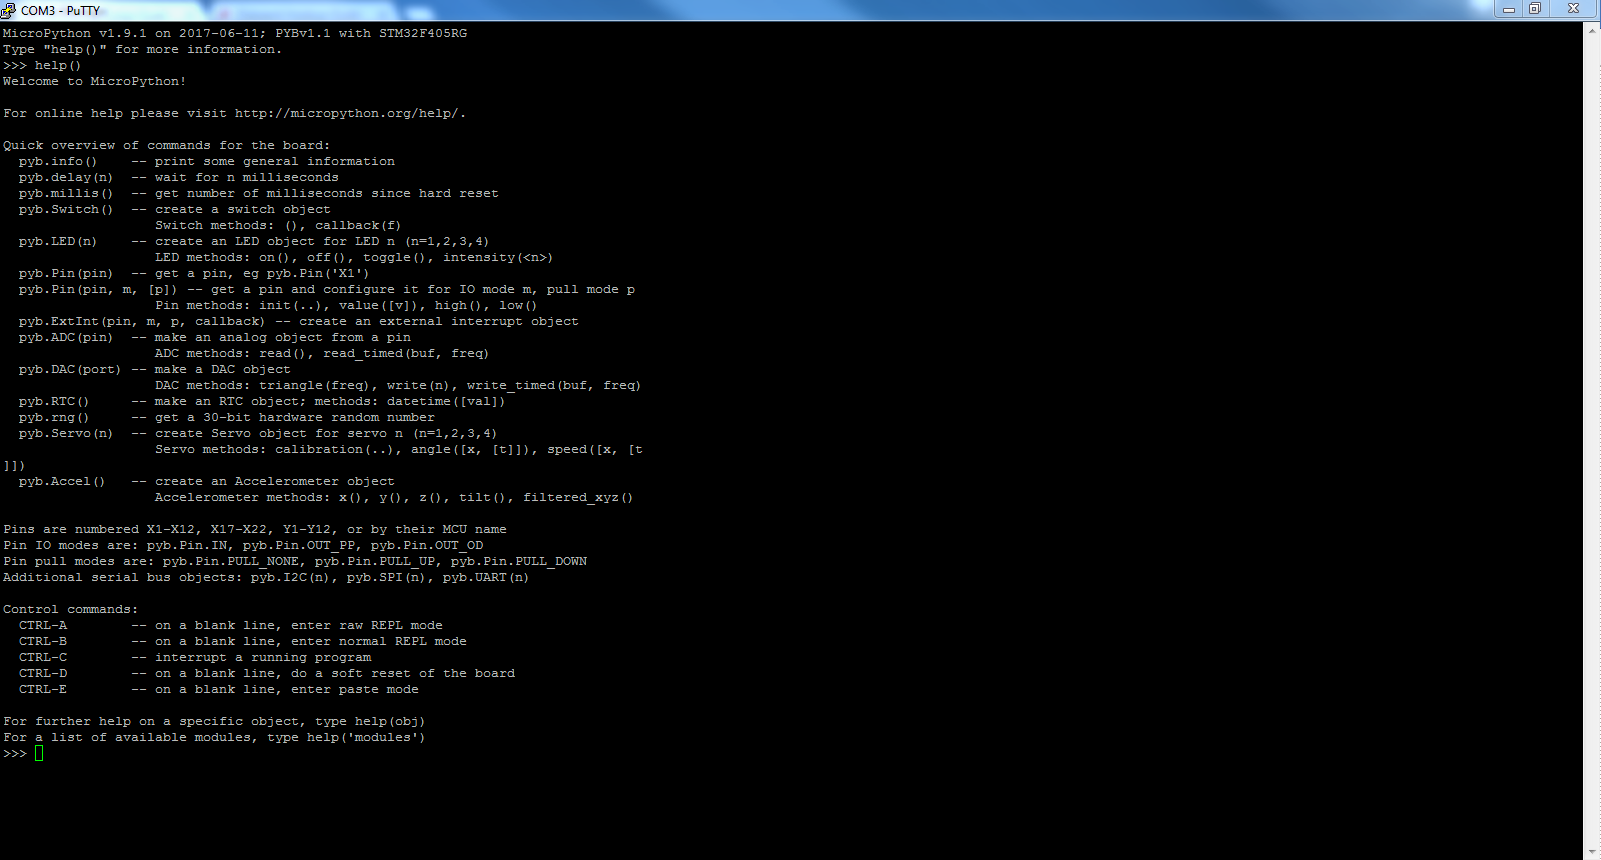
Let's explore some things from here.
Playing with the Onboard LEDs.
In your terminal type:
>>>pyb.LED(1).on()
>>>pyb.LED(2).on()
>>>pyb.LED(3).on()
>>>pyb.LED(4).on()
You'll see each LED turn on as you enter a new line in the terminal.
USR Switch
The switch class makes it easy to obtain a switch state. From the terminal:
>>>mySwitch = pyb.Switch()
>>>mySwitch
>>>mySwitch()
You should false if you are not pressing the USR switch and true if you are pressing the switch when the function is called.
Accelerometer
The accelerometer y, y, z methods return a signed number between -30 and 30. There are a few methods we can call here to obtain values from the accelerometer.
>>>accel = pyb.Accel()
>>>accel.x()
The corresponding x-value will be returned.
>>>accel.y()
The corresponding y-value will be returned.
>>>accel.z()
The corresponding z-value will be returned.
>>>accel.filtered_xyz()
This will return a list of comma separated x, y, and z values.
Resources and Going Further
Now that you've successfully got your pyboard up and running, it's time to incorporate it into your own project!
For more information, check out the resources below:
- Pyboard Datasheets - For the components on the pyboard.
- MicroPython Documentation
- MicroPython Libraries
- Pyboard Quick Reference Guide - Super useful
- Skins - Like Arduino shields but for the pyboard.
- Pyboard and MicroPython Examples
- MicroPython Forum