Portable DIY Teensy Synth
 Chowdah
Main Board Construction


The heart of this build is the Teensy 4.1, Audio Shield, and Speaker Amp, all of which are connected together via a solderable breadboard setup shown above. The synth’s internal connections are outlined in the schematic below, and one set of rails provides 5V and GND, while the other provides 3V3 and GND. Refer to the video for more insight on how this translates from schematic to the real world.
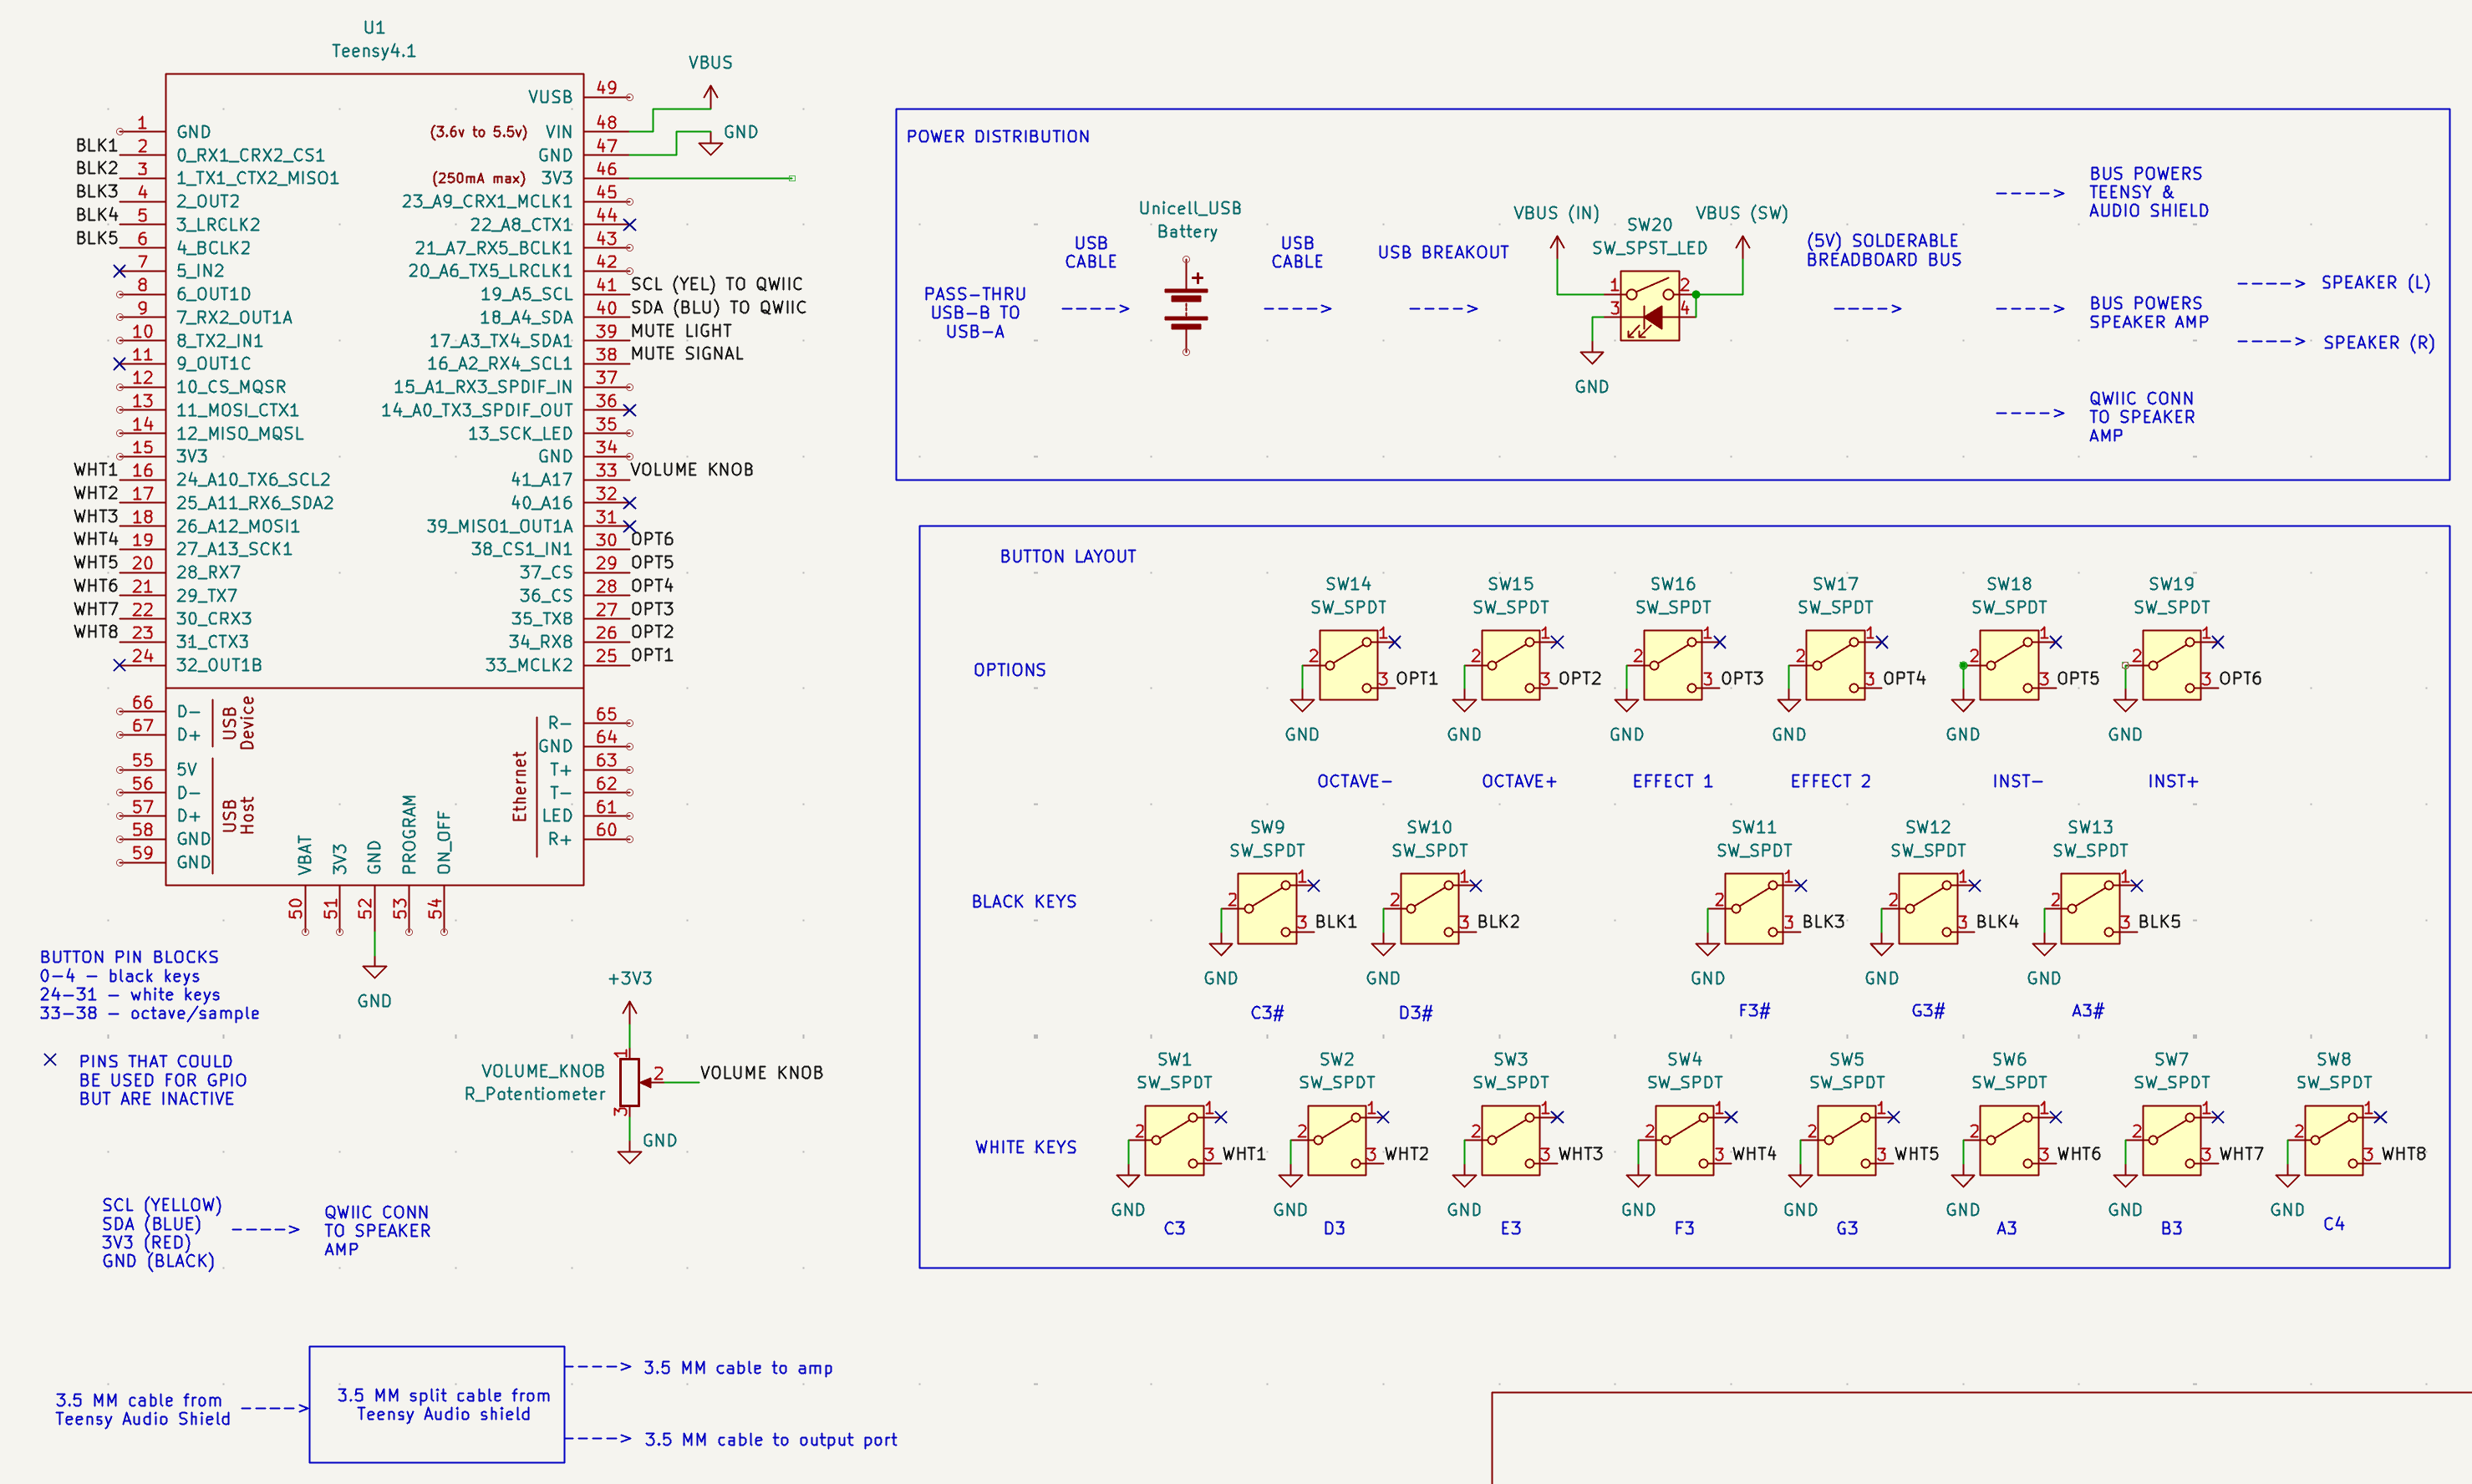
As shown in the video, the Teensy 4.1 is soldered with long centered headers, while the solderable breadboard, along with the Audio Shield, use female headers. This allows for quick attachment and removal as needed. Snap the male headers to length, and clip the female headers to fit on the Audio Shield.

Cut the top of your box as shown in the image and in the video, using a 1 1/8 inch hole saw for the buttons and a 2 inch hole saw for the speakers. DXF/PDFs of the layout are found here. You can use this as a template if you have a large enough printer and/or laser cutter available, but DO NOT laser directly on the case. Drill holes in the side to suit your side interface implements, roughly centered in the vertical orientation.
