Pokémon Go Patches with EL Panels
 Gella
Gella 
Introduction
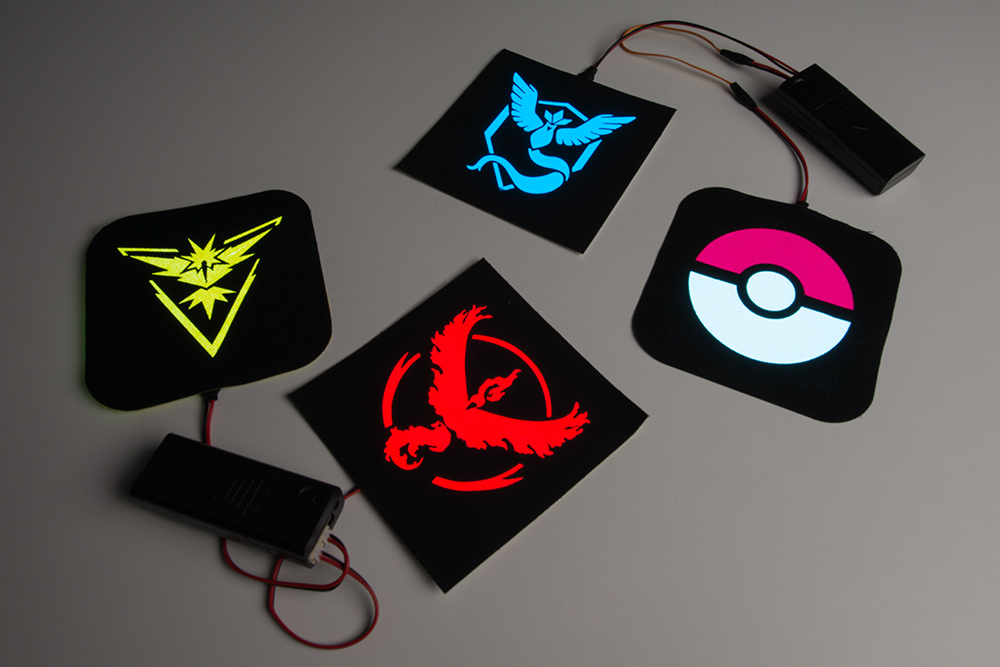
Here's a fun way to show your team pride when out at night Pokémon hunting. In this project, we'll add a cloth stencil over EL panels to create glowing team logos and designs. Read on for more tips and tricks at customizing EL panels and attaching them to clothing, backpacks, and more.
Suggested Reading
For this project, we'll be using EL wire and will be doing some soldering. Here are some tutorials to review before getting started:
Materials
Here are some suggested materials for completing this project. The list shows a White EL Panel, but feel free to use your color of choice. SparkFun carries Red and Blue panels; we'll also cover creating custom colors using lighting gels or fabric layers (for those of you wanting to make some Team Instinct swag or a Poké Ball).
Additional Materials:
- Something to put the patch on - a hoodie, jacket, backpack, or hat would work well. The patch should be at least 5"x5" to completely cover the EL panel, so make sure that there is room on your item and that it can be ironed without melting.
- Iron-on patch fabric - thick enough to block the light from the panels. We recommend denim or twill patches from your local fabric store. You can also create your own using an iron-on adhesive - Heat n' Bond brand works well.
- Sewing supplies - scissors, thread, needle
- Soldering iron, solder - to make an optional extension cable
- Wire strippers - for soldering
- Heat shrink - to insulate any exposed soldered connections
- A cutting machine - Silhouette or Cricut personal cutting machines or a laser cutter work well. If you have the patience, hand cutting a stencil with a hobby knife will also work.
- Iron - small wand-style craft irons work best for this project to get into detailed areas of the fabric without touching the EL panel directly. We are using a Clover Mini Iron in this tutorial.
Preparing Your Stencil
Before we begin building, we'll need a stencil design. If cutting on a machine, you will need a vector line drawing of your logo/image. If you do a google search for 'Pokémon GO Team Logo Vector,' you will most likely find some files that other generous folks have created to download. They are often in .svg or .ai format, which may not import directly into your cutting machine's software (see below for special considerations for each machine).
You can also use Software like Adobe Illustrator®, CorelDraw®, or Inkscape to trace an image and export for your machine.
For all stencils, size your image to ~3.75" x 3.75" to make sure it stays within the boundary of the EL Panel (10cm or ~3.9" square). Adjust any lines so that the space between cuts is thick enough that the fabric doesn't tear or warp when removing from the cutting surface or installing.
Cutting Machine Tips
Silhouette Machines -
Unfortunately you cannot import .svg files into their software unless you upgrade to Silhouette Studio® Designer Edition. The premium software allows you to import files directly from Adobe Illustrator® or CorelDraw®. You can also download a plug-in called Silhouette Connect™.
If you don't want to upgrade the software, you can also export your files as .dxf and import them.
Here are some additional resources for the Silhouette:
Cricut Machines -
If you have a Cricuit machine, you'll use a web-based software called Cricuit DesignSpace. It will import both .svg and .dxf files, but they may need some clean up before use.
Note: Newer cutting mats can be sticky and transfer some adhesive to your fabric. Be careful when removing from the mat not to tear or warp the fabric. Using specialty spatula tools that come with the machines help to remove small parts of the cut without damaging the fabric.
Laser Cutter
Import your vector as you would any other print. Attaching the fabric to a piece of scrap cardboard with some clear tape will make it easier to remove the stencil from the bed.
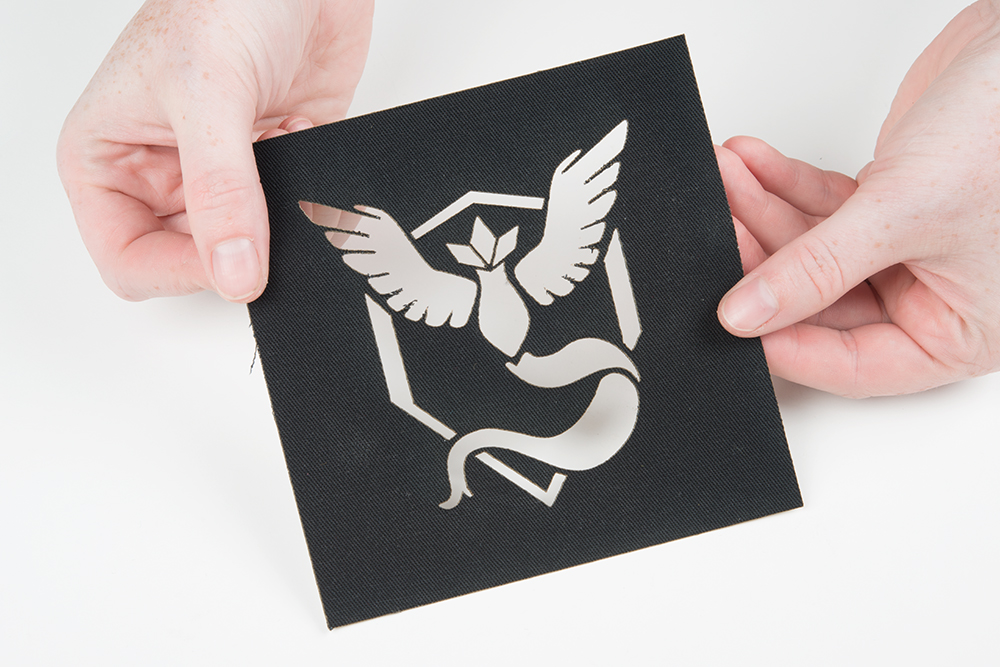
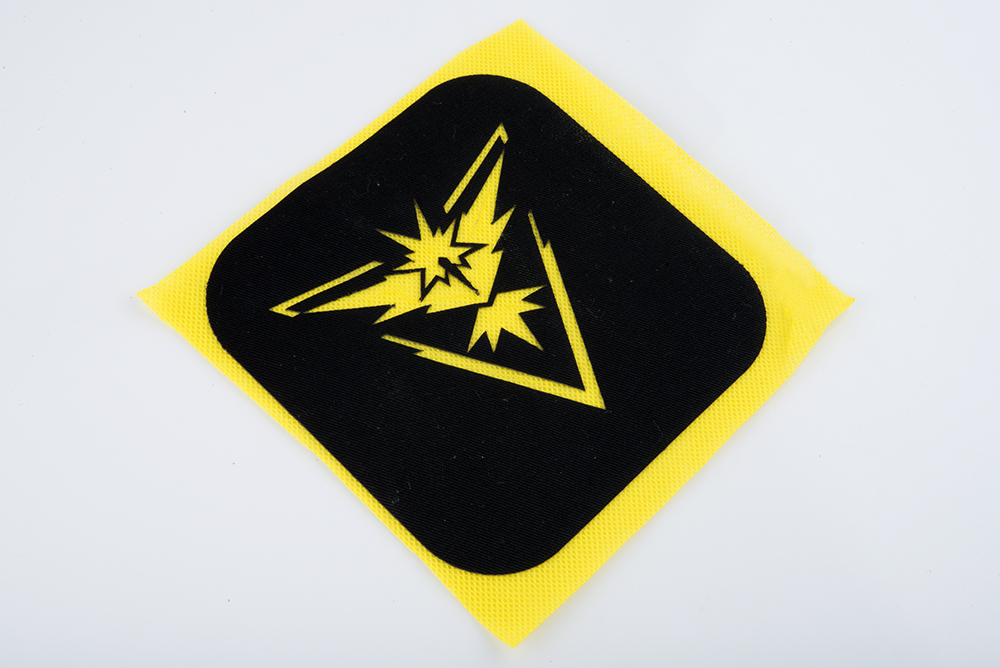
It may be necessary to adjust the graphics to avoid small areas where strain may tear the fabric. In the example below, the spaces between parts of the stencil were too thin, and tore when removing from the machine. Practice on a test piece of fabric first.

Attaching Stencil
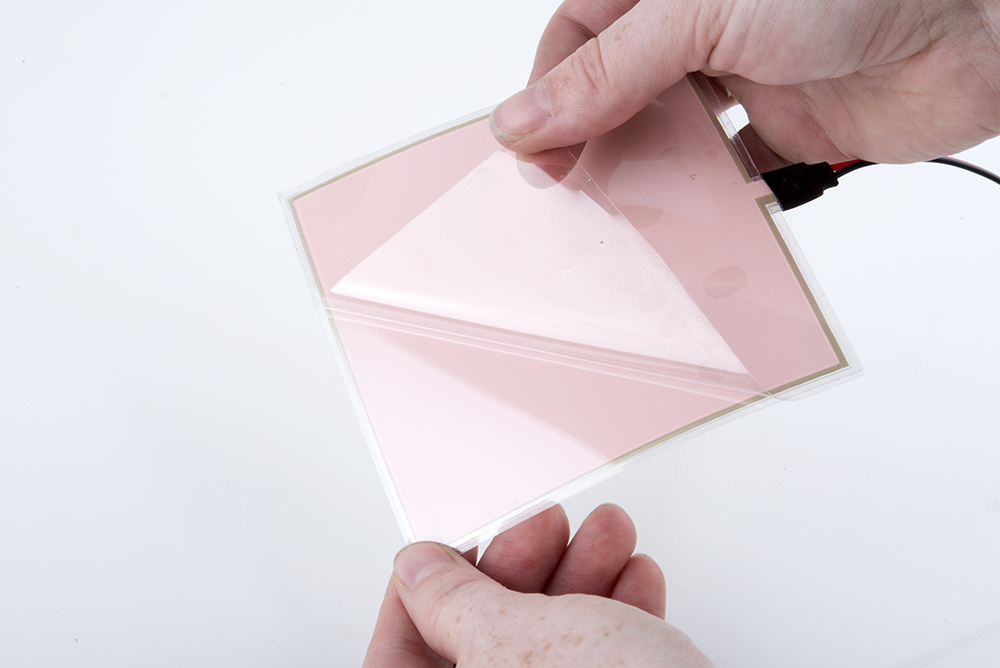
Next, we'll adhere the stencil to the EL panels. Remove the thin plastic sheet covering from the EL panel and discard.
Adding Color Effects
If your design requires a different color or multiple colors on one El panel, here are a couple of a techniques you can try. Using a white EL panel as the base layer will give you the best color results.
Cut a piece of lighting gel (or colored plastic) slightly larger than the holes in your design, but smaller than the edge of the El Panel. Make sure to choose a material that can withstand the heat of the iron.
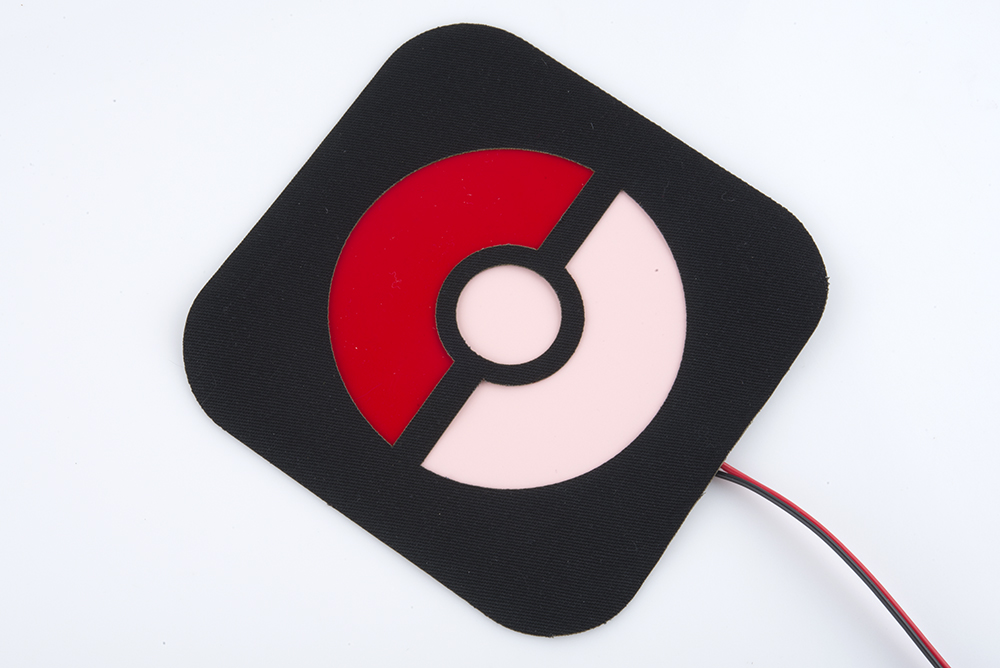
Alternatively, a thin piece of fabric or felt can be placed under the design and ironed in place.
Attaching Stencil
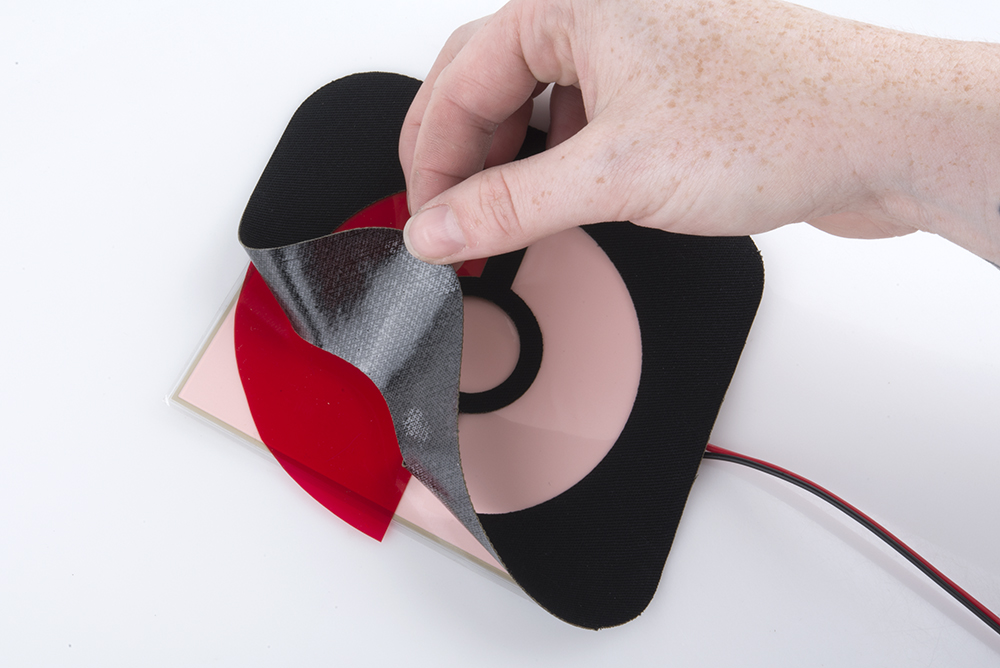
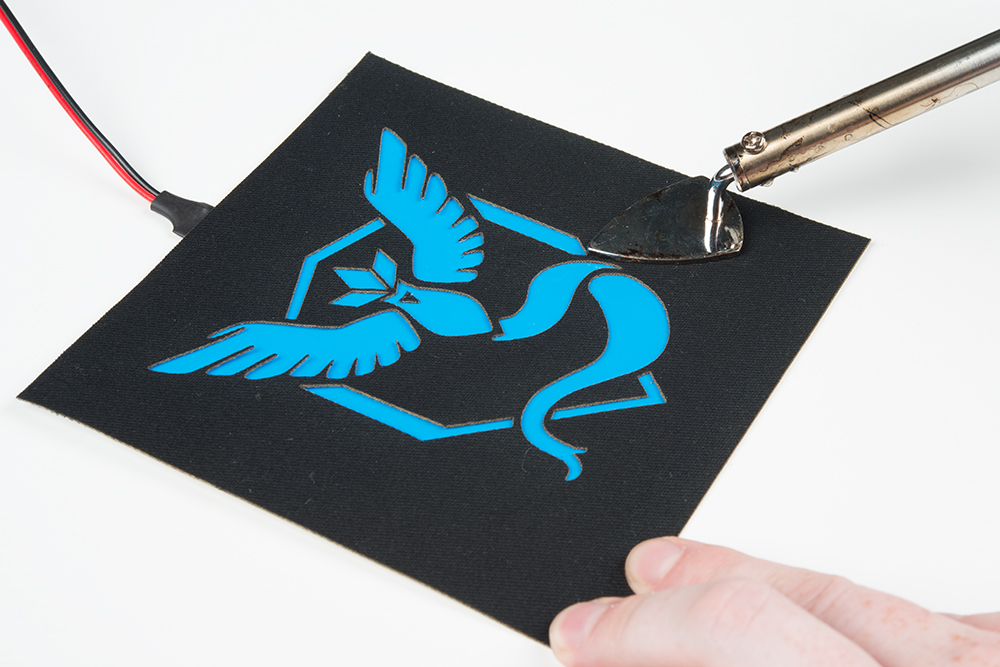
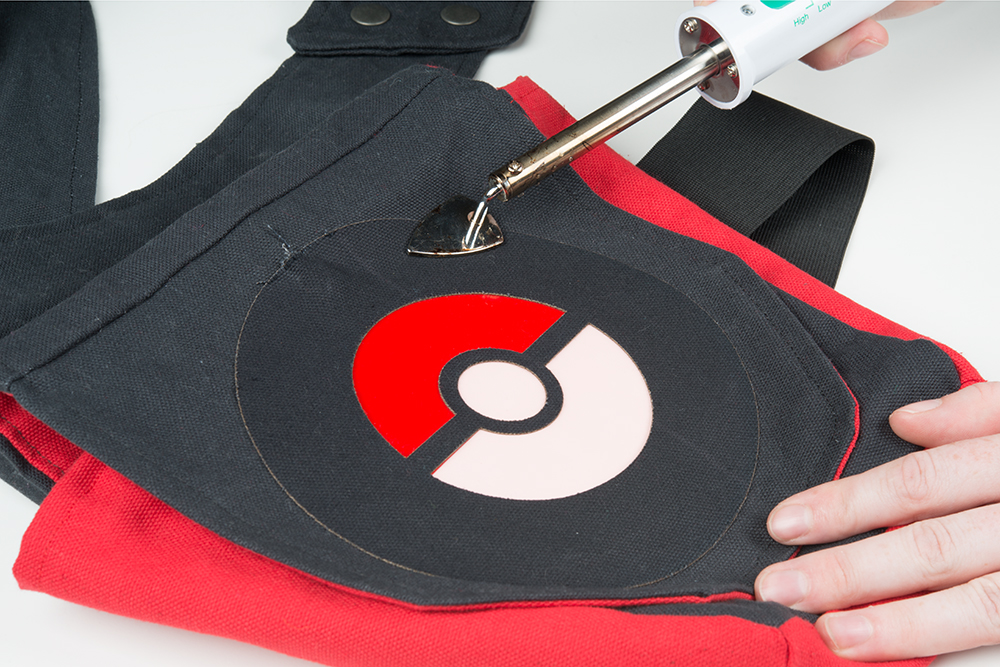
Carefully line up your stencil on the colored side of the EL panel, centering and adjusting as needed. When the design is placed, make small circles with a craft iron to begin melting the adhesive on the fabric. Move quickly and avoid touching the plastic of the EL directly. It's better to make a few passes than hold the iron in place for too long.
Check the adhesive every so often by carefully trying to peel up edges of the fabric.
If ironing on the panel doesn't work (some iron-on adhesives are better than others), you can use glue to attach the fabric stencil.
Adding Extension Cables
The wires on the EL panels are shorter than on EL wire, which can make intuitive placement of the battery pack a bit of a challenge. If you would like to place the EL panel further away from the battery pack, you can cut the wires and solder in additional wire as an extension cable.
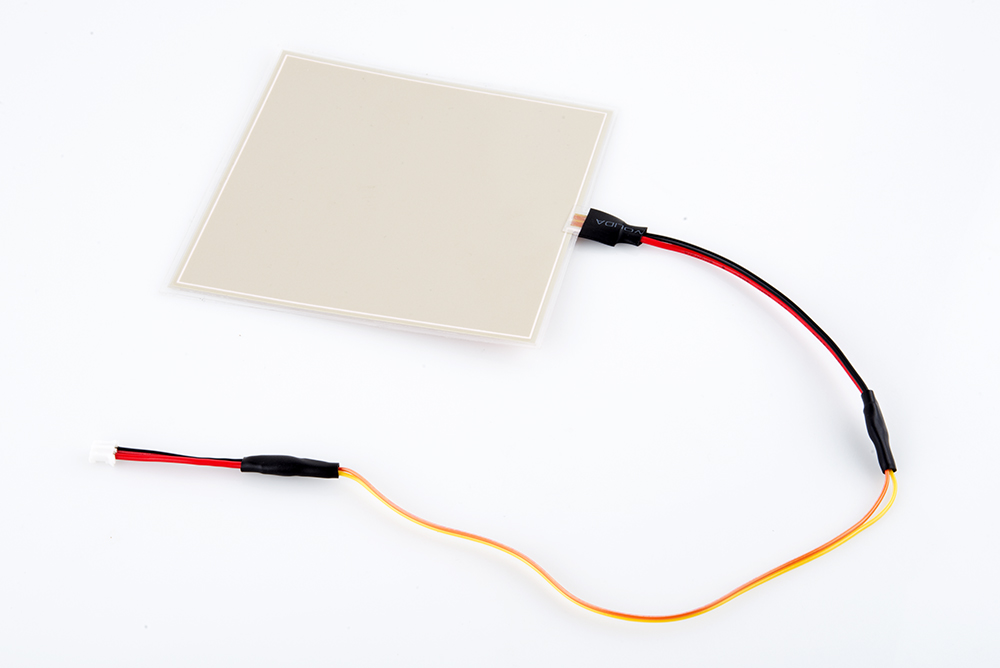
Prepare the wires for soldering by cutting them halfway between the EL panel connection and the JST connector. Measure two equal lengths of wire to use as the extension wiring, adding additional length for give/tension if needed. We used ribbon cable for this example because it is inexpensive and flexible.
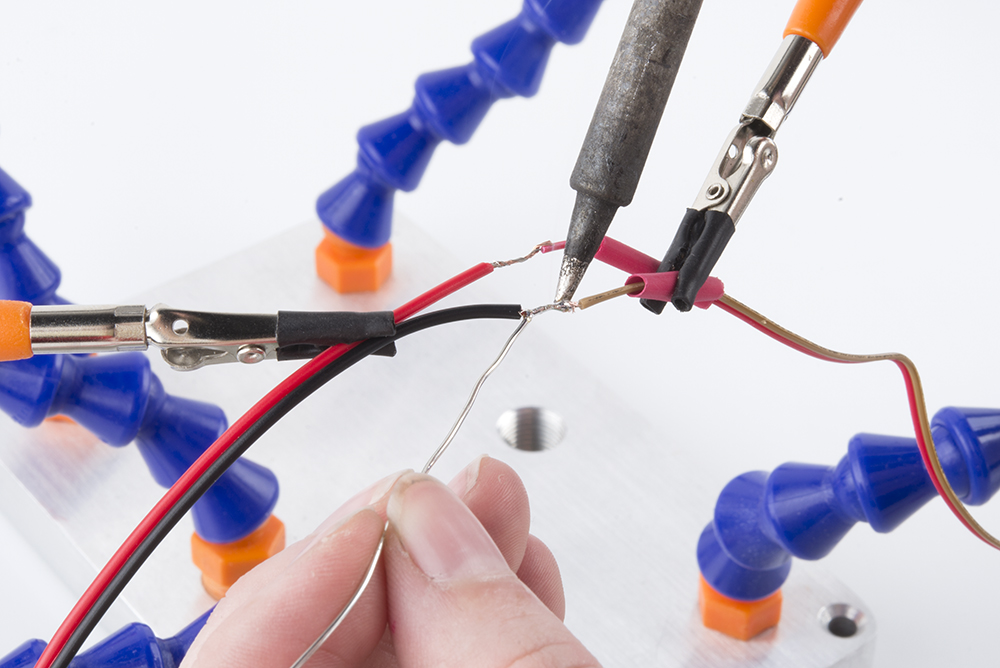
Strip the ends of all wires, cut some heat shrink and feed over the wire before and away from the soldering area before you begin soldering. The heat shrink will slide over the soldered connection afterward to protect it. Solder the two extension wires to the panel wires.
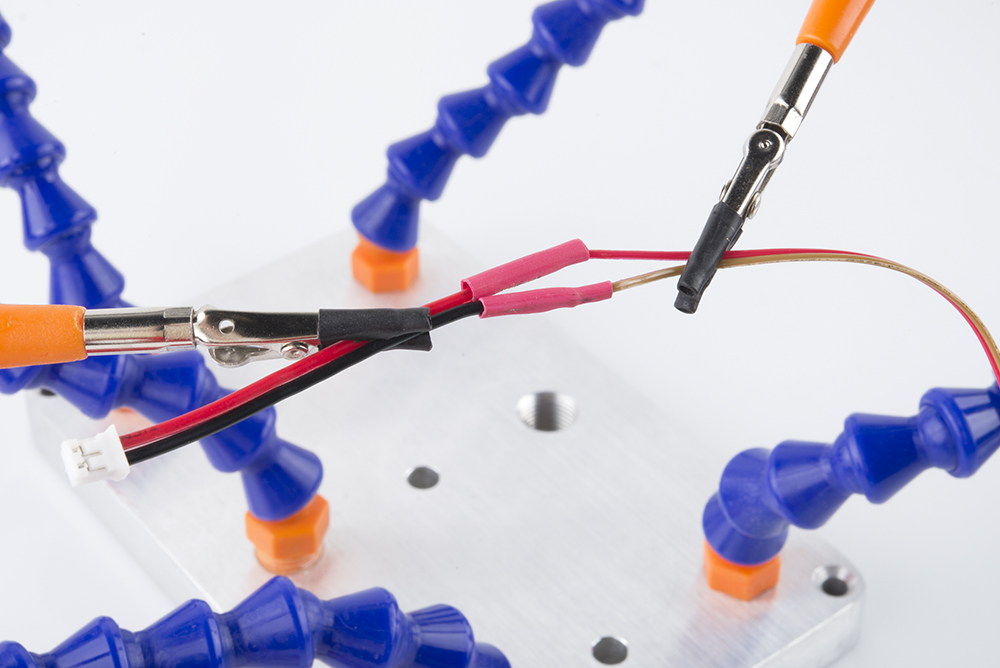
After the solder is cool, slide the heat shrink over the connection, and use a heat gun or the edge of the soldering iron to shrink it. If desired, use a large piece of heat shrink over both of the wires for extra insulation and support. Repeat for all four connection points (two ends on each wire).
Installation
Now it's time to put the patch on something! Position the patch on your item of choice and mark any holes that may need to be cut to thread the cable through. Check the positioning of battery pack so that it is in an easily accessible place.
Once everything is in place, use an iron to adhere the patch to your fabric - making sure to iron only the extended edges and not the panel itself.
Alternative Attachment Methods
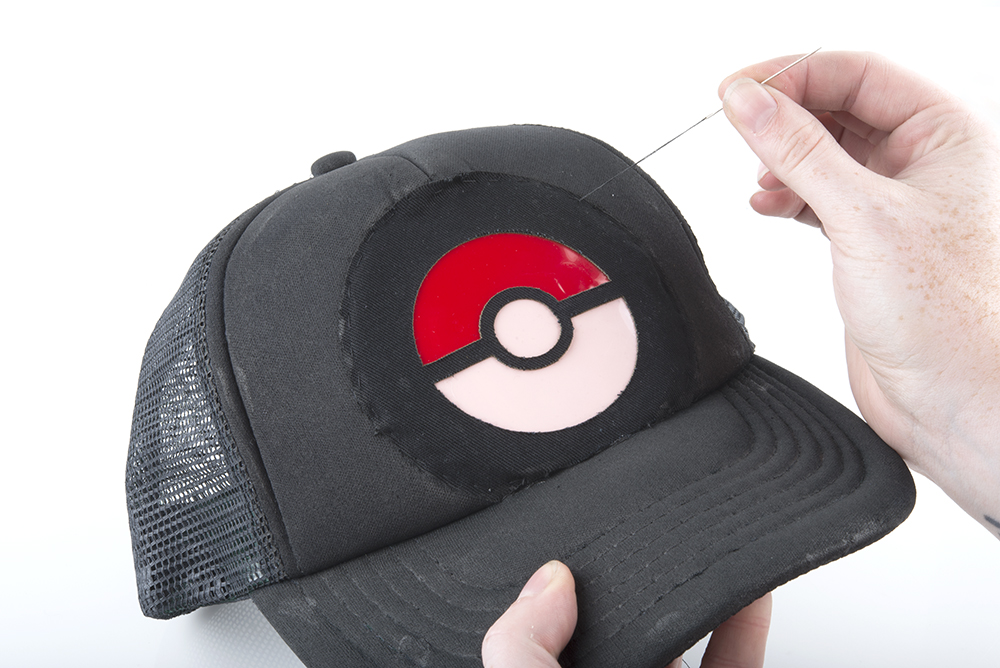
You can also stitch the patch on with a sewing machine or by hand, be mindful of not puncturing the panel with the needle. Decorative stitching is a great way to add some extra customization to the patch.

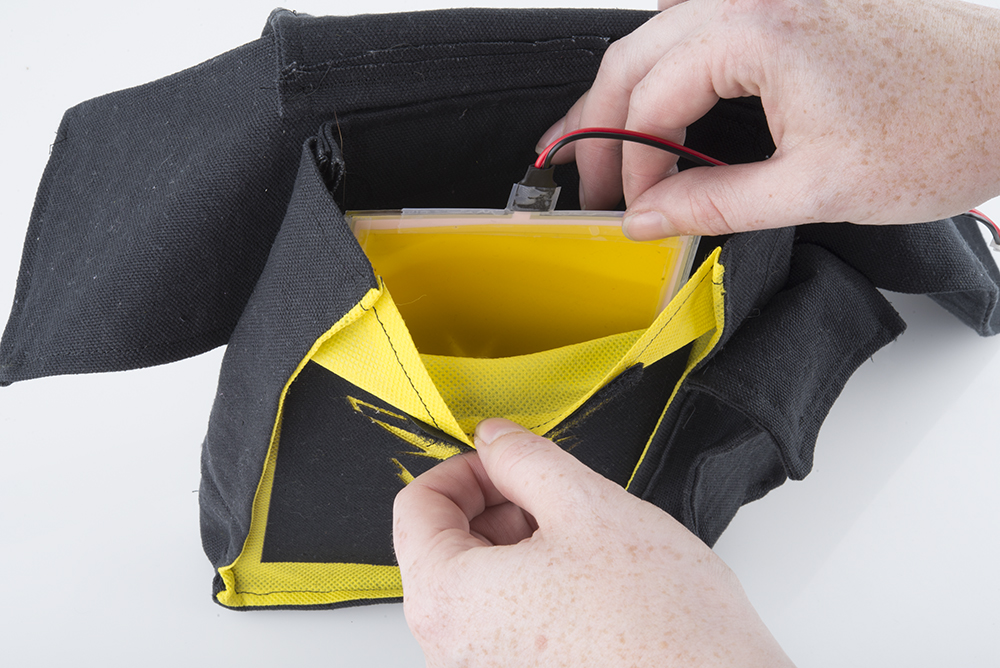
A third option is making a pouch for the panel. This is great for an item that may need frequent washing or if you'd like to switch out the panel for another design in the future. The example below uses the fabric stencil on a pocket and a plain panel to backlight it.
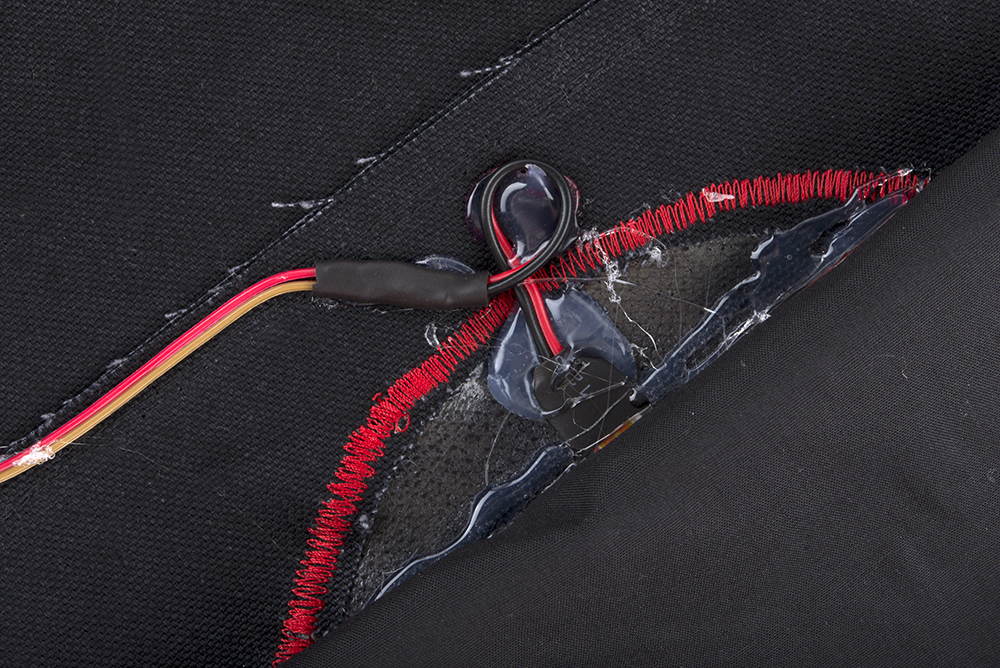
Reinforcing the Connector Tab
The small tab on the EL panels can get damaged from frequent bending or pulling. To avoid the tab breaking or wires disconnecting, take special care in where the patch is placed. After installing, you can add a small loop in the wiring (secure with stitching, hot glue, or secure to itself with electrical tape) to ease the strain of the wires on the connection point.
Finally, feed the cable through your project, and plug it into the battery back. Light up, and enjoy!
Project Examples
Here are some examples of the patches used in different ways.
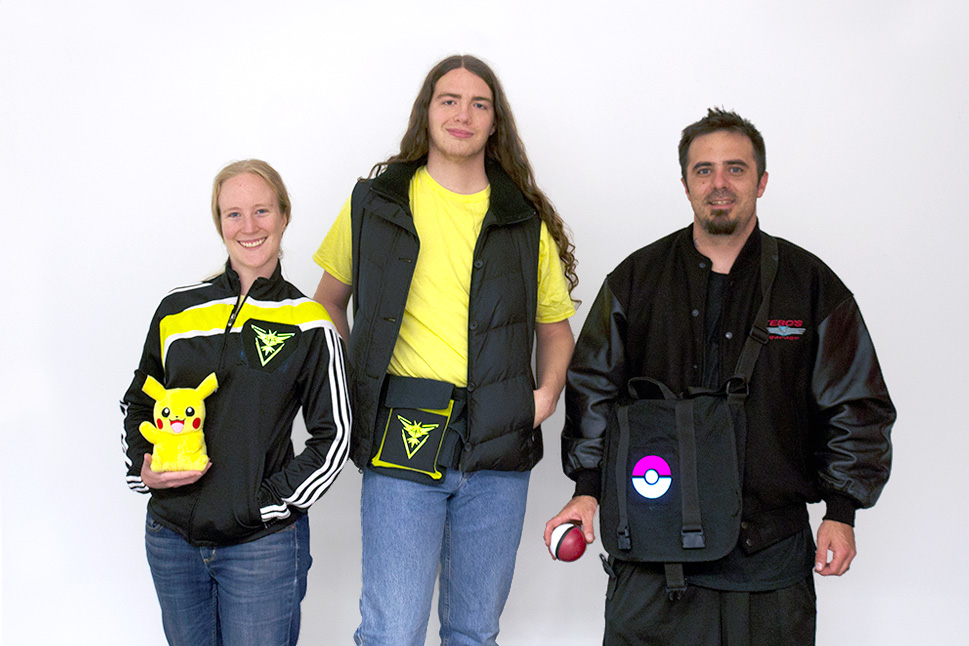
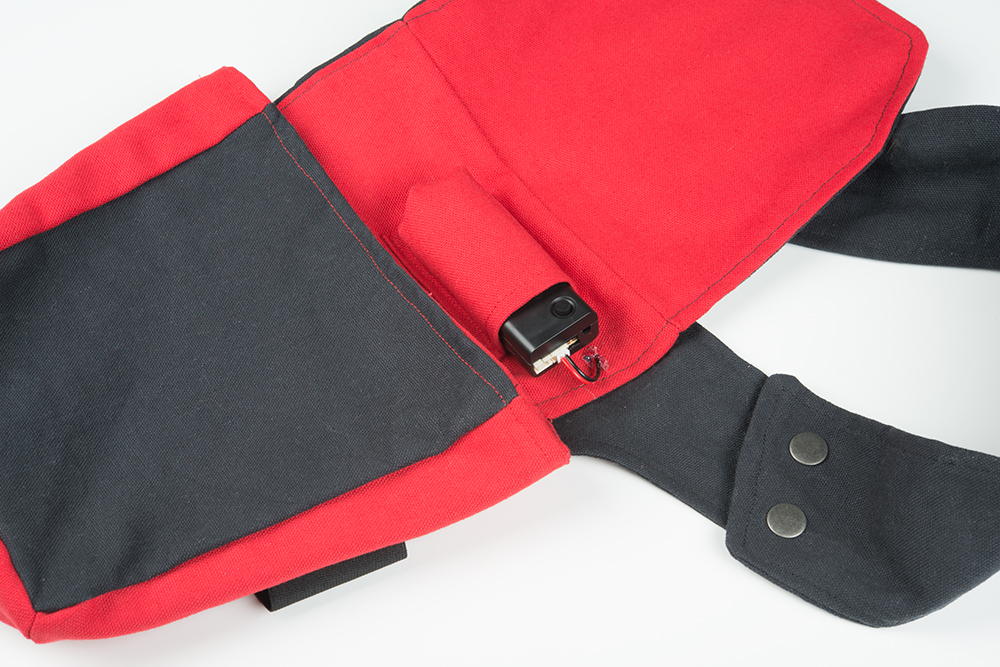
Team Instinct: We liked this track jacket, but it wasn't iron-friendly, so we sewed the patch on. For the utility belt, we created a backlit pouch so the panel could be removed. The messenger bag has an iron-on patch.

Team Mystic: A trimmed down panel was installed in this baseball cap. For the messenger bag, iron-on adhesive was applied directly to the canvas bag, then cut on the laser. After cutting, the EL panel was placed underneath and ironed on. The jacket uses a faux leather patch cut on a craft cutting machine and glued on top of the EL panel.
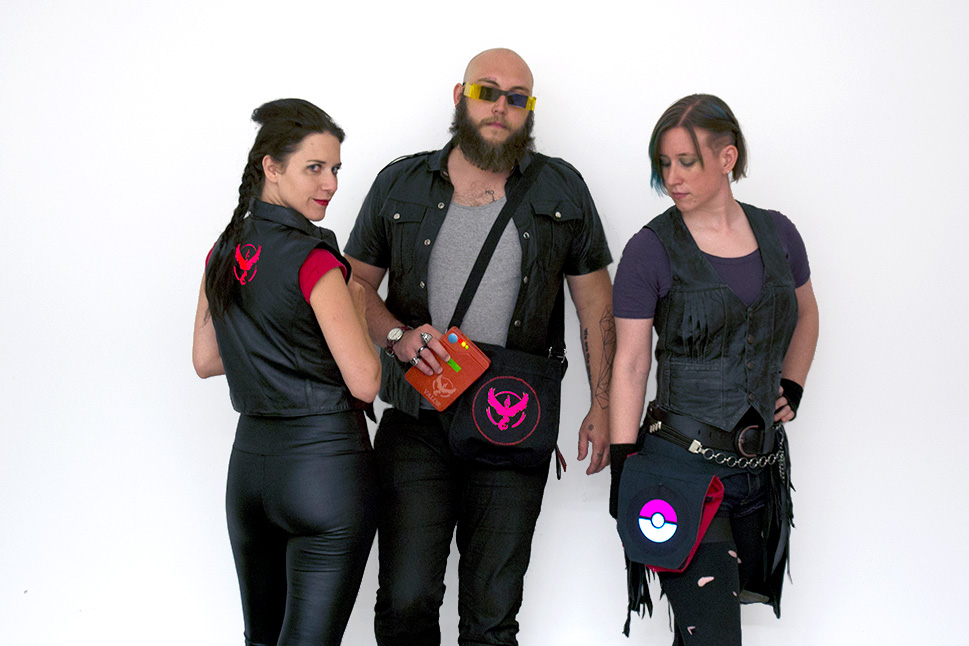
Team Valor: The leather vest was laser cut and an EL panel was applied underneath with glue instead of ironing on a patch. The messenger bag features a sewn on patch with contrast stitching. The thigh holster uses an iron-on patch.
Resources and Going Further
Here are some additional tutorials to check out:
Check out these other EL tutorials for ways to make your patch more interactive: