MaKey MaKey Quickstart Guide
This Tutorial is Retired!
This tutorial covers concepts or technologies that are no longer current. It's still here for you to read and enjoy, but may not be as useful as our newest tutorials.
View the updated tutorial: Makey Makey Classic Hookup Guide
 jimblom
Introduction
Welcome to the world of MaKey MaKey! A world where every day objects are much more than what they appear. Bananas are more than just a curvy fruit - they're keys to a virtual piano. Play-dough isn't just a tasty child's toy - it's the controlling force behind Pacman's up/down/left/right. And your simple pencil drawings are a portal to Portal.
Be prepared to look at every day objects in a whole new light. Be stoked! The world is your construction kit.
Covered in This Tutorial
This tutorial's purpose is to help get you up and running with the MaKey MaKey -- everything from what the board is, to installing it, to using it. Sections are split into pages, covering the following topics:
- What is the MaKey MaKey? -- What's what on the MaKey MaKey board?
- Installing the MaKey MaKey -- How to connect the board, and install it. Extra focus on Windows, which requires a driver be installed.
- Making Your First Key -- How to use banana cables to create your first MaKey MaKey button.
- Resources and Going Further -- Links to inspire and educate.
Materials Required
- MaKey MaKey -- The star of the show! The standard and retail versions of the MaKey MaKey should already include:
- A computer (Windows, Mac OS X, or Linux) with an available USB slot
- Software to read in key presses (e.g. Canabalt, Virtual Piano, Tetris, Powerpoint, etc.)
- Button material (e.g. fruit, Play-Doh, tin foil, copper tape, a friend)
- A primed imagination
Suggested Reading
- What is a Circuit? -- To create a MaKey MaKey "key", a circuit must be created so current can flow.
- Voltage, Current, Resistance and Ohm's Law -- Learn about the three fundamental concepts behind electricity, and how they're related by Ohm's law. The MaKey MaKey works by bending our idea of resistive material.
- Voltage Dividers -- Voltage dividers are the secret behind every MaKey MaKey input. This tutorial digs a bit deeper into circuit theory.
What is the MaKey MaKey?
The MaKey MaKey is a collaborative project between Jay Silver and Eric Rosenbaum of the MIT Media Lab, and us here at SparkFun Electronics. It's an invention kit that encourages people to find creative ways to interact with their computers, by using every day objects as a replacement for keyboards and mice. With the MaKey MaKey, you could replace your space key with a banana, use play-doh to move and click your mouse, or high-five your best friend to advance PowerPoint slides.
It's a Mouse/Keyboard
The MaKey MaKey is a two-sided circuit board. On the more simple, top side, the MaKey MaKey has 6-inputs: the up/down/left/right arrow keys, as well as the space bar and mouse left click:
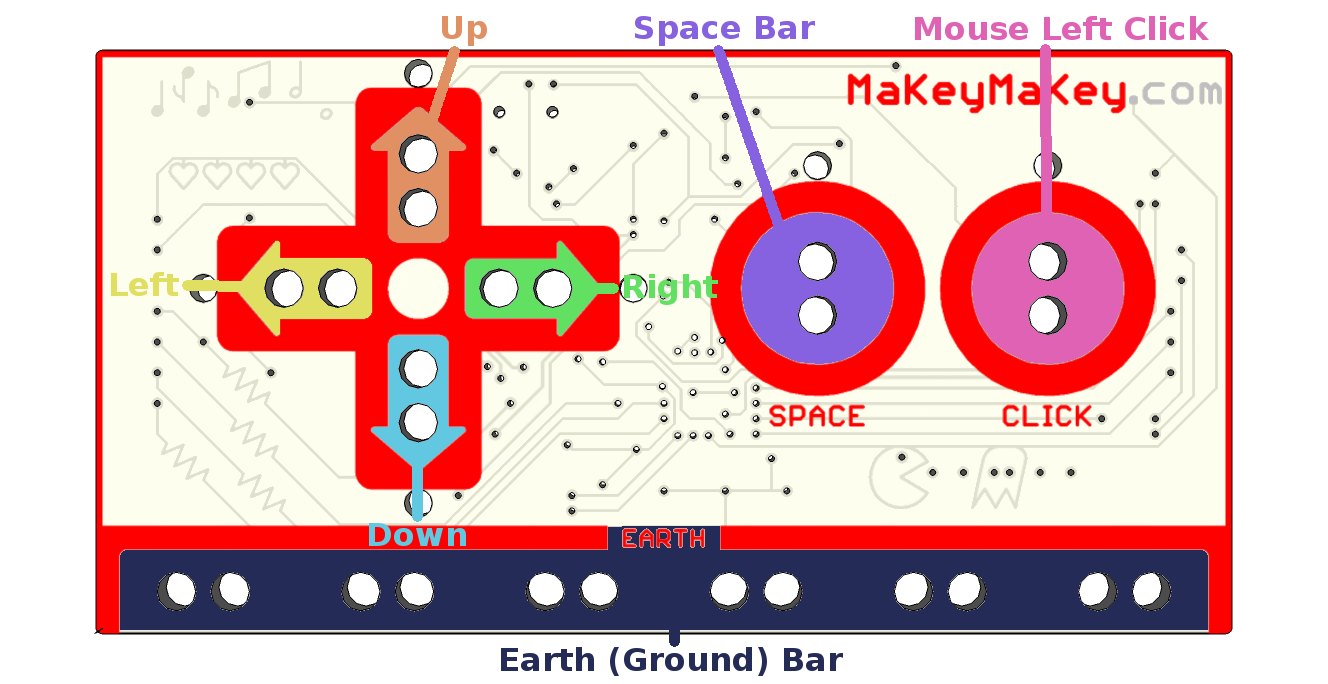
Each of those inputs as well as the very important “Earth bar” are available in the form of what I like to call “alligator-bait” connectors. You'll use the included alligator clip cables to clip right into the hole pairs. This will all be made much more clear in the next section. For now, let's keep summarizing your MaKey MaKey.
When you flip the board over, you've got access to 12 more keys: W, A, S, D, F, and G on the keyboard side, and up/down/left/right mouse movement and left/right clicks on the mouse side. The bottom header has six ground (aka Earth) outputs, while the top header is an expansion/output header. There are also a few LEDs on the back to indicate whether you're pressing a mouse or keyboard key.
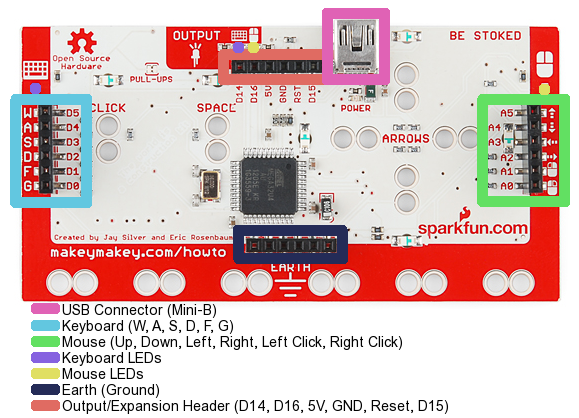
The pins on the back side are all available in the form of “jumper-wire” connectors. If you bought the deluxe kit, you'll already have the jumper wires needed, otherwise you can buy them separately here.
It's an Arduino
As I mentioned before, what makes the MaKey MaKey extra-awesome is the fact that it's completely Arduino-compatible.
Arduino is a super-popular electronics development platform. In essence, it's a tiny, little programmable computer, with seemingly infinite uses, that's been adopted as the go-to electronics platform for artists and electronics veterans alike.
What's made Arduino so popular, though, is the fact that it's a lot more than just a board full of electronics. It's a well-documented programming environment. It's a huge electronics and programming resource manual. And, most importantly, it's a community full of both budding electronics-addicts, and helpful EE know-it-alls.
But, I digress. Basically, the MaKey MaKey's Arduino-ness, means that you can easily reprogram it to work just exactly how you want. Do you need to replace W, A, S, D, F and G with Q, W, E, R, T, and Y? You're about six lines of easy code edits, and one button click away from that quick fix!
Installing the Board
Enough talk, let's start making! On this page we'll detail the installation process for both Windows and Mac OS X (which should match Linux pretty closely).
Windows Installation
If you're a Windows person, there are drivers. Sort of. The keyboard/mouse part of the MaKey MaKey should not require drivers. If you have no interest in reprogramming the board, then skip this part. But, it's really worth it to install the drivers. You want to get the most out of your MaKey MaKey, right?
First, you'll need a copy of the driver. Click here to grab the driver. You'll need to unzip that folder. Remember where it saves to on your computer!
- The first time you plug your MaKey MaKey in, Windows will try to find drivers for it. It'll fail pretty miserably. You might get an error like this:

- So, we'll tell Windows what's what with these drivers. You'll need to open your Device Manager. Either by navigating to your Control Panel, then System, and then Device Manager. Or (my preferred method) by running (press either Windows Key + R, or Start > Run) devmgmt.msc.
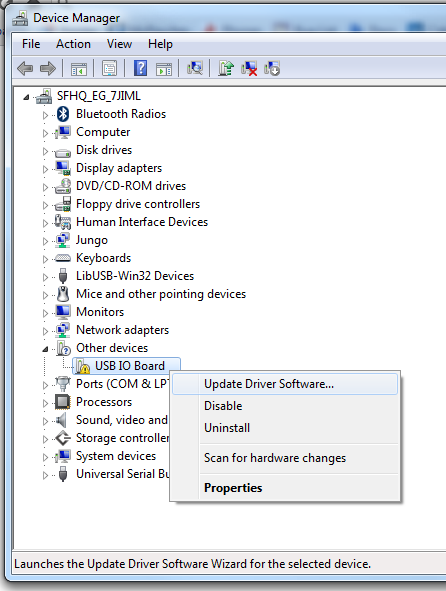
- In the Device Manager, scroll down to Other Devices. There you should find the cause of all this unpleasantness. Mr. "USB IO Board". Right click that and select Update Driver Software....
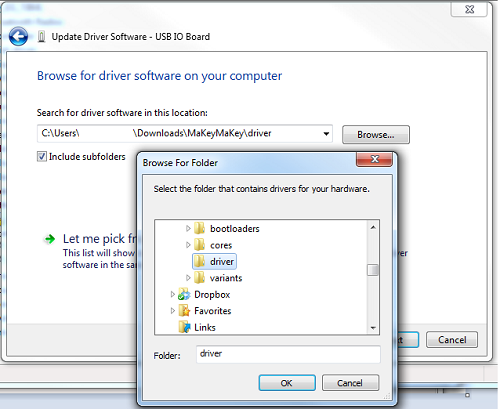
- Next Windows will ask you how you want to search for the driver. Well, it's already failed at searching "automatically" for the driver, so let's pick Browse my computer for driver software. On the next screen, click Browse... and navigate to the folder where you stored the driver (Downloads perhaps?). Then you can click Next.
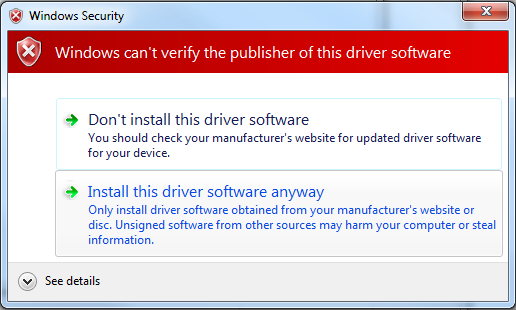
- Uh, oh. Red alert. Windows security is being a little nosy. You can safely click Install this driver software anyway.
- Finally, after a few moments you should be greeted with something like this:
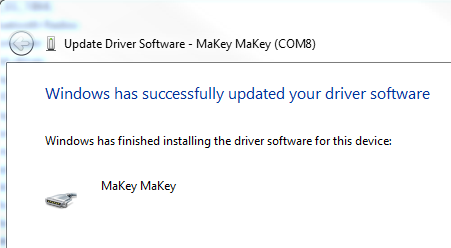
- Do a happy dance!
If you're having any trouble installing drivers, please don't hesitate to contact our technical support team. We're more than happy to help out!
Mac Installation
If you're a Mac or Linux person, there are no drivers! When you plug your MaKey MaKey in, you'll be greeted with a screen like this:
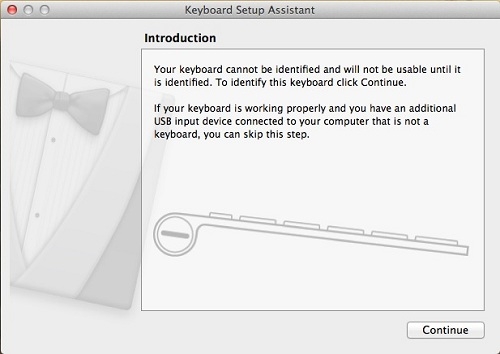
To which you can reply with a "Continue". That'll be followed by:
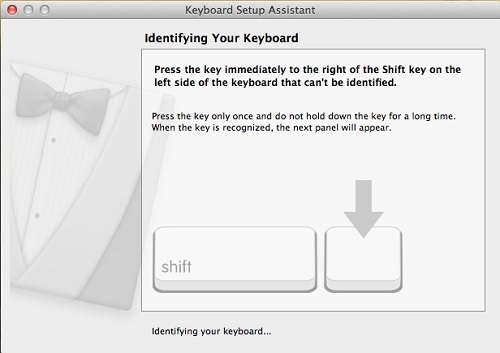
The MaKey MaKey doesn't exactly have a shift key, much less a key next to it. I'm not exactly sure of what Mac OS is trying to do here, but you're safe to ignore this window by just closing it. You'll only be asked to "Identify Your Keyboard" the first time you plug the MaKey MaKey in.
Making Your First Key
The most simple MaKey MaKey key you can make is one that only uses your fingers. Try touching the Earth bar while simultaneously touching the space circle pad. The LED above the SPACE key should light up, and a space command should be sent to your computer.
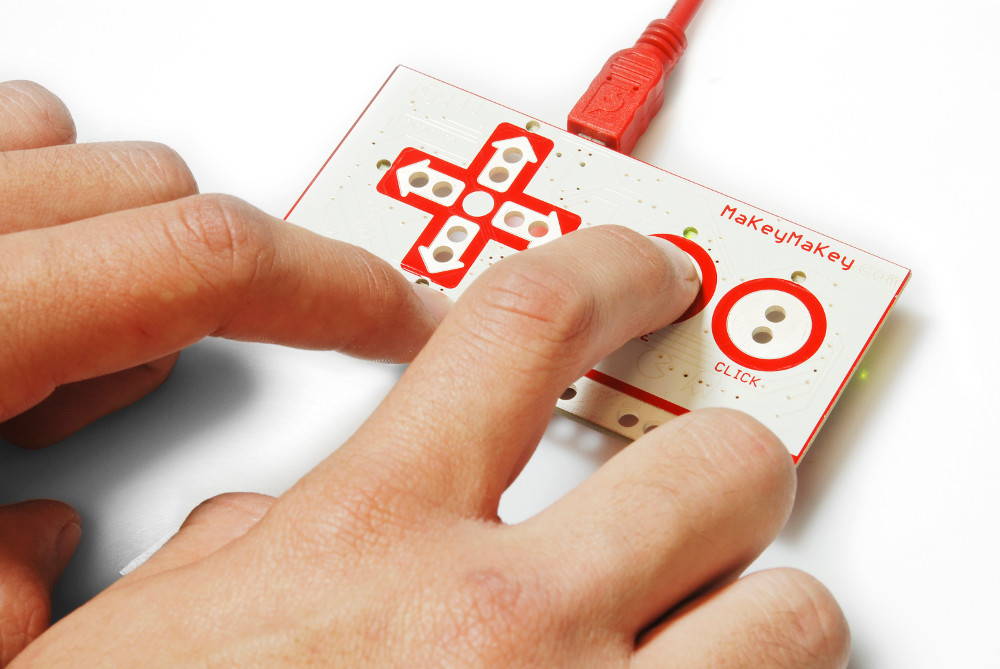
Now try leaving one finger on the Earth bar while quickly tapping the space button. Getting a feel for it? It should work just like your standard space key!
MaKey Key-Making Materials
To make your "standard" key with the MaKey MaKey you need the following:
- A connection to a MaKey MaKey input. This can be done using alligator clips on the top side, or jumper wires on the bottom.
- Connection to a MaKey MaKey ground (Earth). Again, you'll connect to earth using either alligator clips or jumper wires.
- Some sort of key material. This is the fun/creative part! There's a world of MaKey MaKey keys out there. Anything that's even slightly conductive is just waiting to become a computer input. The classics, of course, are your fingers, bananas, and pencil scratchings.
- Something to activate the key, by connecting between the key material and the ground input. Your fingers work pretty well for this. Anything even slightly conductive will do though.
Making a Key
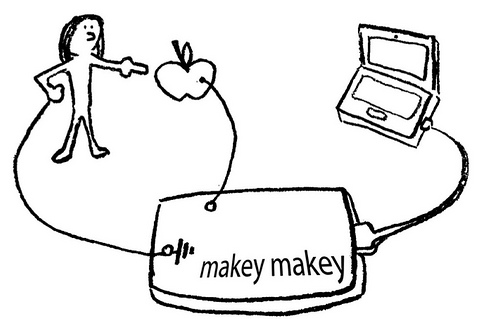
Activating a key means creating a closed circuit. For the circuit to work, electrons have to be able to flow from the MaKey MaKey input key to MaKey MaKey's ground. Usually your fingers will be the missing link between those two:
Let's try making a bona fide MaKey MaKey key. First, you'll need to find some sort of key object. Dig around your house, check your fruit basket, your coin purse, or grab a pencil and make a drawing.
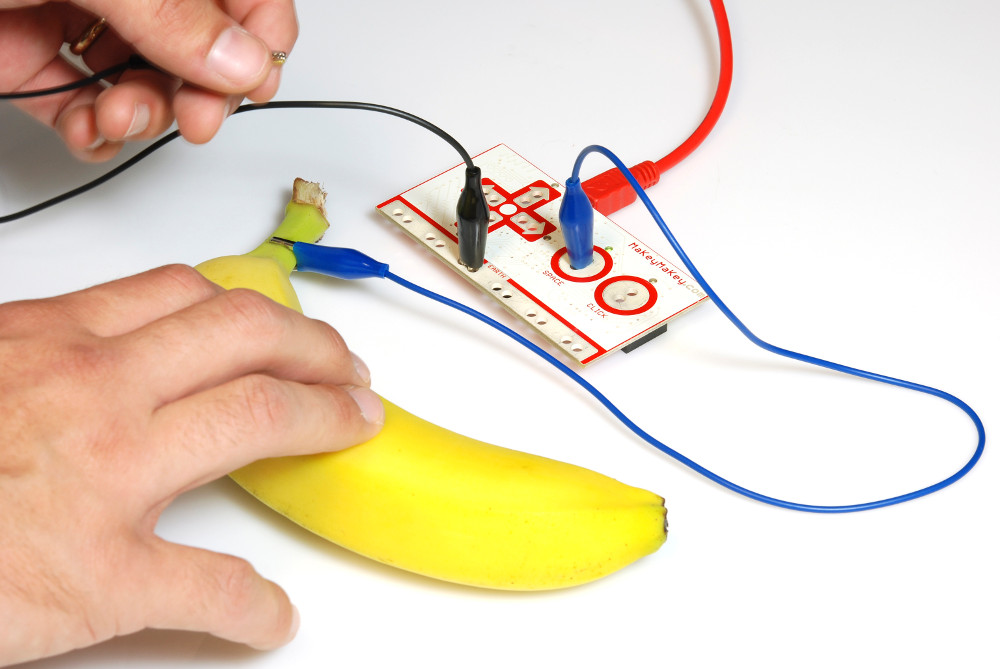
Pick out your favorite-colored alligator clip cable, open one of the jaws, and snap it down onto your key. And clip the other end of the clip into one of the MaKey MaKey top-side inputs. SPACE is great for testing purposes:
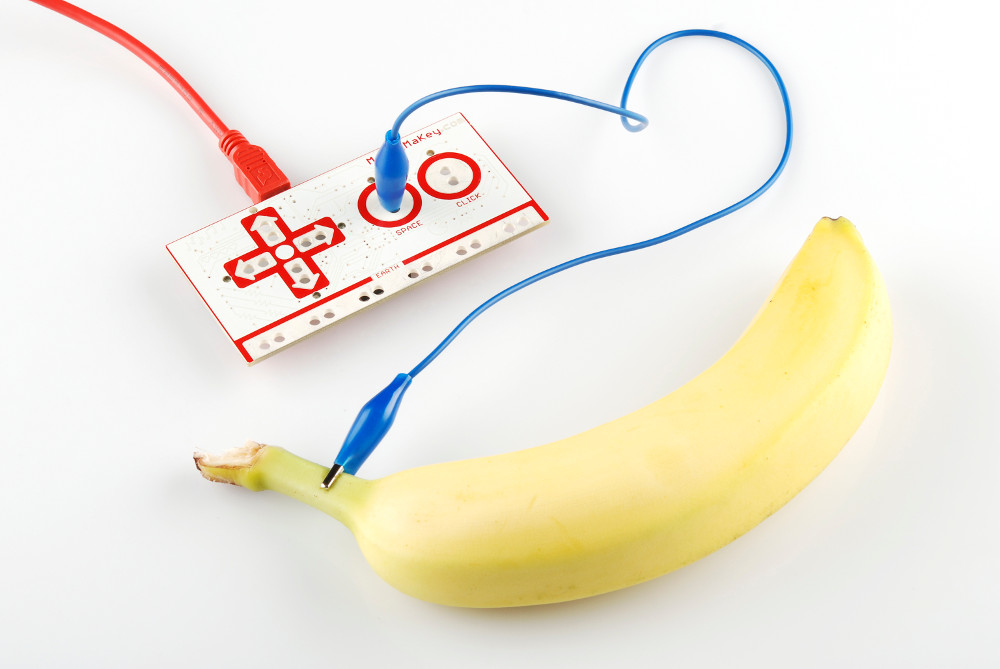
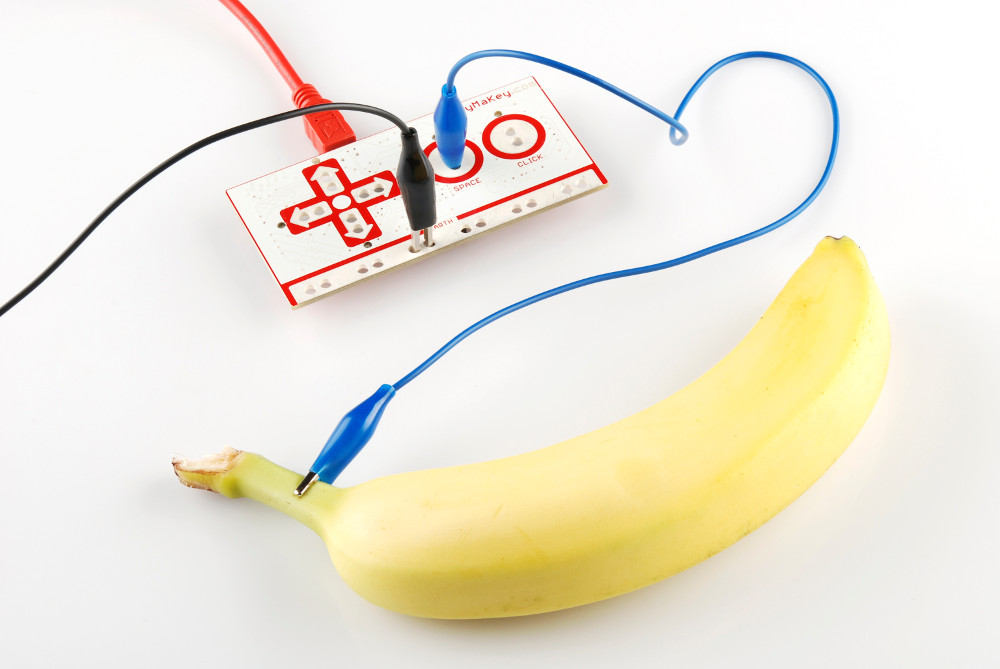
Now, grab a second cable for the ground connection. Black is the classic "ground color", but set your own trend and pick whatever you want. Clip one end of one cable into the Earth bar, and let the other end dangle for now.
Open up some sort of text editor (Notepad, Word, TextEdit, etc.) on your computer. Remember that, just as with your boring ol' keyboard, your computer will interpret keypresses differently depending on what program is active.
Finally! Grab the dangling end of the ground cable with one hand. Make sure you're touching the metal part of the clip. Then use your other hand to touch the banana, or whatever your key might be. BAM! Space!
Adding More Keys, Using the Back
To add more keys, simply connect another alligator clip to another MaKey MaKey input (e.g. arrow keys or mouse click), and connect the other end to a key material. No further ground connections are necessary.
Want to make use of the back side of the board? You can follow a similar set of steps, replacing alligator cables with jumper wires. Jumper wires are a bit tougher to connect to keys. An easy solution is to connect an alligator cable to the free end of the jumper.
Play-doh, or other materials which enable you to jab the jumper wire in also work great! How about a Play-doh Mouse:
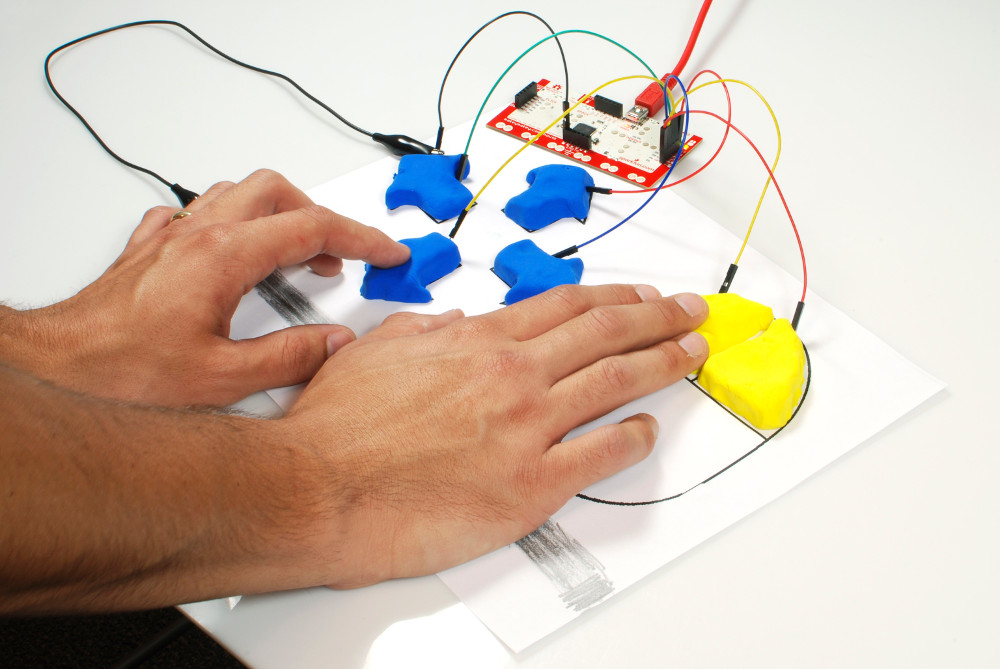
(Hint: Get creative with the ground connection. In the example above, we connected ground to a penciled bar where we rested our hand.)
What Makes a Key? Conductivity.
A material is a conductor if it allows electricity (even just a tiny bit of it) to flow. This is the magic behind the MaKey MaKey: most of the world is conductive! Anything metal will almost certainly conduct electricity. The "standard" conductors are copper, silver, gold, etc. But with the Makey MaKey our conductor scope grows. Most organic materials - things like human skin, liquids, foods, and frog legs - are at least a little conductive. And that's really all the MaKey MaKey needs.
If an object isn't conductive, it's an insulator. Common insulators include plastic, glass, ceramic and wood. You can usually tell just by looking at something whether it's an insulator or conductor. You'll have to watch out for objects like this, as they just won't work with the MaKey MaKey. To get around that, though, you can line them with a conductive material (like copper tape, or just regular old wire), to create the illusion that they're conducting electricity.
Resistance is a measure of exactly how conductive a device is. Resistance can be measured with just about any standard multimeter. Any object with a resistance of about 4.5MΩ (that's a really high resistance) or less should work as a MaKey MaKey input. If you're not sure if something will work with the MaKey MaKey, whip out a multimeter (buy one if you have to, they're an essential tool for electronics hobbyists) and test that resistance! Or, better yet, just connect it to your MaKey MaKey and experiment.
Resources and Going Further
If you're left with any questions after reading this tutorial, here are all the MaKey MaKey-related resources we can find:
- MaKey MaKey Schematic -- A PDF of the MaKey MaKey's circuit.
- MaKey MaKey Eagle Files -- The design files. What we use to make the PCB.
- MaKey MaKey GitHub Repository -- Where we keep all of the MaKey MaKey's firmware and design files up to date.
- Windows Driver -- Should work for all compatible versions of Windows.
- MaKeyMaKey.com -- The home of MaKey MaKey. Check out their Quick Start Guide for more help.
- SFE InventorSpace - Additional classroom activities and tutorials.
Example Projects
Sometimes following by example is the best way to learn. If you're not sure where to start with the MaKey MaKey, give these examples a look-over. I hope they inspire you! If you want your project added to this list, post it in the comments below, or send us an email!
- O Say Can You See (Lunch)
- j.viewz Playing Teardrop With Vegetables
- Banana Keyboard with Beau Silver
- Playing Minecraft with a MaKey MaKey
- Office Plant Drum Session
Advanced MaKey MaKey-ing
Have you outgrown the MaKey MaKey's default arrow, space, and home keys? Want to remap the MaKey MaKey inputs, program the MaKey MaKey in Arduino, and use that mysterious output connector? Then join us over on part 2 of this quickstart guide!