Makey Makey Classic Hookup Guide
 jimblom,
  bboyho
Making Your First Key
Makey Makey Key-Making Materials
To make your "standard" key with the Makey Makey you need the following:
- A connection to a Makey Makey input. This can be done using alligator clips on the the hole pairs, or jumper wires on the black connector sockets.
- Connection to a Makey Makey ground (Earth). Again, you'll connect to earth using either alligator clips or jumper wires.
- Some sort of key material. This is the fun/creative part! There's a world of Makey Makey keys out there. Anything that's even slightly conductive is just waiting to become a computer input. The classics include your fingers, bananas and pencil scratchings.
- Something to activate the key by connecting between the key material and the ground input. Your fingers work pretty well for this. Anything even slightly conductive will do, though.
Making a Key
Activating a key means creating a closed circuit. For the circuit to work, electrons have to be able to flow from the Makey Makey input key to Makey Makey's ground. Usually your fingers will be the missing link between those two:

Let's try making a bona fide Makey Makey key. First, you'll need to find some sort of key object. Dig around your house, check your fruit basket or coin purse, or grab a pencil and make a drawing to try it out.
Pick out your favorite-colored alligator clip cable, open one of the jaws, and snap it down onto your key. Clip the other end of the clip into one of the Makey Makey top-side inputs. SPACE is great for testing purposes, so we will start with that key pad:
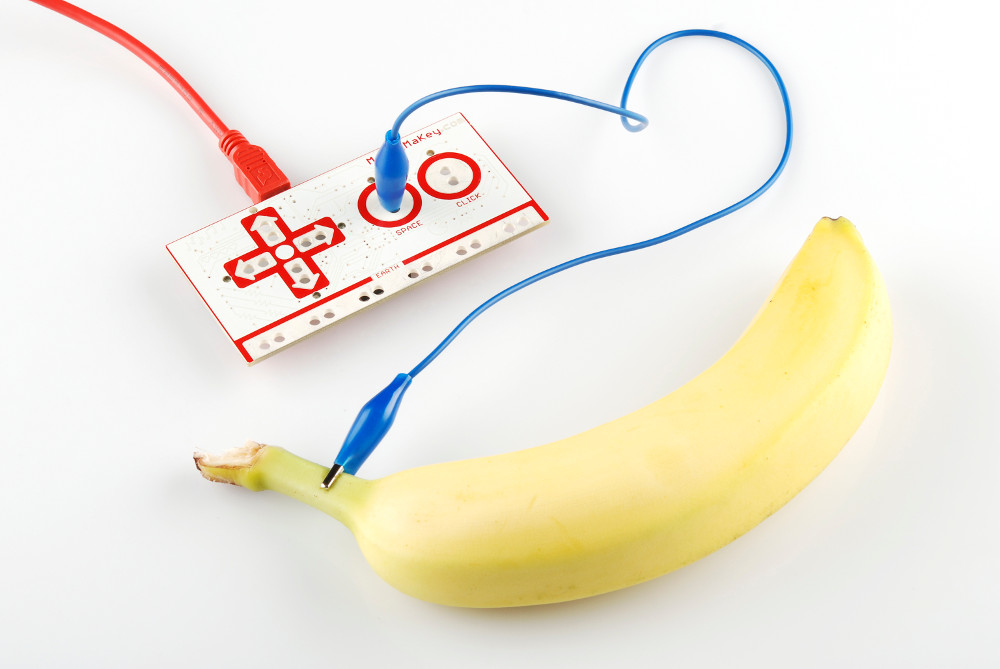
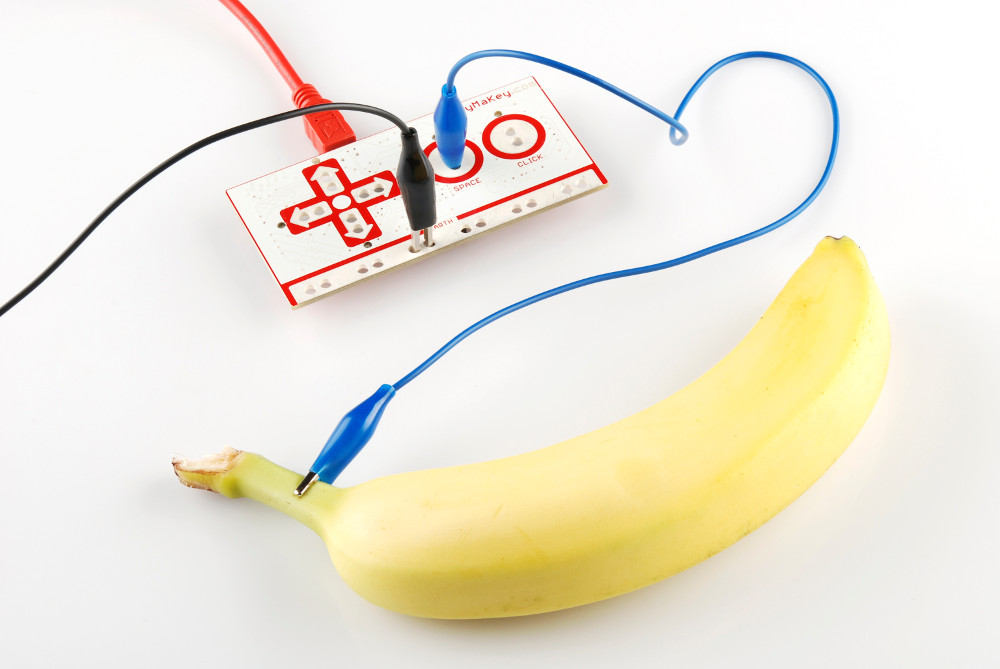
Now, grab a second cable for the ground connection. Black is the classic "ground color", but set your own trend and pick whatever you want. Clip one end of one cable into the Earth bar and let the other end dangle for now.
Open up some sort of text editor (Notepad, Word, TextEdit, etc.) on your computer. Or you can click between the words in the test box provided below.
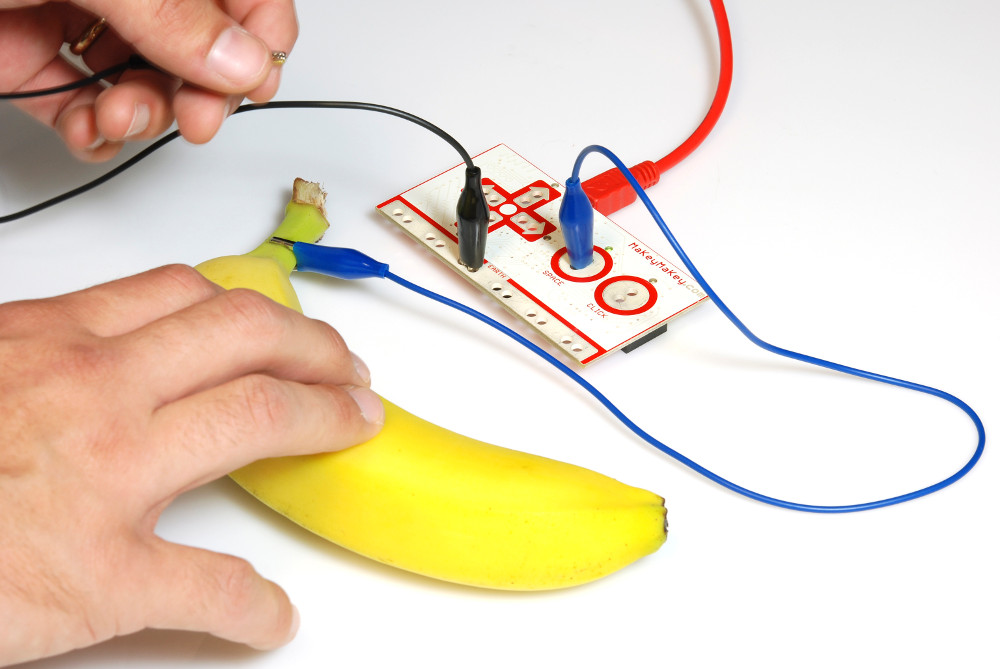
Finally! Grab the dangling end of the ground cable with one hand. Make sure you're touching the metal part of the clip. Then use your other hand to touch the banana, or whatever your key might be. BAM! Space!
Experimenting With Key Materials
Don't have a banana? Try experimenting with different materials. Some materials conduct better than others. Certain materials can also be conductive over a period of time. Try it out!
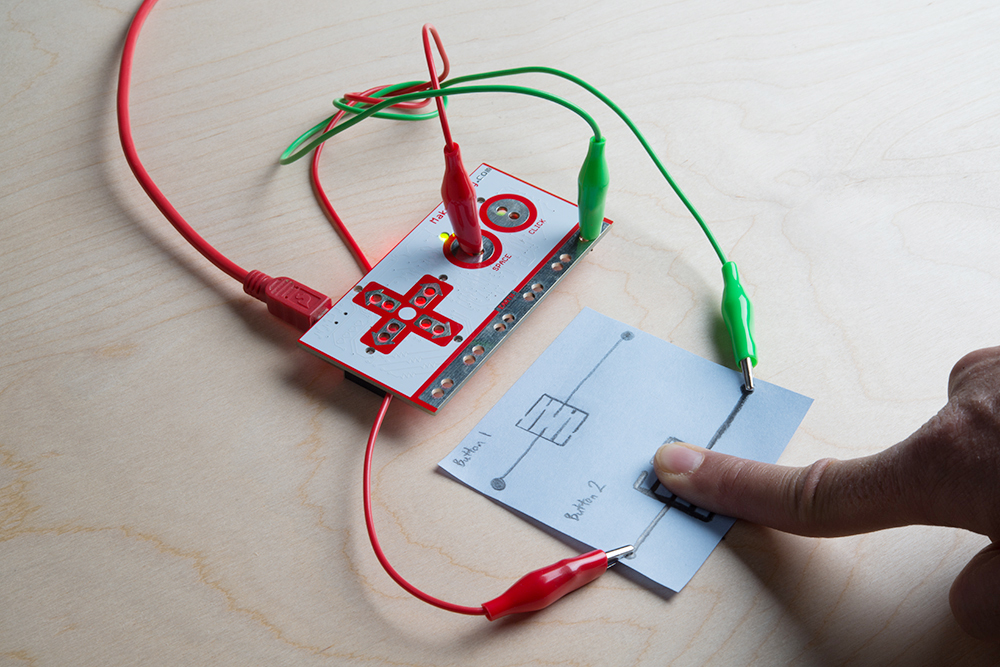
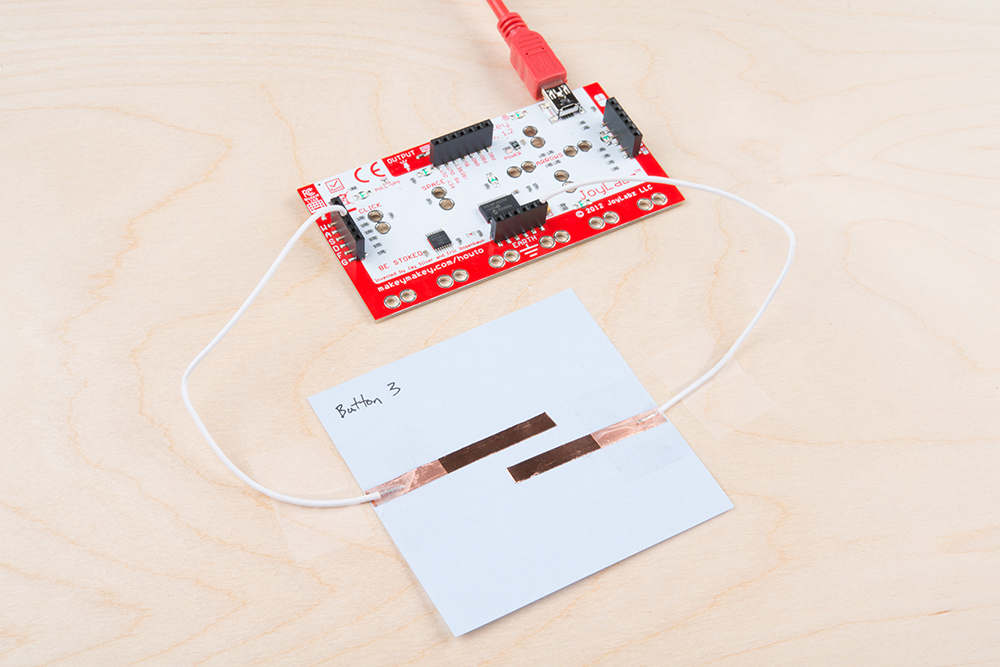
Below is an example of a hand-drawn key from a standard pencil. A dotted circle was drawn on two sides of a piece of paper and extended to the center. Lines of alternating lengths were drawn (short and long) from each extension with a gap between the lines so that one finger could be used as the key.

The first drawing with the thin lines labeled "Button 1" was a poor conductor on paper. However, the second drawing with the bold, thick lines labeled "Button 2" was able to conduct. In this case, the pencil was only able to conduct when there was enough of the material. After a few uses, the lines faded and required another layer of graphite.
Using the Back
Remember the black connectors on the other side of the board? There are additional keys that you can connect! You can follow a similar set of steps, replacing alligator cables with jumper wires. The wires included with the Makey Makey is one type of jumper wire. Jumper wires can be a bit tougher to connect to keys. An easy solution is to connect an alligator cable to the free end of the jumper.
Let's try it out. Insert one end of the tinned tipped wire fully into a socket. Connect the other end to a conductive material. You may need to use an alligator cable to extend and connect to the material. Repeat for the ground connection.
The example below is similar to the hand-drawn button. Strips of copper tape were used for "Button 3" instead of a pencil. Since the material is more conductive and thicker than the hand-drawn lines, only two stripes were used. Regular tape was used to secure the tinned ends of the wire against the paper and table. After a few uses, the copper fared better than the graphite pencil.
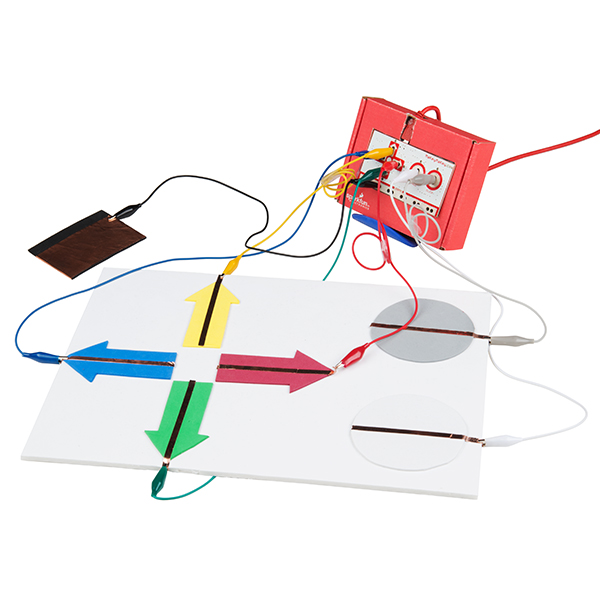
Adding More Keys!
To add more keys, simply connect another alligator clip to another Makey Makey input (e.g., arrow keys or mouse click) and connect the other end to a key material. No further ground connections are necessary as long as there is one available. Be creative and connect as many keys as you can to the Makey Makey!

What Makes a Key? Conductivity.
A material is a conductor if it allows electricity (even just a tiny bit of it) to flow. This is the magic behind the Makey Makey: most of the world is conductive! Anything metal will almost certainly conduct electricity. The "standard" conductors are copper, silver, gold, etc. But with the Makey Makey our conductor scope grows. Most organic materials --- things like human skin, liquids, foods and frog legs --- are at least a little conductive. And that's really all the Makey Makey needs.
If an object isn't conductive, it's an insulator. Common insulators include plastic, glass, ceramic and wood. You can usually tell just by looking at something whether it's an insulator or conductor. You'll have to watch out for objects like this, as they just won't work with the Makey Makey. To get around that, though, you can line them with a conductive material (like copper tape, or just regular old wire) or paint. This creates the illusion that they're conducting electricity.
Resistance is a measure of exactly how conductive a device is. Resistance can be measured with just about any standard multimeter. Any object with a resistance of about 4.5MΩ (that's a really high resistance) or less should work as a Makey Makey input. If you're not sure if something will work with the Makey Makey, whip out a multimeter (buy one if you have to; they're an essential tool for electronics hobbyists) and test that resistance! Or, better yet, just connect it to your Makey Makey and experiment.