$8.60
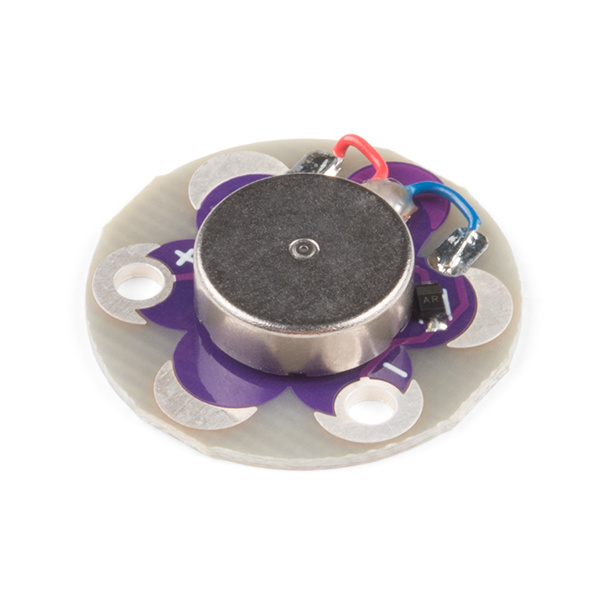
The LilyPad Vibe Board is a small vibration motor that can be sewn into projects with conductive thread and controlled by a LilyPad Arduino. The board can be used as a physical indicator on clothing and costumes for haptic feedback.
To follow along with this tutorial, you will need the following materials. You may not need everything though depending on what you have. Add it to your cart, read through the guide, and adjust the cart as necessary.
If you aren’t familiar with the following concepts, we recommend checking out these tutorials before continuing.
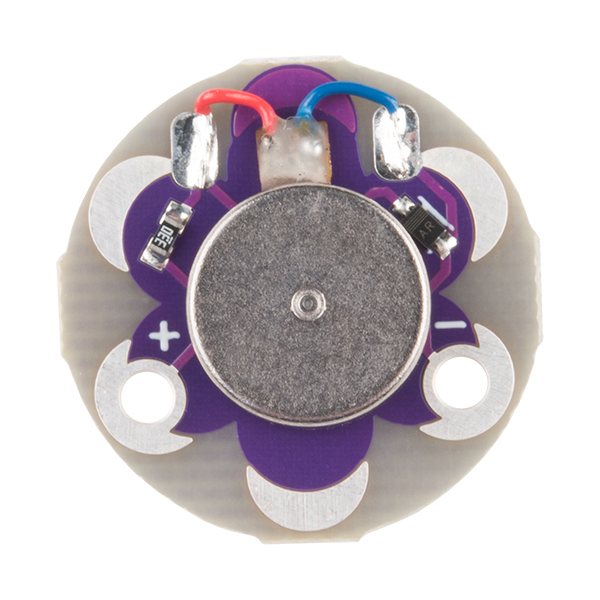
The LilyPad Vibe Board has two sew tabs: Power (+) and Ground (--). Next to each tab is a white label for reference. For power, you can connect an input voltage anywhere between 3.3V and 5V. The motor can vibrate faster as you provide more voltage. We recommend connecting the (+) tab to a MOSFET to drive the motor when using it with an Arduino due to the amount of current each I/O pin can source . To adjust the intensity, we recommend using a PWM capable sew tab on a LilyPad Arduino.
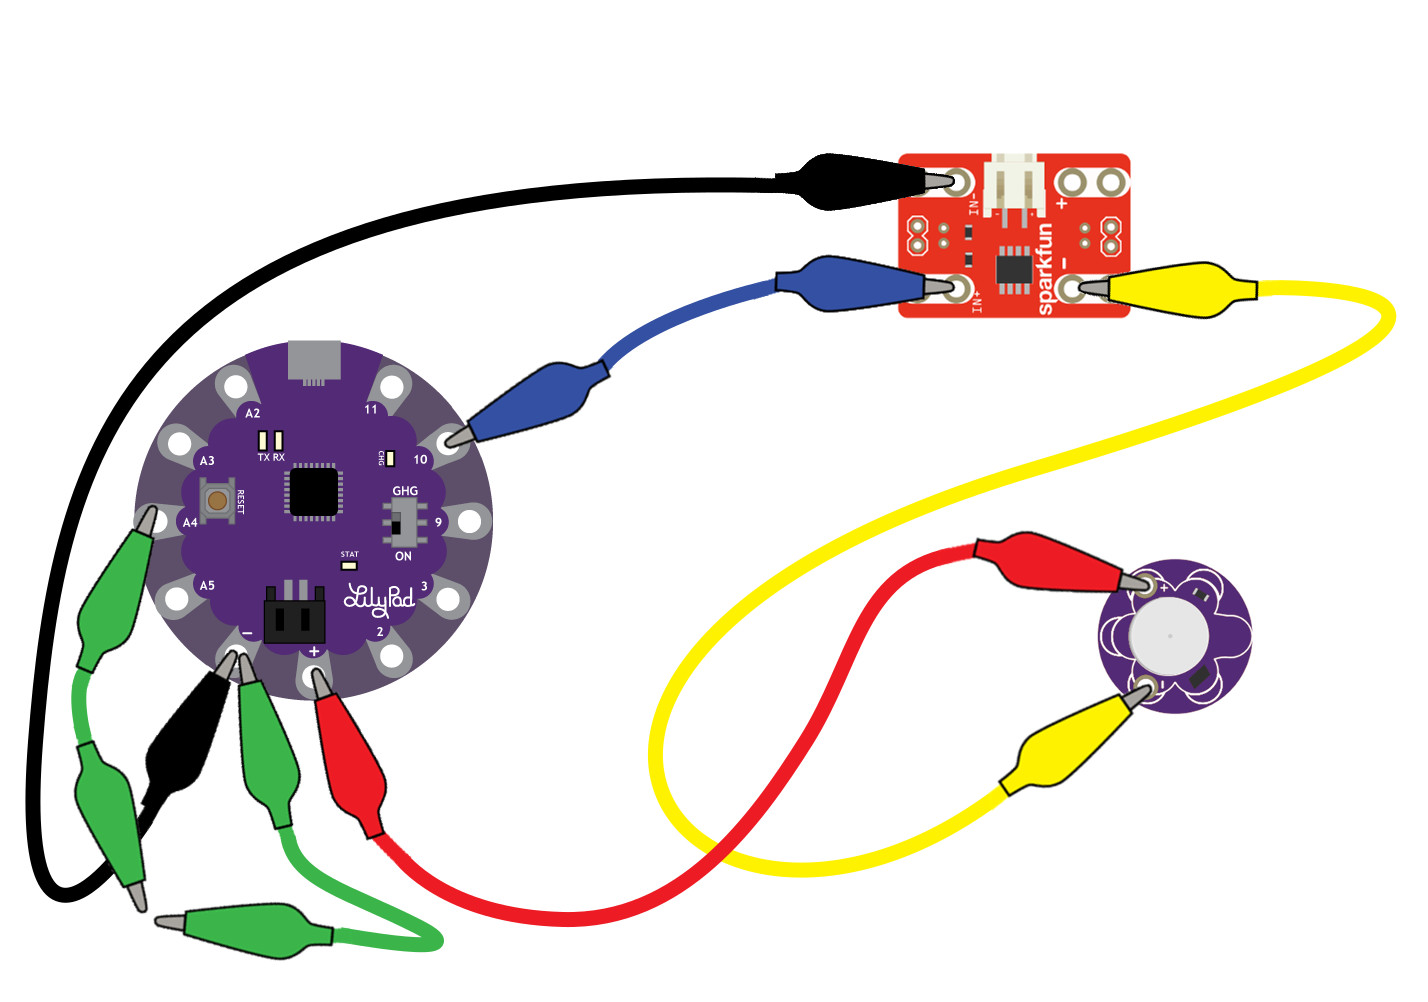
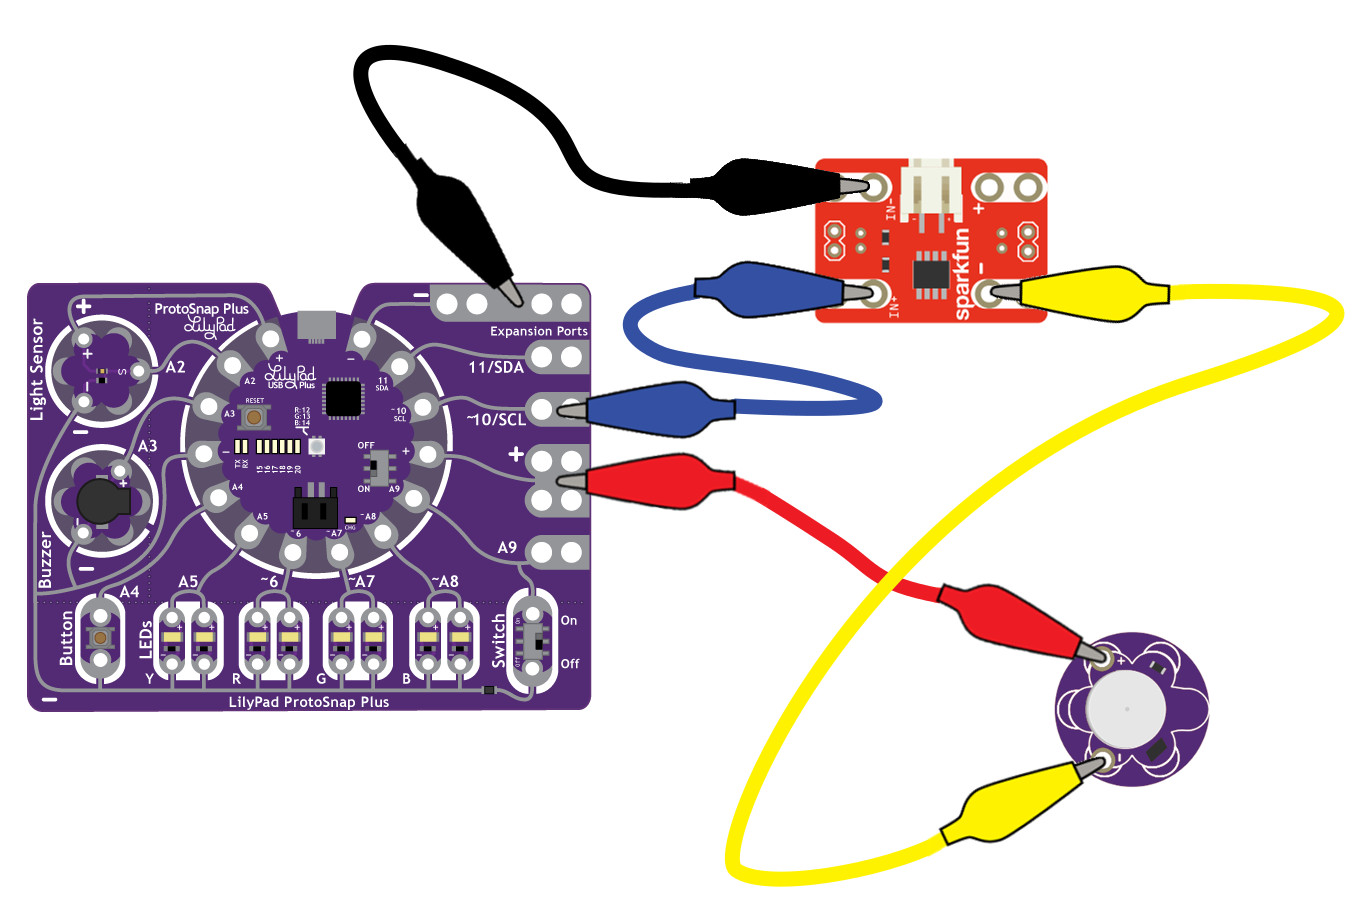
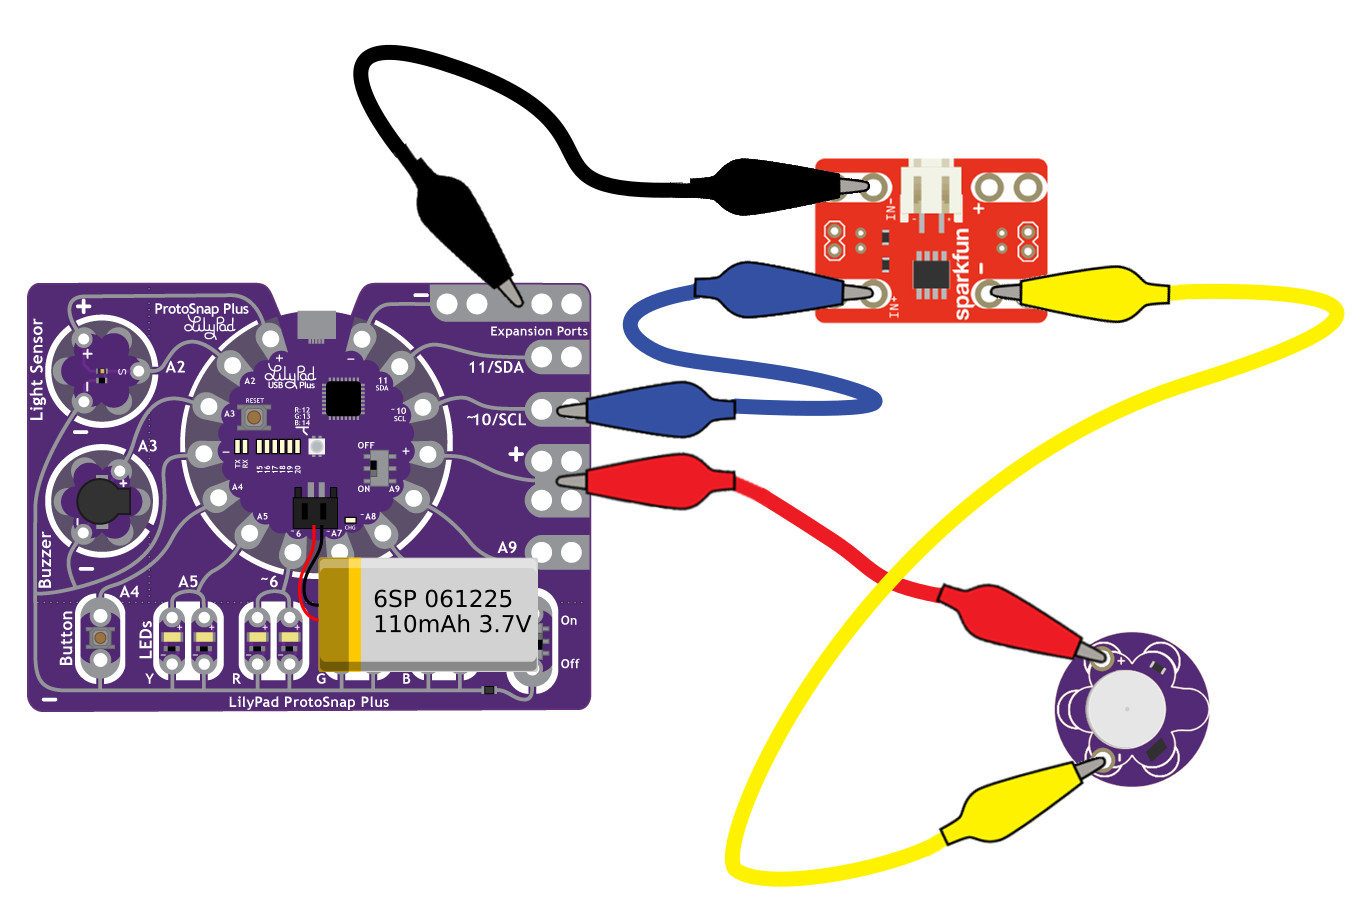
To follow along with the code examples in this tutorial, connect the vibe board and transistor to a LilyPad Arduino as shown in the images below. Use alligator clips to temporarily connect the circuit. Connect the LilyPad's "+" sew tab to the "+" sew tab of the vibe board. Make another connection between the "--" sew tab and the MOSFET power controller's "--" sew tab. Keep in mind that the "--" label on the MOSFET power controller does not represent ground (GND or "--"). Ground is represented as "IN--". The "IN--" should be connected to a LilyPad Arduino's "--" sew tab.
To control the vibe board, connect a PWM pin (pin 10 in the following cases) to the "IN+". When testing the example for button feedback, simply connect A4 to the LilyPad Arduino's "--" ground sew tab. After you are finished prototyping, replace the alligator clips with conductive thread traces for permanent connection in your project.
Copy the code below and paste it into your Arduino IDE. Select your board (i.e. LilyPad Arduino USB for the LilyPad USB, LilyPad USB Plus for the LilyPad USB Plus, etc.) and COM port. Finally, click the upload button to upload the demo on your Arduino.
language:c
/*
  LilyPad Vibe Board: Button Feedback
  Written by: Ho Yun "Bobby" Chan
  @ SparkFun Electronics
  Date: 1/14/2019
  https://www.sparkfun.com/products/11008

  The main code checks for a button press. If there is a button press,
  the Arduino turns on the LilyPad Vibe Board for haptic feedback.
  For a visual cue, the LED will turn on too. If not, the LED and
  motor will remain off.
*/

const int motorPin = 10;     // motor connected to PWM pin 9
const int button1Pin = A4;  // pushbutton 1 pin
const int ledPin =  13;     // LED pin

int button1State;  //check state of button press

void setup() {
  //Serial.begin(9600); //setup serial monitor, uncomment Serial.print()'s to debug
  //Serial.println("Begin LilyPad Vibe Motor Tests");

  pinMode(button1Pin, INPUT_PULLUP);//set internal pull up for button
  pinMode(ledPin, OUTPUT); //visual feedback


  //Quick Test 1: Check If LED and Motor Can Turn On

  //Serial.println("Turn LilyPad Vibe Motor And LED ON");
  //digitalWrite(ledPin, HIGH);  // turn the LED on
  analogWrite(motorPin, 255);  //turn motor
  delay(300);

  //Serial.println("Turn LilyPad Vibe Motor And LED OFF");
  //digitalWrite(ledPin, LOW);  // turn the LED off
  analogWrite(motorPin, 0);   //turn motor off
  delay(300);

  //Quick Test 2: Check Intensity of Motor (turns on at about 130
  // fade in from min to max in increments of 5 points:
  for (int fadeValue = 0 ; fadeValue <= 255; fadeValue += 5) {
    // sets the value (range from 0 to 255):
    analogWrite(motorPin, fadeValue);
    //Serial.print("LilyPad Vibe Motor Intensity = ");
    //Serial.println(fadeValue);

    // wait for 100 milliseconds to see motor
    delay(100);
  }
  // fade out from max to min in increments of 5 points:
  for (int fadeValue = 255 ; fadeValue >= 0; fadeValue -= 5) {
    // sets the value (range from 0 to 255):
    analogWrite(motorPin, fadeValue);
    //Serial.print("LilyPad Vibe Motor Intensity = ");
    //Serial.println(fadeValue);

    // wait for 100 milliseconds to see motor
    delay(100);
  }

}

void loop() {
  // Here we'll read the current pushbutton states into
  // a variable:

  // Remember that if the button is being pressed, it will be
  // connected to GND. If the button is not being pressed,
  // the pullup resistor will connect it to Vcc.

  // So the state will be LOW when it is being pressed,
  // and HIGH when it is not being pressed.

  // Now we'll use those states to control the LED.
  // Here's what we want to do:

  button1State = digitalRead(button1Pin);

  if (button1State == LOW)  // if we're pushing button 1
  {
    //Serial.println("Button has been pressed, turn LilyPad Vibe Motor And LED ON");
    digitalWrite(ledPin, HIGH);  // turn the LED on
    analogWrite(motorPin, 255);  //turn motor on
    delay(300);                  //slight delay for feedback
  }
  else
  {
    digitalWrite(ledPin, LOW);  // turn the LED
    analogWrite(motorPin, 0);   //turn motor off
    delay(300);
  }
}
After uploading, you should see the built-in LED on the LilyPad Arduino and the vibe motor turn on and off. The LilyPad Arduino will then slowly increase and decrease in intensity. The vibe motor will turn on when the Arduino's PWM output is around 130. Once we start looping in the loop() function, the LilyPad Arduino will check to see if there is a button press. If the button is pressed (i.e. or when A4 is connected to ground), the built-in LED and vibe motor will turn on. There is a slightly longer delay after this happens so there is enough time to detect when the motor is turned on as feedback. If there is no button press, both will remain off.
Once you are finished prototyping your project using the LilyPad Vibe Board, you can replace any temporary connections with conductive thread. For an overview of sewing with conductive thread, check out this guide:
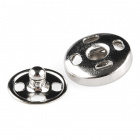
You can also make your own button by using metal snaps or any conductive material.
As you start embedding your circuit into your project, we recommend connecting a LiPo battery to the LilyPad's JST connector to regulate the voltage. There are also LiPo charge IC's built into LilyPad Arduinos to recharge the LiPo batteries so that it does not have to be removed from the circuit.
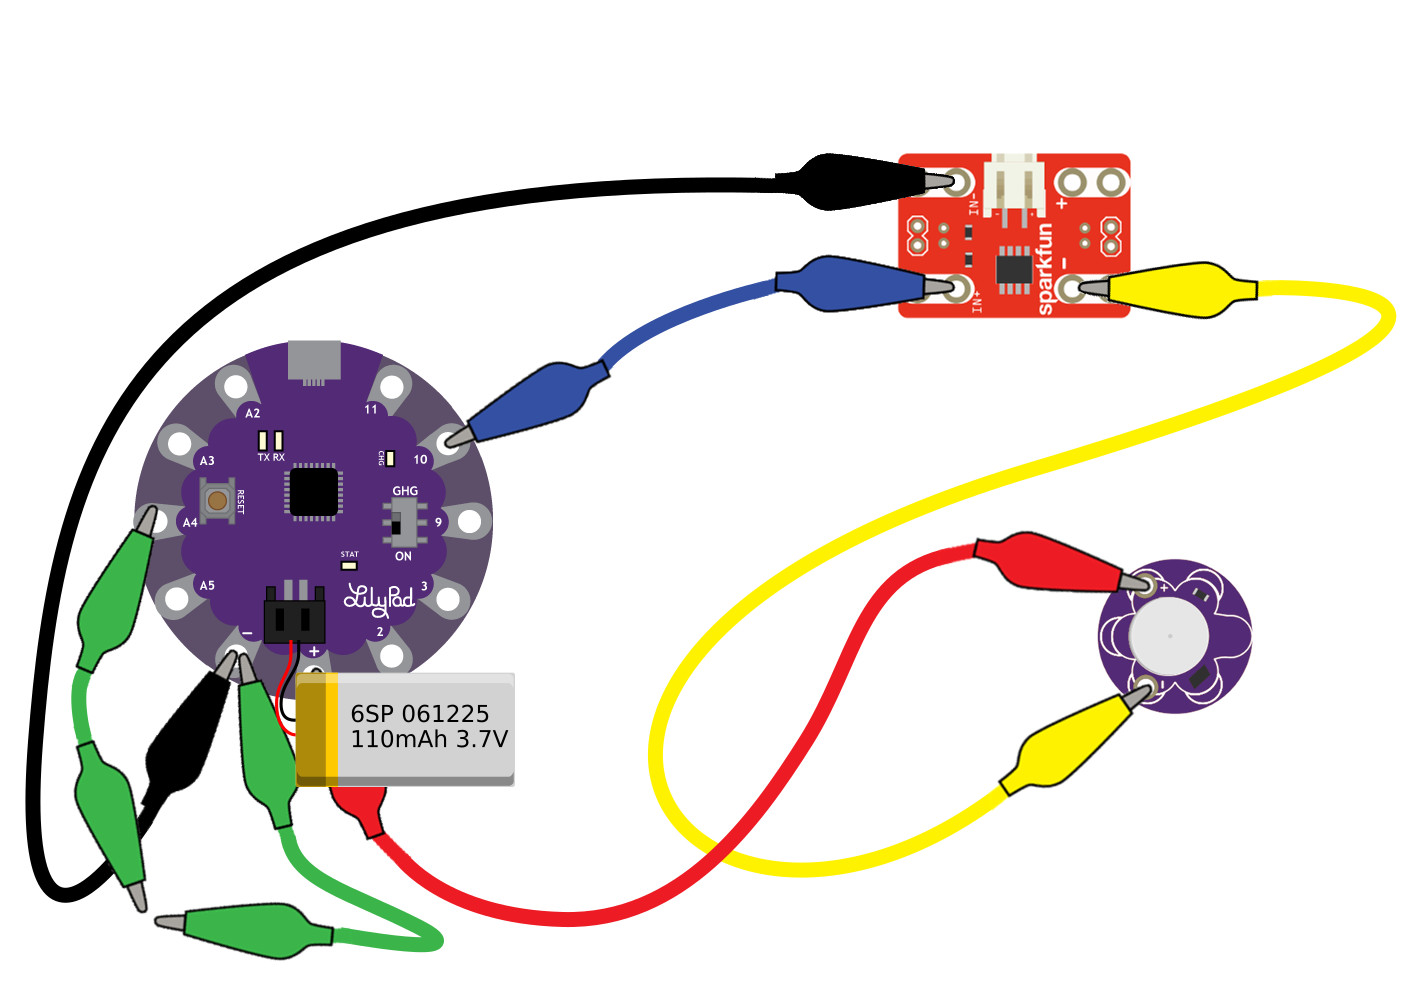 |
 |
| Circuits with LiPo batteries for remote power. Click on images for a closer view. | |
For more information about using LiPo batteries with LilyPad, check out the tutorial for Powering Your Project.
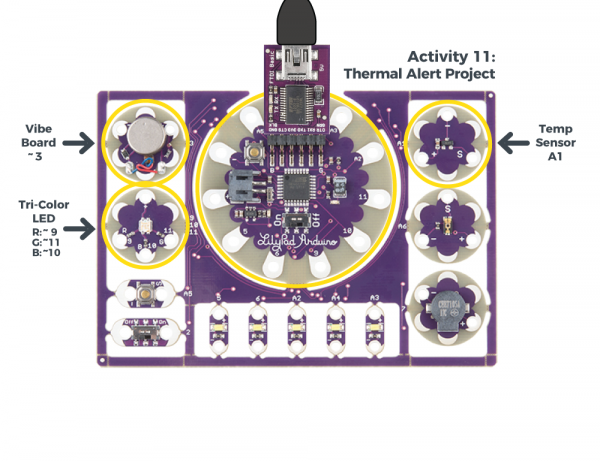
By adding a temperature sensor to the circuit, you can trigger the motor whenever it gets too hot. For more information, check out the thermal alert project from the Lilypad Development Board Activity Guide. Just make sure to redefine the LilyPad Arduino's pins in code.
This fitness bracer uses two vibe boards to alert the wearer when they have been inactive for 60 minutes.
This posture-sensing wearable is built with a LilyPad, conductive fabric, and vibe board provides feedback when your shoulders hunch forward. Learn how to build this project and more wearables with LilyPad in the Instructables Wearable Electronics class.

Lynne created a jacket that uses an LV-MaxSonar ultrasonic range finder, LilyPad Arduino, and vibe board to alert the wearer to solid objects in their path.

The LilyPad Vibe Motor is not limited to just haptic feedback. You can also build a neat little bristle bot with the vibe motor, battery holder, and coin cell. You can even add a light sensor and MOSFET to have the robot react to your environment!
Here are some resources for e-textiles and planning a project with the LilyPad Vibe board.
Or, you can check out some of our other wearables tutorials:
Looking for more information about haptic motors and wearable project ideas? Check out the following tutorials.
Or check out some of the following projects for more tutorials and ideas.
learn.sparkfun.com | CC BY-SA 3.0 | SparkFun Electronics | Niwot, Colorado