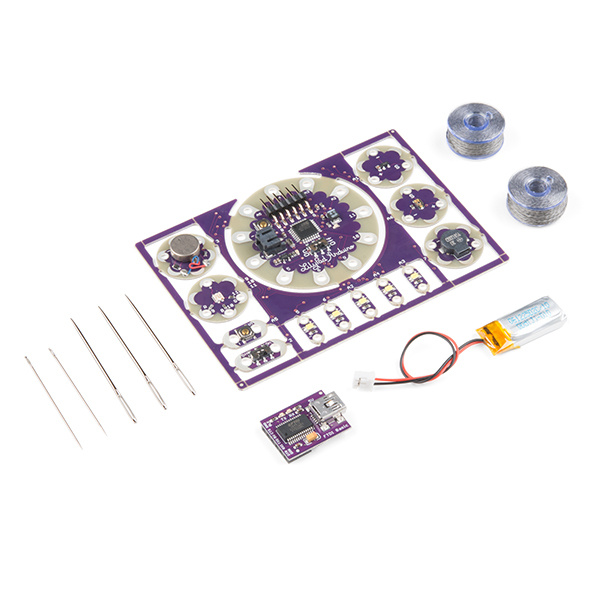
Interested in getting into LilyPad? Or maybe it's Arduino that tickles your fancy? Both? Well, whatever it is, the ProtoSnap LilyPad Development Board is a great tool to start with!
The ProtoSnap LilyPad Development Board features a conglomerate of some of our favorite LilyPad boards. At the center of this mish-mash is our LilyPad Arduino Simple Board -- a small, LilyPad version of the popular Arduino development platform. Using the included FTDI Basic Breakout, you can program this board to work with a whole mess of inputs and outputs:
All of these are already wired up to the LilyPad Arduino Simple. Then, once you feel comfortable programming the Arduino to talk to all those boards, you can break each piece off individually and implement them into your project however you see fit. But...
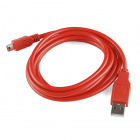
To reprogram and recharge the board, you'll need to connect a mini-B USB cable. Double check that it is not labeled ‘Power Only’ as these type of cables will not transmit the programming data needed by the LilyPad Arduino Simple Board. If you don't have one you can get one from SparkFun:
If you aren't familiar with the following concepts, we recommend checking out these tutorials before continuing.
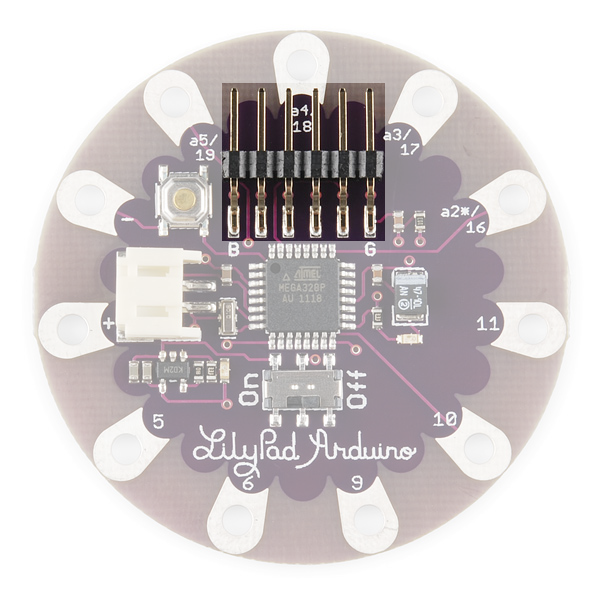
The LilyPad Development Board features twelve LilyPad components connected to a LilyPad Arduino Simple microcontroller by conductive pathways called traces. Many of these traces are hidden, but for reference, each component on the ProtoSnap has a nearby label printed in white silkscreen with the number of the LilyPad Arduino Simple sew tab it is connected to.
If you've used an Arduino before, you're probably familiar with its pins -- both digital and analog. An Arduino has 14 digital pins, and six to eight analog pins, all of which can be used to interface with other components; for instance, those surrounding the Arduino on the ProtoSnap LilyPad Development Board.
It's important to know which pin on the Arduino is tied to which component. Should you ever need a reminder of what pin connects to what, all you really need to do is look down.

But, in case your eyes aren't up to reading that tiny text, here's a list of the components that are connected to the LilyPad Arduino Simple:
| LilyPad Component | Arduino Pin | Connected to LilyPad Arduino Simple Sew Tab | Description |
|---|---|---|---|
| LilyPad Vibe Board | ~3 | Haptic feedback is provided with the motor's vibration and is controlled by the LilyPad Arduino Simple. | |
| LilyPad Tri-Color (RGB) LED - Red | ~9 | ✓ | The tri-color LED's red is controlled by the LilyPad Arduino Simple. |
| LilyPad Tri-Color (RGB) LED - Blue | ~10 | ✓ | The tri-color LED's blue is controlled by the LilyPad Arduino Simple. |
| LilyPad Tri-Color (RGB) LED - Green | ~11 | ✓ | The tri-color LED's green is controlled by the LilyPad Arduino Simple. |
| LilyPad Button | A5 | ✓ | LilyPad Arduino Simple receives button presses as an input. |
| LilyPad Slide Switch | 2 | LilyPad Arduino Simple receives switch state (on/off) input. | |
| LilyPad White LEDs | ~5, ~6, A2, A3, A4 | ✓ (all 5 LEDs) | A set of white LEDs controlled by the LilyPad Arduino Simple. |
| LilyPad Buzzer (+) | 7 | A buzzer that create tones controlled by the LilyPad Arduino Simple. | |
| LilyPad Buzzer (-) | 12 | A buzzer that create tones controlled by the LilyPad Arduino Simple. While normally connected to GND, it can be connected to an Arduino pin. | |
| LilyPad Light Sensor | A6 | LilyPad Arduino Simple receives ambient light level input from light sensor. | |
| LilyPad Temperature Sensor | A1 | LilyPad Arduino Simple receives temperature from a physical touch based on body heat and ambient conditions with the analog sensor. |
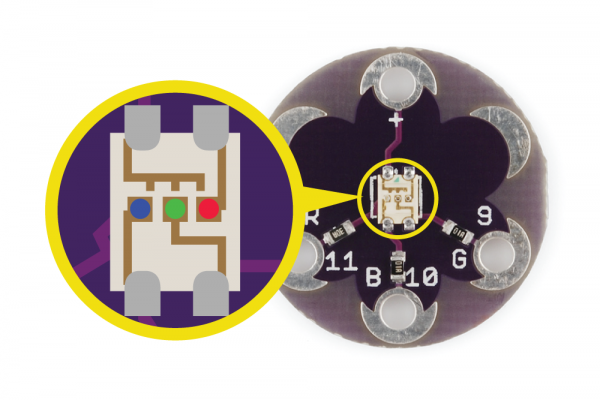
Inside an RGB LED are three smaller LEDs - a red, green, and blue. Each of these LEDs is connected to a sew tab on the Tri-Color LED, and they are all connected through a common anode (positive) pin. Unlike other RGB LEDs, this configuration means that to light up the LED you need to ground the individual red, green, and blue LEDs instead of sending them power.
Most of the individual boards on the ProtoSnap LilyPad Development Board are relatively simple; they've got one big component, and maybe a few small supporting components, like resistors. But there are a few complexities to the LilyPad Arduino Simple we should overview.
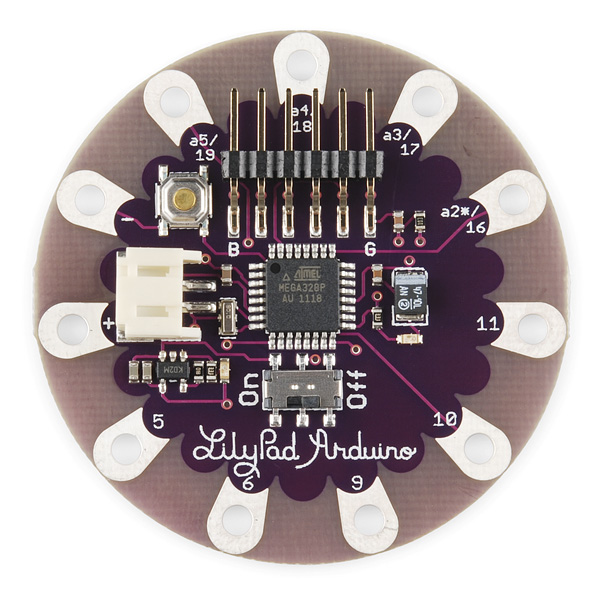
Features:
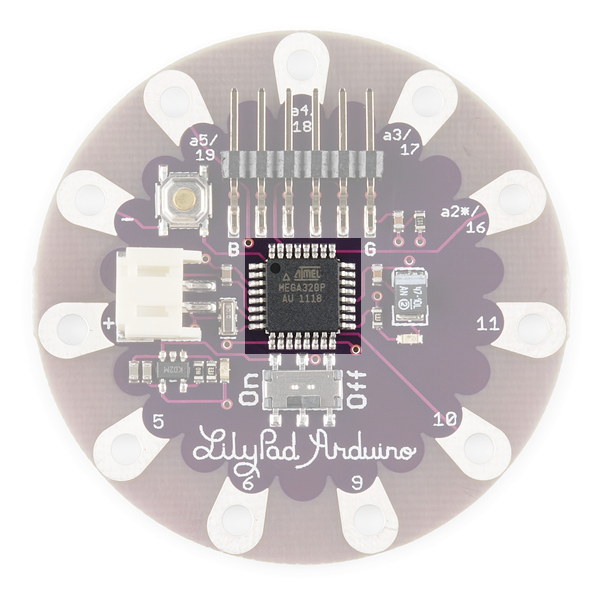
Central to the Simple board is the ATmega328 -- the big black square in the middle of the board. This is the microprocessor, the "brains of the operation." This is what stores and executes your Arduino sketch. Surrounding the ATmega328 are a few passive supporting components, nothing all that important to you.
To the right of the ATmega328 (though it'll be hard to see unless it's lit) is a tiny little LED. This could be classified as the most important component on the Arduino. The LED is tied to Arduino pin 13, and can be used for all your blinking needs. At the top left, there's a momentary push button, used to reset the ATmega328. This will make whatever sketch the Arduino is running start from the very top again.

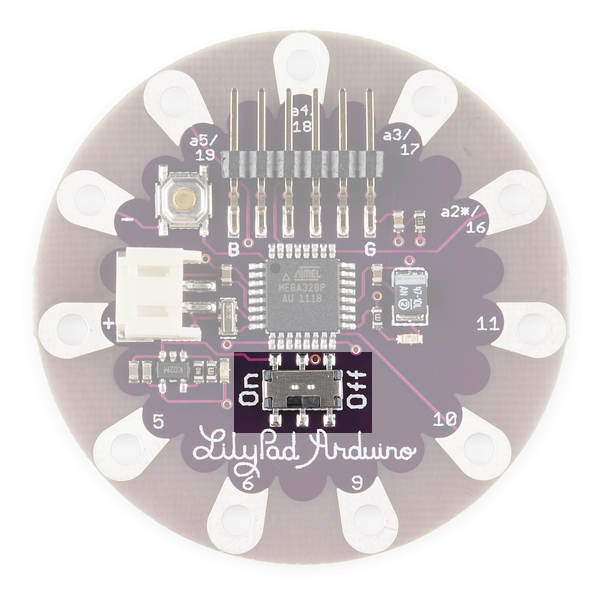
There's an On/Off slide switch under the ATmega328. The functionality of that is pretty obvious, but it can be a little misleading. There are a few ways to power the ProtoSnap LilyPad Development Board, and in most cases, you'll probably use the included FTDI board to power it using your computer's USB. If the board is powered by the FTDI board, the On/Off switch will do absolutely nothing. The switch only controls power to the Arduino if you're powering it via that little white connector to the left of the ATmega.
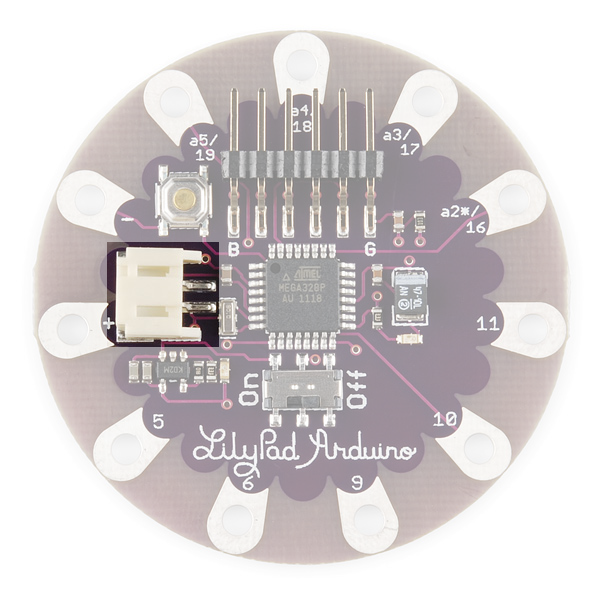
The white connector on the Simple board is a somewhat common power connector, hailing from the JST family of connectors. It's mainly geared towards connecting one of our Lithium Polymer batteries. LiPo's are rechargable batteries, so we've also included a battery charger on the LilyPad Arduino Simple. So if you have the battery plugged in, and an FTDI Basic Breakout connected, you can charge the battery from your computer.
Oh, and where do you connect the FTDI board? Well, spiking up at the top of the Arduino Simple is a right-angle six-pin male header. The female header on the FTDI board should slide smoothly onto that connector.
The LilyPad LilyPad Development Board can be powered in two ways:
If you have a USB power source available (a computer, 5V USB wall adapter, USB battery pack, etc.), you can run the board from a USB cable and FTDI.
If you'd like your project to be more portable, you can easily attach a rechargable Lithium-polymer battery to the board. See Technical Notes section for more information on batteries and charging.
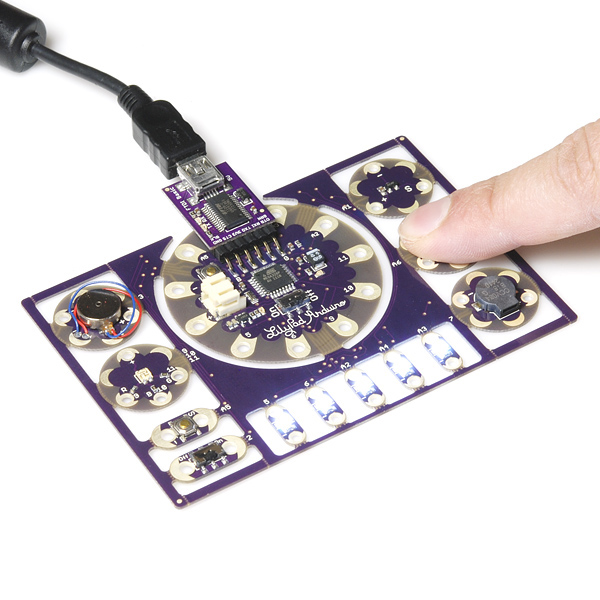
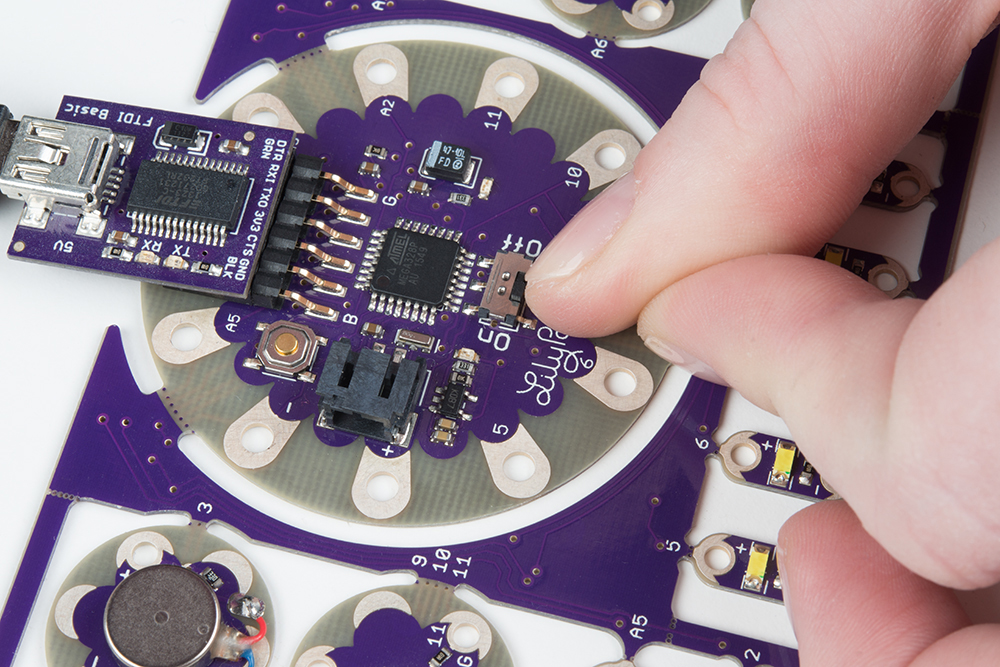
The LilyPad Development Board ships with pre-loaded code that showcases all of the LilyPad pieces connected to it. To power up the LilyPad Development Board, connect it to your computer using a FTDI and mini-B USB cable, or attach an E-Textiles Battery. Then slide the switch on the right side of the LilyPad Arduino Simple to the ON position.
First the white LEDs turn on individually one at a time. Then the RGB LED will blink each color. Once the sequence completes, the LilyPad Development Board will be ready to take inputs! Try placing your finger over the temperature sensor. Once the sensor reads a certain threshold, the red LED will light up. Placing your finger over the light sensor will turn on the white LEDs. Pressing on the momentary push button will cause the buzzer to make some noise. Flipping the LilyPad slide switch (located on the bottom left side of the board) to the ON position will cause the vibe motor to begin vibrating for haptic feedback.
Note: This guide assumes you are using the latest version of the Arduino IDE on your desktop. If this is your first time using Arduino, please review our tutorial on installing the Arduino IDE.
If you've never used a LilyPad Arduino before, you will need to install FTDI drivers. Depending on your computer’s operating system, you will need to follow specific instructions. Please go to How to Install FTDI Drivers, for specific instructions on how to install the FTDI drivers onto your computer.
Note that you won't have to install the FTDI drivers again.
You will need to perform the below three steps every time you want to program the board. These three steps are:
Let's go over the three steps in detail:
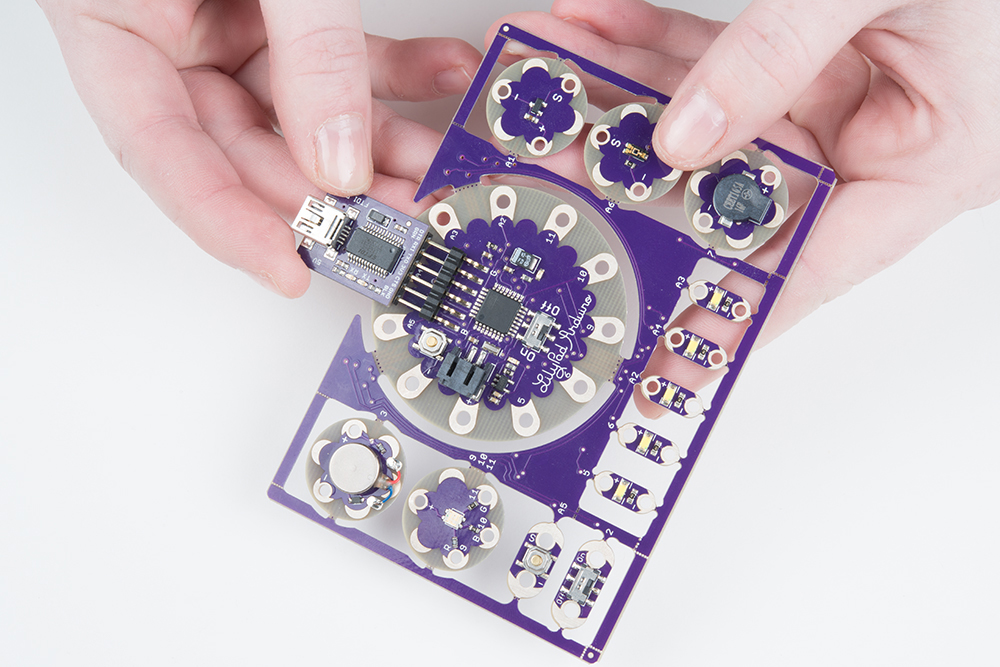
Place the LilyPad Development Board on a clean, non-metal work surface. Connect the LilyPad FTDI Board to the headers on the LilyPad Arduino Simple at the center of the Development Board.
Connect the other side of the FTDI board to a mini-B USB cable.The cable can only be inserted one way, and should snap in securely.
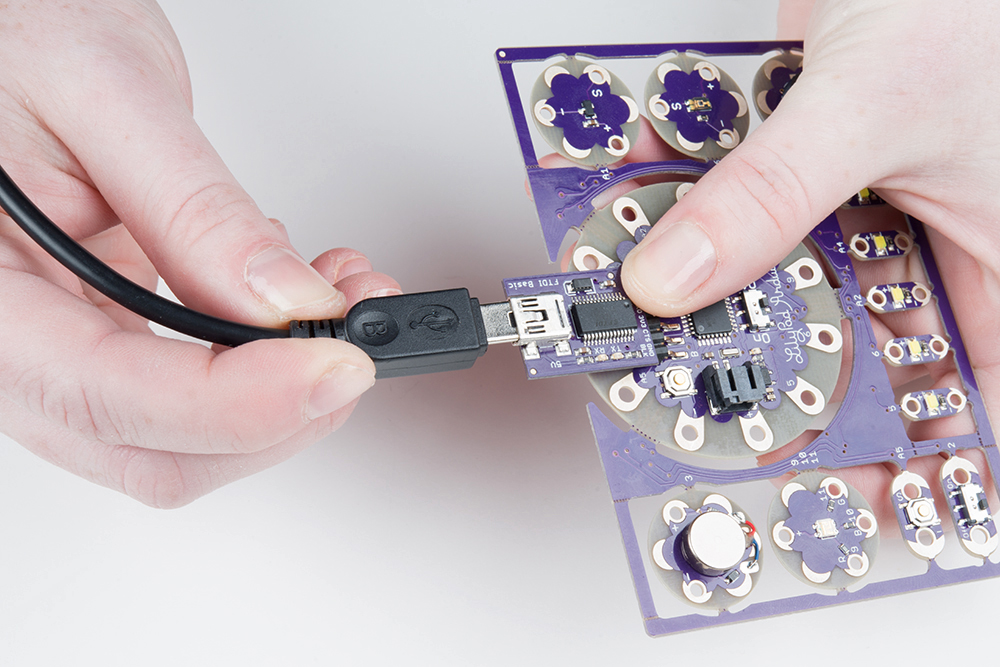
Then connect the other end of the USB cable to a USB port on your computer.

Slide the switch on the LilyPad Arduino to the ON position. You will not be able to upload code to the board if it is set to the OFF position.
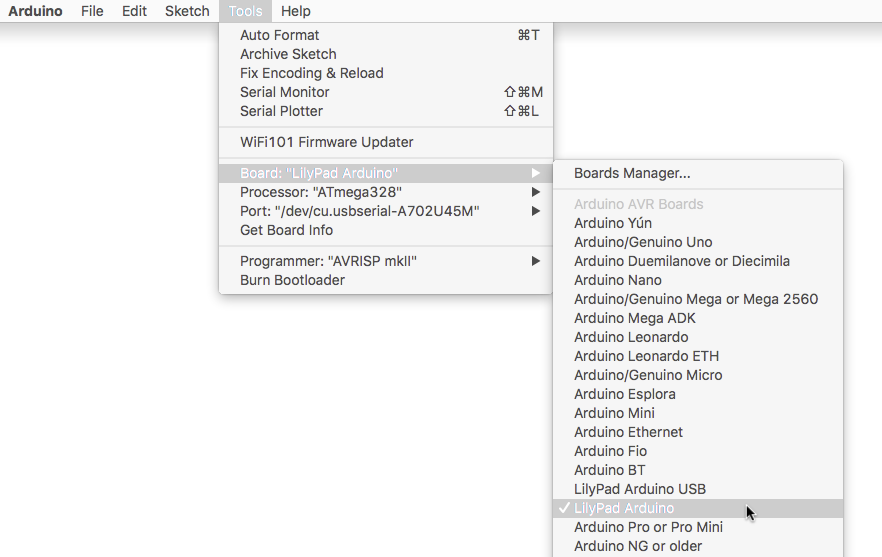
To program the LilyPad Arduino Simple at the center of the LilyPad Development Board, open the Tools > Board list and select LilyPad Arduino. A dot (Windows) or check mark (Mac) will show next to the board in the menu when it is selected, and it will show next to Board in the Tools menu.
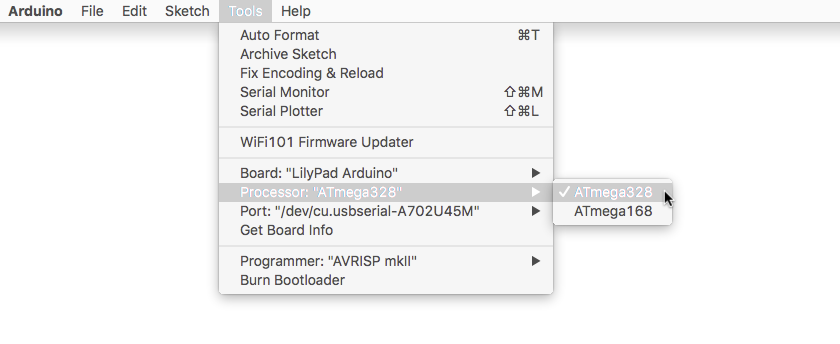
After selecting the LilyPad Arduino, there will be two options available in the next menu down labeled Processor. Select ATmega328 for your LilyPad Arduino.
Arduino needs to know which port your LilyPad Arduino is attached to so it can program it. Whenever you plug a USB device into your computer, your computer will assign it a port number. Go to the Tools > Port menu, and select the port that has the LilyPad Arduino attached to it.
On Windows ports are listed as COM##; on a Mac or Linux machine they will be "/dev/cu.usbmodem####". Your screen may look different than the image below, depending on what operating system you are using.

In the world of embedded electronics, every good development platform has to have an LED, and the first test program to be run on any development platform is almost always the blinking of an LED. So let's blink that little LED on the LilyPad Simple Arduino board.
To review, once you've:
You are ready to upload code! Let's upload some code to try it out.
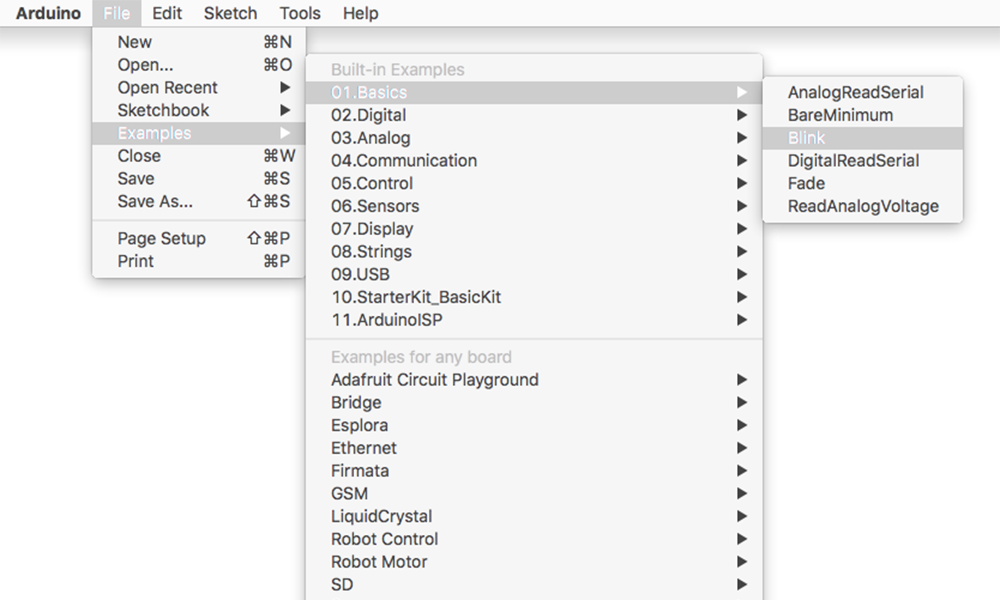
Load the "Blink" example from the menu File > Examples > 01.Basics > Blink, and click the "Upload" button (the large round button with the right arrow in it). This is a very simple example program; it just blinks a LED on and off once per second.
Arduino will compile the code, then send it to the LilyPad Arduino Simple via the USB cable. While the code is uploading, the built-in LED will blink to signal the code is transferring. When the code finally runs, the LED at the center of the board will slowly blink green. Success!
If this all works, congratulations! You're all set up and ready to prototype with the LilyPad Development Board.
If you are interested in re-uploading the default example code that you explored earlier, it is available in the product GitHub repository and in the download button shown below.
Well, we've just opened an enormous can of worms, and you've taken your first step into the life-consuming world of Arduino. From here, you may want to explore some of Arduino's other example sketches. There's one for the button (File > Examples > 2.Digital > Button), or you could fade those RGB LEDs (File > Examples > 1.Basics > Fade), or you could play a song on the buzzer (File > Examples > 2.Digital > toneMelody), or maybe try adapting the AnalogInOutSerial sketch (File > Examples > 3.Analog > AnalogInOutSerial) to the temperature and light sensors. Just make sure you change the pins to their proper mapping on the LilyPad Development Board!

You can also check out the LilyPad Development Board Activity Guide:
Once you feel comfortable with the Arduino programming, maybe you'll start to feel constrained by the current configuration of the ProtoSnap LilyPad Development Board. At that point, feel free to snap each individual part off, and turn them into the next great creation! You'll have a solid foundation in Arduino programming, so you can put all your focus into getting the hardware just right.
For ideas, check out the example project used in the smaller LilyPad Development Simple board in order to snap the components and sew to fabric.
These tutorials will give you some tips and tricks for project construction and insulation:
If you’ve already programmed Arduino for a while, read on for some additional notes about the LilyPad Development Board. It’s very similar to other Arduinos, but has some special features and limitations you’ll want to know about.
Below is a list of the LilyPad Arduino Simple I/O pins and each function.
Legend:
| Function | Digital | Analog |
|---|---|---|
| Rx-I | {0}, RX | |
| Tx-O | {1}, TX | |
| Slide Switch | (2) | |
| Vibe Board | (~3) | |
| White LED | ~5 | |
| White LED | ~6 | |
| Buzzer | (7) | |
| RGB LED - Red | ~9 | |
| RGB LED - Blue | ~10, SS | |
| RGB LED - Green | 11, MOSI | |
| [12], MISO | ||
| Built-in Green LED | [13], SCK | |
| Temperature Sensor | (15) | (A1) |
| White LED | 16 | A2 |
| White LED | 17 | A3 |
| White LED | 18 | A4, SDA |
| Momentary Push Button | 19 | A5, SCL |
| Light Sensor | (A6) |
SparkFun sells a number of LiPo batteries compatible with this board. If you are new to the LilyPad system, we recommend the E-Textiles Battery. If you're supplying your own battery, use a single-cell (3.7V) LiPo battery with a JST connector.
Batteries with larger capacities (measured as amp-hours or Ah) will run the board longer before needing recharging. How long will depend on how many LEDs your program turns on, etc. If you're just running a few LEDs, you can expect the board to run about 5 hours for every 100mAh of battery capacity.
To recharge an attached battery, plug the board into a USB power source. While the battery is charging, the "CHG" LED will illuminate. When the battery is fully charged the LED will turn off. The default charge current is set to 100mA, so a 100mAh battery will recharge in one hour, a 1000mAh battery in 10 hours, etc. Since the board is set to charge at a rate of 100mA, we do not recommend connecting a lower capacity LiPo battery (i.e. 40mAh LiPo battery) to charge.
It is safe to leave a LiPo battery attached to the board permanently, even with USB power applied. The battery will not be overcharged.
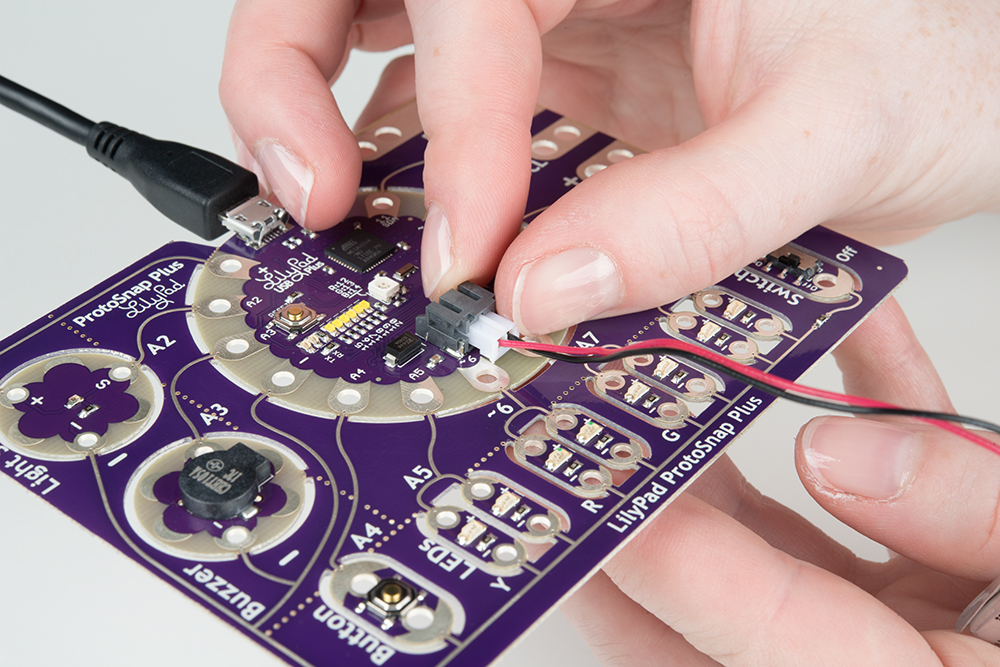
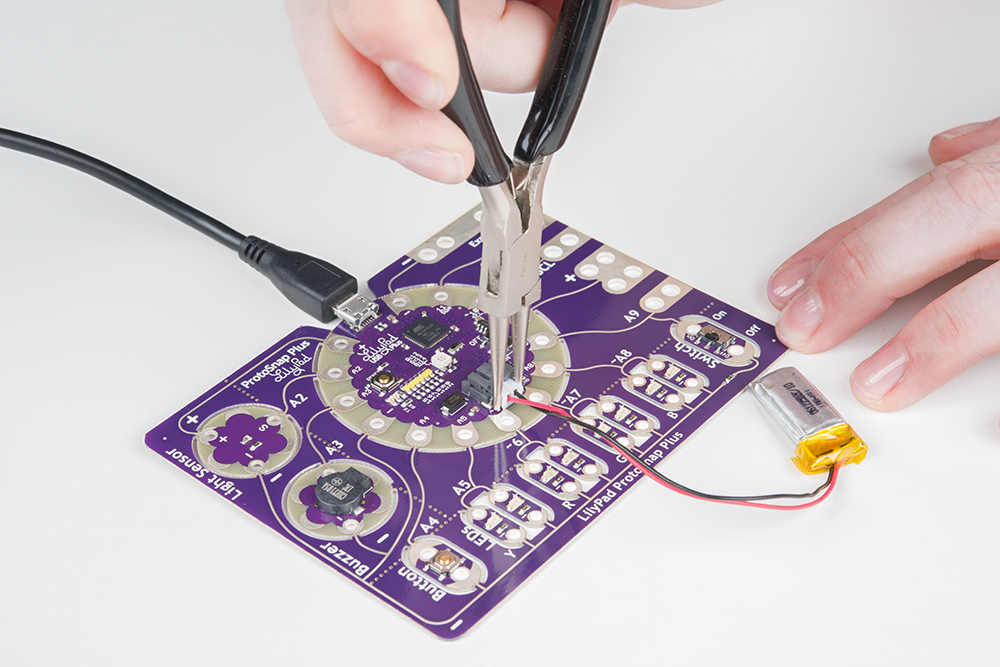
The battery connector can be tight; to remove a battery never pull on the wires. Use a pair of needle nose pliers or cutters to gently hold pull the plug out of the connector.
Below is an image of the a LiPo battery being removed from a different LilyPad with needle nose pliers.
Not working as expected? Don't worry, it happens to us all. Sometimes things do not go as planned even though you followed the guide. This section highlights a few possible errors that you may encounter when trying to upload code to the LilyPad Development Board.
If you get an error message at the bottom of the Arduino IDE like the following:
avrdude: stk500_getsync(): not in sync: resp=0x00
avrdude: stk500_disable(): protocol error, expect=0x14, resp=0x51
or
avrdude: stk500_recv(): programmer is not responding
avrdude: stk500_getsync() attempt 10 of 10: not in sync: resp=0x8c
The error output that you are seeing can be due to a number of reasons.
The value of the "sync resp" is different and not always the same, so it’s hard to say. Here are a few common reasons for the error and possible solutions that are known in our knowledge base:
If you get an error message like the following:
avrdude: ser_open(): can't open device "\\.\COM15": Access is denied.
COM15 but the Lilypad Arduino Simple was not connected physically to the FTDI.If you still have problems uploading code to the LilyPad Arduino Simple and it is not outlined here, try checking out the troubleshooting section of our activity guide:
Or you can also try following the link provided at the end of the upload error:
Problem uploading to board. See http://www.arduino.cc/en/Guide/Troubleshooting#upload for suggestions.
The link heads over to Arduino.cc's general troubleshooting page with a few possible solutions that are not outlined in our guides.
For more information about the LilyPad Development Board, check out the resources below:
Here are some additional LilyPad boards that can be combined with the LilyPad Development Board and project ideas:
Here are some resources to help you plan a project with the LilyPad Development Board:
learn.sparkfun.com | CC BY-SA 3.0 | SparkFun Electronics | Niwot, Colorado