How to Read a Schematic
Reading Schematics
Understanding which components are which on a schematic is more than half the battle towards comprehending it. Now all that remains is identifying how all of the symbols are connected together.
Nets, Nodes and Labels
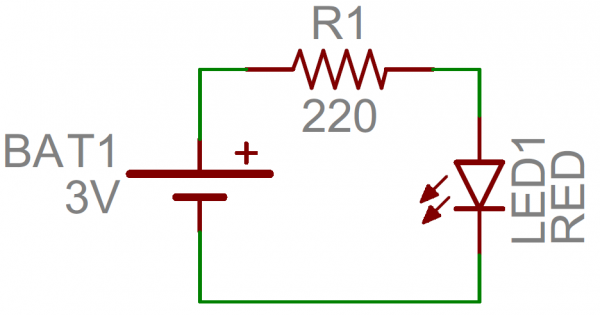
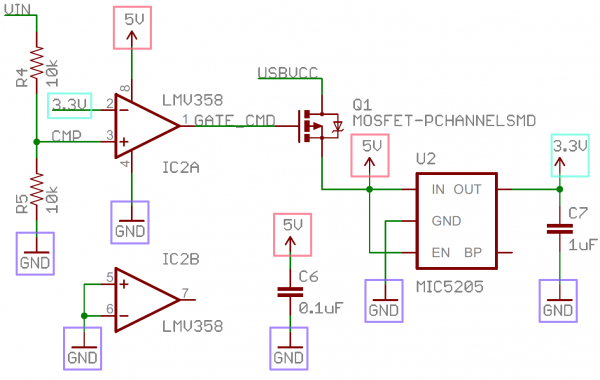
Schematic nets tell you how components are wired together in a circuit. Nets are represented as lines between component terminals. Sometimes (but not always) they're a unique color, like the green lines in this schematic:
Junctions and Nodes
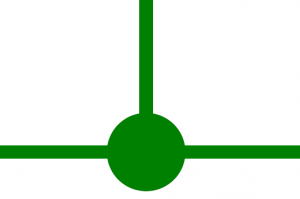
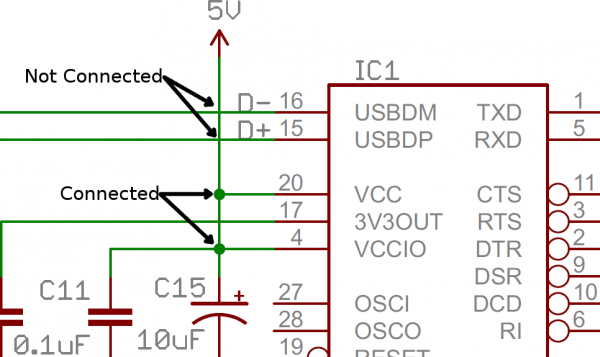
Wires can connect two terminals together, or they can connect dozens. When a wire splits into two directions, it creates a junction. We represent junctions on schematics with nodes, little dots placed at the intersection of the wires.
Nodes give us a way to say that "wires crossing this junction are connected". The absences of a node at a junction means two separate wires are just passing by, not forming any sort of connection. (When designing schematics, it's usually good practice to avoid these non-connected overlaps wherever possible, but sometimes it's unavoidable).
Net Names
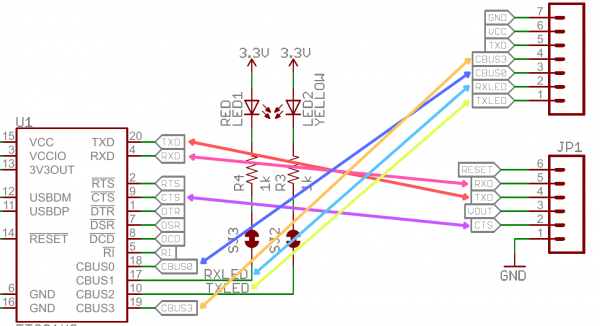
Sometimes, to make schematics more legible, we'll give a net a name and label it, rather than routing a wire all over the schematic. Nets with the same name are assumed to be connected, even though there isn't a visible wire connecting them. Names can either be written directly on top of the net, or they can be "tags", hanging off the wire.
Nets are usually given a name that specifically states the purpose of signals on that wire. For example, power nets might be labeled "VCC" or "5V", while serial communication nets might be labeled "RX" or "TX".
Schematic Reading Tips
Identify Blocks
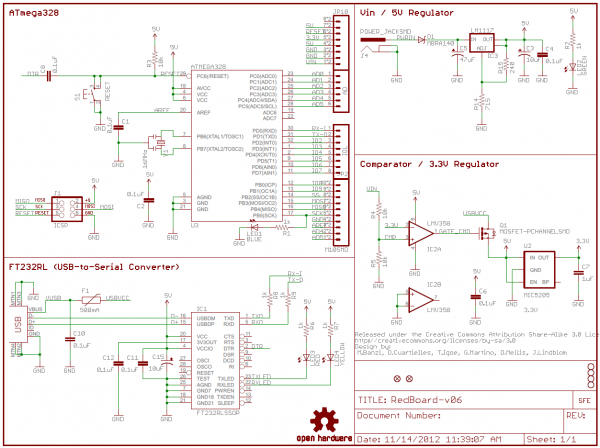
Truly expansive schematics should be split into functional blocks. There might be a section for power input and voltage regulation, or a microcontroller section, or a section devoted to connectors. Try recognizing which sections are which, and following the flow of circuit from input to output. Really good schematic designers might even lay the circuit out like a book, inputs on the left side, outputs on the right.
Recognize Voltage Nodes
Voltage nodes are single-terminal schematic components, which we can connect component terminals to in order to assign them to a specific voltage level. These are a special application of net names, meaning all terminals connected to a like-named voltage node are connected together.
The ground voltage node is especially useful, because so many components need a connection to ground.
Reference Component Datasheets
If there's something on a schematic that just doesn't make sense, try finding a datasheet for the most important component. Usually the component doing the most work on a circuit is an integrated circuit, like a microcontroller or sensor. These are usually the largest component, oft-located at the center of the schematic.
Interested in learning more foundational topics?
See our Engineering Essentials page for a full list of cornerstone topics surrounding electrical engineering.
