Hookup Guide for the BlackBoard Artemis Nano
This Tutorial is Retired!
View the updated tutorial: Hookup Guide for the SparkFun RedBoard Artemis Nano
 Nate, Ell C
 Introduction
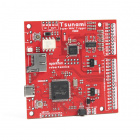
We like to joke that the BlackBoard Artemis Nano is a party on the front and all business on the rear! A light weight, 0.8mm thick PCB, with on board lipo-battery charging and a Qwiic connector, this board is easy to implement into very small projects. A dual row of ground connections make it easy to add lots of buttons, LEDs, and anything that requires its own GND connection. At the same time, the board is breadboard compatible if you solder the inner rows of pins. Add into that all the bells and whistles of the Artemis module and you've got one heck of a party going on. Let's check it out!
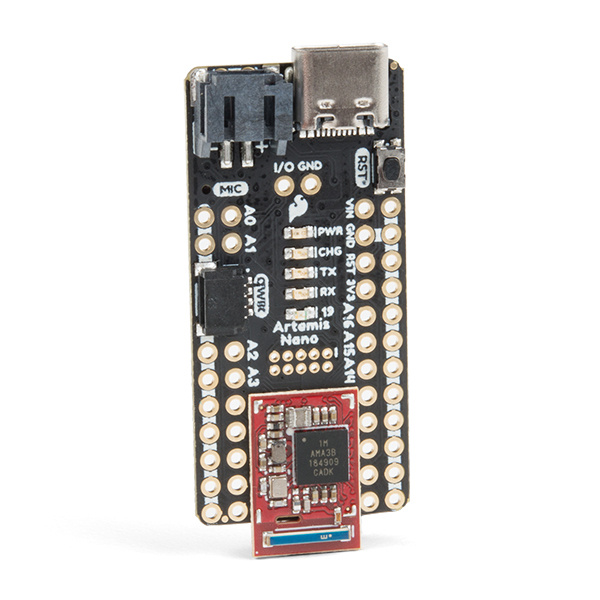
BlackBoard Artemis Nano
SPX-15411Required Materials
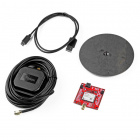
You'll need a USB C cable for programming. Any USB C cable should work including the one that probably came with your phone charger. If you don't already have a USB C cable you can pick one up here.
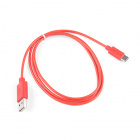
USB 2.0 Cable A to C - 3 Foot
CAB-15092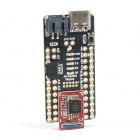
BlackBoard Artemis Nano
SPX-15411Suggested Reading
| Qwiic Connect System |
We also recommend checking out these tutorials before continuing:
I2C
Using SparkFun Edge Board with Ambiq Apollo3 SDK
Designing with the SparkFun Artemis
Artemis Development with Arduino
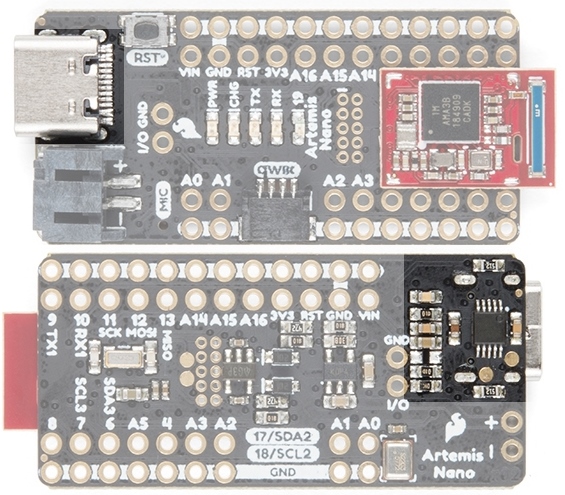
Hardware Overview
Power, GPIOs and GND Connections
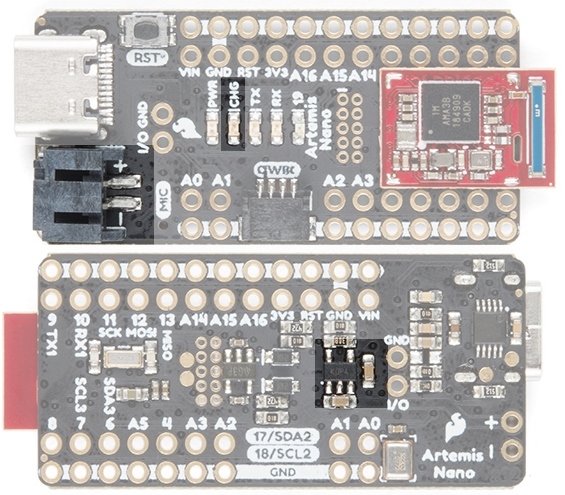
The Nano breaks out 17 GPIO to PTH holes. Each GPIO is paired with a ground connection. We found the extra grounds immeasurably useful when wiring up projects; you'll often need a separate ground for each LED, button, or sensor. The Nano makes it that much easier to prototype an idea.
The Nano is breadboard compatible if you solder headers into only the inner rows of PTH holes. This will give your breadboard access to all GPIO, RST, 3.3V, VIN, and 1 ground pin.

Power is automatically selected between USB, LiPo, and Vin (Vin takes precedence). The VIN pin can handle up to 6V and will be regulated down to 3.3V using the AP2112 voltage regulator (600mA max output). The 3.3V pin can be used to power various 3.3V devices up to 600mA.
USB C and Serial Bootloading
We've designed the Nano with a reversible USB C connector and the CH340E USB to serial IC. This is an amazing IC that is small enough to fit under the USB C connector. The driver should automatically install on most operating systems. However, there is a wide range of operating systems out there. You may need to install drivers the first time you connect the chip to your computer's USB port or when there are operating system updates. For more information, check out our How to Install CH340 Drivers Tutorial. Also be sure to checkout our CH340 hookup guide for tips on using the CH340.
How to Install CH340 Drivers
SparkFun Serial Basic CH340C Hookup Guide
The current USB C configuration is with two 5.1k Ohm resistors. This will allow up to 2 amps at 5 volts from your USB source. Nearly all modern computers and battery packs have short circuit protection but just be aware that the Nano does not have any short circuit protection.
Reset and Power Control
The Nano is a great device to embed in a project. But if it's embedded, it is often impossible to access the reset and power switches on a board. We've exposed the reset pin and an I/O pin. This is a perfect place to solder a big external power switch. The I/O pin controls the enable line on the 3.3V regulator. Pull this line low and the board will turn off. Release the I/O line and the board will run normally. The enable line is pulled high with a resistor so if you don't hookup anything the board will operate normally.

RTC and PDM Microphone
The Artemis has built in RTC capabilities if it is given a 32kHz source so we've added a 32kHz crystal to the Nano. Additionally, one of the main applications of the Artemis is voice recognition so we've added a MEMS digital PDM microphone to the board so that you can capture and analyze audio.
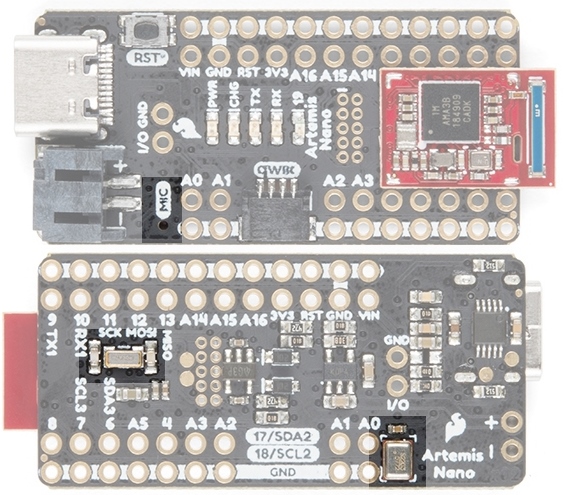
LiPo Battery and Charging
The Nano has integrated LiPo power and charging. Any one of our LiPo batteries with work great with the Nano. The CHG LED will illuminate while the battery is charging via USB and will turn off when the battery is at peak voltage. Charge rate is set to 500mA. The general rule of thumb is charge no faster than 1C so the minimum recommended battery size is a 500mAh battery, but any of the larger batteries will work just fine.
Software Setup
The BlackBoard Artemis runs both Arduino and the more advanced Ambiq HAL/SDK. Checkout these tutorials to get you up and blinking in 5 minutes!
Artemis Development with Arduino
Using SparkFun Edge Board with Ambiq Apollo3 SDK
Troubleshooting
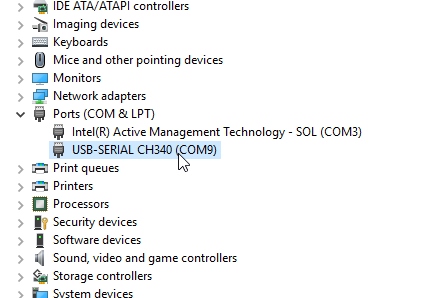
My Nano is not showing up as a COM port?!
Most Artemis carrier boards use the CH340C IC which is not affected by this issue. This issue is only for the Nano that uses the much smaller CH340E.
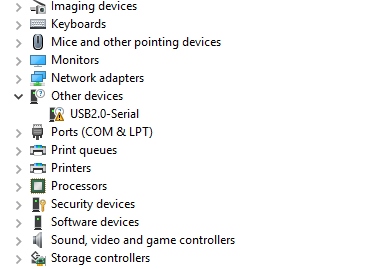
We've had some issues with the CH340E having an incorrect Vendor ID. If your PC is showing the above as an unknown USB2.0-Serial device you may have this issue.

For the Nano we needed to use the much smaller CH340E that has only RTS. The CH340E and RTS work fine to reset the Artemis module and activate the SparkFun variable bootloader with one exception: according to the company when the RTS pin has too much load resistance the IC will enumerate incorrectly with VID 0x9986 (correct VID is 0x1A86). It's a very weird failure mode that is not documented. We'll be working closely with the CH340 manufacturer WCH to get this resolved on future Nano boards.
There are two solutions if you experience this:
Option 1: Unplugging and re-plugging USB will cause the IC to properly enumerate under the correct VID/PID and the drivers will work as expected. This works well if you remember to do it but if you're like me, I'll forget two weeks from now and wonder why the COM port isn't coming up.
Option 2: Force Windows to use the correct drivers. WCH (the company behind the CH340) has good drivers but the INF for Windows is expecting the PID of 0x1A86. Here are the steps to make the drivers work even with a VID of 0x9986:
Step 1: Step 5: Be sure to download and install the Windows driver from the WCH website.
Step 2: Open device manager and locate the problem serial device.
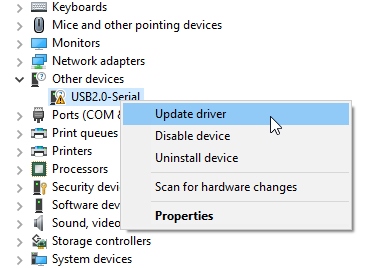
Step 3: Right click on the device and update driver
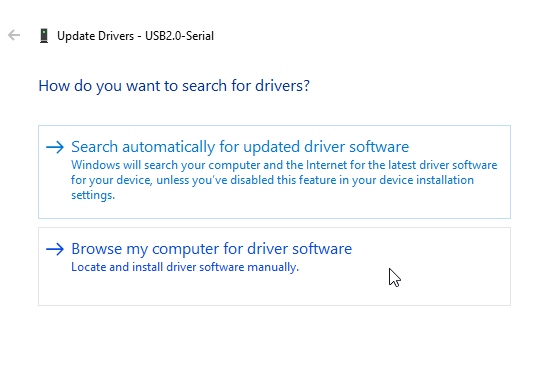
Step 4: Select the driver from the available list of drivers
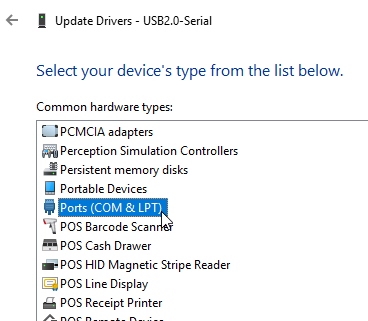
Step 5: Navigate to the Ports.
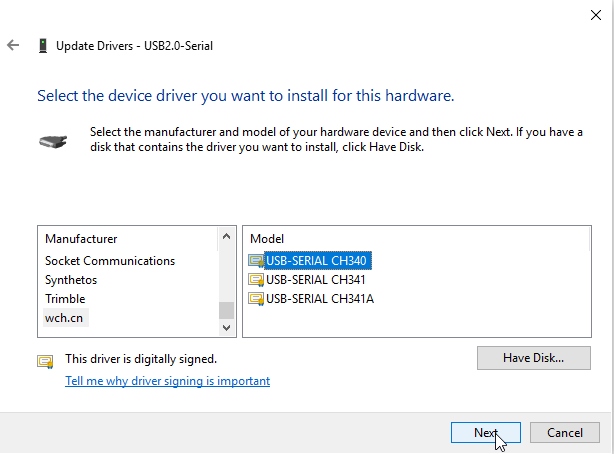
Step 6: Scroll to the bottom of the manufacturer's list and select wch.cn. Select CH340 in the right hand window. If you do not see wch.cn on the list then download and install the Windows driver from the WCH website and repeat the above steps.
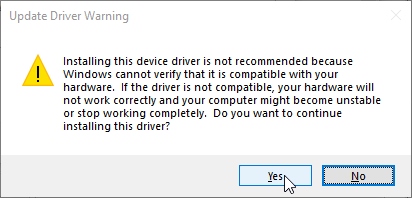
Step 7: Tell Windows you are sure.
Step 8: Verify the COM port is appearing correctly.
Once you have the driver installed for both VIDs you computer will correctly enumerate a COM port regardless of how cranky the CH340E is feeling that day.
As mentioned above, we'll get this sorted out with WCH soon.
Need more help?
If your product is still not working as you expected or you need technical assistance or information, head on over to the SparkFun Technical Assistance page for some initial troubleshooting.
If you don't find what you need there, the SparkFun Forums are a great place to find and ask for help. If this is your first visit, you'll need to create a Forum Account to search product forums and post questions.
SparkFun Artemis Forums
Resources and Going Further
Did you know you can use the BlackBoard Artemis Nano as the starting point of your very own Artemis product? Get the design files from our repo here and edit them using Eagle PCB!
- Schematic (PDF)
- Eagle Files (ZIP)
- Artemis Module Graphical DataSheet (PDF)
- Arduino Core
- Artemis Info Page
- Apollo3 DataSheet (PDF)
- GitHub Hardware Repo
- CH340E USB to serial IC Drivers
You've now explored the board, let's get blinking with Arduino! Or perhaps you want to learn a little more about the Artemis module itself. Checkout these tutorials!
Designing with the SparkFun Artemis
Artemis Development with Arduino
Did you know the Artemis is compatible with our Qwiic line? Checkout these products that simply plug in and work!