Gram Piano Assembly Guide
This Tutorial is Retired!
This tutorial covers concepts or technologies that are no longer current. It's still here for you to read and enjoy, but may not be as useful as our newest tutorials.
 JordanDee
Pre-Programmed Functionality
The microcontroller included with the Gram Piano Kit comes with a pre-installed program that lets you play with the Kit as soon as you have finished building it.
Place your built kit on a flat surface, and turn the power switch on the right side of the board into the ON position. When you power the board, the power LED (PWR) will turn on. Soon after, the center status LED in the center of the board will blink indicating the board is ready for use. Now start touching the various keys, and you will hear the corresponding notes. The board has an octave's worth of keys allowing you to play up and down a scale of notes, play simple tunes, or experiment with creating your own.
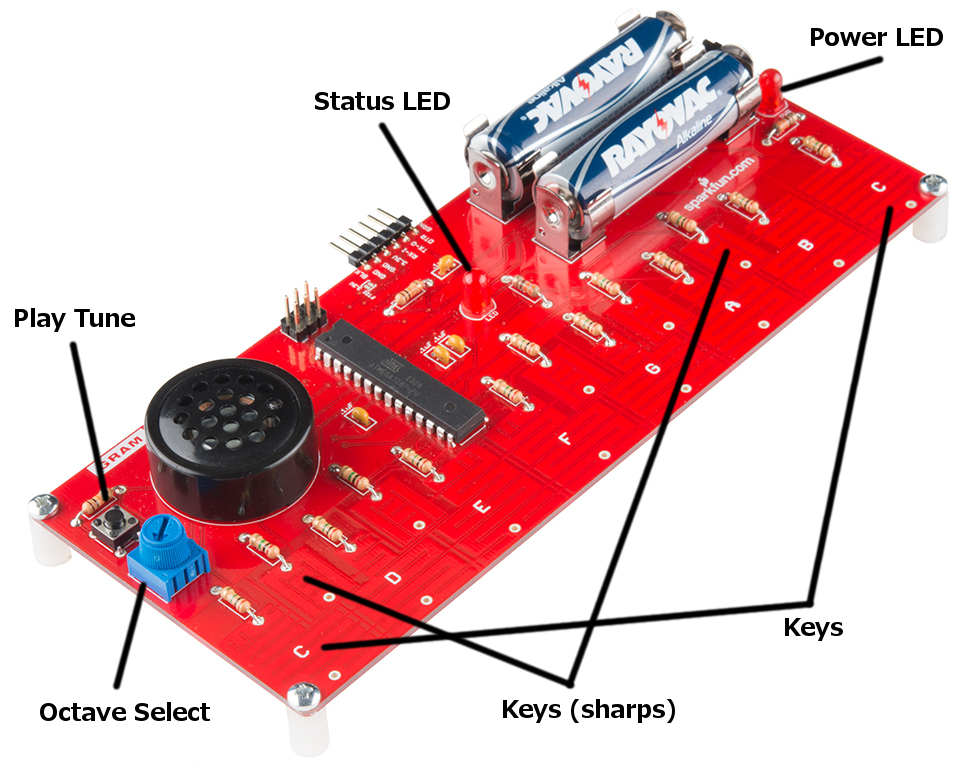
The potentiometer on the left side of the board allows you to select three different octaves. By default, the arrow should be facing up, which will tell the board to use the middle octave. If you turn the knob to the left, the keys will play notes of one octave lower. Similarly, if you turn the knob to the right, the keys will play notes one octave higher. This allows you to switch easily between three octaves without having to reprogram the board.
The button on the top left of the board is programmed to play a specific sequence of notes you may recognize. If the button is pressed again while the notes are still being played, the playing will stop.
Out of the box, the Gram Piano can essentially be used as a simple musical keyboard. In the next section, we will go over the default code running on the Gram Piano so you can learn how it works and give you ideas on how you can tailor the board to your own desires.