Getting Started with the 8BitDo Bluetooth GamePads
Introduction
One of the best things about this job is that I get to play with all the new products that come in. If you have a gamer in your family, listen up. The SN30 Pro Bluetooth Gamepad and the Lite Bluetooth Gamepad (which also comes in yellow) from 8BitDo are REALLY cool. They are after market game controllers that work on a variety of platforms, including the Switch, Windows, Linux, Raspberry Pi and possibly even on the iOS. Let's check 'em out!
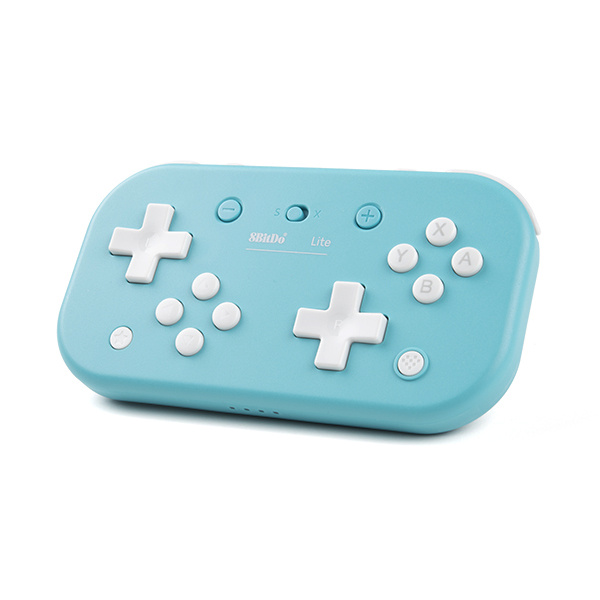
8BitDo Lite Bluetooth Gamepad - Blue
WIG-17266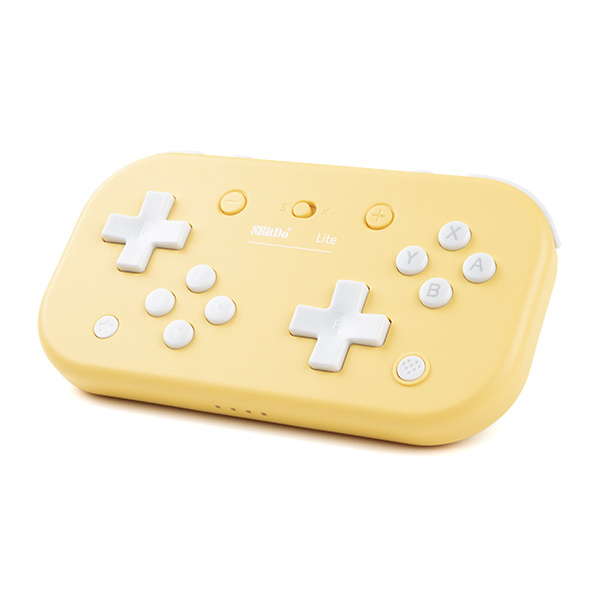
8BitDo Lite Bluetooth Gamepad - Yellow
WIG-17265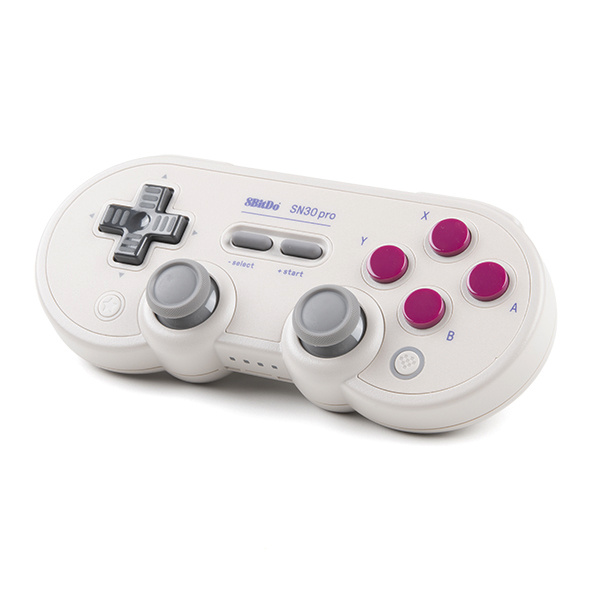
8BitDo SN30 Pro Bluetooth Gamepad
WIG-17264Suggested Reading
MetaWatch Teardown and Arduino Hookup
Bluetooth Basics
Connectivity of the Internet of Things
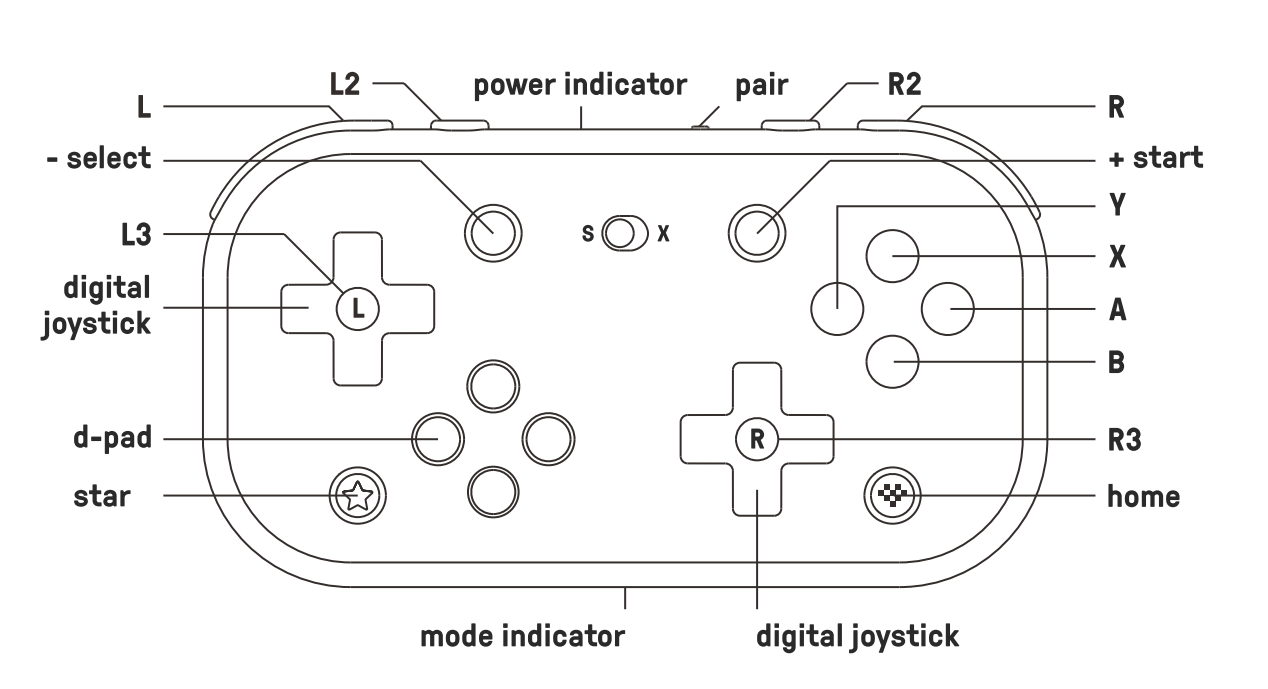
Lite Hardware Overview
8BitDo's Lite Controller is a D-pad extravaganza. Who needs extra D-pads? I mean, who doesn't? They do have the "push button" functionality of the joystick but you have to press all four direction buttons down at the same time and it's hit or miss. That said, this controller is great for my kiddos - it extremely low profile, so it fits better into their smaller hands and thus it's easier for them to maneuver on. Let's have a look at some of the specs:
- Compatibility: Windows, Steam, Switch
- Dimension / Weight: 12066.216.2mm / 84g
- Special Features:
- Dual D-pads
- Mode switch
- Customizable turbo functionality ( X-input )
- Connectivity:
- Wireless Bluetooth®
- USB-C
- Battery Type / Battery Life:
- 480mAh Li-on battery, rechargeable
- 18 play hours with 1-2 hour charging time
- Includes:
- 8BitDo Lite Bluetooth gamepad
- USB cable
- Instruction manual
Battery and Charging
The Lite Controller comes with a standard USB-C cable and takes a couple hours to charge up. 8BitDo's documentation boasts about 18 hours of play once charged and while I haven't done any actual benchmarking on that, I will say that my kids have been playing on this thing for a week and I have yet to need to charge it. So it ain't too shabby.
Cons
All this low profile and portability comes at a bit of a cost. The 8BitDo Lite controller does not have an accelerometer or rumble feature, and there is no NFC reader. But! If you're a retro gamer who loves old school Zelda, Mario, etc, this is the controller for you.
Lite Hardware Pairing
Switch
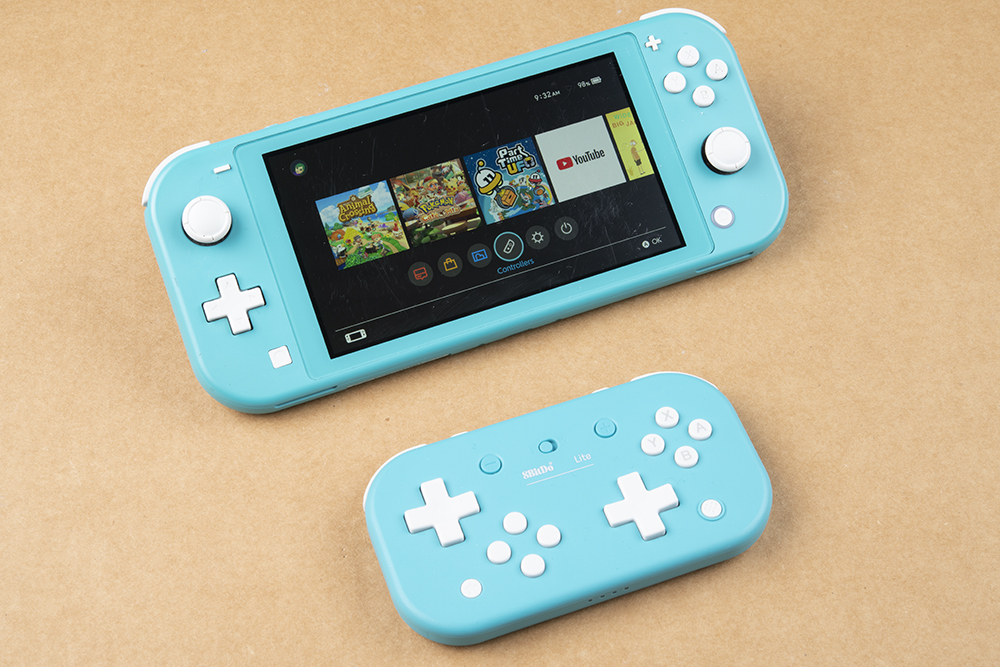
The 8BitDo Lite is designed to work with the Nintendo Switch Lite. In fact, the colors of these controllers match the yellow and turquoise versions of the Switch Lite. If you're not color coordinated, do you even game, bro?
Let's pair. From your main screen, navigate to "Controllers".
Select Change Grip/Order:
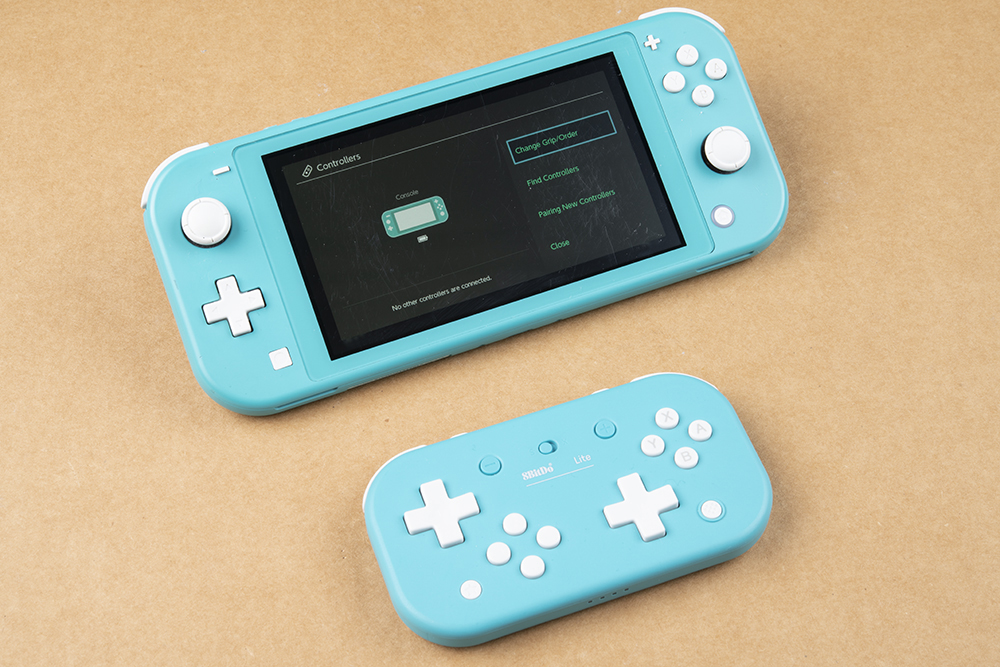
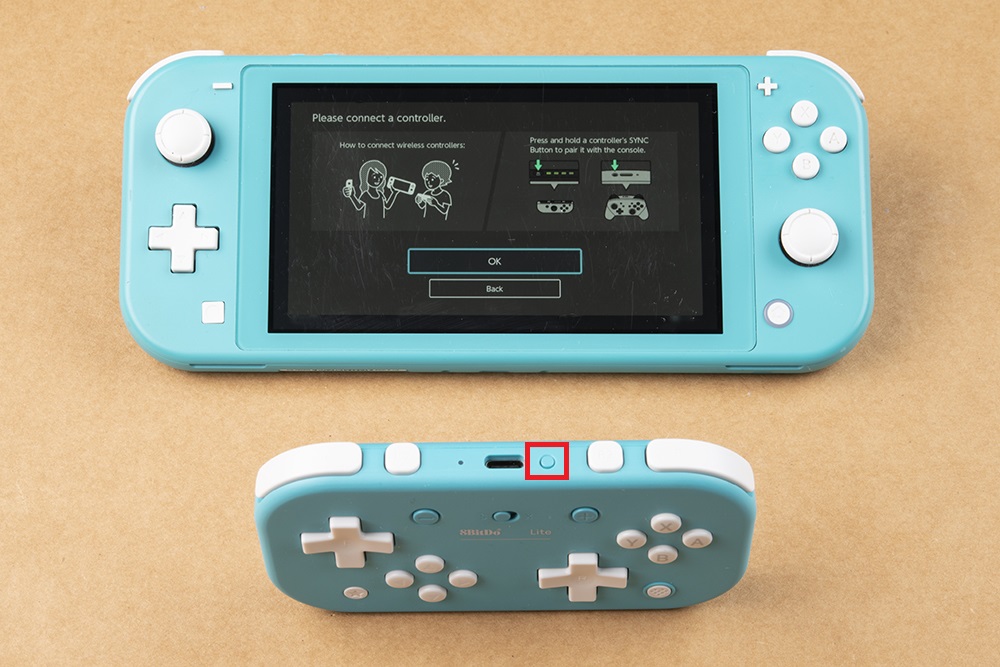
You'll see the following screen:
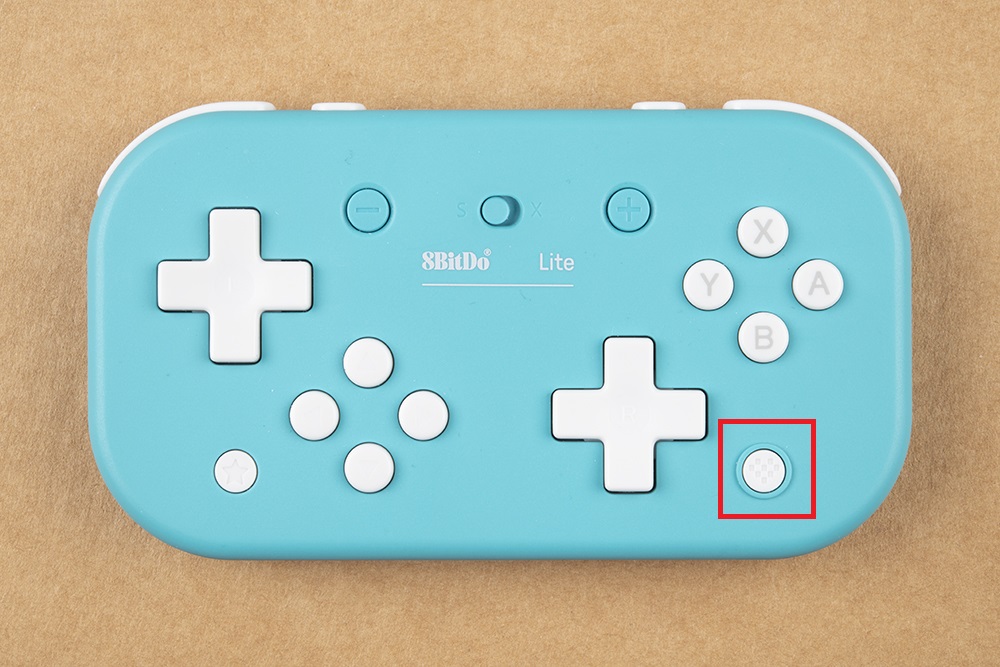
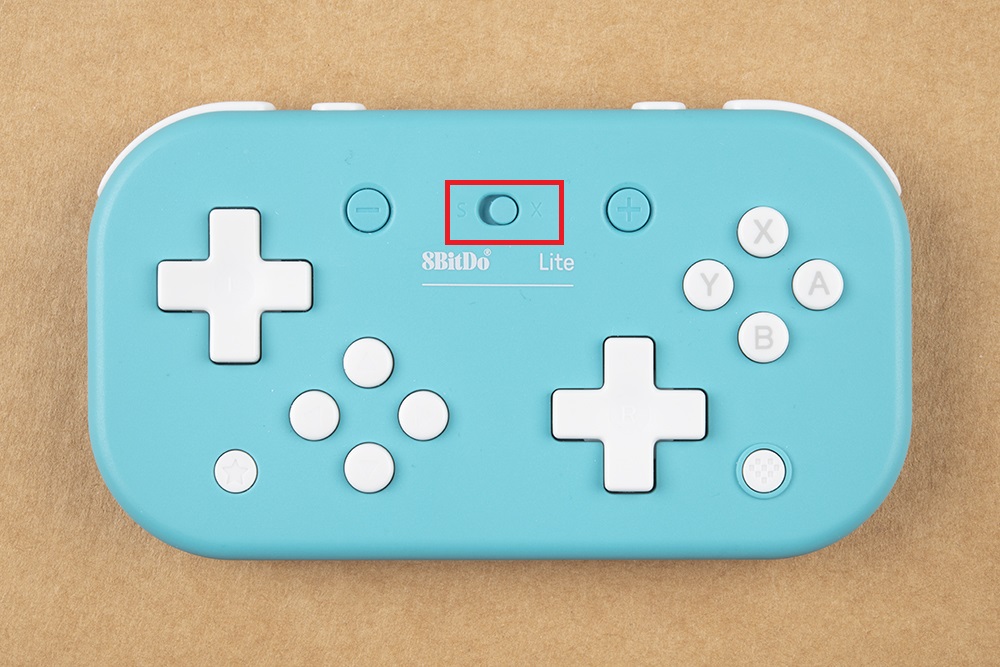
Make sure the S/X button is moved to the "S" position like so:

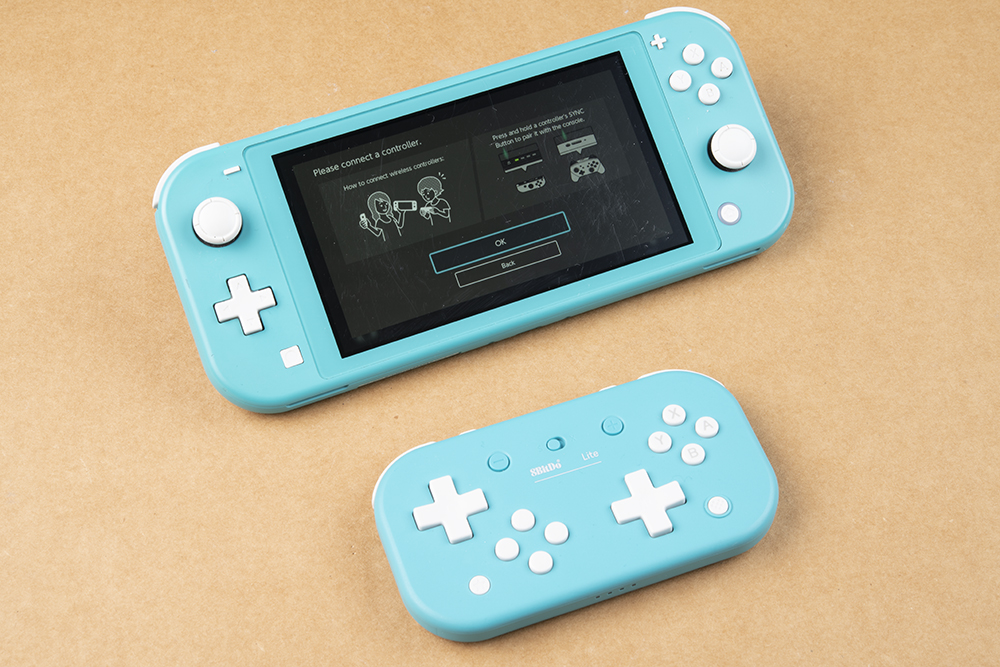
Then press the Home button to turn the controller on:
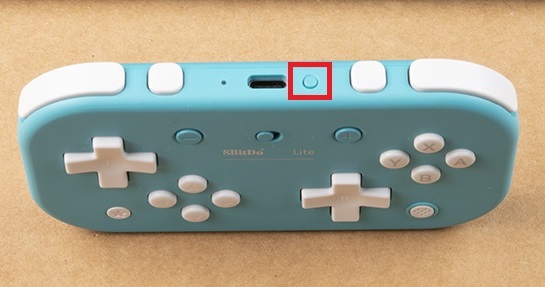
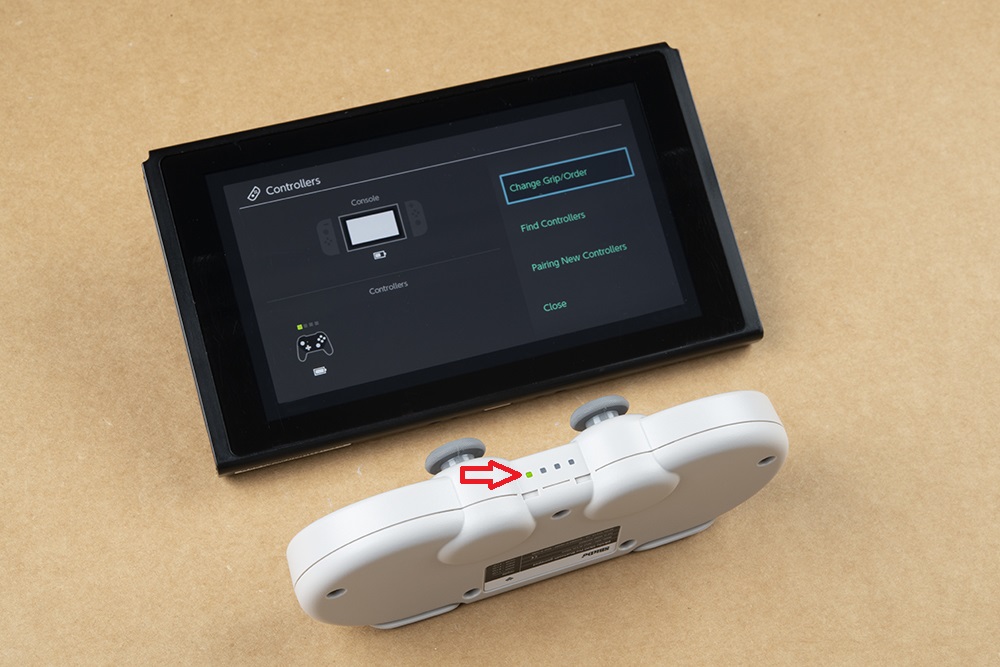
On the bottom of the controller, you'll see LEDs turn on. Once the LEDs are lit up, press and hold the Pair button at the top of the controller for 3 seconds to enter pairing mode.
The LEDs will run back and forth while pairing. Once pairing is complete, a single LED will light up and you'll see the following screen:
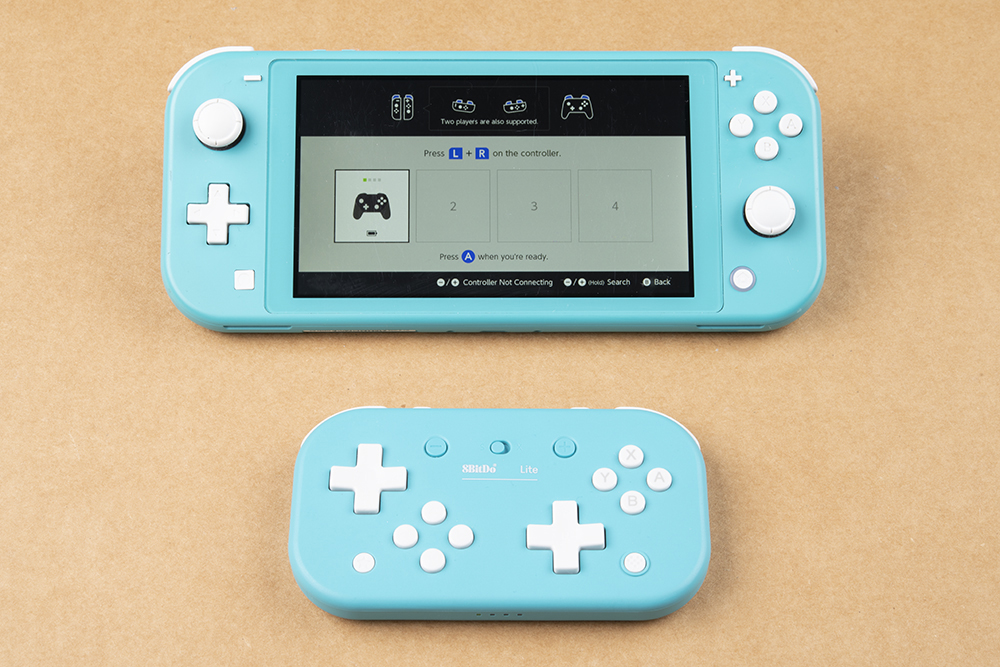
WOO GAME!
Windows
To pair your 8BitDo Lite Controller with Windows, start by navigating to your Bluetooth Settings from your Windows Start menu.

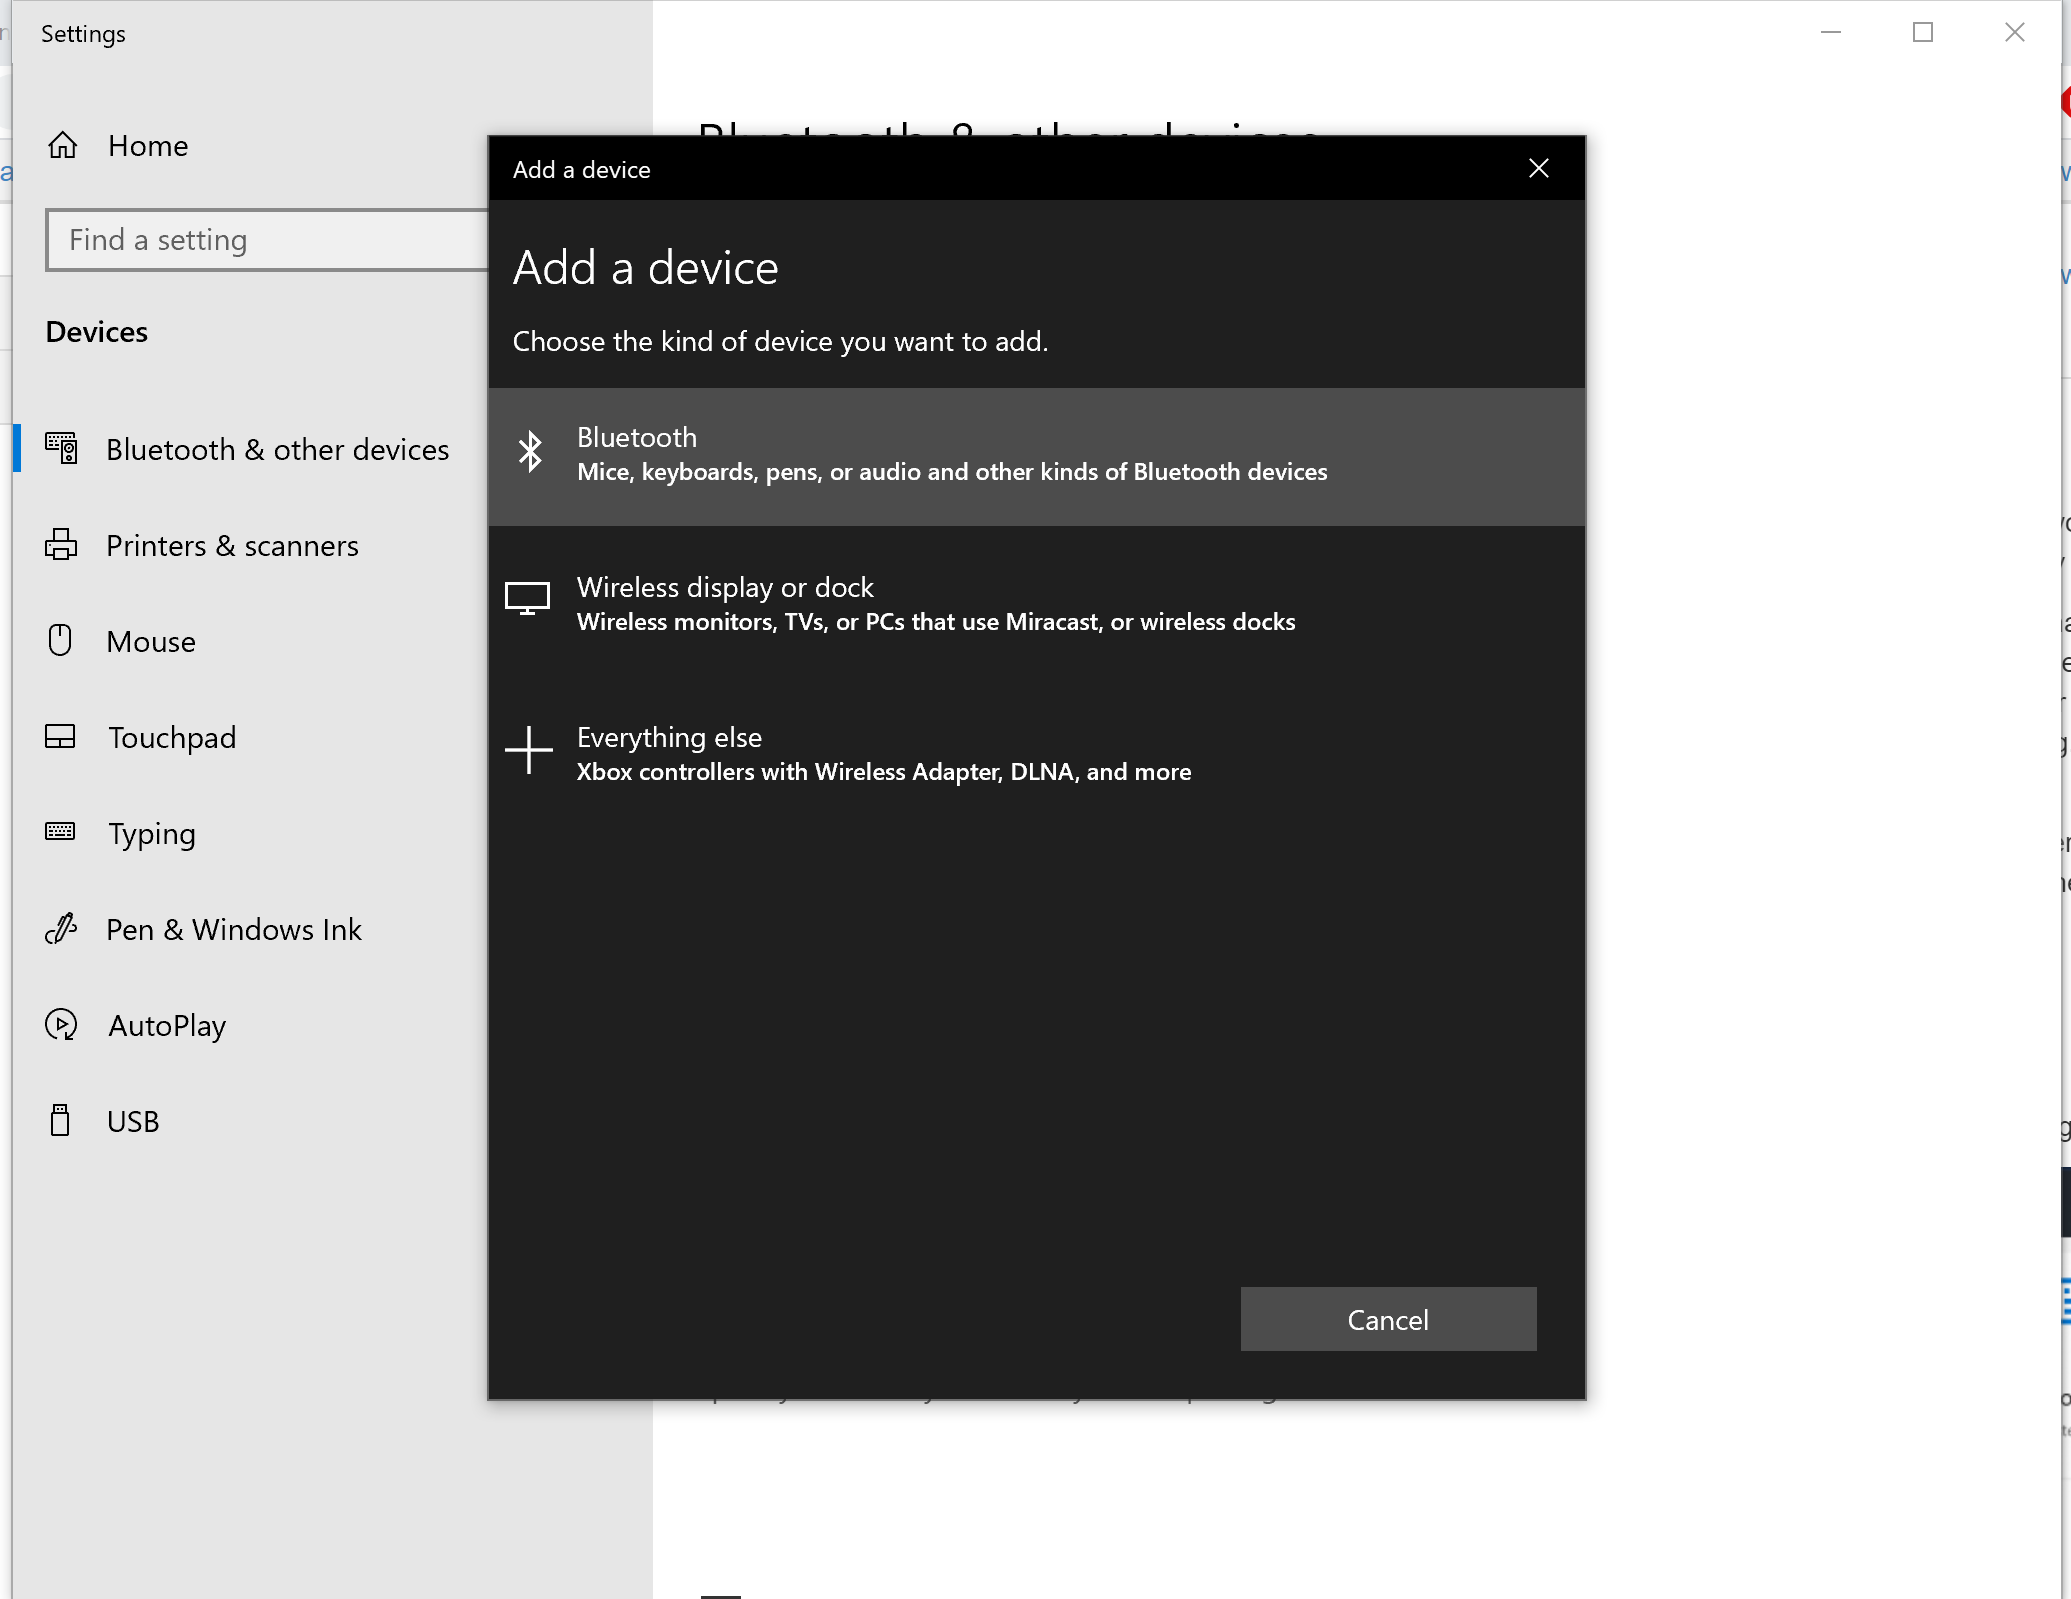
Click on Add Bluetooth or other device:

Within this dialog, select Bluetooth:
Make sure you have the Select switch on the 8BitDo Lite Controller is set to "X".
Press the Home button on the Lite Controller:

The LEDs on the bottom of the Lite controller will light up. Once you see this, press the "Pair" button on the top of the Lite Controller.
In Windows, you should see the 8BitDo Lite show up. Go ahead and click on that.
Once paired, game on.
SN30 Pro Hardware Overview
Got drift? The 8BitDo SN30 Pro Controller Gamepad is, in essence, a pro controller for the Nintendo Switch. Instead of going out and buying a new joycon, feel free to pick one of these bad boys up instead. Let's look at all the features!
- Compatibility: Windows, Android, macOS, Steam, Switch, Raspberry Pi
- Controller Mode: X-input, D-input, Mac mode, Switch mode
- Special Features:
- Rumble vibration
- Motion controls
- Turbo function
- USB-C
- Dimension / Weight: 14463.533mm / 114g
- Connectivity:
- Wireless Bluetooth®4.0
- USB-C
- Includes:
- SN30 Pro G Classic
- USB-C cable
- Instruction manual
Battery and Charging
Like all of 8BitDo's controllers, this one uses a Universal USB-C and charges up in a couple of hours. 8BitDo mentions that a single charge can play for 16 hours, but I haven't tested that out. Uh... I'll do that now. BRB...
SN30 Pro Hardware Pairing
Switch
Like it's Lite brethren, the 8BitDo SN30 Pro is designed to work with the Nintendo Switch system. And just as similarly, the pairing process is fairly straightforward.
From your main screen, navigate to "Controllers".
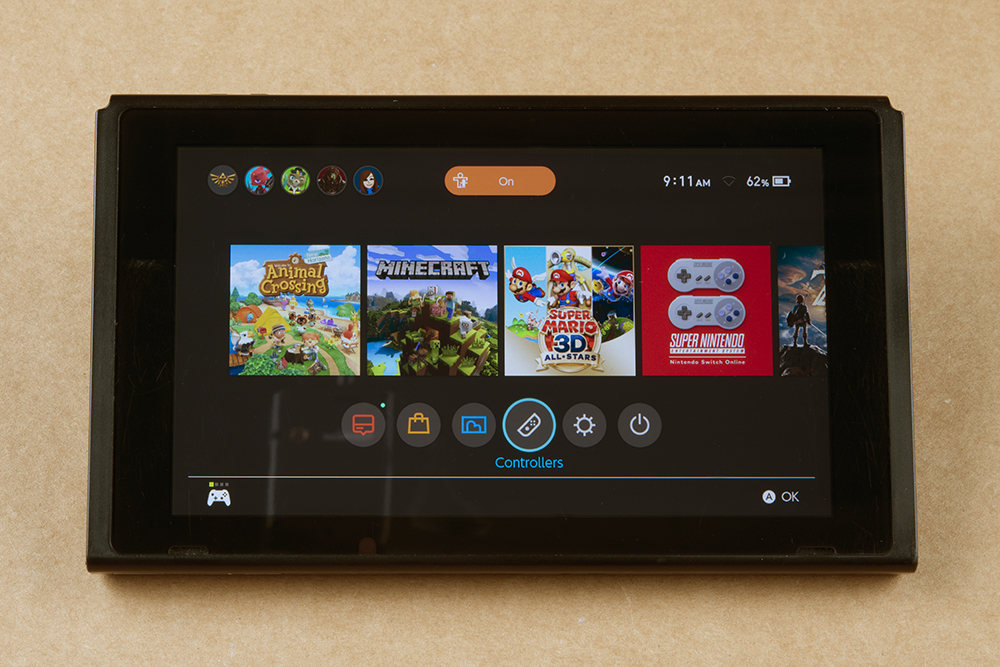
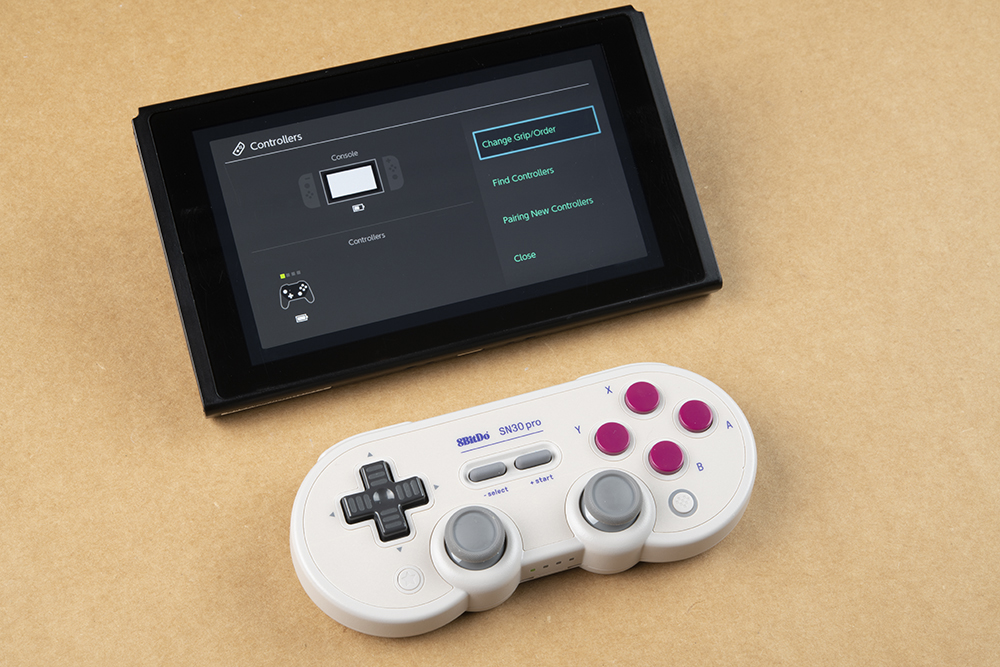
Select Change Grip/Order like so:
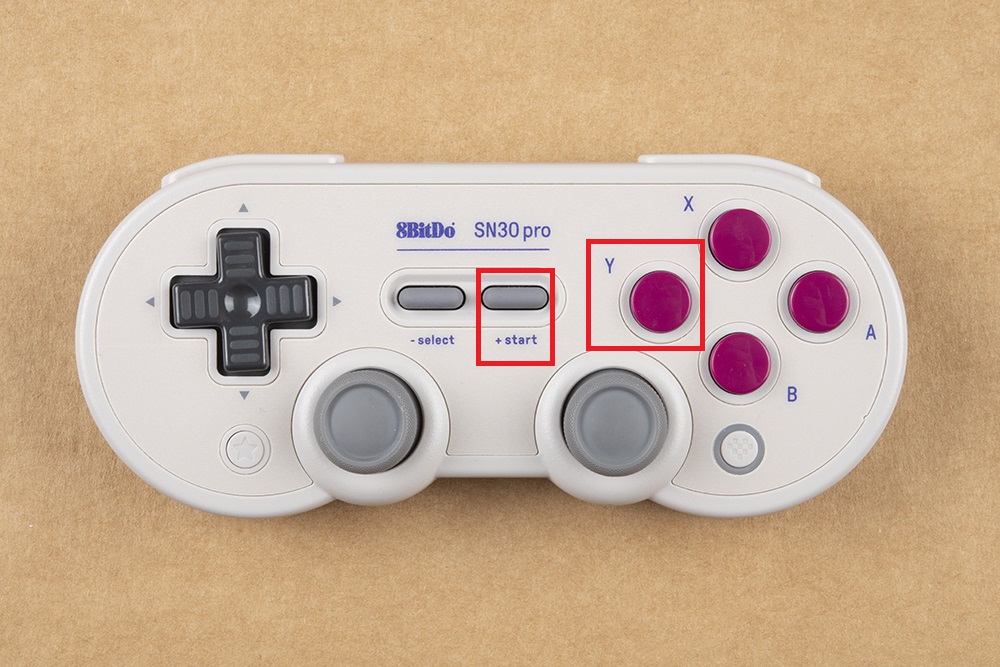
On the SN30 Pro Controller, press Y and Start simultaneously.
Once the LEDs are lit up, press and hold the Pair button at the top of the controller for 3 seconds to enter pairing mode.
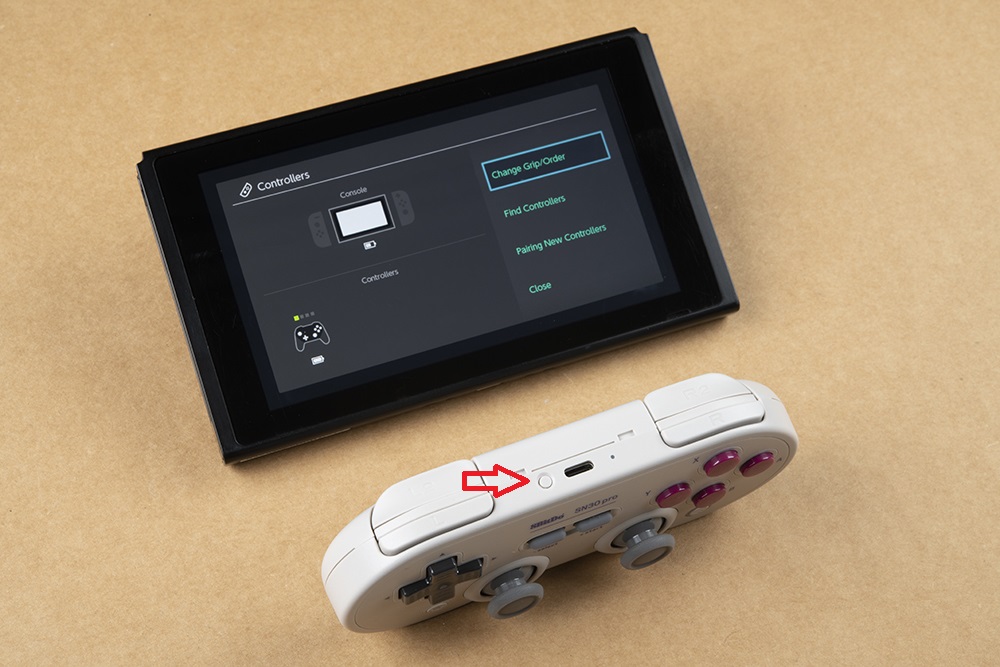
The LEDs will run back and forth while pairing. Once pairing is complete, the LED will light up.
Playtime!
If you're used to the Nintendo Switch Pro Wireless Controller, the SN30 Pro takes a hot minute to get used to. That said, all the functionality is there, and the price is pretty sweet.
Windows
Got Windoz gamez? Let's pair.
Go to the Start menu and navigate to your "Bluetooth" dialog.
Once your Bluetooth Dialog is open, click on Add Bluetooth or Other Device.
Choose your Bluetooth Type (top option):
On the SN30 Pro Controller, press X and Start simultaneously

Once the LEDs are lit up, press and hold the Pair button at the top of the controller for 3 seconds to enter pairing mode.
In Windows, you should see the 8BitDo show up. Go ahead and click on that.
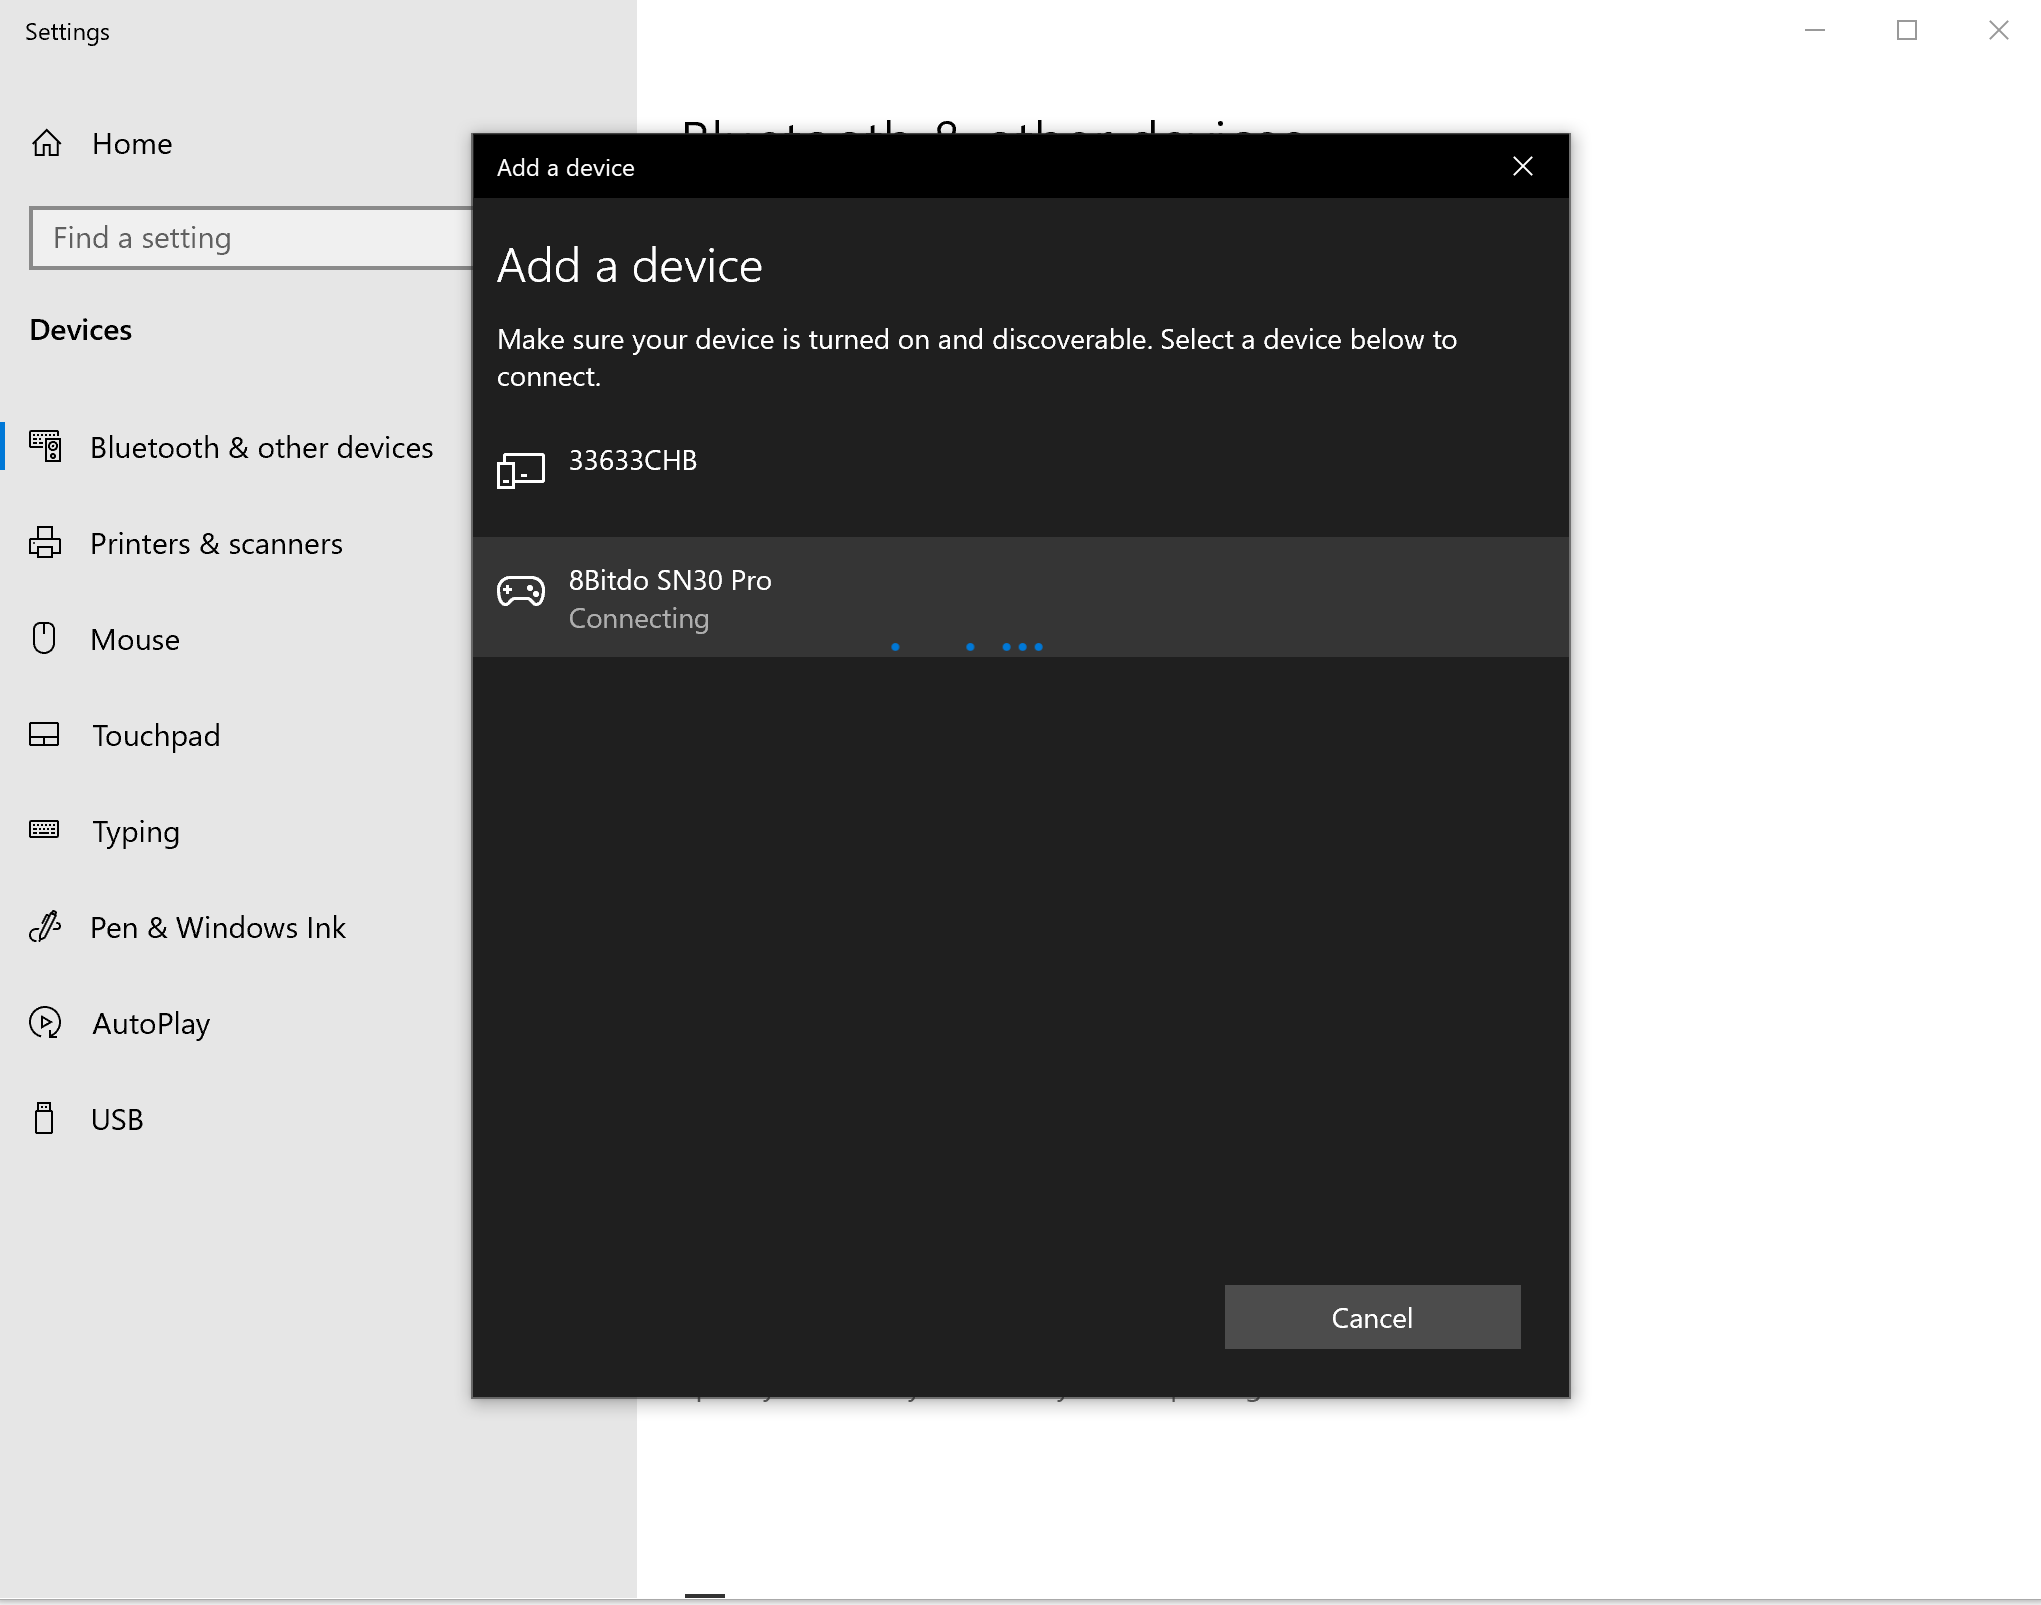
The LEDs will run back and forth while pairing. Once pairing is complete, the LED will light up.
GAME ON.
Raspberry Pi
It isn't the goal of this tutorial to get you set up with a RetroPie gaming system. If you aren't already up and running, the documentation at RetroPie's First Installation Webpage is a great start.
Here are all the items I've used here:
That said, I did do a few mods after setup. At a broad stroke, here's where I went:
- Updated the firmware on my Pro Controller
- Updated my RetroPie
- Downloaded Game ROMs
- Transferred my game ROMs
- Reboot!
Initial Setup
For your intial setup of the SN30 Pro Controller, you'll wanna plug that bad boy in. I know, we want to go wireless. This is just the first go around.
- Using the provided cable, plug the SN30 Pro into your RetriPie and then boot the Pi. You should see a Welcome screen like this:
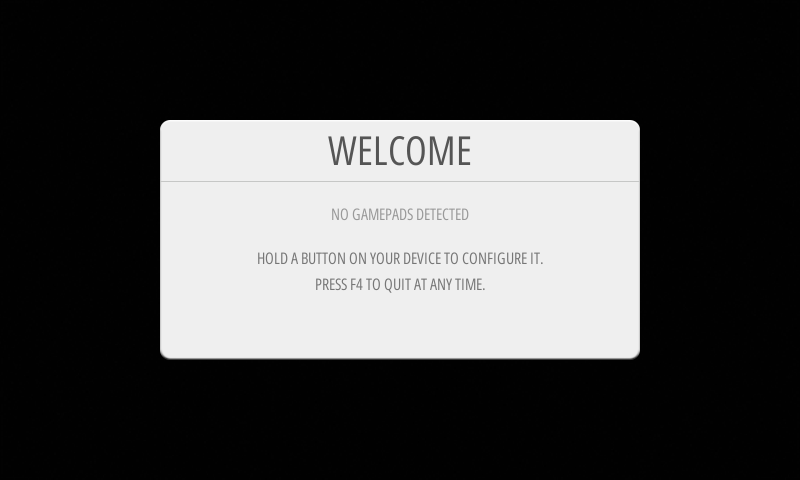
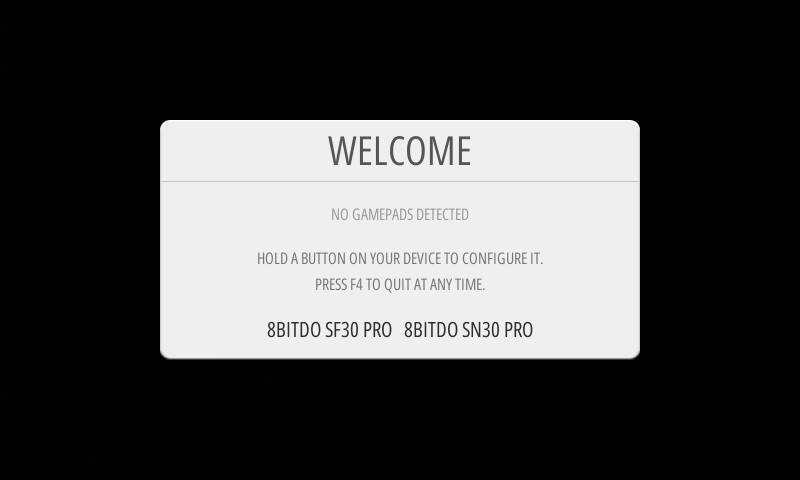
- Press and hold down the "A" button on your Controller. The Welcome Screen should recognize your controller and show you the following:
- Configure your SN30 Pro Controller as prompted. Here's mine in progress:
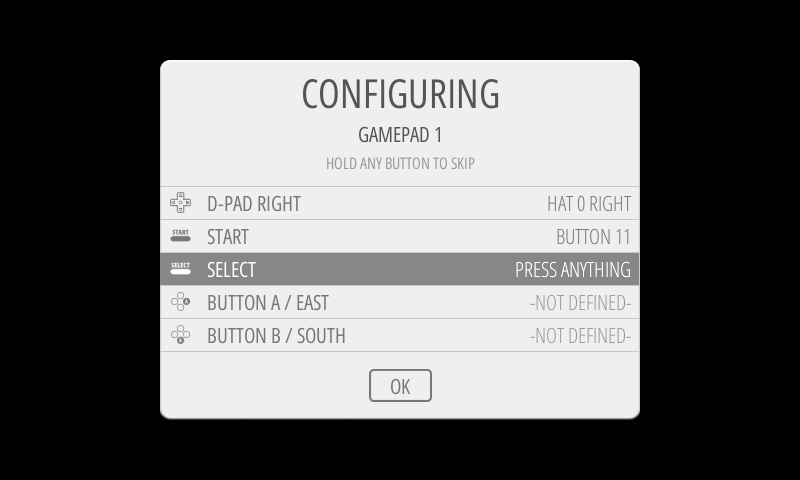
Once you are finished, you should be taken to the RetroPie main window! WOOOOO!
Bluetooth
The easiest way to get gaming is to just leave your controller plugged in. But NO! We want to walk across the room to do something vital while continuing to play our game on the RetroPie! Let's take advantage of that fancy Bluetooth capability, shall we?
- To start out, make sure you have a keyboard or other controller plugged in and ready to control and push buttons.
- Get yourself to your RetroPie Main Screen and select "Bluetooth"
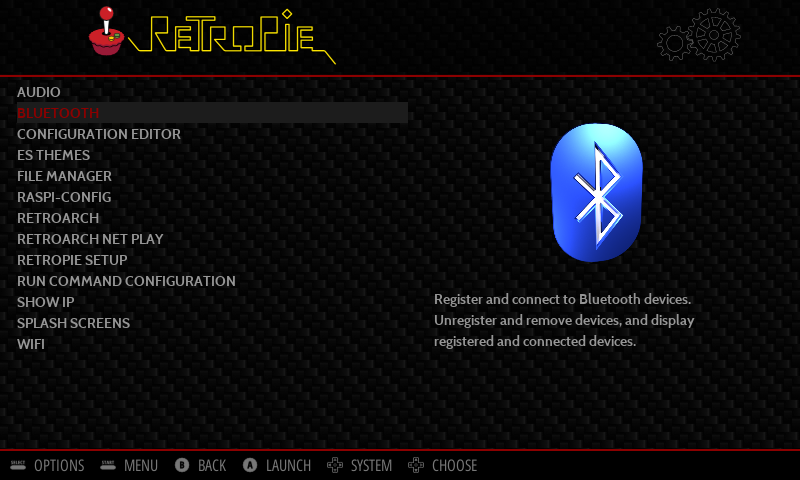
- Once you select Bluetooth, you'll see the following show up:

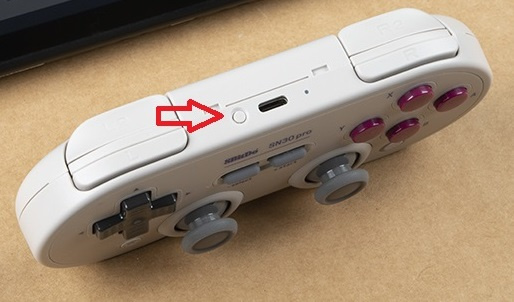
- On your SN30 Pro controller, hold down X and Start at the same time.
- Once you see the LED blinking at the bottom, push the "Pair" button on the top.
- If all goes well, you should have some lovely mac addresses and the 8Bitdo SN30 Pro!
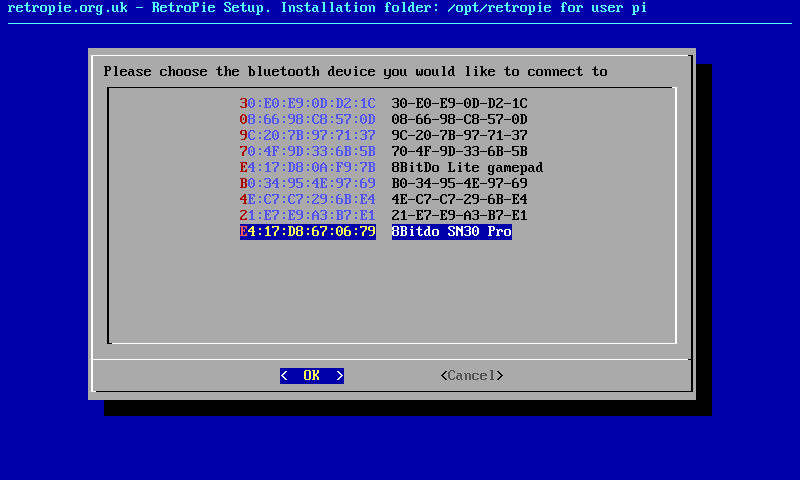
- Select "OK" and then 1 DisplayYesNo.
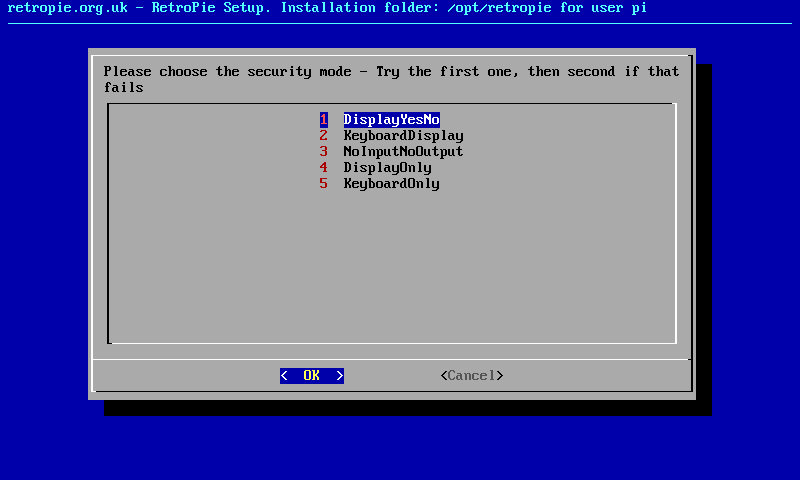
- With any luck, you'll get a happily paired and functional 8Bitdo SN30 controller that you can now wander around the living room with!
Troubleshooting
I had some shenanigans happening with Bluetooth for a bit. I finally tracked it down to a mismatch between some updated vs non-updated dependencies, but I suggest that if you find that you cannot pair, verify the version of your controller's firmware, update all modules on your RetroPie, and if all else fails, uninstall and reinstall RetroPie (make sure you back up your ROMS!!!).
Resources and Going Further
We've covered some of the basics here and we'll add more as we can, but these little controllers have so much potential. Is it feasible to connect them to your other bluetooth devices? Can you drive around a robot? What else can you hack?
8BitDo resources:
- 8BitDo
- 8BitDo SN30 Pro Bluetooth Gamepad Instruction Manual (PDF)
- 8BitDo Lite Bluetooth Gamepad Instruction Manual (PDF)
Need inspiration for your next project? Check out some of these Bluetooth tutorials!