Getting Started with OBD-II
 Toni_K
Using a Simulator
While these protocols are great for collecting data from your vehicle, it can be a real pain when prototyping to have to sit with a computer, various electronics, and cables running all over the place in the front of your car. Luckily, there are many simulators out there that allow basic prototyping and testing of OBD-II systems.
We have a few different simulators laying around here that are useful for working with these protocols. We'll update this section if/when we get our hands on any additional ones.
ECUsim 2000
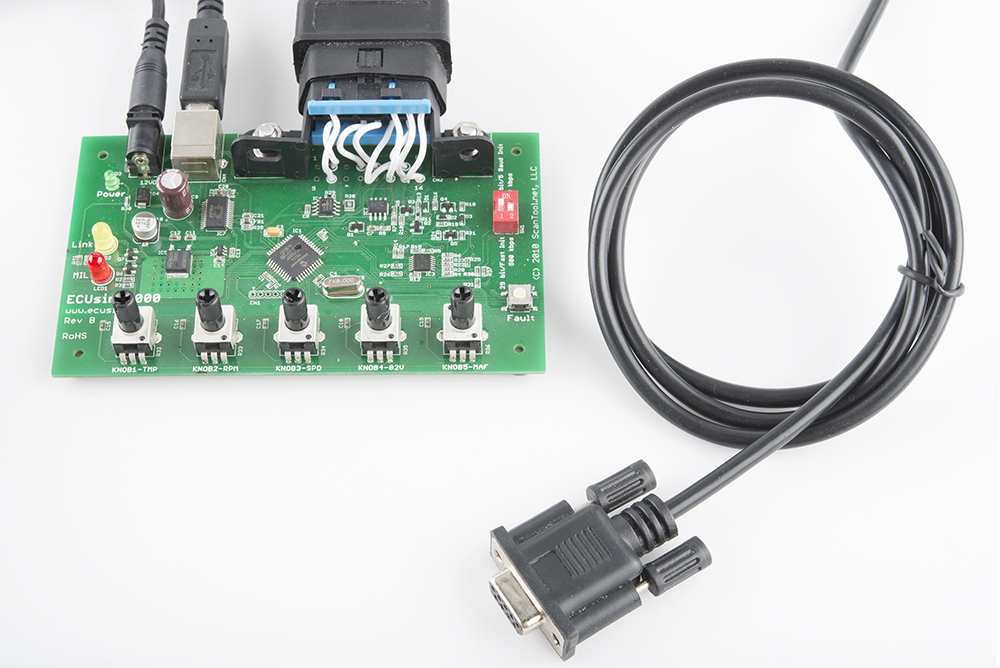
This ECU simulator is designed and manufactured by the lovely folks over at ScanTool. You can view all of the product information over at their product page here.
To get started using this simulator, you must make the following connections:
- Plug a USB cable in to the simulator and the computer. Install the necessary drivers.
- Plug in the OBD-II cable to the simulator.
- Power your simulator off of the supplied 12V power supply.
- Open up a serial terminal at
115200 bps, 8,N,1connecting to the serial port the simulator is configured to. - Configure the simulator to the protocol you desire to test.
- Connect to your ECU device (OBD-II board, CAN-Bus Shield, Raspberry Pi, etc.)
Now, you can leverage the power of the simulator by verifying that the data being transmitted over the bus is what your ECU reader is receiving and vice verse.
Several different programming options are available for configuring the simulator. Check out the programming manual for more information. The version we currently have has firmware compatible with several different OBD-II protocols, which will vary depending on what you order.
The programming manual also includes all of the commands that you can use for the simulator.
For example, if we need to determine what protocol our simulator is currently set to, we would use the SPI command. In our terminal, that would look like the following:
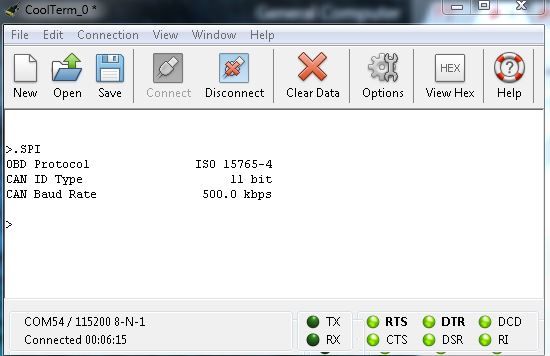
This shows that the simulator is currently set to the ISO 15765-4 protocol (a.k.a CAN), with an 11 bit ID type and is running at 500 kbps.
If you then need to send data from your simulator to a device such as the SparkFun OBD-II UART Board or CAN-Bus Shield for testing, you can use the transmit command SOMT <header>, <data>. For example, if we want to send the command that the engine fuel pressure is 100kPa, we would send SOMT followed by the Parameter ID (PID) for fuel pressure, which is 0A, and follow that with the hex value for 100 (64) in this case.
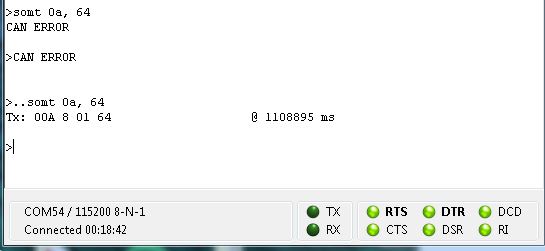
If we initially leave the connection floating (by forgetting to tighten the anchor screws on the DB9 connector) in order to simulate a connection problem, we receive the CAN ERROR message the first time we send the command. On this simulator, that means that there is a problem between the simulator and our CAN reader. Once we fix the connection however, the simulator is able to send the data, and tells us exactly what it transmitted. Pretty neat!