DigitalSandbox PicoBoard
Using Scratch
Scratch is an amazing platform for teaching an introduction to programming. It uses simple color-coded blocks that snap together to create programs or "scripts." It is designed with kids in mind, but the features and functionality of Scratch are extensive enough for you to create your own data-logging dashboards, arcade-style games, or full-length animations. Once you've uploaded the "Picoboard Arduino Code," the Digital Sandbox will work identically to the PicoBoard in Scratch.
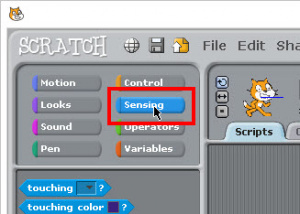
To use the PicoBoard Sensor Blocks, click on the blue Sensing Palette:
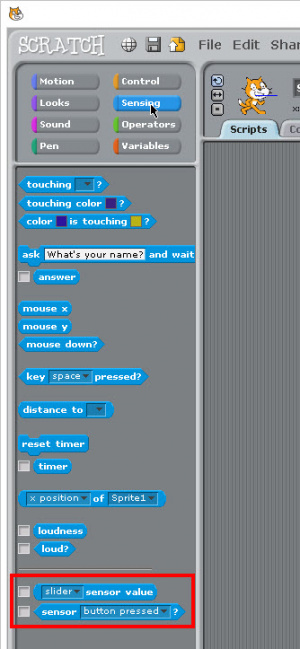
At the very bottom of the list, there are two blocks that we can use. One is (slider sensor value) and the other one is a boolean/logic block < sensor button pressed ? > All of the sensors on the PicoBoard (Digital Sandbox) return a value from 0 to 100. It is a scaled value where 0 V ==> 0 and 5 V ==> 100 in the Scratch environment.
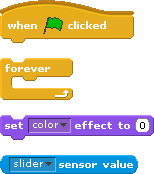
To help us get started, I like to just make a real quick and simple test script using just these four blocks:
Connect / assemble these blocks into a simple program like this:
Test it out!
Click the green flag and see what happens. The color of Scratch the cat should change as you move the slider back and forth. You should see the cat change from Orange --> Yellow --> Green --> Blue.
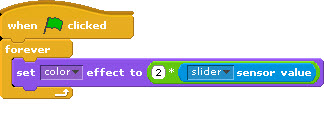
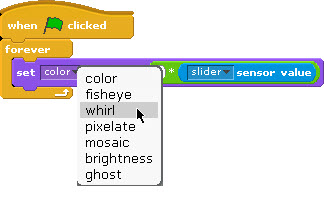
It seems like we're missing some of the colors. A little digging into the documentation on Scratch shows that the set color effect block operates on a scale of 0 - 200. So, to get the full range, we need to multiply the sensor value by 2. Grab a multiply block from the math operators:
Then, re-assemble the blocks so that it looks like this:
Click the green flag and try it again! How many colors does Scratch go through now?
Play around with other effect options and features. You can tie these to any of the sensors on the PicoBoard (Digital Sandbox) -- Slider, Light, or Sound. We tied the temperature to the Resistance-A sensor - which is also a range of values from 0 to 100.
