Benchtop Power Board Kit Hookup Guide
Hardware Assembly
When soldering your kit together, it's generally a good idea to check that you have all of the components first and then start soldering with the smallest components first.
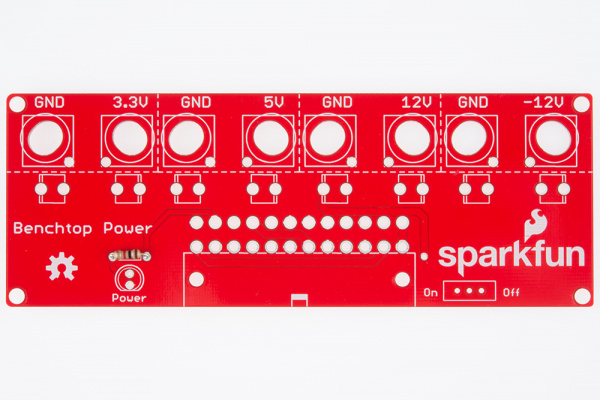
We are going to start with the 1K Ohm resistor. Since resistors are not polarized, it doesn't matter which way we plug it into the board. Bend the legs at 90 degrees to the body of the resistor, and place one leg in each hole next to the 1K silkscreen on the top of the board. You should then solder the resistor legs on the side of the board opposite all of the silk screen. Make sure you get a good connection between the resistor legs and the board.
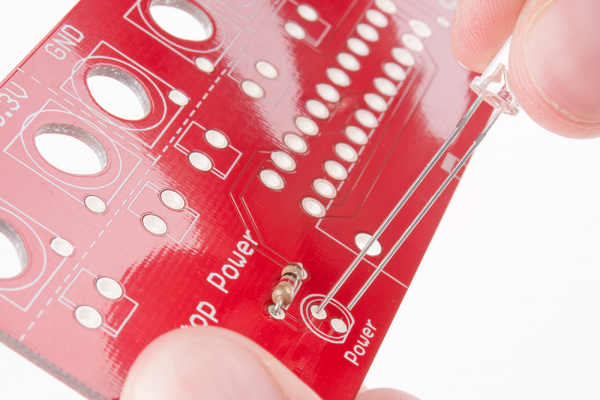
Once you have the resistor securely attached, it's time to add the red LED to the board. LEDs are polarized, so double check that you have the LED oriented correctly before soldering it down.
When looking at the LED, one leg should be longer than the other. This is the anode, or positive leg. The shorter leg, the cathode, should be placed in the hole closest to the flat edge of the LED silk screen on the board. This flat edge on the silk screen will also correspond to the flat edge of the LED casing as well. Again, this is important! If you solder in the LED backwards, it will not function!
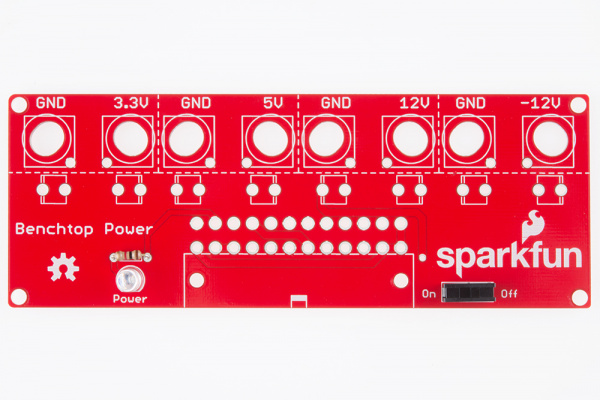
Flip the board over and solder the LED just like the resistor.
The next component to solder on is the switch. The switch is not polarized (just like the resistor), so you can place it in any orientation on the board. Place it in the box with the On/Off silk box, and solder the legs on the bottom of the board.
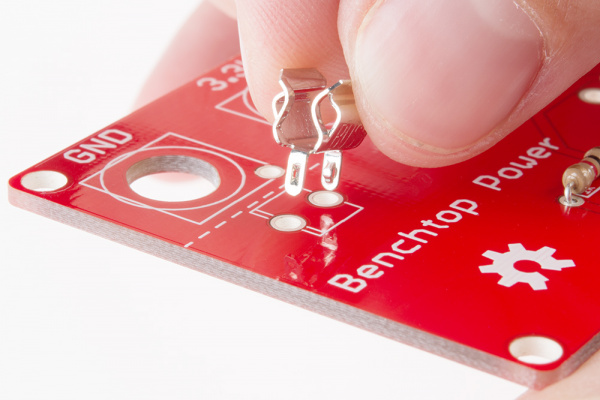
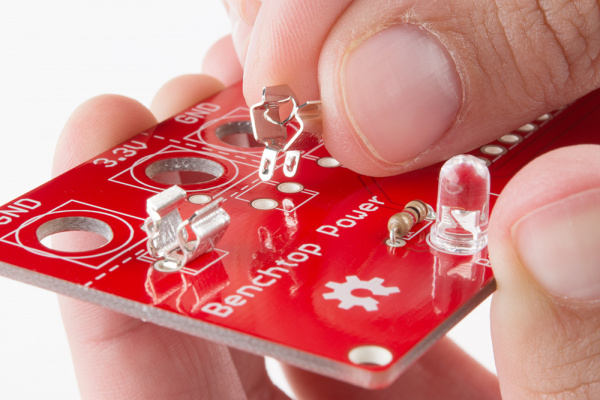
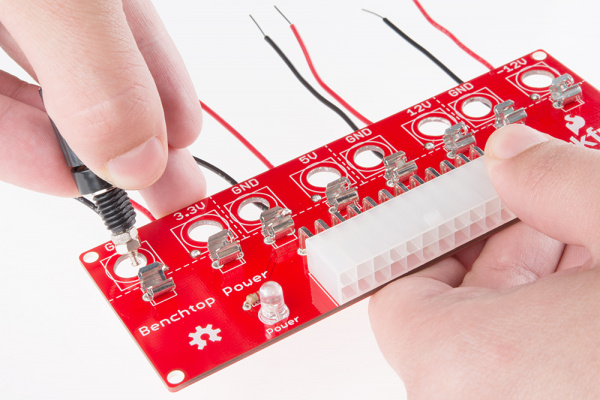
The next components you want to solder are the fuse clips. These clips are basically shaped pieces of conductive metal, but they still need to be oriented properly!! If you look at a single clip, one side of the U-shape will have two little curved-in pieces. These are designed to prevent the fuse from slipping out the end of the fuse clip. You will be pairing these up on the board (2 clips for each fuse), so they need to be oriented correctly to ensure that the fuse will actually fit in between them.
If you look closely at the silk screen on the board for the fuse clips, you will see one side of the square has a secondary line added. This is the side you should orient the curved bits towards.
Remember you need to be able to hold a fuse between each pair of clips, so be very careful when inserting them into the board. Double-checking before you solder them in will prevent frustrating rework time.
These can be a bit finicky at staying in the holes while you solder them, so it may help to bend the tab out a bit on each leg of the clip before attempting to solder them. Also, keep in mind that these are just basically hunks of metal, so they will take a lot of heat from the soldering iron to get a properly flowed joint. The clip itself will also heat up, so make sure you don't accidentally touch it and burn yourself!
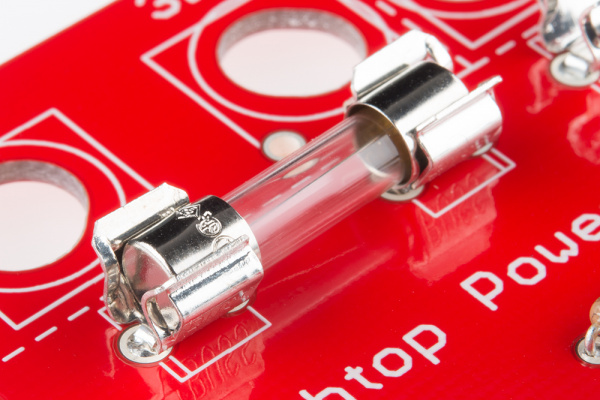
Once the fuse clips are in, you can either insert the fuses, or wait until you are done soldering, so they aren't in the way.
If the fuse slips out or won't stay inserted, take a pair of pliers and bend one side of the clip in towards the other. You'll want a good connection between the fuse clip and the fuse.
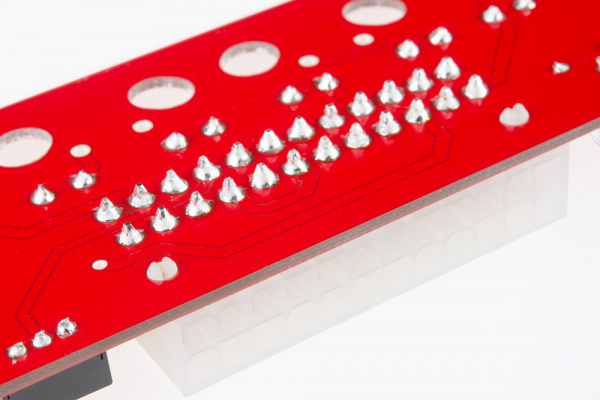
The last component you will be soldering onto the top of the board is the ATX connector. Make sure you carefully align all the pins and line up the edge of the connector with the edge of the board. The two plastic clips should also line up and snap into the vias on the board, to ensure the connector is oriented properly. Flip the board over and solder each of the pins. Make sure you don't bridge any of these - this connector can handle a large amount of current and a short could ruin your day.
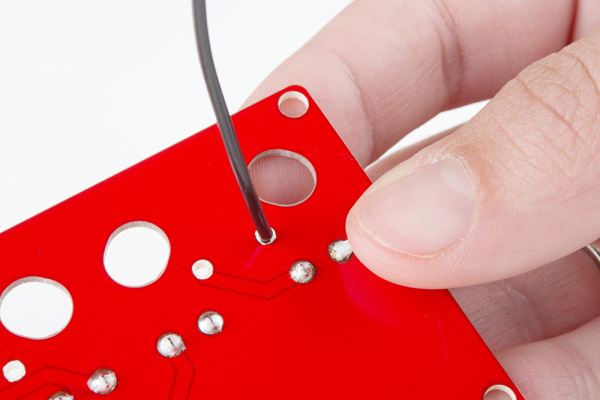
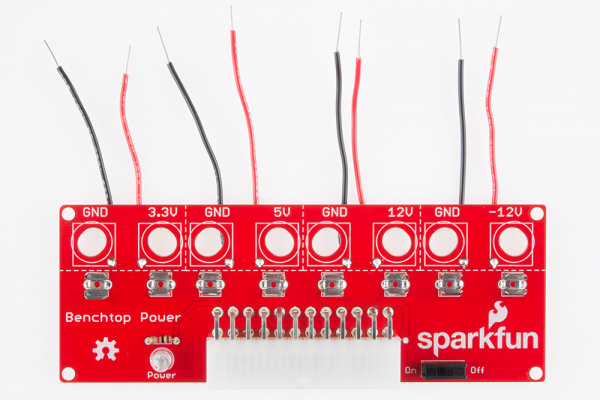
Once you have all of the components soldered to the top of the board, it's time to connect the wires to the board. You will want to cut 8 2-inch pieces of wire (one for each barrel jack connector). I personally like to use red hook-up wire for the positive voltage lines and black hook-up wire for the ground voltage lines. Strip a bit of the coating off of each end of the wire. Once the wire is prepped, it's time to solder it.
To make the rest of the assembly go smoothly, you should connect the wire to the bottom of the board, meaning that you will be soldering on the top of the board. This should be opposite of all of the other soldering you have done up to this point.
Once everything is soldered properly to the board, double check that you don't have any jumpers anywhere, and also make sure you clip any component legs that could potentially short out later.
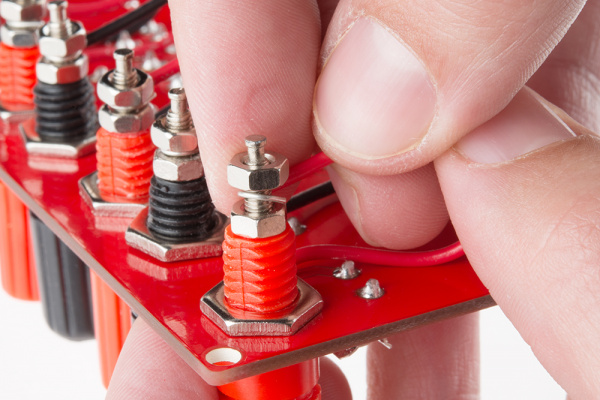
It's time to add in your barrel jack connectors. You will want to unscrew the large nut from each jack, orient the jack in the hole in the board, and then reattach the nut on the bottom to secure the jack to the board. Again, this should follow the convention of red for positive voltages and black with ground connections.
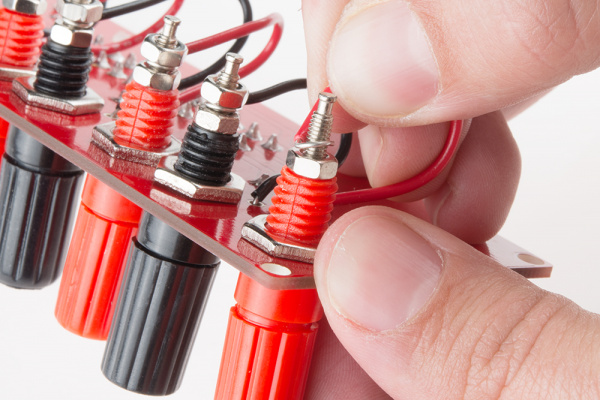
To connect your barrel jacks to your wires, you will want to unscrew the first small nut on the bottom of the barrel jack. Take the corresponding wire for that jack, and wrap it around the bottom of the jack. Then secure the wire in place by tightening back on the first nut to the jack.
It is extremely important at this step to ensure you connect your wires tightly to the jacks and to clip of any dangling ends. We really don't want these to short out once the system is powered!
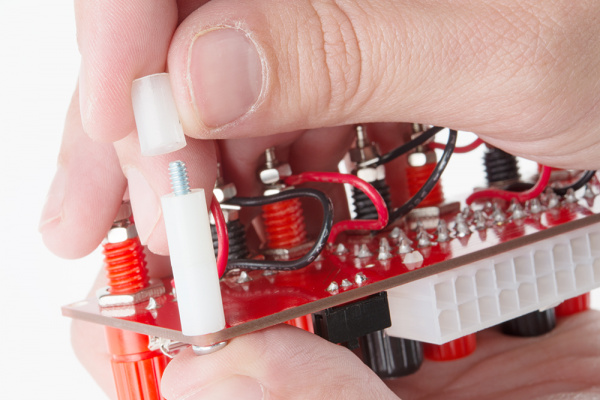
The final step of the assembly is to attach the stand-offs. Keep in mind this step is optional, depending on how you will be using the board. If you intend to mount this into a case, you may not need the following steps. We do have a template file in the GitHub repo that you can use to mill or cut out a space for this board if you are so interested.
Insert a screw into the top of the board so the screw head lays flush on the same side as the components. Screw on the plastic standoff on the bottom of the board.
If you didn't already, now is the time to insert the fuses into the clips.
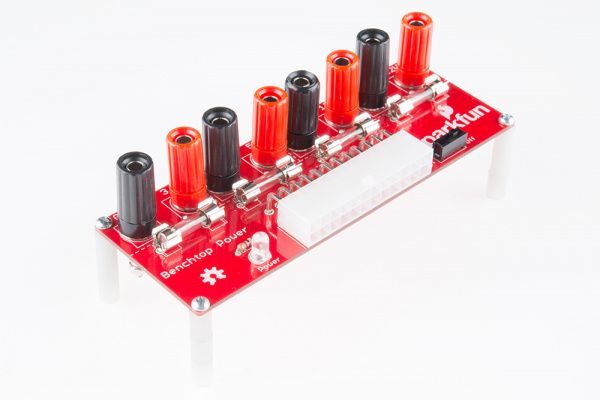
Your assembly is now complete!
