Addressable LED Strip Hookup Guide
 Nick Poole
Hardware Assembly
For the purposes of this tutorial, I'm going to assume that you have some very basic soldering experience. There are only a handful of connections that you'll need to solder, so this isn't a bad project to start with However, if you are using this as your introduction to soldering, we strongly suggest reading this tutorial first.
How to Solder: Through-Hole Soldering
Addressable LED strips, like the one in this tutorial, tend to use a standardized 3-pin connector. This makes it easy to chain multiple LED strips together. Because the battery pack included with this project is not going to support a lot more than the 60 included LEDs, you may find it convenient to cut the female connector off the "out" end of the strip and solder it to the RedStick to make your LEDs detachable.
![]()
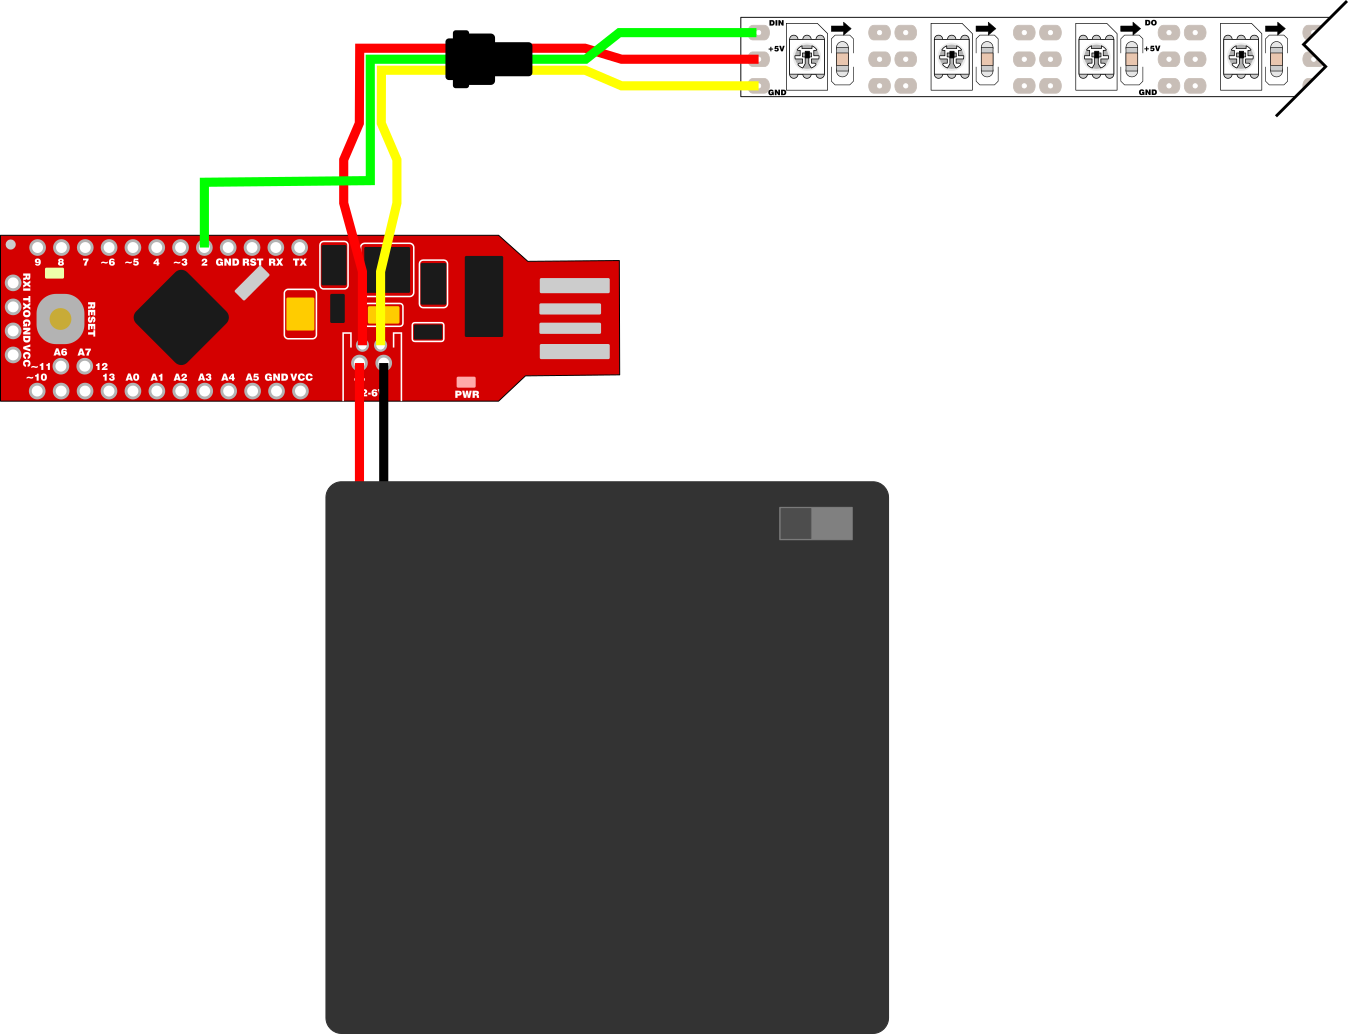
The diagram below illustrates the handful of connections that you'll need to make. You'll notice that the red and yellow wires from the LED strip are connected directly to the battery connector. You may be tempted to connect them to the GND and VCC pins on the RedStick, but don't do that. The VCC pin draws current through the on-board voltage regulator, which isn't rated for the high current that the LEDs require to operate. If powered from VCC, the regulator will definitely get hot and may fail altogether.