21st Century Fashion Kit: Inflation
 Dia, Member #313449
 Introduction
Inflatables are a great way to make fashion that transforms shape, or has a large exaggerated silhouette. A model with an inflatable skirt is my favorite thing to send down the runway, as she walks her skirt inflates growing larger and larger. But inflatables are also a fun way to prototype superhero outfits with your kid. This tutorial will teach you how to make an inflatable shape that you can turn on with the push of a button, using parts from the 21st Century Fashion Kit.
ReplaceMeOpen
ReplaceMeClose
Tools and Materials
Craft materials first:
- Iron
- Ironing board
- Long scrap of cotton fabric (a 7” x 36” strip is great!)
- Scissors
- Ballpoint Pen
- Wire Cutter
- Wire Stripper
- Soldering Iron
- Solder
- Clear Packing Tape
- Felt (Optional, if you choose to make the soft circuit button)
From the 21st Century Fashion Kit, you will need:
You'll also need the lace tablecloth in the kit, which isn't available separately on our storefront.
In this project, I've added a Soft Circuit button, which is strictly optional. You can also use a pre-made momentary button, either sewable or not.
Suggested Reading
Here are a few topics you might want to familiarize yourself with in preparation for this tutorial:
- What is Electricity? - Relevant to everything, ever.
- Transistor Basics - This is great information to have, and good background on the mosfet you'll be using!
- Switch Basics - Learn more about how the buttons you'll be using work.
- How to Solder - This tutorial will use both solder...
- Working with Conductive Thread - ...and conductive thread.
Create the Inflatable Shape

Start with two layers of plastic. Draw a pattern with the ballpoint pen, and leave an opening for the fan.
Add an additional inch of material around the edge of the pattern to create a seam allowance, and cut the pattern out (you can eyeball the inch). You will later fuse the seam allowance together with the iron.
Tip: Place a couple of heavy things on the plastic tablecloth to hold the two layers in place while you are cutting. I used my pattern weights.Fold the long scrap of cotton fabric in half, so it is 2” wide, and iron it. You will be using the fabric as a press cloth, so that you do not melt plastic on your iron.
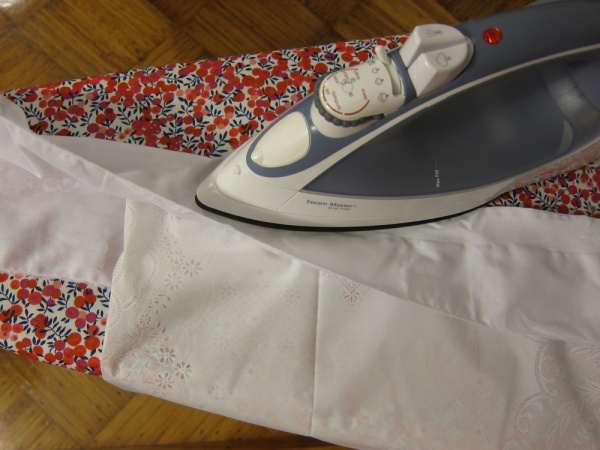
Fuse the tablecloth by sandwiching the edge of the two patterns inside of your press cloth. With your iron on the wool setting, press along the outer 1” edge of the shape holding the iron in place for 10 seconds as you press (make sure to leave the opening for the fan). Wait until the press cloth has completely cooled to touch, and then carefully peel off the cloth. Test after removing the press cloth the first time.
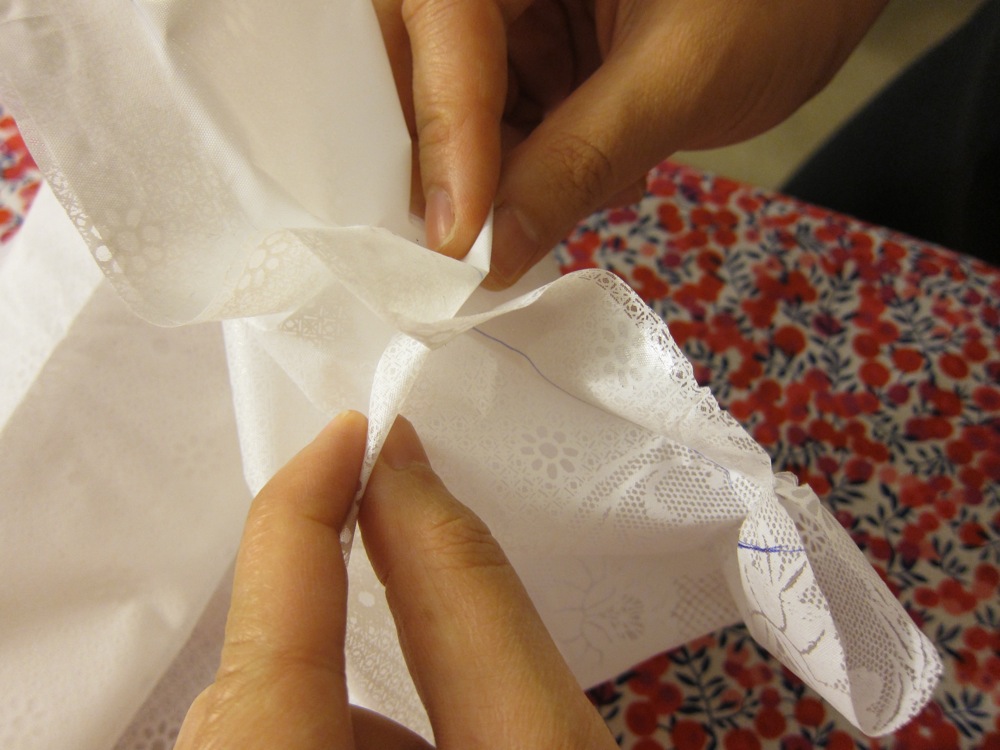
Is the iron too hot? If you are unable to remove the press cloth because the tablecloth has melted into it, or if the tablecloth tears from being heated too much, then lower the temperature of the iron or press for a shorter amount of time.

Is the iron too cold? Hold each piece of tablecloth between two fingers and gently pull them apart. If the tablecloth separates because it has not fused together then raise the temperature of the iron.
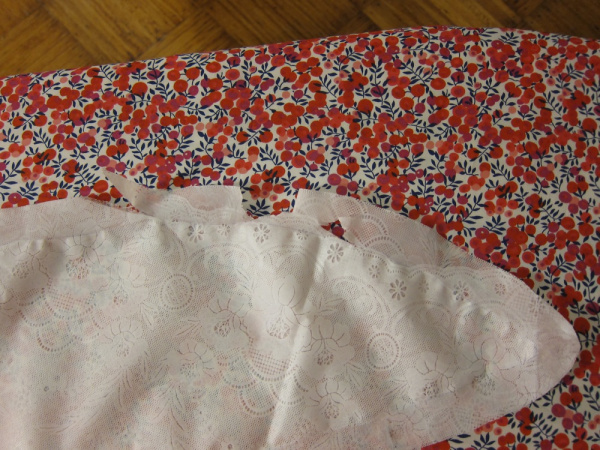
Turn your shape inside out to hide the fused seam.
Tip: If you arrange the press cloth so that the fold of the cloth is right next to the edge of the plastic patterns it will help you fuse your plastic more accurately.


Soft Circuit Button
If you would like to make your own fabric button, follow the steps below. For a more traditional button, move ahead to the next step, Momentary Push Button.
You will use conductive thread and felt to sew a button. When you push the felt, two pieces of conductive thread inside of the button will touch, turning on the circuit.

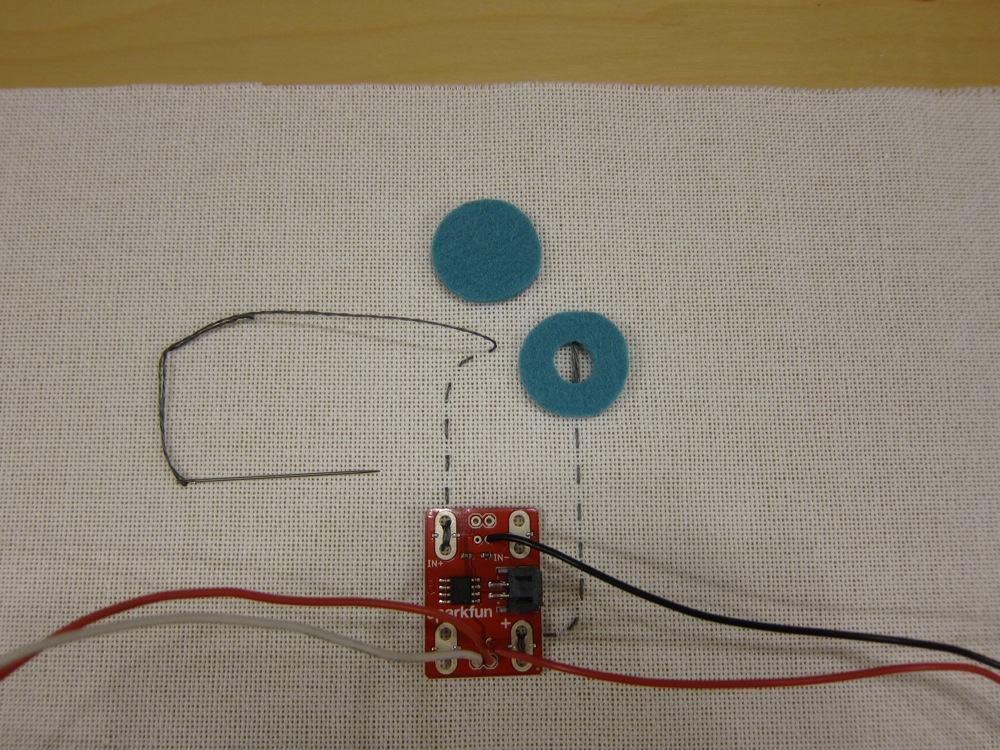
Solder the white ground (GND) wire of the squirrel cage blower to 'Out -' on the MOSFET Power Controller. Solder the red voltage wire to 'Out +'. Solder the red wire of 9V snap connector to the same 'Out +' pin on the Power Controller. Solder the black ground wire of the 9V snap connector to 'In -'.
Using the conductive thread, sew from 'In+' to the side of your button location. With a second piece of conductive thread, sew from 'In-' to the bottom of your button location. For a strong secure connection, stitch through the through-holes in the board a few times, and make sure your stitches are tight. The two threads should not touch.
Tip: Don’t use your fancy sewing scissor to cut the conductive thread. It is steel and will dull them.

With one thread, create a long stitch in the fabric that will go under the button. Sew back over the stitch three times, tie off the thread on the back, and cut off the loose end.
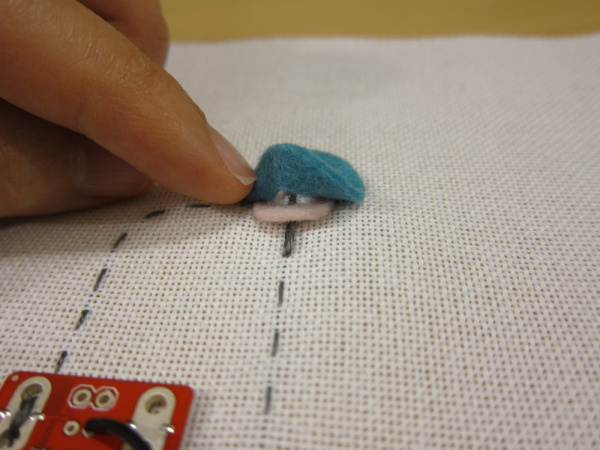
Cut a piece of felt for the top of the button and a piece for the inside. Cut a small hole in the inside piece of felt (the conductive thread will touch through this hole when the button is pushed).
Place the felt button inside piece over the long stitch. With the remaining conductive thread, sew across the felt button inside piece so that the two threads are perpendicular to each other. Stitch so that the thread spans across the top of the hole and is separated from the bottom thread by the felt. Once you have sewn to the opposite side of the button, tie off the thread on the back, and cut the loose end. Make sure the two threads do not touch.

Fine-tune Your Button
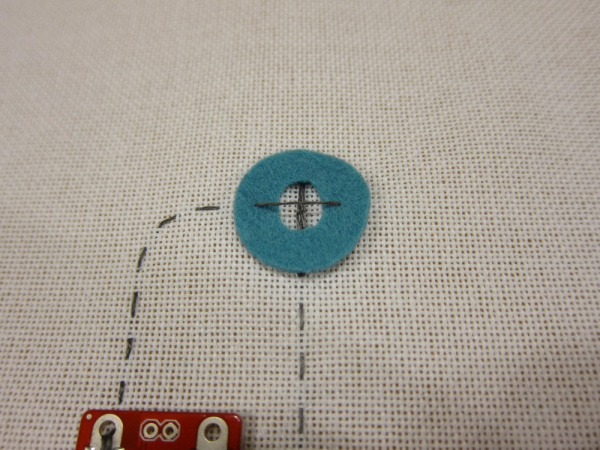
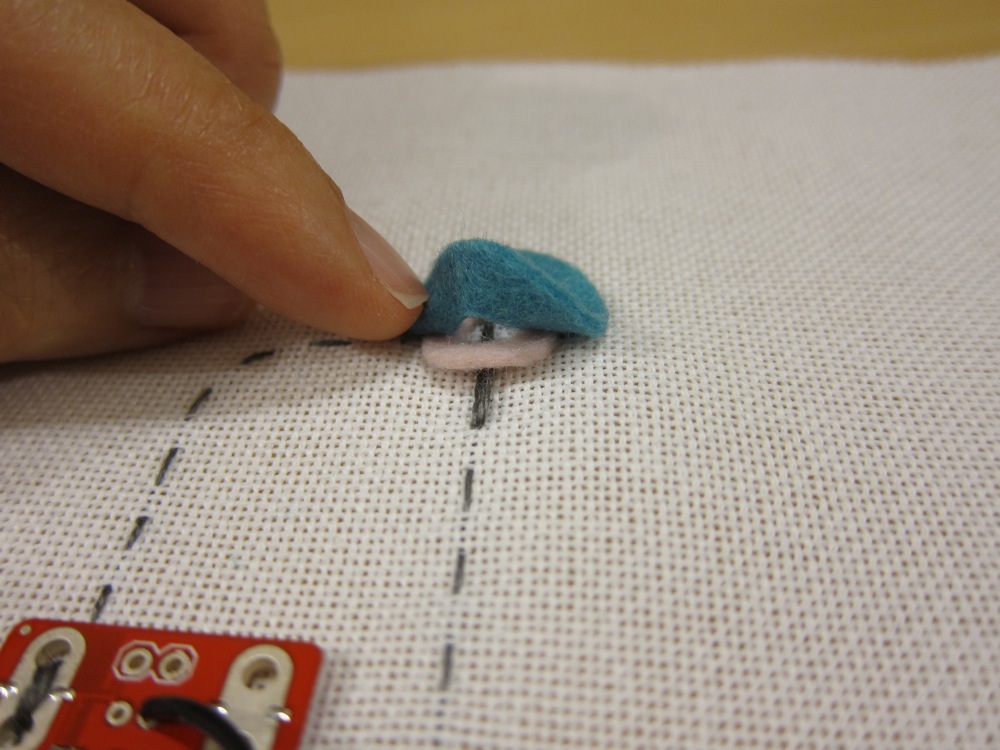
Start by making sure your button can be turned off. If the fan turns on, unplug your battery immediately. This means the top thread of the button is too close to the bottom thread (it’s completing the circuit before you even press the button). Cut a small doughnut of felt, and slide it under the button felt. This will raise the top thread a little higher.
Repeat the previous step until the fan no longer turns on.
Now it’s time to make sure your button can be turned on. With the battery plugged in, place the top piece of felt on the button. Then push the button. Make sure that the fan is turning on. If the fan is not turning on, trim the holes in the felt button and felt doughnuts a little bigger. Then try to push the button again. Be patient, you will probably need to trim and test several times. Once you can turn the circuit on by pushing the button, go back to the previous step, and make sure the button also turns off. Remember, this is experimental fashion, so getting a working button takes some fine tuning. Make sure to unplug your battery whenever you are working on your circuit.
Got a working button? Great! Stitch all of your felt pieces in place with traditional thread. Be careful not to sew through the conductive thread. Give the button one more test. If it isn't working, you'll need to do some restitching and trouble shoot your circuit using these steps.
Momentary Push Button
If you prefer to not make your own felt switch, using a standard push button will work just as well.
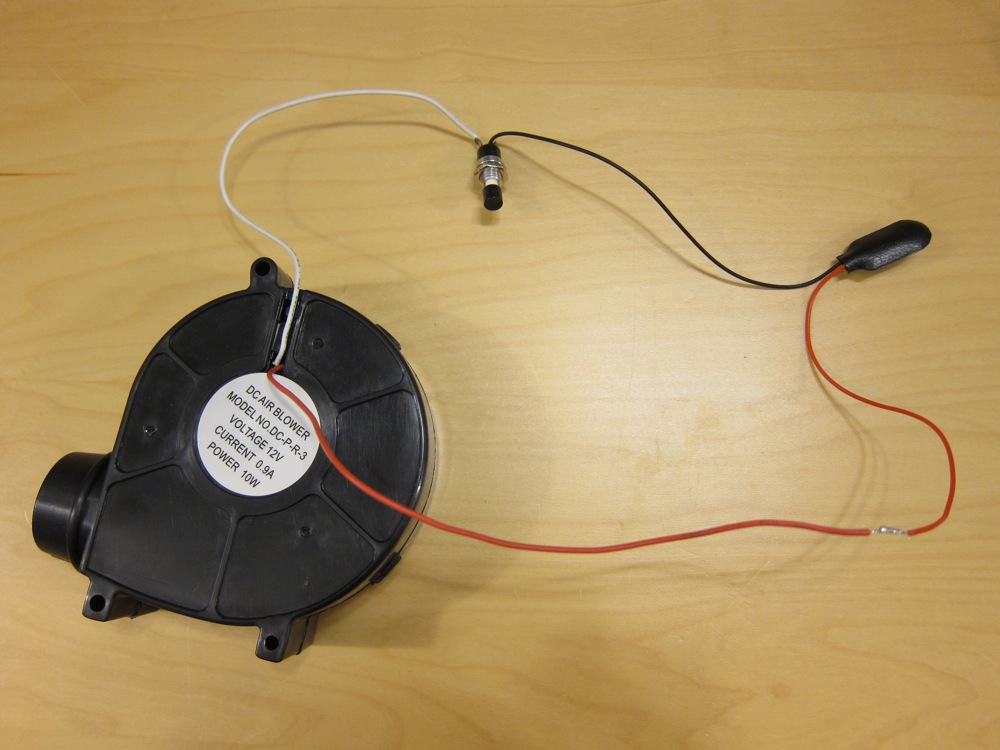
Solder the red voltage wires of the squirrel cage blower and the 9V snap connector together. Then solder the momentary push button switch between the white ground squirrel cage blower wire and the black ground 9V snap connector. Cover your soldered connections with electrical tape or heat shrink to cover any exposed wires and to avoid shorting!
Connect Inflatable Shape
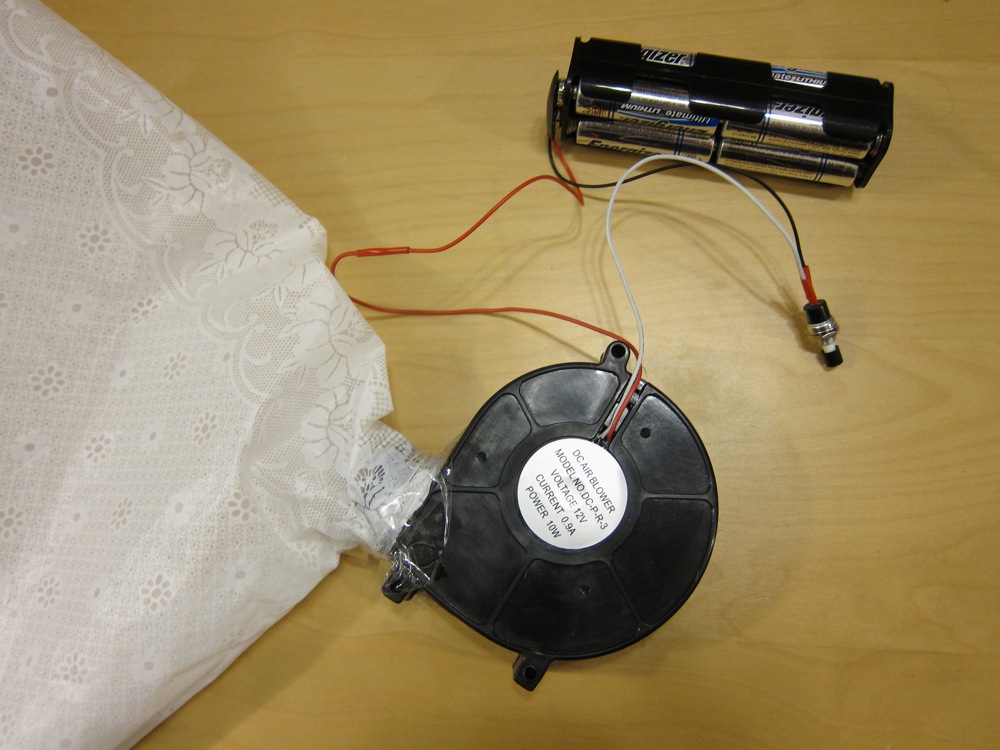
Slide the opening of the inflatable shape over the exhaust of the squirrel cage blower and secure it with the clear packing tape. Connect your battery, and you are ready to push the button and start inflating. Event hough the blower is rated for 12V, it will still run at 9V. Should you desire more power, you can always use an variation of battery holders to make your own power source.
Resources and Going Further
Hope you enjoyed this experiment!
Check out the other tutorials for the 21st Century Fashion Kit!
- Humidity-sensing LED Flower - Use the 21st Century Fashion Kit to create a smart terrarium that can tell you if it needs some water.
- ElectroChromatic Circuits - Use the 21st century fashion kit to create a color-changing project with designs that appear and disappear!