LogicBlocks & Digital Logic Introduction
Introduction
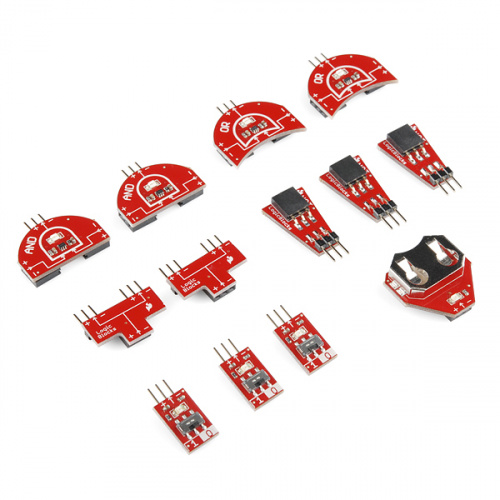
Get up close and personal with the driving force behind the world of digital electronics - digital logic! The LogicBlocks kit is your ticket to discovering digital logic, visualizing how it works, and exploring what it can create.
This tutorial is a continuation of the LogicBlocks Kit Information booklet, which is included with the kit, but we'll regurgitate some of the information in that booklet here. If you've already familiarized yourself with the LogicBlocks kit, I'd encourage you to skip parts 1-3, and head straight down to the experiments in part 4.
Covered In This Tutorial
This tutorial aims to familiarize you with both digital logic and the LogicBlocks. It's split into the following sections:
- What is Digital Logic?
- LogicBlocks Fundamentals
- The Blocks In-Depth
A second tutorial, the Logic Blocks Experiment Guide, follows this tutorial and houses all of the experiments we've concocted with LogicBlocks.
Suggested Reading
Before delving into the LogicBlocks, we recommend reading through these tutorials first:
- Analog vs. Digital -- This tutorial explores the difference between analog and digital signals. Important, since we'll be doing a lot of talking about digital logic.
- Digital Logic -- If you want to go more in-depth into digital logic theory, check out this tutorial.
- Binary -- Binary is the language of computers. Digital logic is a tool we can use to add and store binary numbers.
What is Digital Logic?
!!!
What is Digital?
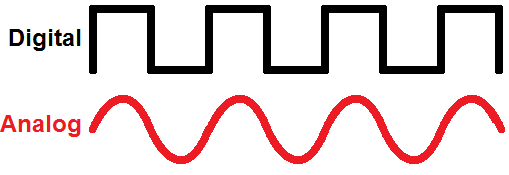
Electronic signals can be divided into two categories: analog and digital. Analog signals can take any shape and represent an infinite number of possible values. Digital signals have a very defined, discrete set of possible values -- usually only two.
Many electronic systems will use a combination of analog and digital circuits, but at the heart of most computers and other every day electronics are discrete, digital circuits.
What is Digital Logic?
We humans are (mostly) logical beings. When we make decisions and act upon them, logic is working in the background. Logic is the process of evaluating one or more inputs, weighing them against any number of outcomes, and deciding a path to follow. Just like we apply logic to make all of our decisions, computers use digital logic circuits to make theirs. They use a set of standard logic gates to help propogate a decision.
For an in-depth look at digital logic, check out our Digital Logic tutorial!
Where Do We See Digital Logic?
There is logic in all circuits. A connection to a power source is an example of an AND. Only if both power AND ground are connected will the circuit allow electricity to run through it.
Where else? Everywhere! The traffic light in a city uses logic when pedestrians push the walk button. The button starts a process that uses an AND logic gate. If someone pressed the walk button AND there is a red light for traffic where the pedestrian will be walking, the walk signal will activate. If both conditions of this AND statement are not true, the walk signal will never be illuminated.
Inputs and Outputs
A digital logic circuit uses digital inputs to make logical decisions and produce digital outputs. Every logic circuit requires at least one input, before it can produce any kind of output.
Digital logic inputs and outputs are usually binary. In other words they can only be one of two possible values.
There are a number of ways to represent binary values: 1/0 is the least verbose and most common way. However, you may also see them in a boolean representation like TRUE/FALSE or HIGH/LOW. When the values are represented at a hardware level, they might be given actual voltage levels: 0V [Volts] is a 0, while a higher voltage - usually 3V or 5V - is used to represent a 1.
| 1 | 0 |
| HIGH | LOW |
| True | False |
| 5V (Volts) | 0V |
Logic Gates
To make their logical decisions, a computer will use any combination of three fundamental logic functions: AND, OR, and NOT.
- AND -- The AND function produces a TRUE output if and only if all of its inputs are also TRUE.
- OR -- An OR will prove TRUE if any (one or more) of its inputs are also TRUE.
- NOT -- The NOT operator has only one input. The NOT operator negates its input, which means the output will be the opposite of the input.
Each of those functions can be realized using logic gates. Logic gates are what we use to create digital logic circuits. They're the building blocks of computers and other electronics . They take one or more inputs, perform a specific function (AND, OR , NOT, etc.) on them, and then produce an output based on that function.
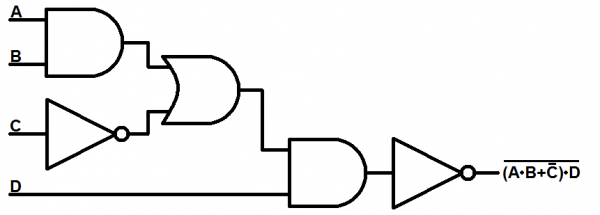
Logic gates all have specific circuit symbols, just like resistors, capacitors, and inductors. And, just like standard electronic component symbols, logic gates can be diagrammed in a schematic by connecting their input and output lines together.
Truth Tables
The 'logic' of a logic gate or function can be represented in a number of ways including truth tables, venn diagrams and boolean algebra. Among those, truth tables are the most common. Truth tables are a complete listing of every possible input combination, and the output they produce.
All inputs are arranged on the left side of the table, while the output is on the right. Every row of the table represents one possible input combination.
| Input A | Input B | Output Y |
|---|---|---|
| 0 | 0 | 0 |
| 0 | 1 | 0 |
| 1 | 0 | 0 |
| 1 | 1 | 1 |
Above is the truth table of an AND gate. An AND gate has two inputs and one output, so the truth table has two columns for input and one column for output. Two input values means there are four possible input combinations: 0/0, 0/1, 1/0, and 1/1. So, the AND gate's truth table will have four rows, one for each combination of inputs. The only case where the output of AND is 1 is when both inputs are also 1.
LogicBlocks Fundamentals
There are six separate LogicBlocks, which can be divided into three categores: logic gates, input blocks and utility blocks.
Logic Gate Blocks
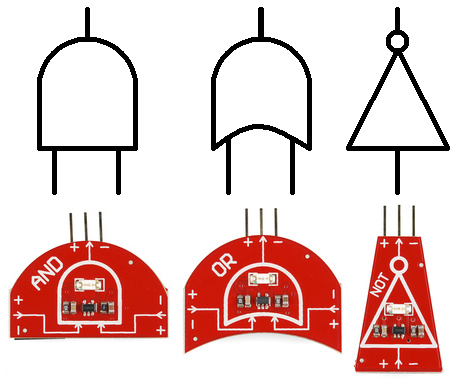
There are three different logic gate LogicBlocks: AND, OR, and NOT - the fundamental logic gates. They're shaped (as much as possible) like their circuit diagram equivalents, and also labeled with their gate name.
Each gate has one output, a male header (the pointy one). The female headers represent the inputs; the AND and OR gates have two inputs, while the NOT gate has just one.
The logic gate LogicBlocks each have an LED, which represents their output status. An illuminated LED represents a logic gate producing a 1, while an unlit LED means the gate is producing a 0.
Input Blocks
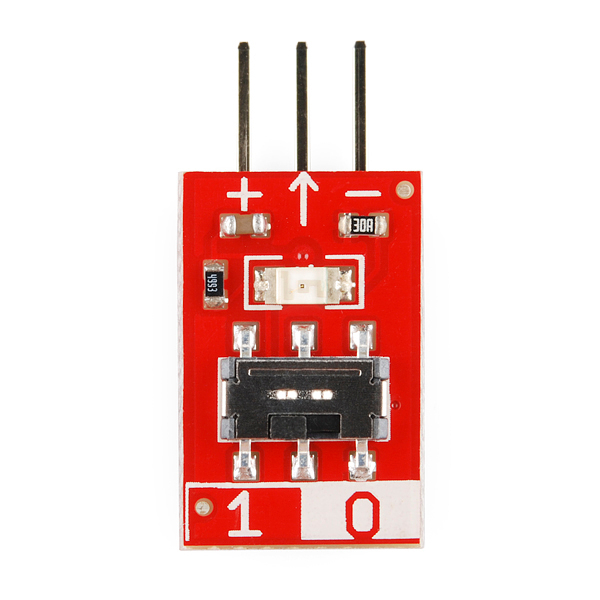
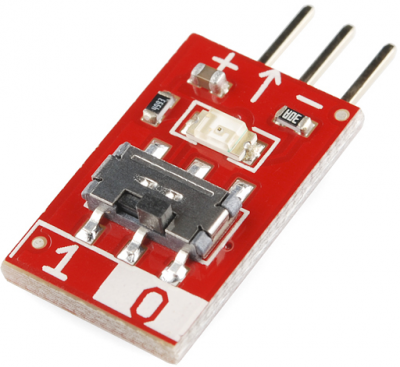
The input blocks are what you'll use to supply LogicBlocks with digital inputs. They have a switch to set the output of the Input block to either 0 or 1. The LED on the Input block displays what value the block is sending out.
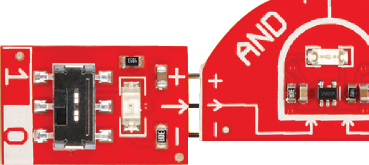
The input blocks have a single, male, output header. This should be plugged into the female inputs of the gate LogicBlocks.
Utility Blocks (and Cables)
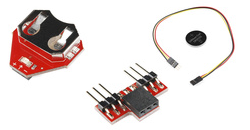
Key among the utility boards is the Power block. Each Logic gate requires power to operate, and this board is there to supply it. The Power block has a single, female, input header, and should be plugged into the output of the last logic gate. You'll only need ONE power block to supply power to an entire digital logic circuit.
There's also a Splitter LogicBlock, which simply divides one input into two outputs. It doesn't perform any operation on the signal, just passes it through. This'll come in handy when you create more complicated digital logic circuits which require one input to run into two or more logic gates.
Also lumped into this category is the feedback cable. This cable will usually be used in conjunction with the splitter block, for more advanced LogicBlock circuits.
The Rules
There's really only one rule when it comes to playing with LogicBlocks: When connecting an output of one block to the input of another, make sure each of the three pins match up. Each of the inputs and outputs consist of three pins: Power (“+”), Ground (“−”), and Signal (“->”).
You'll also need to make sure there's always one (and only one) Power Block connected to your LogicBlock circuit.
All inputs of a logic block (or cable) should have the output of another block (or cable) attached to them. If an input is left floating (not connected), the gate won't know if the input is a 1 or a 0, and, as a result, the output will be unreliable.
Response Times
Logic gates form their output decisions faster than any human could ever detect (we're talking nanoseconds). So to make the process more visible, we've slowed the LogicBlocks down so you can see the process they go through. If you've got a long line of logic blocks, this delay will allow you to more visually see how the outcome of one block affects the input of another.
The delay is on the order of half a second. Just long enough to see what's going on.
The Blocks In-Depth
On this page we'll dig into the gritty details of each component in the LogicBlocks kit. We'll talk about what each block's purpose is, examine their truth tables, and look at what other blocks they can plug into.
Here are some quick-links to the blocks we'll be covering on this page:
- Input LogicBlock
- AND Gate LogicBlock
- OR Gate LogicBlock
- NOT Gate LogicBlock
- Power LogicBlock
- Splitter LogicBlock & Feedback Cable
Input LogicBlock
The Input Blocks make the LogicBlocks world go 'round. These small rectangular blocks have one male connector, which plugs into the female input pins of gate blocks, power blocks, and splitters.
Each Input Block has a two-position switch, which you'll use to set the block as either 1 or 0 (TRUE or FALSE, ON or OFF).
A green LED on the Input Block represents the value it outputs. An illuminated LED indicates that the block is set as 1. If the LED is off, the output value is 0.
AND Gate LogicBlock
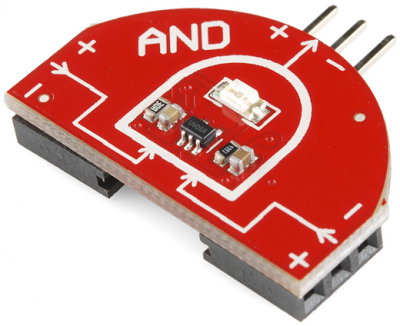
The AND LogicBlock is a two-input, single-output AND gate. The block is in a "D shape", much like the AND gate circuit symbol. The two female input headers are located on either side of the AND Block. The output of the AND Block is located at the middle-top.
You can connect either an Input Block or the output from another Gate Block to these inputs. The male output header can be plugged into either the input of another gate or a Power Block.
Each AND Gate Block has a single blue LED, which represents the output of the gate. If the LED is on, then that means the AND Gate is producing a 1 (TRUE, ON) at the output. If the LED is off, then the AND Gate's output is 0.
AND Truth Table, Circuit Symbol, Boolean Notation
Here's a truth table for the AND Block:
| Input A | Input B | Output |
|---|---|---|
| 0 | 0 | 0 |
| 0 | 1 | 0 |
| 1 | 0 | 0 |
| 1 | 1 | 1 |
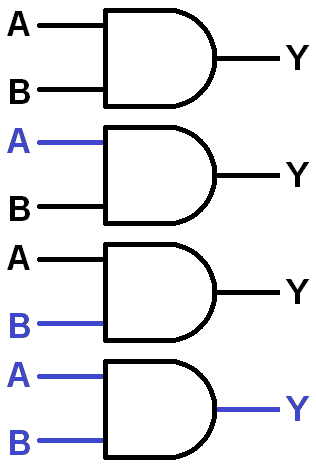
And the circuit symbol for an AND gate, which you'll get very used to seeing:
The boolean equation symbol for AND is the centered dot (·). For example, the gate above could be represented by the equation: A · B = Y.
OR Gate LogicBlock
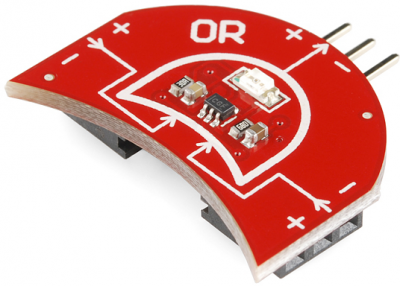
The OR LogicBlock is a two-input, single-output OR gate. The block is shaped like and OR gate circuit symbol -- a convex arc on the output side, and a concave arc on the input side. The two female inputs are located on either side of the OR Block. The output of the OR Block is located at the middle-top of the block.
You can connect either an Input Block or the output from another Gate Block to either of the two inputs. This male output connector can be plugged into either the input of another gate, or a Power Block.
Each OR Gate Block has a single yellow LED, which represents the output of the gate. If the LED is on, that means the OR Gate is producing a 1 (TRUE, ON) at the output. If the LED is off, then the OR Gate's output is 0.
OR Truth Table, Circuit Symbol, Boolean Notation
Here's a truth table for the 2-input/1-output OR gate:
| Input A | Input B | Output |
|---|---|---|
| 0 | 0 | 0 |
| 0 | 1 | 1 |
| 1 | 0 | 1 |
| 1 | 1 | 1 |
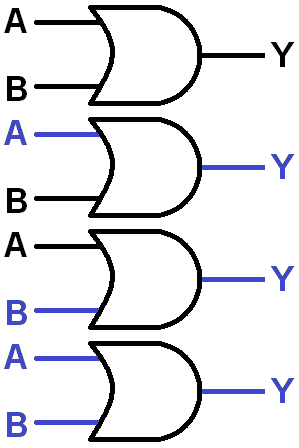
And the circuit symbol, shaped much like the block itself:
We can represent digital logic using boolean equations. The boolean equation symbol for OR is the plus sign (+). Here's the boolean equation for the OR circuit above: A + B = Y.
NOT Gate LogicBlock
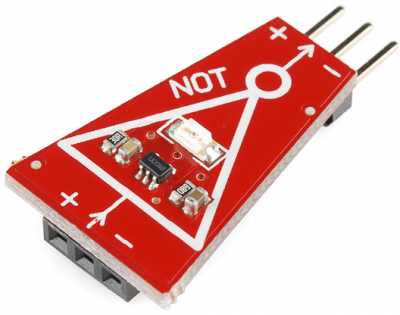
The NOT LogicBlock is a single-input, single-output NOT Gate. The Block comes in a trapezoid shape (it's as close as we could get to the triangle-shaped NOT gate circuit symbol). The female input connector is located on the side with the larger edge. The output of the NOT Block is located on the smaller edge.
You can connect either an Input Block or the output from another Gate Block to this input. This male connector can be plugged into either the input of another gate or a Power Block.
Each NOT Block has a single red LED, which represents the output of the gate. If the LED is on, then that means the NOT Gate is producing a 1 (TRUE, ON) at the output. IF the LED is off, then the NOT gate's output is 0.
NOT Truth Table, Circuit Symbol, Boolean Notation
A NOT gate is often called an inverter because it inverts any signal it receives. A 0 turns into a 1, and a 1 turns into a 0. An inverter's truth table looks something like this:
| Input A | Output |
|---|---|
| 0 | 1 |
| 1 | 0 |
When writing boolean equations, the NOT operation is usually indicated by a bar over any variables it inverts. For example the boolean equation for the circuit above would simply be:  .
.
Power LogicBlock
No electronic circuit can work without some form of power. Enter the Power Block!
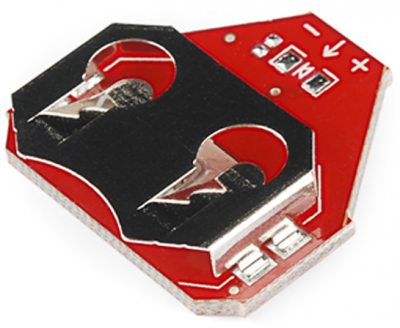
The Power Block runs on a single 20mm coin cell battery, which optimally provides around 3V, and should last for quite a while. The LogicBlocks can work at voltages between 2 and 5V, and they consume very little current.
The Power Block has a single female connector, which should be connected to the output of a Gate Block. Only one Power Block should be connected in any circuit.
The Power Block is the final piece to any LogicBlock circuit. It should be connected to the output of the very last Logic Block gate.
Splitter LogicBlock and Feedback Cable
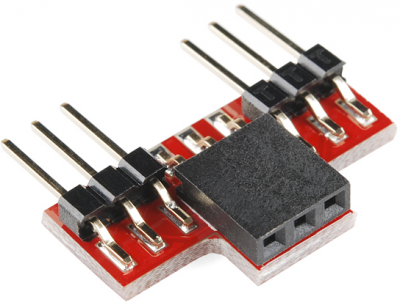
The Splitter Block allows the output of one Block to feed into the inputs of two separate Blocks.
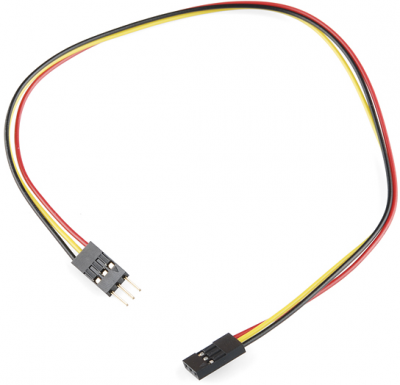
For more advanced circuits you'll want to spread inputs to multiple gates, or add feedback. This is where both the Splitter Block and Feedback Cable come in handy. Often the Feedback Cable will be connected to one of the two Splitter Block outputs.
The Feedback Cable is made of three separate wires -- colored red, yellow, and black. Red should always be connected to the + pin, black to the − pin, yellow will pass the signal through.
LogicBlocks Experiments
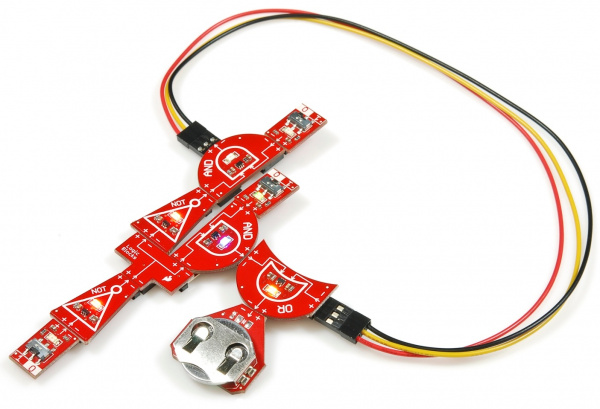
Now that you've been introduced to the fundamentals of LogicBlocks and digital logic, it's time to experiment! In the LogicBlocks Experimenter's Guide we'll build all sorts of fundamental logic circuits with the handful of components you've been introduced to. Like this 2-to-1 multiplexer:
For all LogicBlocks experiments, please head over to the LogicBlock Experimenter's Guide!
