Variable Load Hookup Guide
This Tutorial is Retired!
This tutorial was written for the older version (purchased prior 24 May 2018). If you purchased a Variable Load board after the date, please refer to the latest tutorial.
View the updated tutorial: Variable Load Hookup Guide - Revised
Introduction
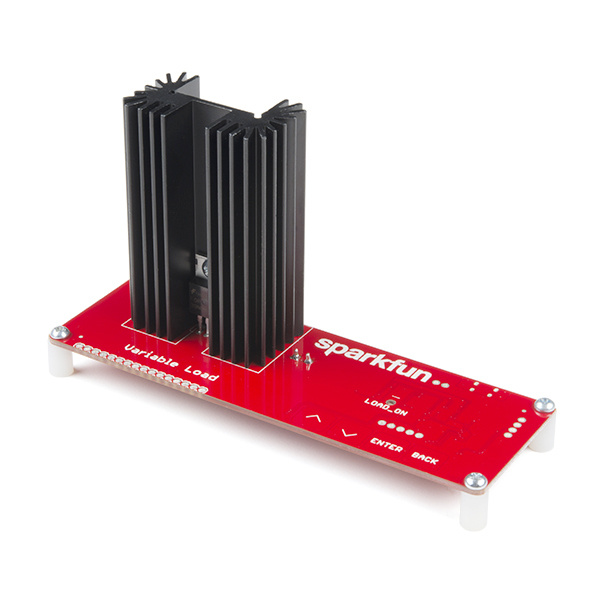
SparkFun's Variable Load board is designed to allow users to draw a specific amount of current from a voltage source. It can be used to test stability of the power supply under various loads, battery lifetime, safety cutoffs, and other design elements of power supplies under test.
The Variable Load can test supplies of up to 30V at currents ranging from a few mA to 4A. For safety, the total load power is limited to 15W, and even at 15W the heatsink gets very hot. The Variable Load is designed to be extensible, with headers for a basic character-based LCD so it can be used without a connection to a PC.
SparkFun Variable Load Kit
KIT-14449Required Materials
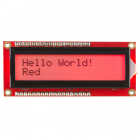
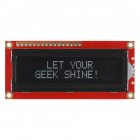
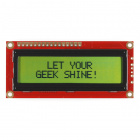
Everything you need to follow this hookup guide is included in the kit, except for the heat sink thermal compound linked below. If you want to add an LCD, any of our 5V character LCDs will work, as linked below. You'll also need some male header pins. You may not need everything though depending on what you have. Add it to your cart, read through the guide, and adjust the cart as necessary.
Required Tools
For assembly of this kit, you will need standard soldering tools. Any soldering iron of reasonable quality and solder should work fine. To mount the transistor to the heat sink, a Phillips head screwdriver is required.
Assembly
We recommend following this guide for easy assembly of the kit.
Install the Heat Sink
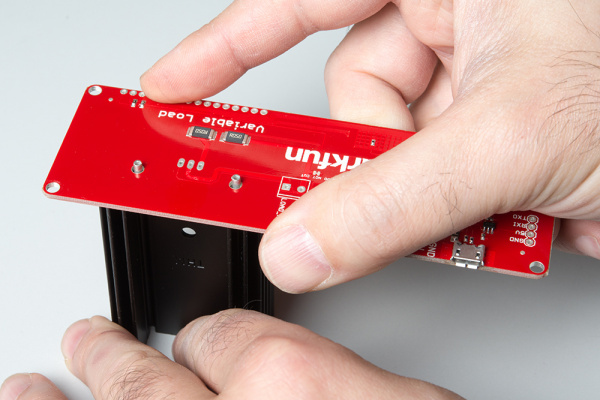
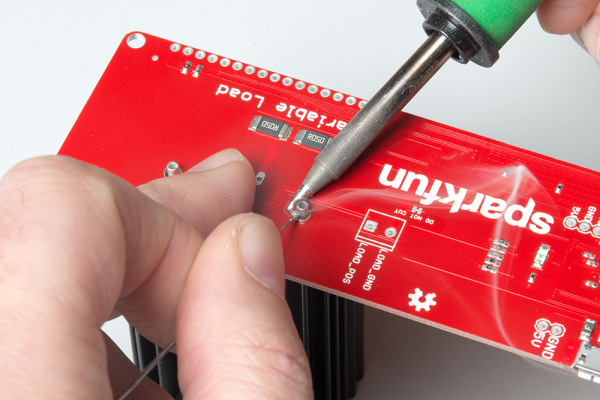
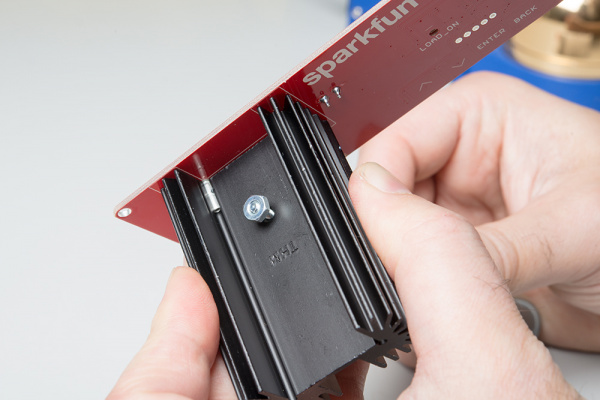
This may seem a little backwards, but there's a reason for this. We want to make sure that the hole in the heat sink is at the right height for the hole in the transistor to mate with it, and the heat sink is of fixed height, so we want to install it first.
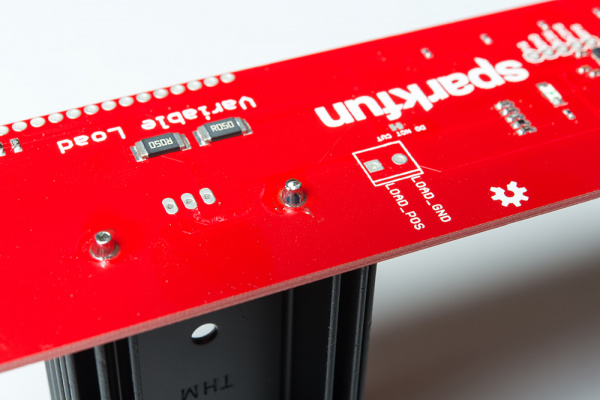
Note that soldering these nubs down takes patience and a willingness to get things pretty hot. If you don't heat the nubs up enough, the solder won't flow over them nicely and you'll get a gloppy, goopy cold solder joint. Heating the nubs takes time, of course, because they're attached to a heat sink! Persist and don't become discouraged if the solder won't flow onto the nubs at first. Give it lots of time. If you have one, a large, hoof-type soldering iron tip is the best bet for heating up the nubs for a good joint.
Note too that there are no exposed copper pads on the PCB. This is okay, as the solder will flow over the nubs and down through the holes, forming a tight fit.
Install the Terminal Block
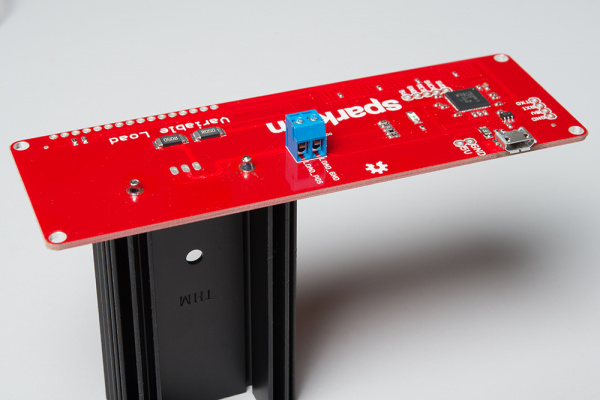
This is a good time to install the terminal block. Notice which side of the board it is installed on, and the orientation of the terminal block with the silkscreen.
Soldering it down should be a fairly straightforward endeavor.
Install the Transistor On the Heat Sink
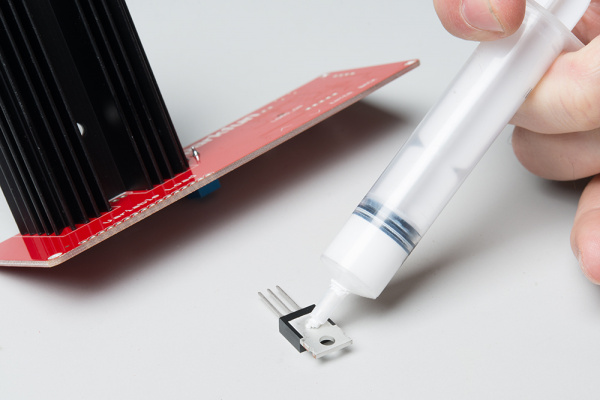
Apply a small amount of thermal grease to the back of the transistor. This will improve heat transfer to the heat sink.
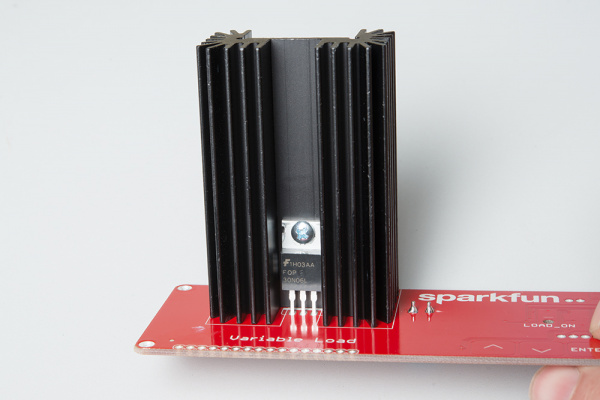
Then, insert the 3/8" 4-40 machine screw through the hole in the transistor. Insert the legs of the transistor into the holes on the PCB and slide the pins down until the screw fits through the hole on the heat sink.
Thread the 4-40 nut onto the screw where it protrudes through the heat sink.
Tighten down the nut until it is snug. A screwdriver will help with this process. Do not overtighten the screw. It only needs to be a little tighter than finger tight. Then, flip the board and solder the transistor pins to the board.
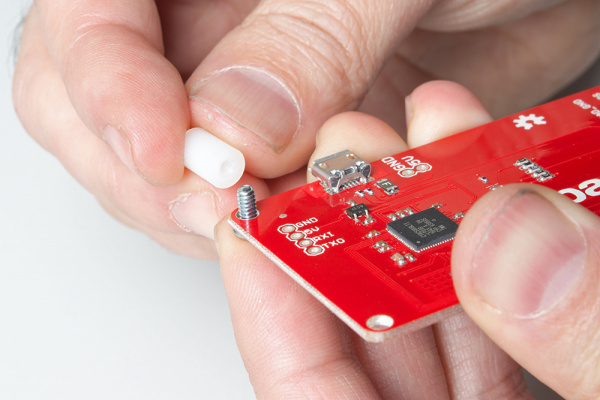
Attach the standoffs to the corners of the board.
Finally, connect a micro-B cable to the Variable Load and your computer to get started.
Optional: Install the LCD Assembly
If you're going to use the Variable Load with the optional LCD, now is the time to attach it.
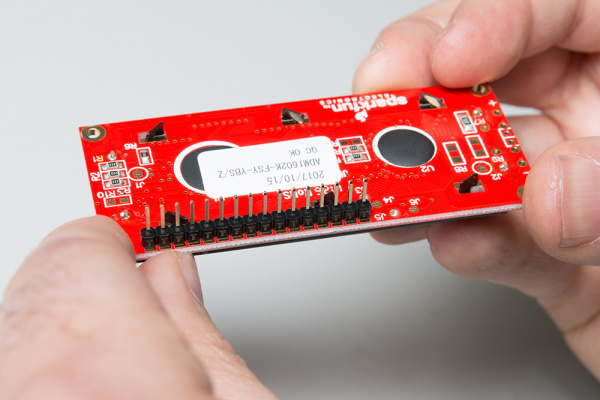
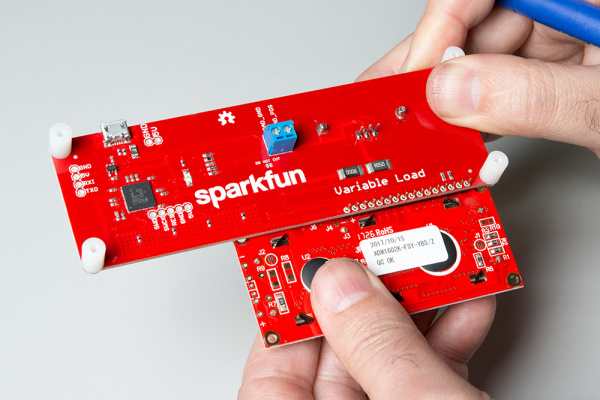
Start by installing the header on the LCD. Observe the image below for proper orientation.
I like to tack down one pin first. Then melt the solder on that pin with one hand and use the other to make sure the header is at a right angle to the board. After soldering down all the pins, you can insert the header into the Variable Load board and repeat the process. Solder down the headers like the image below.
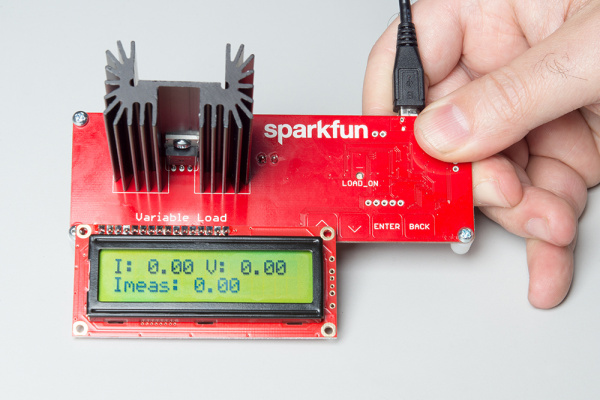
The LCD is now in place and should just work when powered up. Connect a micro-B USB cable to the Variable Load and your computer to get started.
Operation
The Variable Load board is designed to work with one of two output modes. Either using a:
- Console on a PC for Feedback
- Basic 16x2 Character LCD
In either case, the capacitive touch buttons on the front of the Variable Load PCB can be used to change the settings.
General Operation
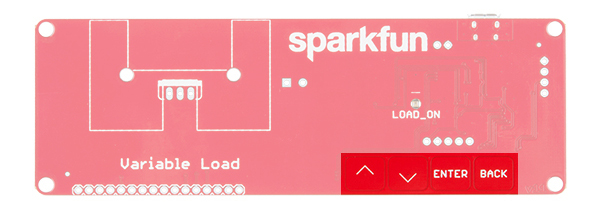
The primary method for controlling the Variable Load is the set of capacitive touch buttons on the front of the board. There are four buttons: up arrow, down arrow, "Enter" and "Back". The up and down arrow keys will adjust the current set point up or down in steps determined by the present set point. The higher the set point, the larger the step size. The "Enter" key turns the load on or off without affecting the set point, and the "Back" button resets the set point to zero.
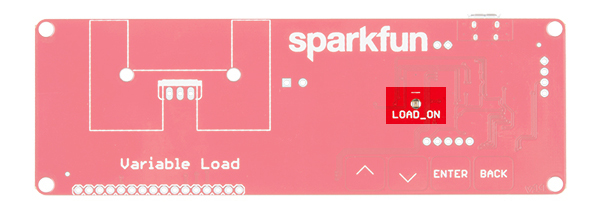
There is an LED visible from the front of the board which will tell you whether the load is enabled or disabled at any given time.
The voltage limit for the board is 40V. Exceeding this level may cause damage to the circuits on board. The current limit is 4A, and the board will not in any case let you set a current draw above 4A. There is also a wattage limit of 15W, which is calculated in live time. Normally, the current draw remains the same as the voltage is increased, but if the voltage is increased beyond a point where the product of the voltage and current exceeds 15W, the output will be disabled until the voltage drops to a safe point again.
Using a Console for Output
Start by checking out our serial terminal basics tutorial. This will get you up and running with a serial terminal. Open a serial terminal program (i.e. PuTTY) to connect.
You'll need to identify the port name of the Variable Load board when it is connected. There are a few methods of determining which port the Variable Load Board is connected to.
One method to determine which port the Variable Load board is on, I recommend using the Arduino IDE. Under the "Tools" menu, there is a sub-menu for "Port". Since we had connected the USB cable to a computer's COM port already, make note of the items on the listed port names. Then unplug the micro-B USB cable from your computer. Give it a few seconds, then re-open that sub-menu to see what item has disappeared. By process of elimination, we can determine the port name that the Variable Load has enumerated to. Reconnect the cable to verify. The port name should reappear as the same name in the sub-menu. Remember, the Arduino IDE's Serial Monitor will not work with the Variable Load board.
Windows
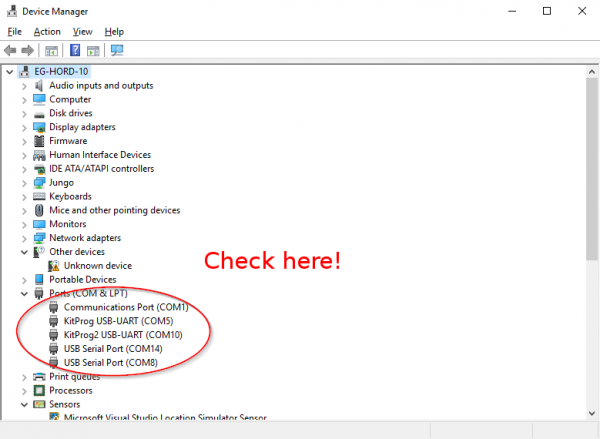
If you don't have the Arduino IDE installed and don't want to install it, you can find the same information using built in tools. Under Windows, open up your device manager (if you don't know how to do this, do a search online for OS specific information on how to do it since it's slightly different under various versions of Windows). Take note of the devices on the list, then unplug the Variable Load and see which port on the list disappears. The port which disappeared from the list is the one you want.
Mac
Using a Mac OS, you'll need to open a terminal window. To figure out which port the Variable Load has connected to, type this command:
language:bash
ls /dev/cu.usbserial-*
This will return a list of USB-Serial converter ports on the system. Take note of the devices on the list, then unplug the Variable Load and see which port on the list disappears. The port which disappeared from the list is the one you want. You can then connect to the port in question by typing this command:
language:bash
screen /dev/cu.usbserial-XXXXXXXX 115200
where the XXXXXXXXX is replaced by information gleaned from the first command.
Linux
Under Linux, the process is similar to Mac OS, only use this command to identify the serial port:
language:bash
ls /dev/ttyUSB*
You may use screen command to connect to the Variable Load:
language:bash
screen /dev/ttyUSBX 115200
Again, the "X" should be replaced with information gleaned from the ls command above. If you receive an error about screen not being installed, you can install screen by typing this command:
language:bash
sudo apt-get install screen
Then re-enter the above command to connect via screen.
The Console
This is what the console will look like when you've connected to the Variable Load. It reports three values:
- I Source -- the actual current being drawn from the source
- I Limit -- the current limit set for the load
- V Source -- the current load voltage at the Variable Load board
In addition to using the arrow keys to adjust the current set point, you may enter a desired current in the console window by selecting the window, typing the current in amps that you want the load to pull, and then hitting the Enter key. This allows a much higher precision than adjusting the load with the arrow keys on the board. You will not be able to see the value you enter as you type it in. If you enter an invalid string, the current draw will be set to zero.
Using the LCD
The LCD output is very similar to the console, except slightly less verbose to fit the data on it. You can use the console and the LCD at the same time, but that sort of defeats the purpose of using the LCD. When using the LCD alone, you'll have to rely on the buttons on the board to control the set point.
Resources and Going Further
Now that you've successfully got your Variable Load Kit up and running, it's time to incorporate it into your own project!
For more information, check out the resources below:
- Schematic (PDF)
- Eagle (ZIP)
- SparkFun Product Showcase: Variable Load Kit
- SparkFun Enginursday: A PSoC-Based Digital Load Box - The original Enginursday project behind this product.
- GitHub Repository - Product Repository for Variable Load.
- Sizing a Heat Sink for a Heavy Load - A little about heat sinks.
