Spectacle User's Guide
 SFUptownMaker
Introduction
Spectacle is a product ecosystem centered around a simple idea: creative people shouldn't have to learn new skills to use electronics in their projects. You've spent years developing the skills you use, and SparkFun wants to recognize that and help you expand your creations to include electronics without requiring you to spend years learning about electronics and programming.
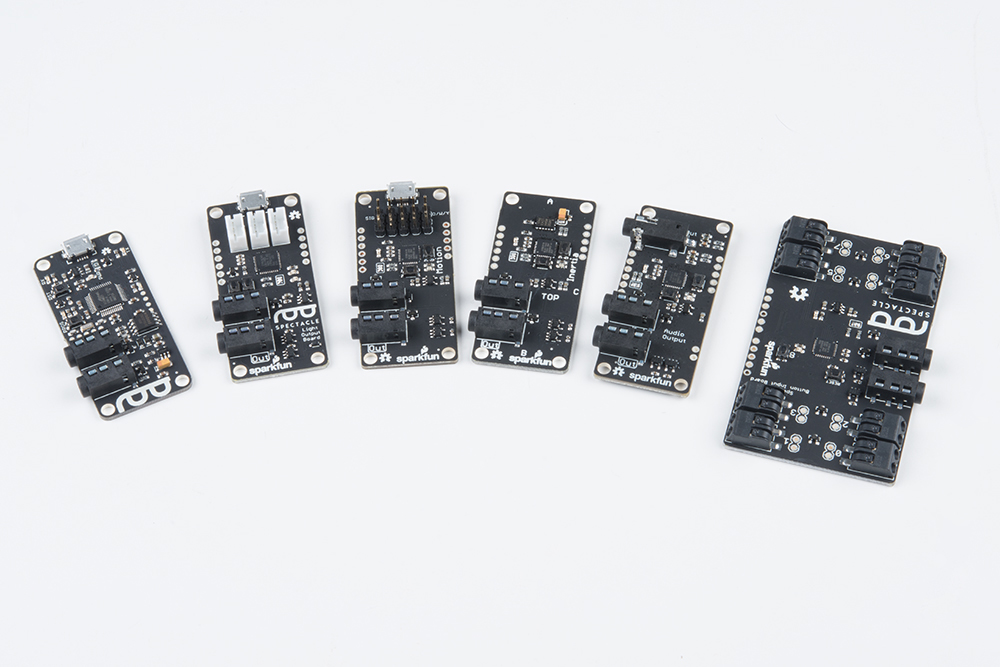
Spectacle launched with six modules: the Director Board, an Audio Output Board, a Motor Control Board, a Lighting Control Board, an Inertia Sensing Board, and a Button Input Board. Every Spectacle project consists of at least two boards: one Director Board and at least one of the output-type modules.
Director Board
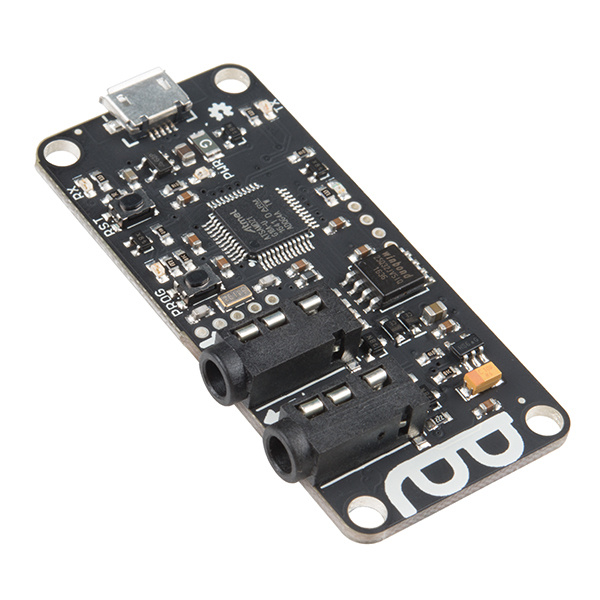
Spectacle Director Board
DEV-13912The Director Board controls all the actions in a Spectacle project. Input-type modules report data on their state back to it, and output-type modules receive their marching orders from it.
Audio Output Board
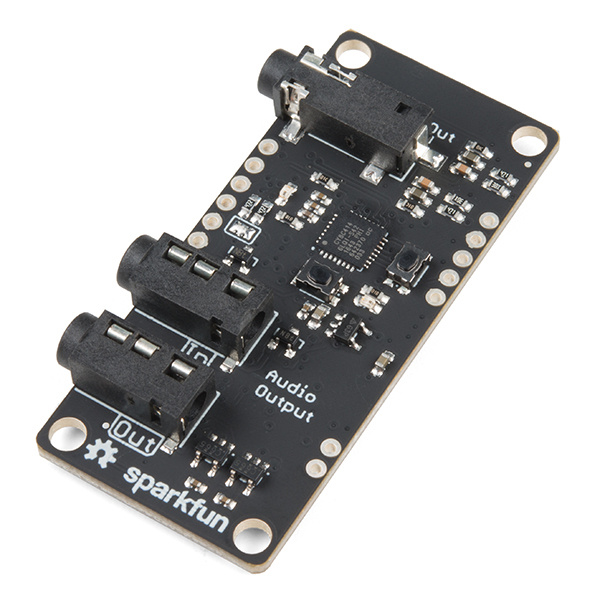
Spectacle Audio Board
DEV-14034The Audio Output Board adds the ability to play sounds from a Micro SD card to your Spectacle system. It provides a line-level output ready to be amplified.
Motor Control Board
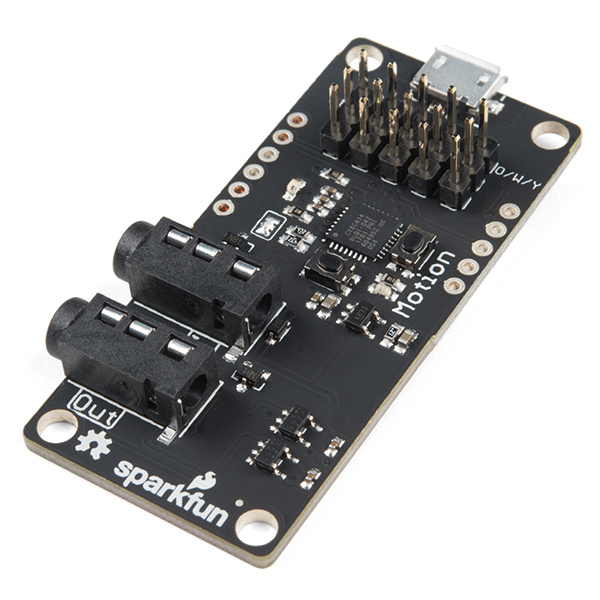
Spectacle Motion Board
DEV-13993The Motor Control Board is made to drive conventional hobby servo motors, either normal type or continuous rotation type. It can be powered via the Director Board connection or via a local input port for higher power servo motors.
Light Board
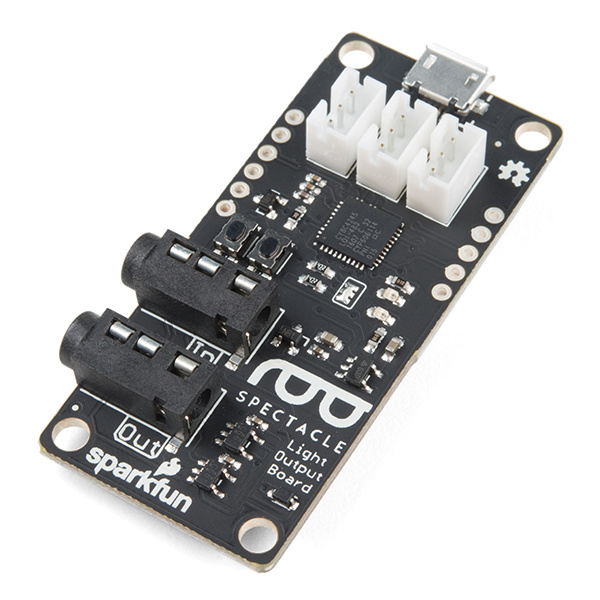
Spectacle Light Board
DEV-14052The Light Board controls strands of addressable LEDs, allowing it to realize quite a few interesting effects that otherwise wouldn't be possible.
Inertia Sensing Board
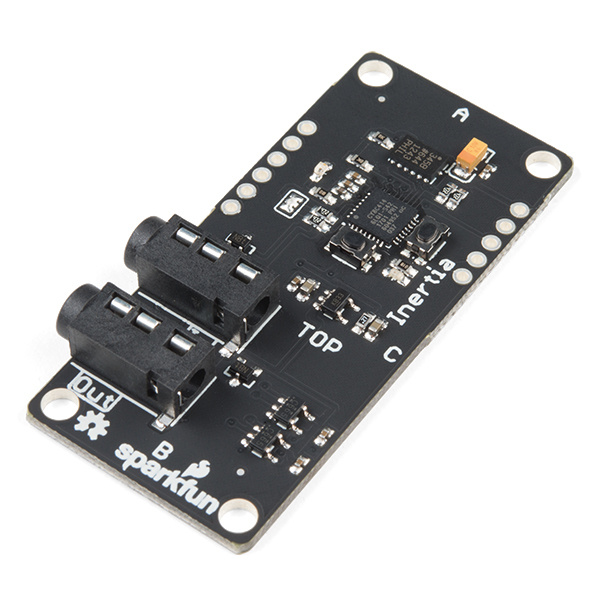
Spectacle Inertia Board
DEV-13992The Inertia Sensing Board allows you to trigger events on motion, stillness, or orientation.
Button Input Board
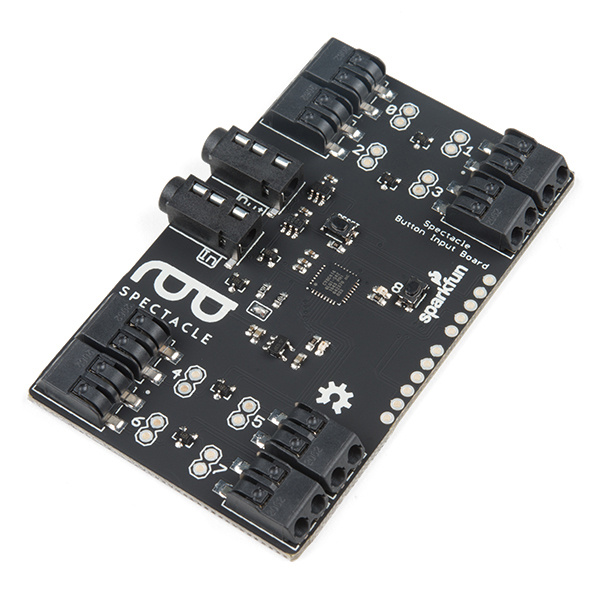
Spectacle Button Board
DEV-14044The Button Input Board takes its input from all manner of button, switches, or other contact type sensing devices. It has 8 external inputs and one onboard button, allowing for a large number of inputs to a single module.
Spectacle Director Board
The Spectacle Director Board is at the core of all Spectacle systems. It stores the program, connects to and sends power to the other boards in the system, and passes messages between the other boards.
Director Board Hardware Tour
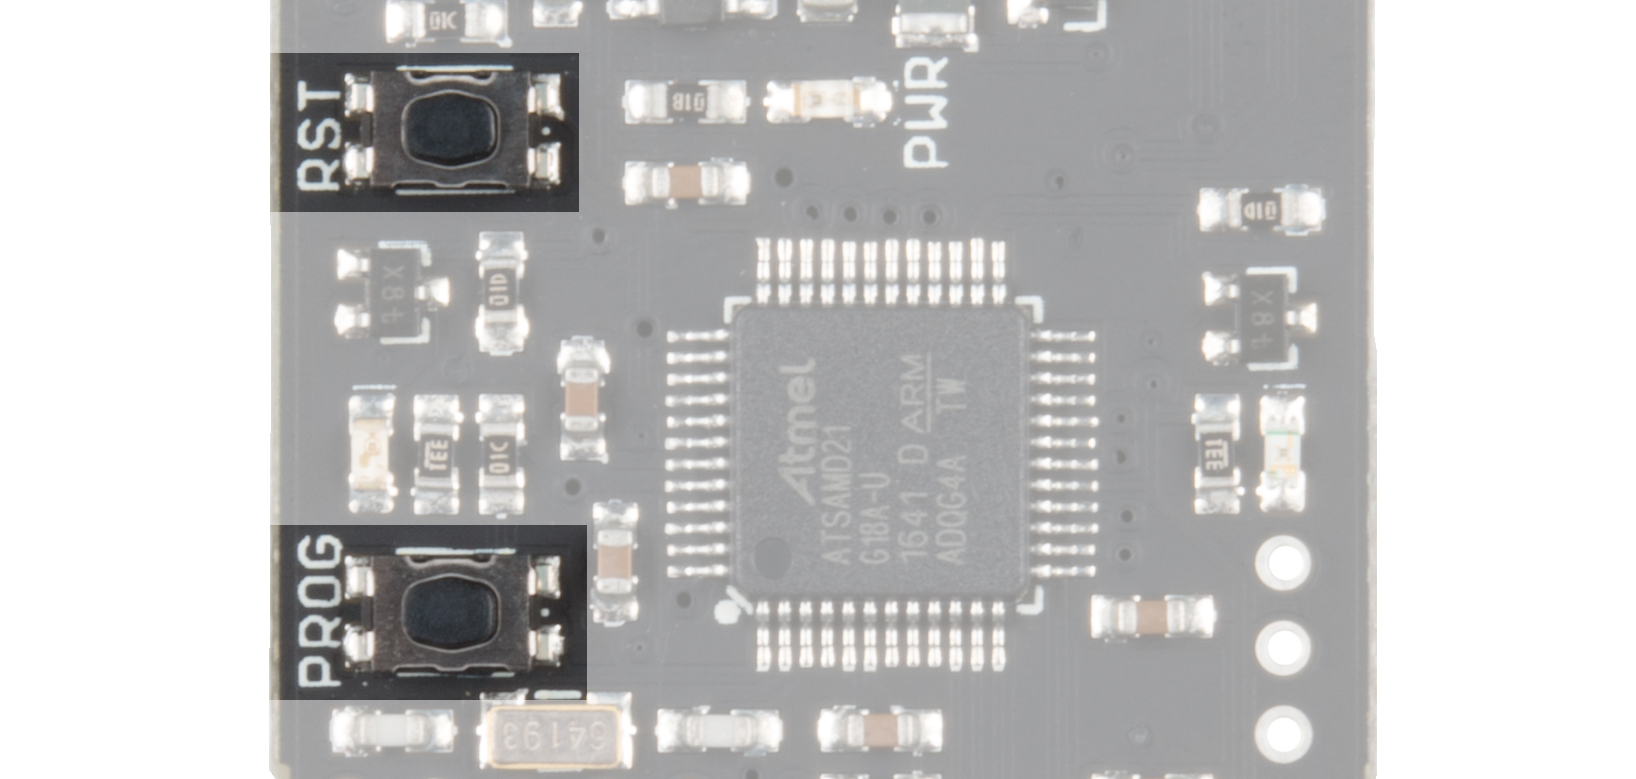
There are two buttons on the Director Board: one labeled RST and one labeled PROG. These buttons allow you to enter programming mode, so new behaviors can be loaded into your Spectacle system.
To enter programming mode, press and hold the RST button, press and hold the PROG button, and then release the RST button.

Power for your Spectacle system is delivered via a Micro USB jack on the Director Board. Power is then delivered to additional boards in the system via the cables connecting the other boards together, although some boards (such as the Motion Board and the Light Board) may require locally delivered power.
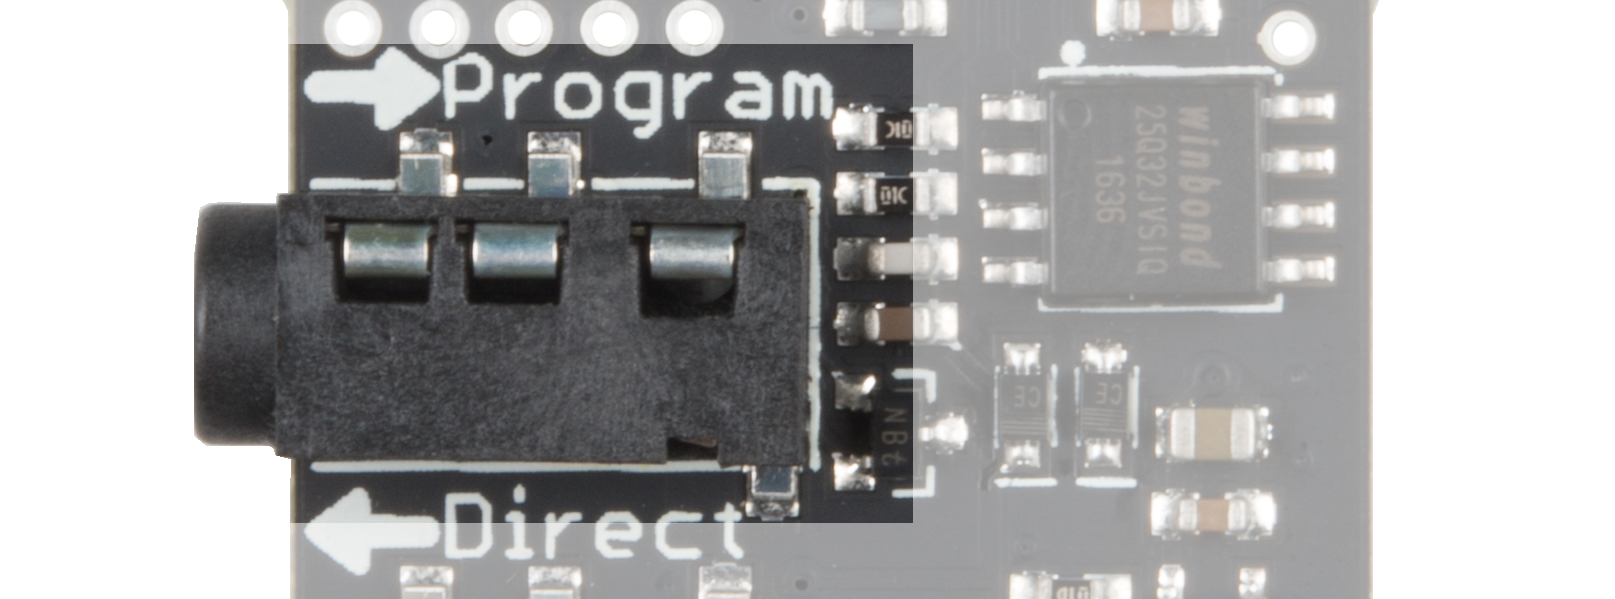
The "Program" jack is where you'll connect the device you use for programming. A cable connecting this jack to the audio output of your programming device is needed to upload a new set of behaviors to your Spectacle system.
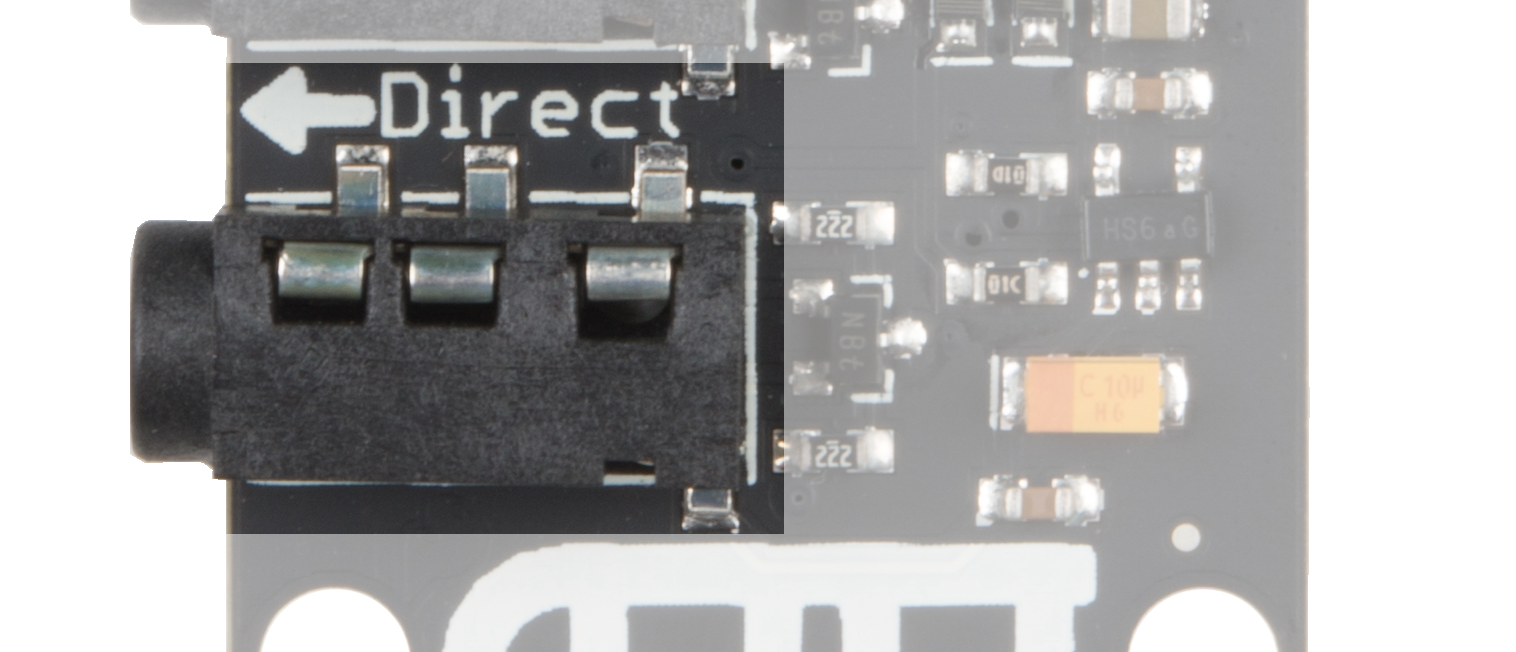
Other Spectacle boards will be connected to the "Direct" jack. Power is delivered via this jack to the other boards, and power to those boards is disconnected while the RST button is held down.
Spectacle Example
Spectacle actions are mediated by "Channels", which represent information sent from input modules to output modules by way of the Director Board. More than one board may listen to a single channel, and more than one board may write to a single channel by use of "virtual" boards to combine signals.
An Example
In our simple example, we've created a system with only two boards: the Director Board and the Audio Output Board. This simple example is going to play a sound at random intervals, with a minimum of 10 seconds between playback.
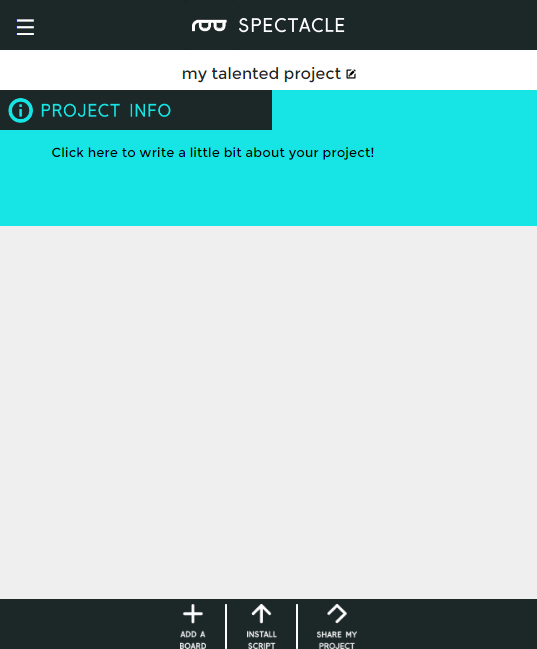
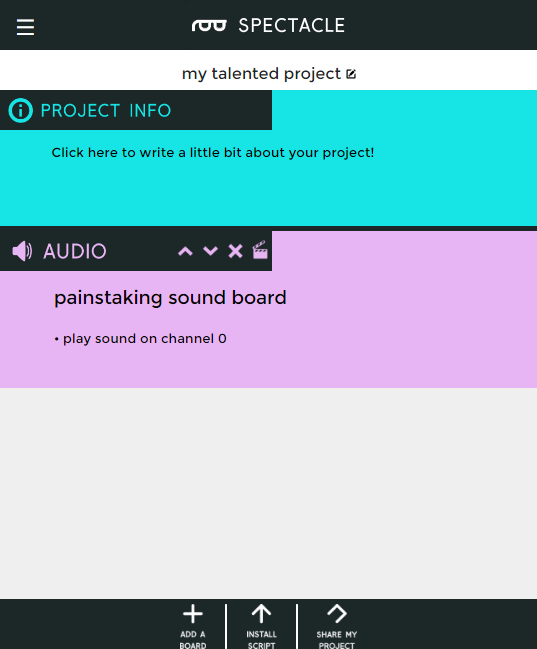
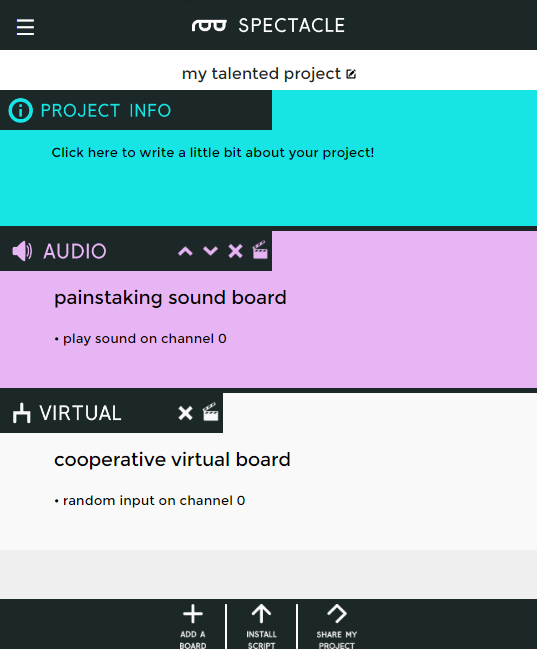
Here we see the opening screen of the Spectacle App. The default name (in this case) is "my talented project" but you can, of course, change this to be anything that you'd like. We'll just leave it as is. Next, we need to add our Audio Output Board to the project. Click the "ADD A BOARD" button at the bottom of the page.
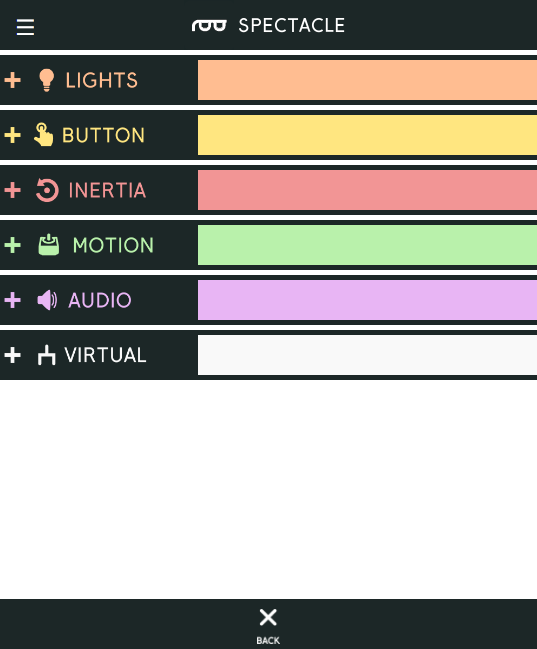
You'll now see a list of the various types of boards which are currently available. We've discussed five of these six entries, and we'll cover what a virtual board is in a second. For now, just click on "Audio" to add our Audio Output Board.
We're now back at the beginning screen, with the addition of another line below the project info line for a "painstaking sound board". You can rename this as you please by simply clicking in the text field holding the board's name.
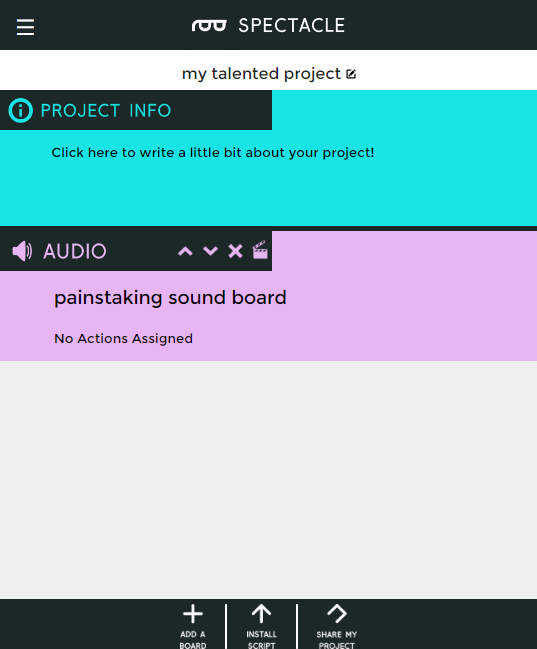
Now click the clapboard icon to bring up a list of actions assigned to the board.

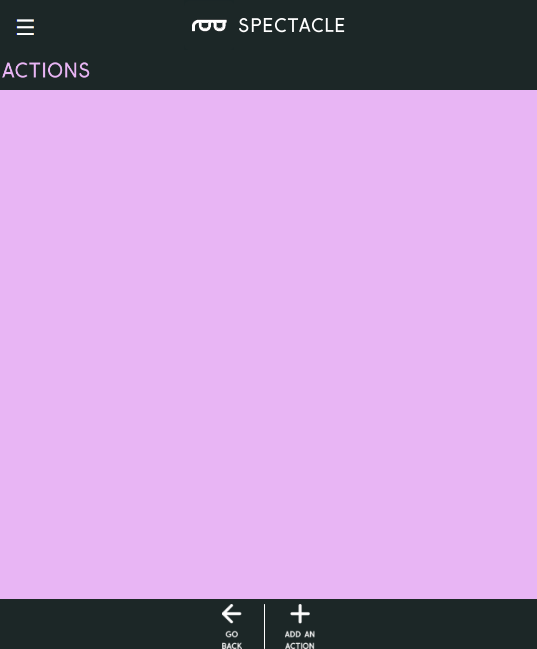
Unsurprisingly, it's empty. We have to add something! At the bottom of the page, find the "ADD AN ACTION" button. Click it and a list of actions will descend from the top of the page.
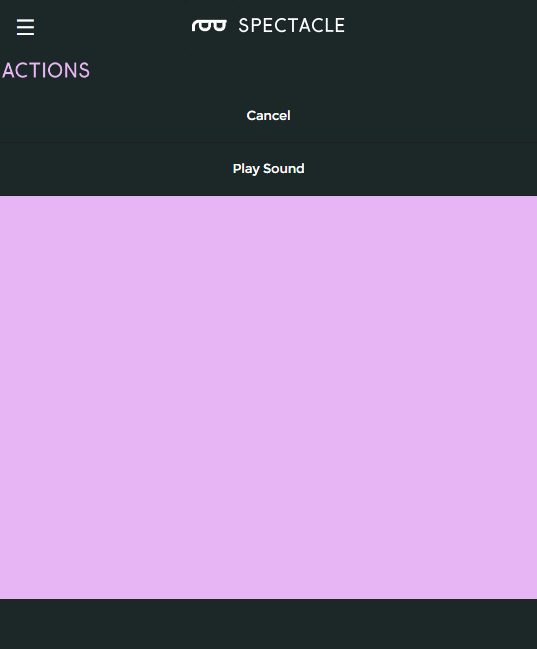
For the Audio Output Board, only two options exist: "Cancel" and "Play Sound". Click on "Play Sound" to add that action to our actions list.
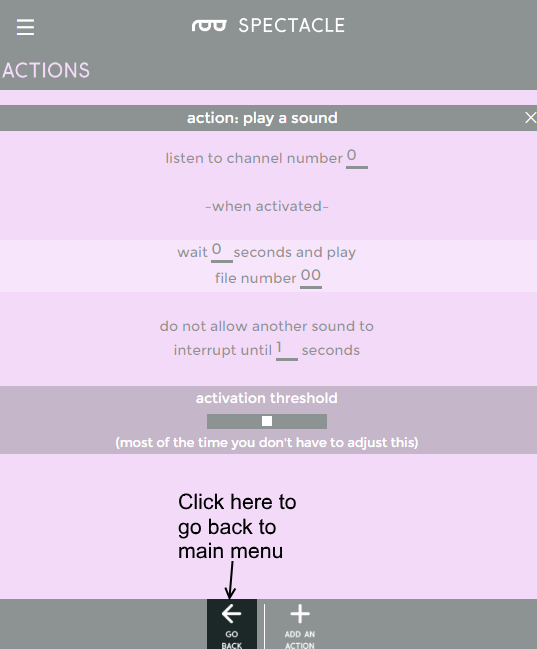
You'll find this screen has appeared. There are four blanks, for four user inputs, and a slider at the bottom which we're going to ignore. Here are the uses of the other fields.
* "Listen to channel number..." - This is the channel number which triggers the audio to start playing. As long as this channel's value is above the threshold level (set by that slider that we're not going to mess with), the sound will repeat playing at a rate determined by the two time intervals specified lower down.
* "wait ... seconds and play..." - This is the first delay in the system. By delaying when a sound plays, you can sequence events however you see fit.
* "...and play file number..." - This is where you tell the board which file to play. Remember, when copying the audio files to the Micro SD card, they should be named as 00.ogg, 01.ogg, 02.ogg, etc. The number in this field corresponds to the number in the name of the audio file. If there is no audio file with the corresponding number, no sound will play.
* "do not allow another sound to interrupt until ... seconds" - The number in this field should correspond to the length of the audio file. If this value is less than the length of the sound file, another trigger sent to the audio board will interrupt the sound before it finishes. If it is longer than the sound, there will be a period of silence after playback before another playback can be initiated.
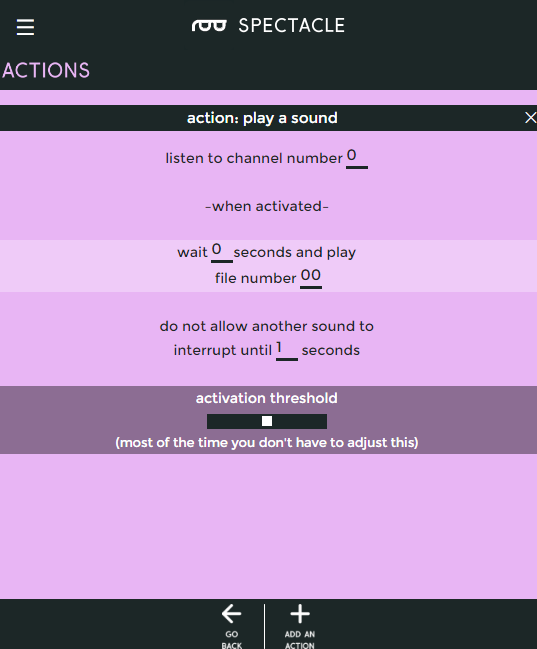
Here are the settings to put into the fields. Note that we are listening on channel 0, as we'll need that information later. We want to play our sound immediately, play sound file 00.ogg, and not interrupt that sound for at least one second.
There! We've added the instruction to play back a sound. Now we need to tell the system when to play the sound. Click the "GO BACK" button at the bottom of the screen. Don't worry, the action you added has been saved automatically.
We're back at the opening screen again, and you can see that "play sound on channel 0" has been added to the Sound Board's entry. If we had created more actions, they would show up there, as well. Click the "ADD A BOARD" button to continue.
We're back at the list of boards. This time, we're going to add a virtual board. This special subset of "boards" adds functionality that otherwise isn't added by any particular hardware board.
Now a virtual board entry appears in our project list. The Virtual Board entry is special, in that it can only exist once in the boards list, and it will always "sink" to the bottom of the list, even if you try to rearrange boards beneath it or if you create boards after the virtual board. Again, click on the clapboard icon to enter the add/edit actions view.

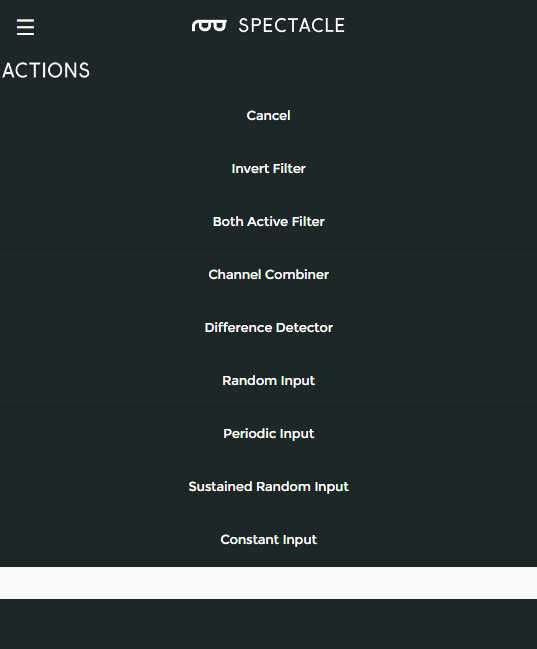
When you click on "ADD AN ACTION", you'll see a greater variety of options than you did with the Sound Board. The first four allow for input signals from external boards to be combined or changed in some way, while the bottom four require no external hardware to use. Choose "Random Input" from the list.
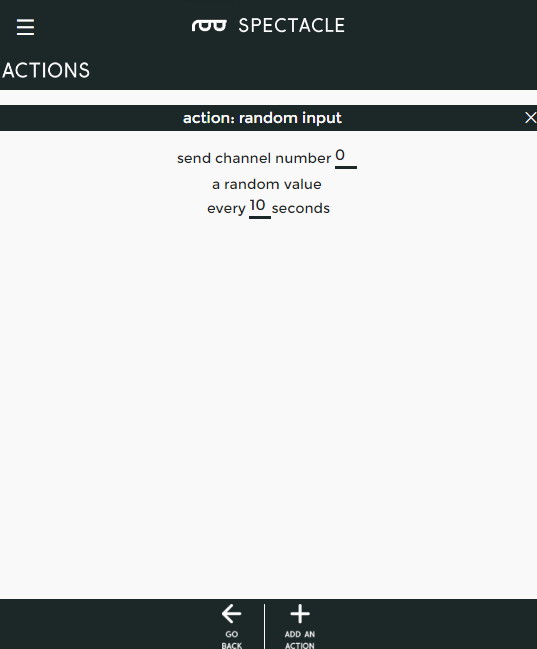
There are only two blanks here: one for channel number, and one for timing. Basically, this action flips a coin every few seconds (how often is determined by the value in the blank) and outputs the result to the channel you set in the blank field. Put '0' in the channel number field and '10' in the "every ___ seconds" field.
Now, click the "GO BACK" button at the bottom of the screen to return to the main menu.
Congratulations! You've just finished setting up the configuration for our random sound player!
Programming the system
Programming the system is done via your headphone output jack. Plug one of the included 3.5mm cables into the headphone jack on your computer, smartphone, or tablet, and plug the other end into the "Program" jack on the Director Board.
Supply power to the Director Board via the micro USB jack on the end of the board, then hold down the RST button. Hold down the PROG button, and release the RST button. After a moment, you should see the LED on the board blinking. It should blink three times, pause, blink three times, pause, repeatedly. Turn your system's volume up all the way, then touch or click the "Install Script" button at the bottom of the screen. That will pull up the page below.
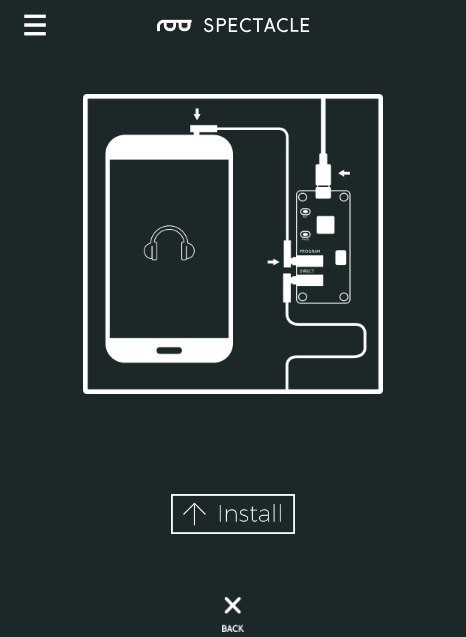
Click or touch the "Install" button at the bottom. The button will gray out during the installation process. When it has returned to its normal color, the installation is done. If the installation was successful, you should see the LED on the Director Board blink 10 times, then pause, then 10 times, then pause, etc. Press the RST button on the Director. Again, you'll see 10 blinks, then a pause on the Director LED. That means the program is loaded and everything is working.
Spectacle Concepts
Momentary versus continuous events
Some events in Spectacle will generate a "one-and-done" pulse, and some will generate a continuous signal. What happens with these signals depends upon what sort of action the signal is connected to.
Example: Inertia board and Sound board
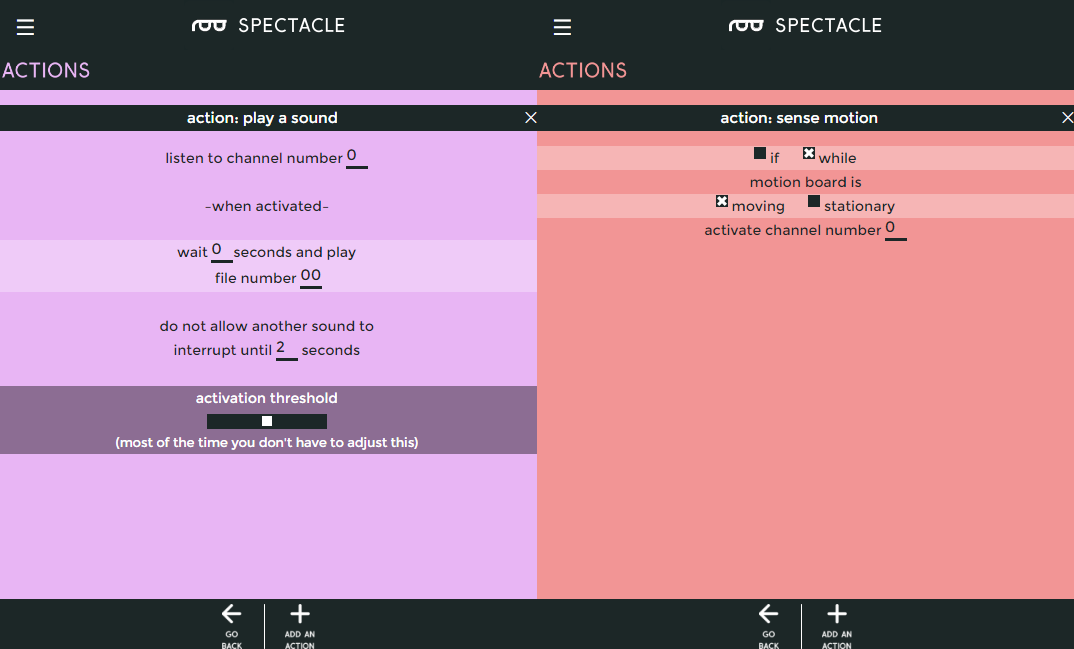
Imagine we have system with an inertia board and a sound board, configured as above.
By the settings you can imagine what will happen: a sound will play when the inertia board is moved. But what happens if the inertia board keeps moving? It will continue to send its signal on channel 0, and the sound board will continue to receive it, and two seconds after the sound starts playing (regardless of the actual length of the sound), the sound will play again. This will continue until the inertia board is allowed to stop moving--a continuous output signal.
To play the sound only once, upon the first motion of the inertia board, what should we change? We would change the check box on the "sense motion" action from "while" to "if".
Example: Button board and Light board
Now let's look at a momentary example, and how not to use it.
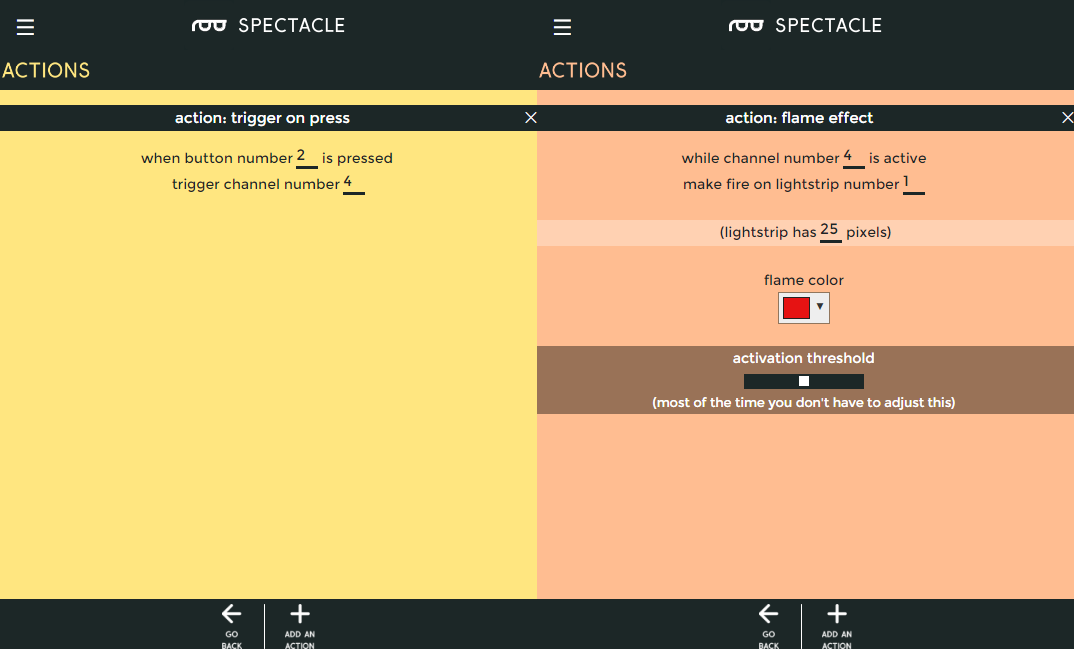
Consider the system described above. One may assume that, when pressed, the flame effect would begin on strip 1 of the light board. And that's true, it will. However, since the flame effect is a continuous effect (that we want to run indefinitely) and the button press is momentary (it only issues a signal when the button is initially pressed), the effect will be brief--probably so brief as to not even be visible to the user.
So what should we change to get what we want? We have a couple of options, looking at the actions available to the button board:
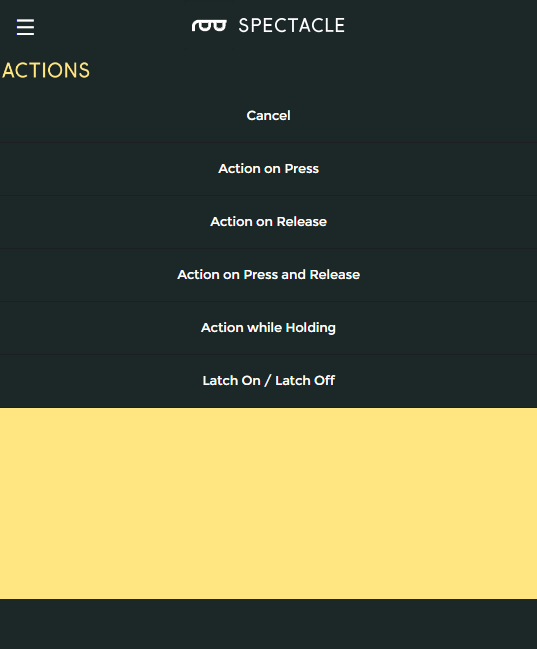
Looking over our available choices, "Action while Holding" and "Latch On/Latch Off" sound like they'll produce a continuous output suitable for triggering our continuous flame effect. Using one of them (depending on whether you want to have to hold the button or just turn it on and off) will get us the behavior we desire.
Troubleshooting
Sometimes things just don't work out the way we envisioned them working out. Here are some tips for troubleshooting a non-functioning (or malfunctioning) Spectacle project.
Board order is wrong
A limitation of the Spectacle application and system is that the boards must be attached to the Director Board in the same order in which they appear in the application list. This means that a system with a Button Board as the top item in the list and a Sound Board second is different to and incompatible with a Spectacle script which has the Button Board at the bottom. It also means that no Spectacle system can have unused boards in it. All of the boards in the system must be included in the script. It is permissible to have a board in a system with no actions assigned to it, however.
Insufficient power
All Spectacle boards can be powered over the 1/8" (3.5mm) TRRS jack cable which connects them. However, a couple of boards (currently, the Motion and Light boards) have a USB micro B connector on board to provide extra power to the motors or LED strips attached to the board.
How do you know if you need to attach another power supply? Well, the easiest way is to try and see. If your system behaves oddly, or doesn't work at all, you probably need more power than can be provided by the Director Board and should attach a supply at the output board.
If you are attaching more than 20 LEDs or more than one of the smallest size servos (or any of the larger servo motors), you should power the output board locally.
Configuration failed to install properly
Sometimes, the upload just doesn't take properly. Usually this is due to the volume on the programming device having been set too low, or to another sound (a notification tone, for instance) playing on the programming device during the configuration installation process.
The solution here is simple: try installing again. If your volume is all the way up, it's possible that your device can't make a strong enough signal to work with Spectacle. This may be especially true of cellular phones in the EU, where maximum volume output is limited by statute.
Single LED blink on Director Board at power up
This means the system failed to initialize properly. This can be because the board order is wrong, there's an extra board in the system, one of the cables isn't connected firmly, one of the cables has been damaged, or because the installation of the program went badly.
Typically, the best way to fix this is by checking connections and board order, reinstalling the code, and (if possible) swapping out the interboard connection cables with other, known good cables.
Resources and Going Further
Now that you've successfully got your Spectacle boards up and running, it's time to incorporate it into your own project!
For more information, check out the resource below:
Ready to move on with Spectacle? Check out detailed instructions for each board below.