Spectacle is designed to make complicated electronics projects simple, so you can focus on what you do best: making cool things!
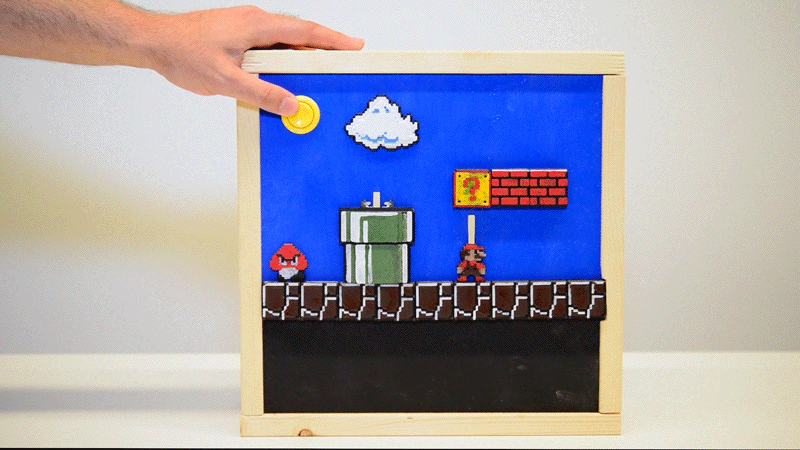
In this tutorial, we'll show you how to make an animated diorama (with sound effects!) using Spectacle.
We created the tiles for the diorama using this project from Thingiverse. We 3D printed the tiles, then painted them accordingly.
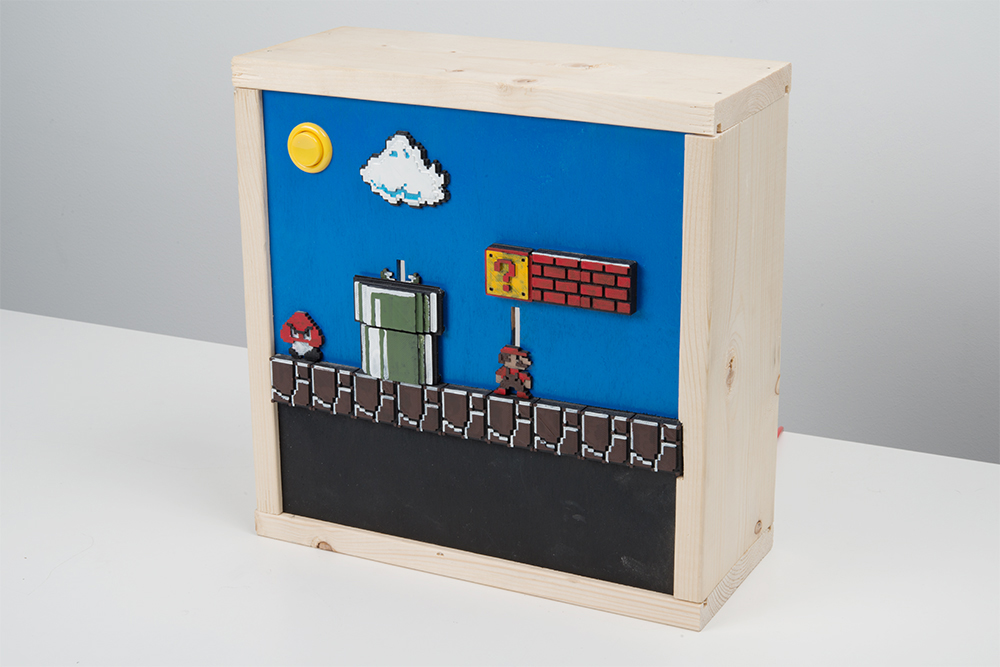
The layout was designed in Inkscape, then etched into the wood with a laser cutter. The laser cutter was also used to cut out the slots that the moving pieces ride up and down in. Of course, this step is optional. The tiles could easily be placed by hand, and the cuts could be made with a hobby knife or similar woodworking tool.
This tutorial assumes a basic familiarity with the Spectacle system. If you haven't yet, read the following tutorials for all the basic information you'll need to know to get this project going:
To animate the diorama, we 3D printed a longer arm for the servo motor. The length of the arm must be approximately equal to the linear distance the moving component is expected to cover.
We then attached a piece of 0.020" (0.5mm) music wire to the end of the arm. The wire must be affixed in such a way that it can rotate freely as the arm moves. We passed it through a hole in the arm and bent it to a shape that will be retained by the hole.
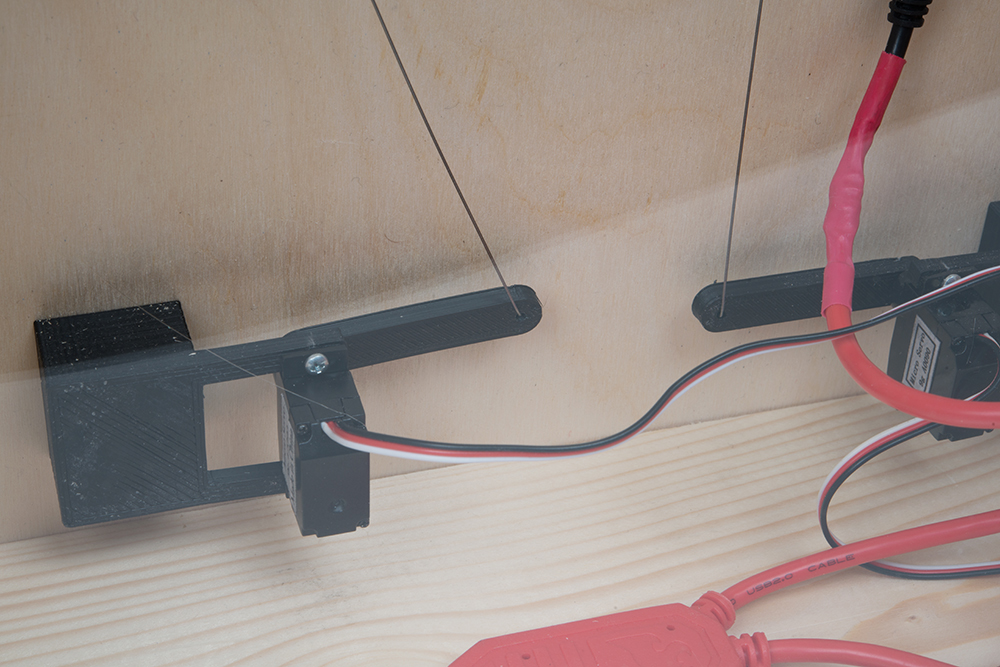
The other end of the wire was affixed to the slide mechanism to which the tiles were glued. In that case, a small loop is printed on the back of the slide mechanism and the wire is again bent into a shape that will be retained by that loop. The wire is rigid enough to push the tiles into a new position, but flexible enough to bend when the stop is hit.
We elected to keep the sound simple for this project, using the delaying mechanism of the Audio Board to trigger the sounds at the appropriate time rather than trying to trigger the sound by having Mario hit another switch.
Finding sound effects is left as an exercise for the reader, to prevent possible copyright or trademark issues. A quick web search will turn up sound effects for most projects, however.
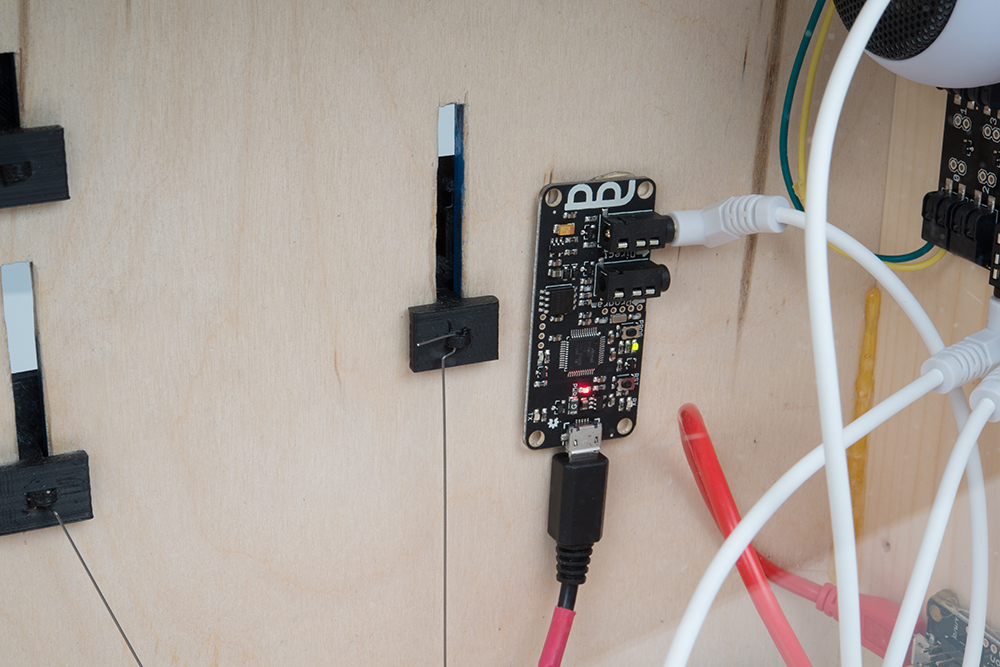
The Spectacle project for this setup is very simple. It consists of a Button Board, a Motion Board, and an Audio Board. We'll just give you the pages of the project here, rather than walk you step-by-step through making a Spectacle project. Below, find the main page of the app, with all the boards in place. Remember that the order the boards are connected in must match the order they appear in the app list in.

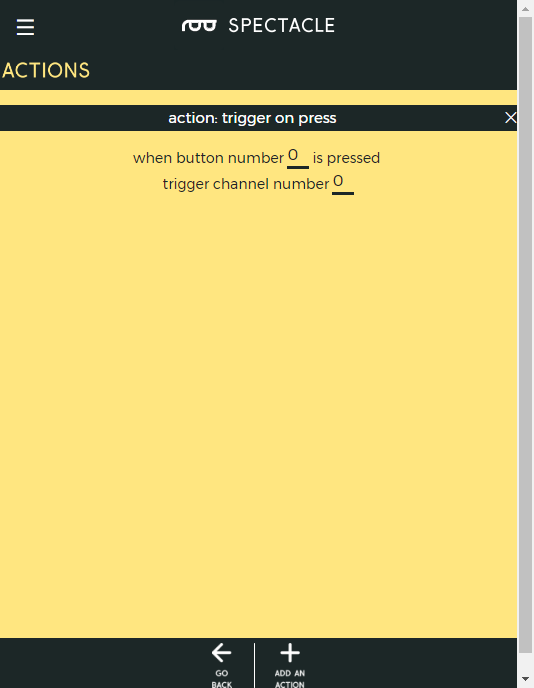
Here are the settings for the Button Board. Note that, although we're triggering four separate actions, we only need to have a signal on one channel.
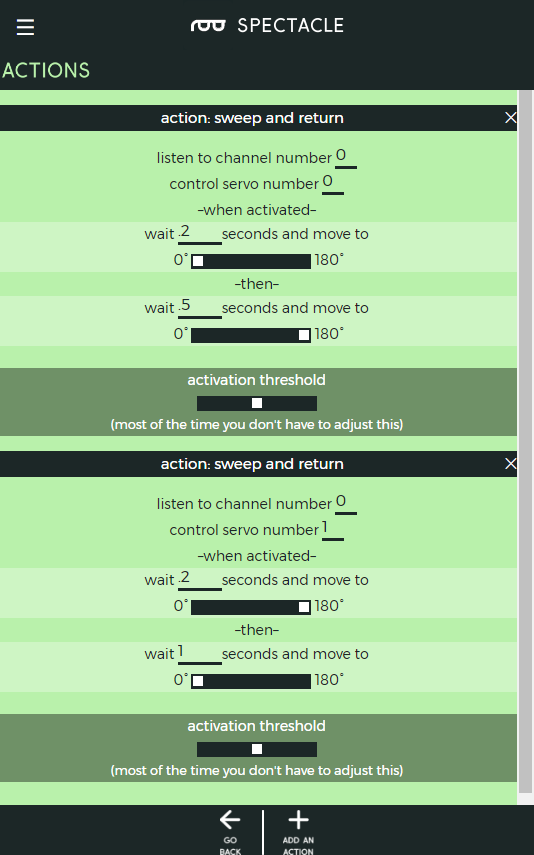
Here we see the Motion Board settings. You'll note that there's a slight delay between receipt of the triggering signal and activation of the first motion. That accounts for the brief delay between triggering the Sound Board and the sound actually playing. The sliders are opposite because the position of the motors is mirrored on the inside of the project.
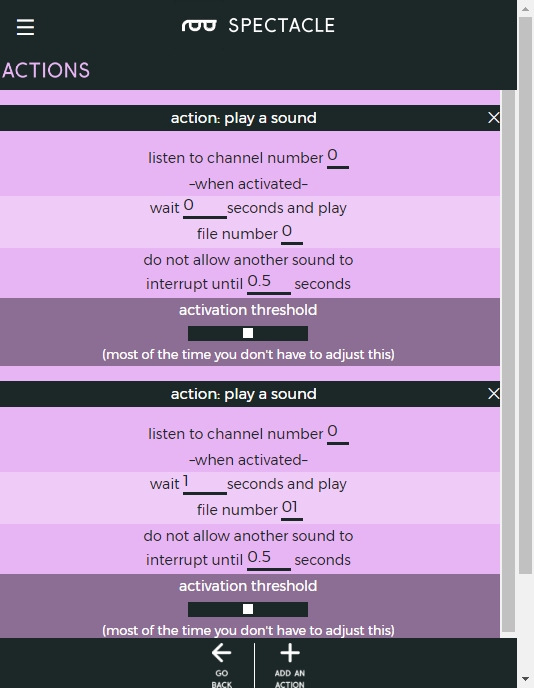
Finally, here are the settings for the two sound events on the Sound Board. By layering them like this, we create the illusion of triggering the second sound when Mario hits the block without having to put a switch on that block.
Note that these are timing values for my system and you'll probably have to change them if you do your own. I figured these out by playing around with it a bit.
For general Spectacle information, please check out the user guide:
For more Spectacle fun, check out the additional tutorials below:
learn.sparkfun.com | CC BY-SA 3.0 | SparkFun Electronics | Niwot, Colorado