$37.95
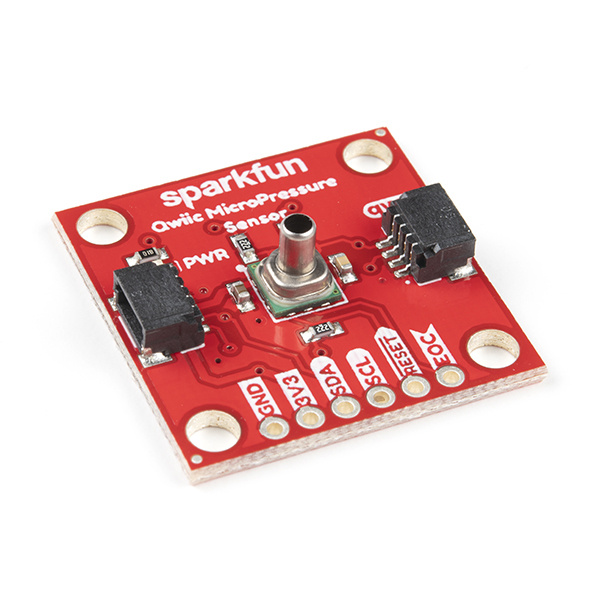
Pressure sensors are used in a wide range of applications. You can find them in the medical field (blood pressure monitoring, negative pressure wound therapy), they have industrial uses (air braking systems, gas and water meters), and have a wide range of consumer uses (coffee machines, humidifiers, air beds, washing machines, dishwashers). Measuring in at 1 square inch, the SparkFun Qwiic MicroPressure Sensor takes advantage of HoneyWell's MPR Series piezoresistive silicone pressure sensor and our plug-and-play Qwiic System to make pressure measurement easy and portable.
The MPRLS0025PA00001A boasts a small form factor (5 mm x 5 mm), easy to read 24 bit digital I2C output, and is calibrated and compensated over a specific temperature range for sensor offset, sensitivity, temperature effects, and non-linearity using an on-board Application Specific Integrated Circuit (ASIC). Add to that ultra-low power consumption (as low as 0.01 mW typ. average power, 1 Hz measurement frequency) and Qwiic ports, you've got yourself a power packed little sensor!
To follow along with this tutorial, you will need the following materials. You may not need everything, depending on what you have. Add it to your cart, read through the guide, and adjust the cart as necessary.
If you aren't familiar with the Qwiic system, we recommend reading here for an overview.
| Qwiic Connect System |
We would also recommend taking a look at the following tutorials if you aren't familiar with them.
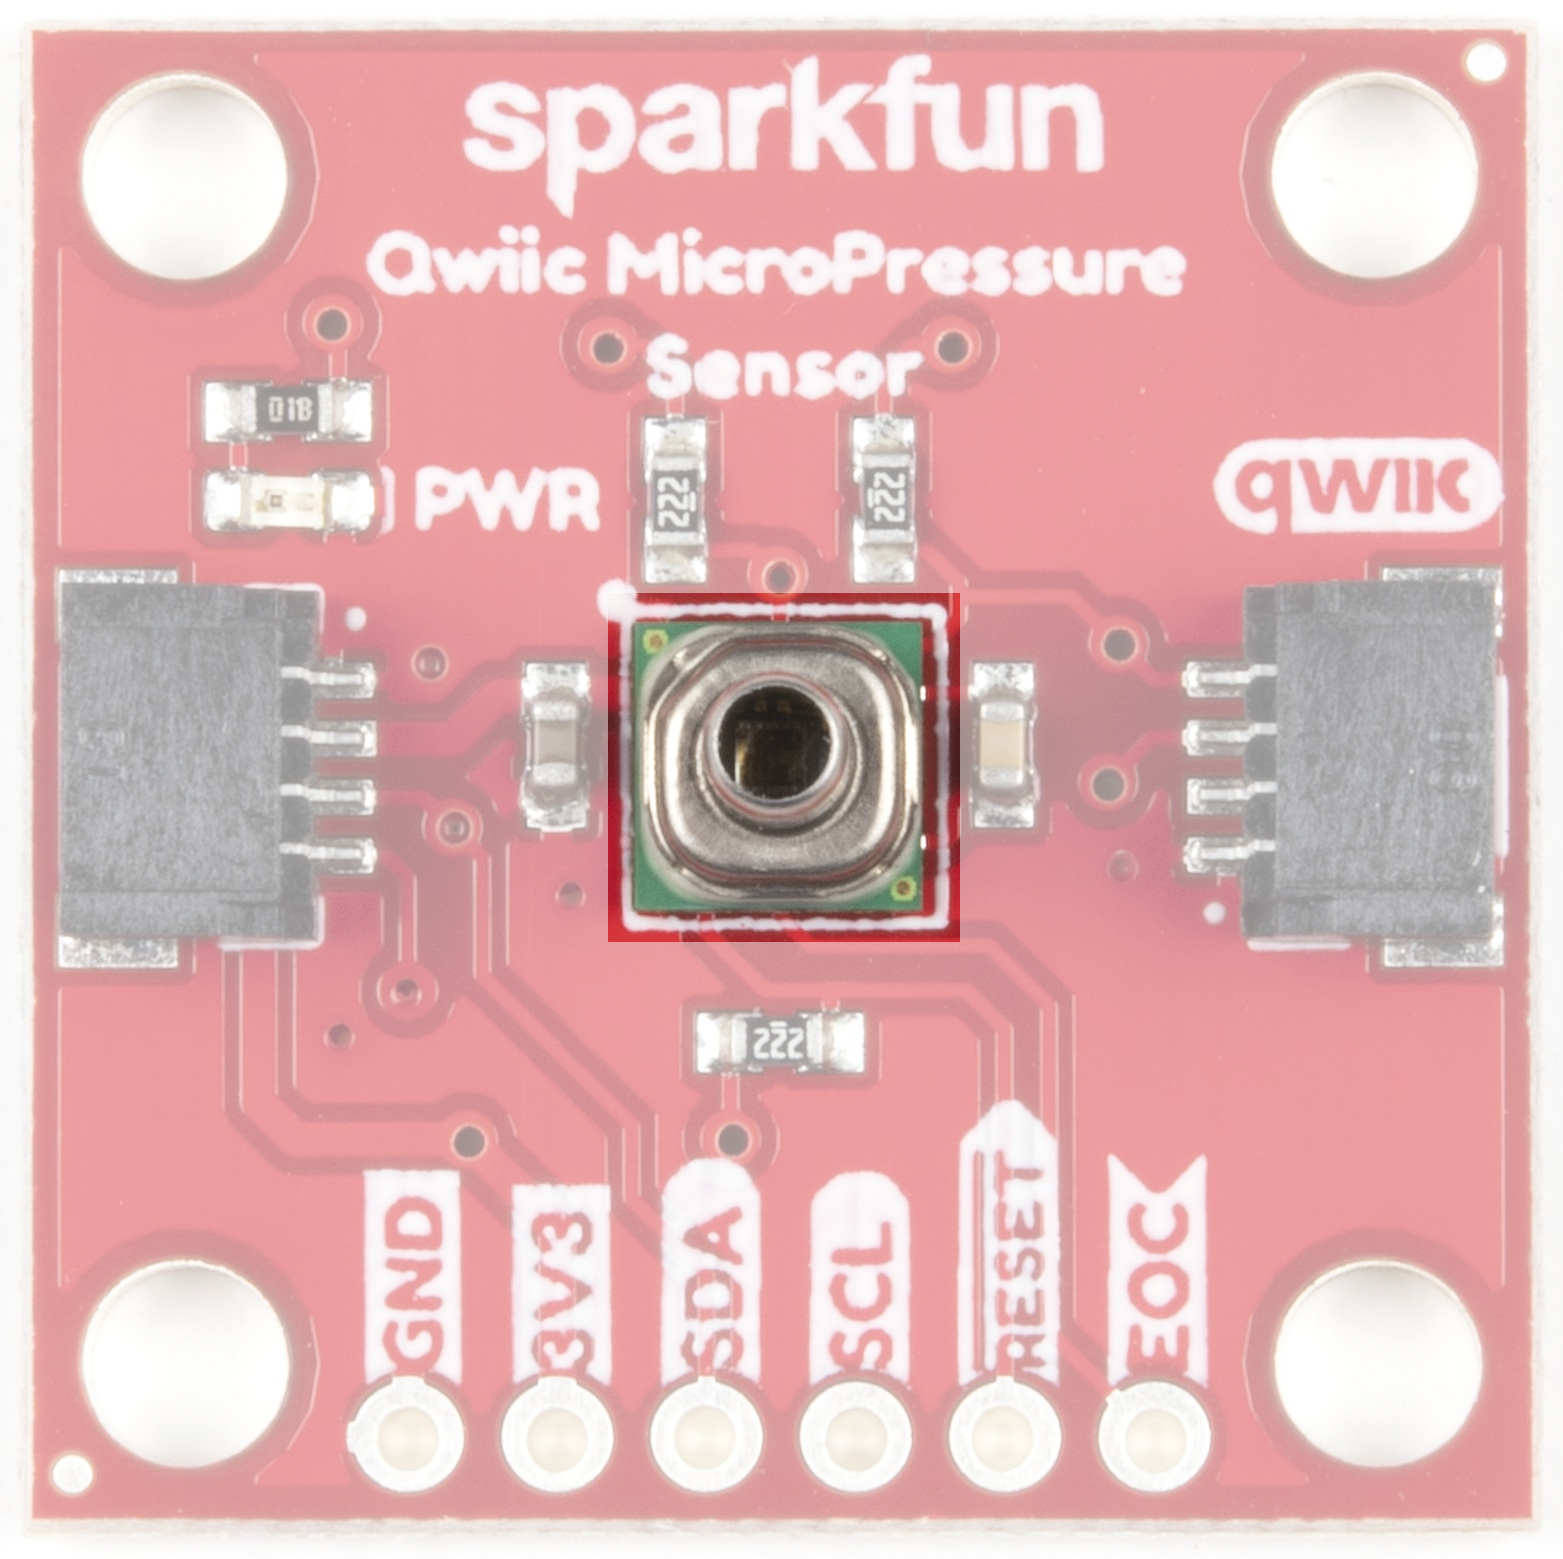
Honeywell's MPR Series MPRLS0025PA00001A sensor is a very small piezoresistive silicone pressure sensor offering I2C ready digital output for reading pressure over the specified full scale pressure span and temperature range. The sensor itself measures 5 mm x 5 mm and has a calibrated pressure sensing range from 1-25 PSI. It is compatible with a variety of liquid media, has a compensated temperature range of 0ºC to 50ºC (32ºF to 122ºF), and has a total error band after customer autozero as low as ±1.25 %FSS. For more information on this little guy, head on over to the datasheet.
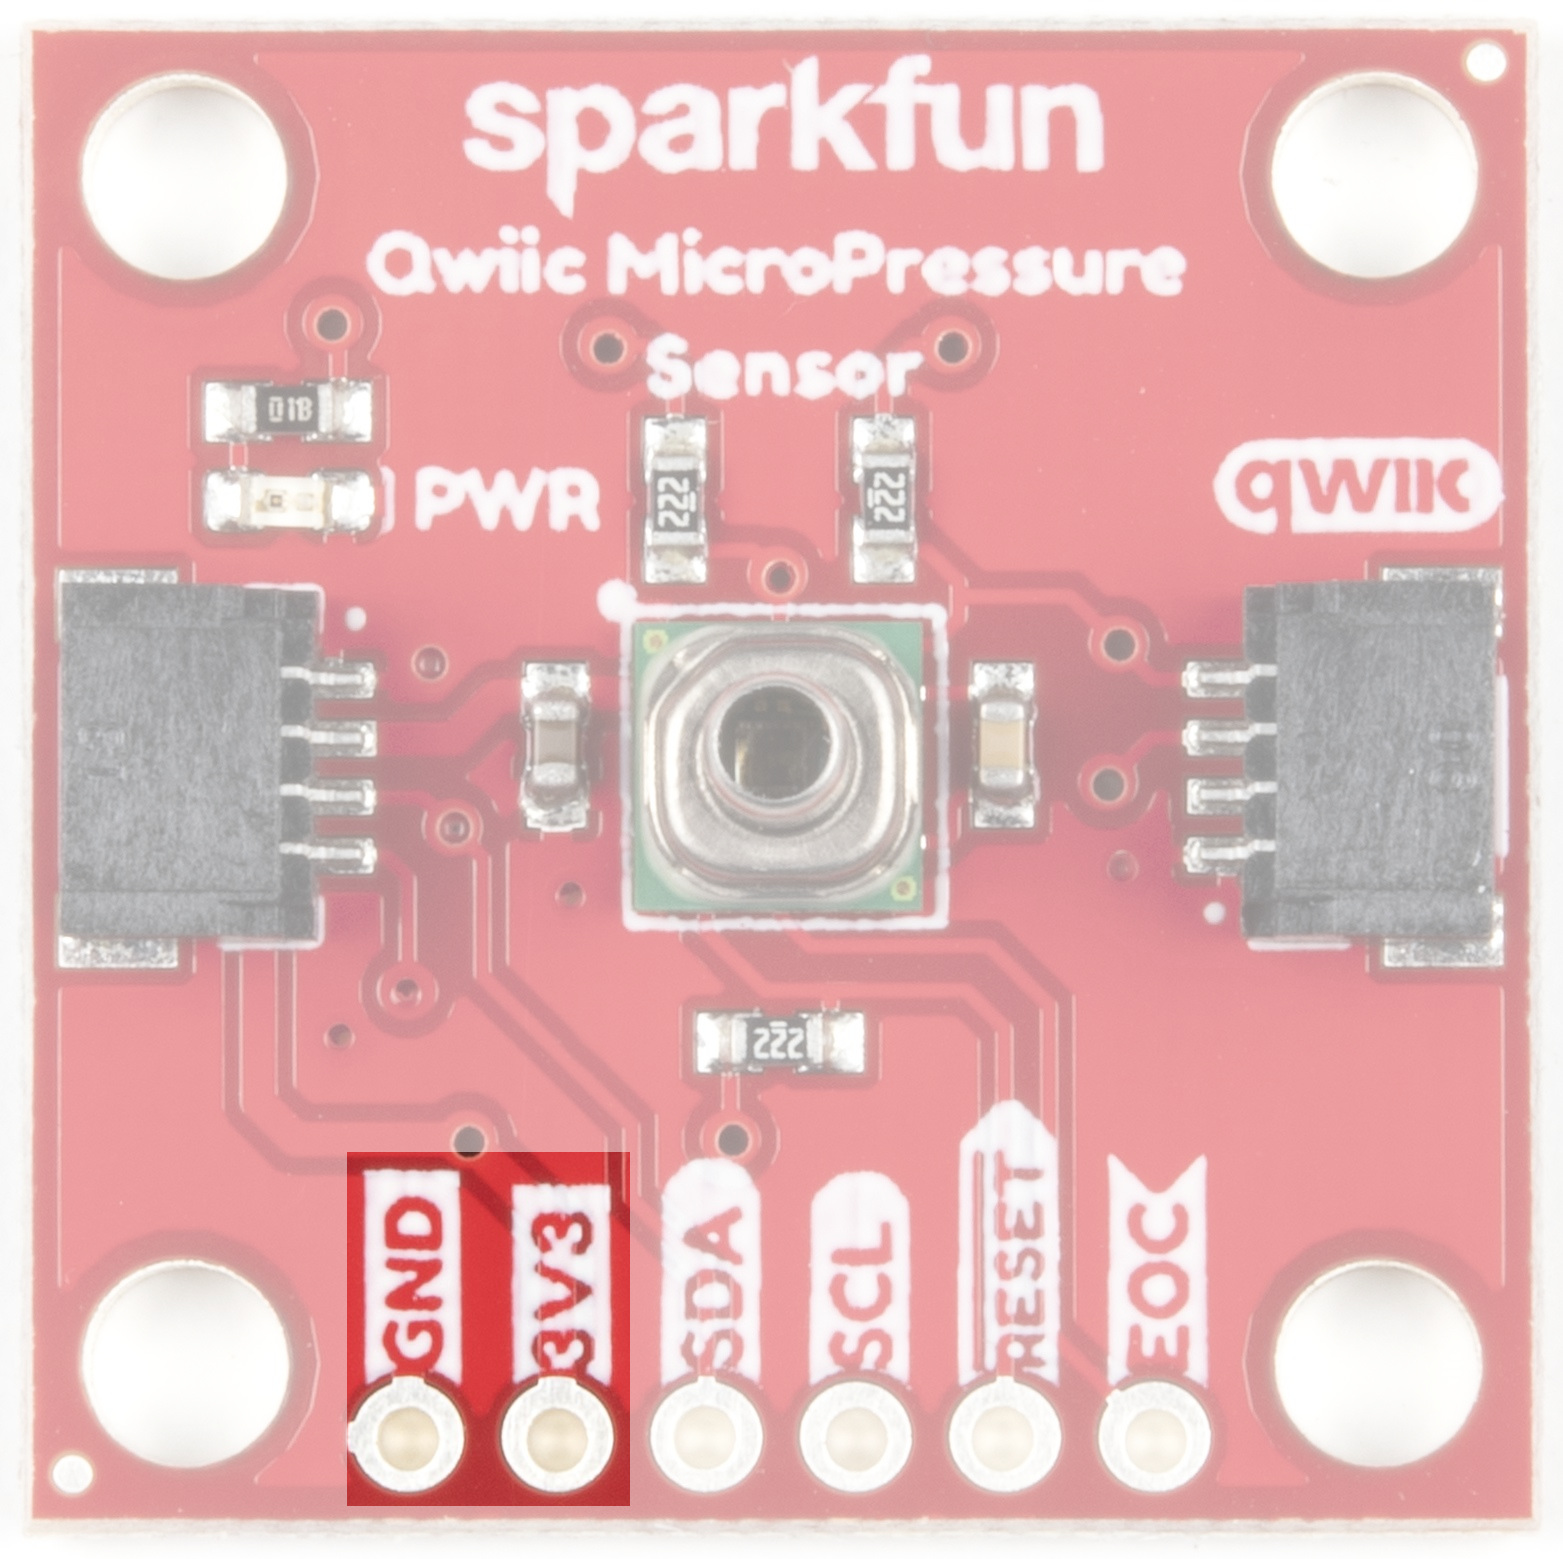
Ideally, power will be supplied via the Qwiic connectors on either side of the board. Alternatively, power can be supplied through the header along the bottom side of the board labeled 3V3 and GND. The input voltage range should be between 1.8-3.6V.
Our Qwiic Ecosystem makes sensors pretty much plug and play. There are two Qwiic connectors on either side of the Qwiic MicroPressure Sensor board to provide power and I2C connectivity simultaneously.

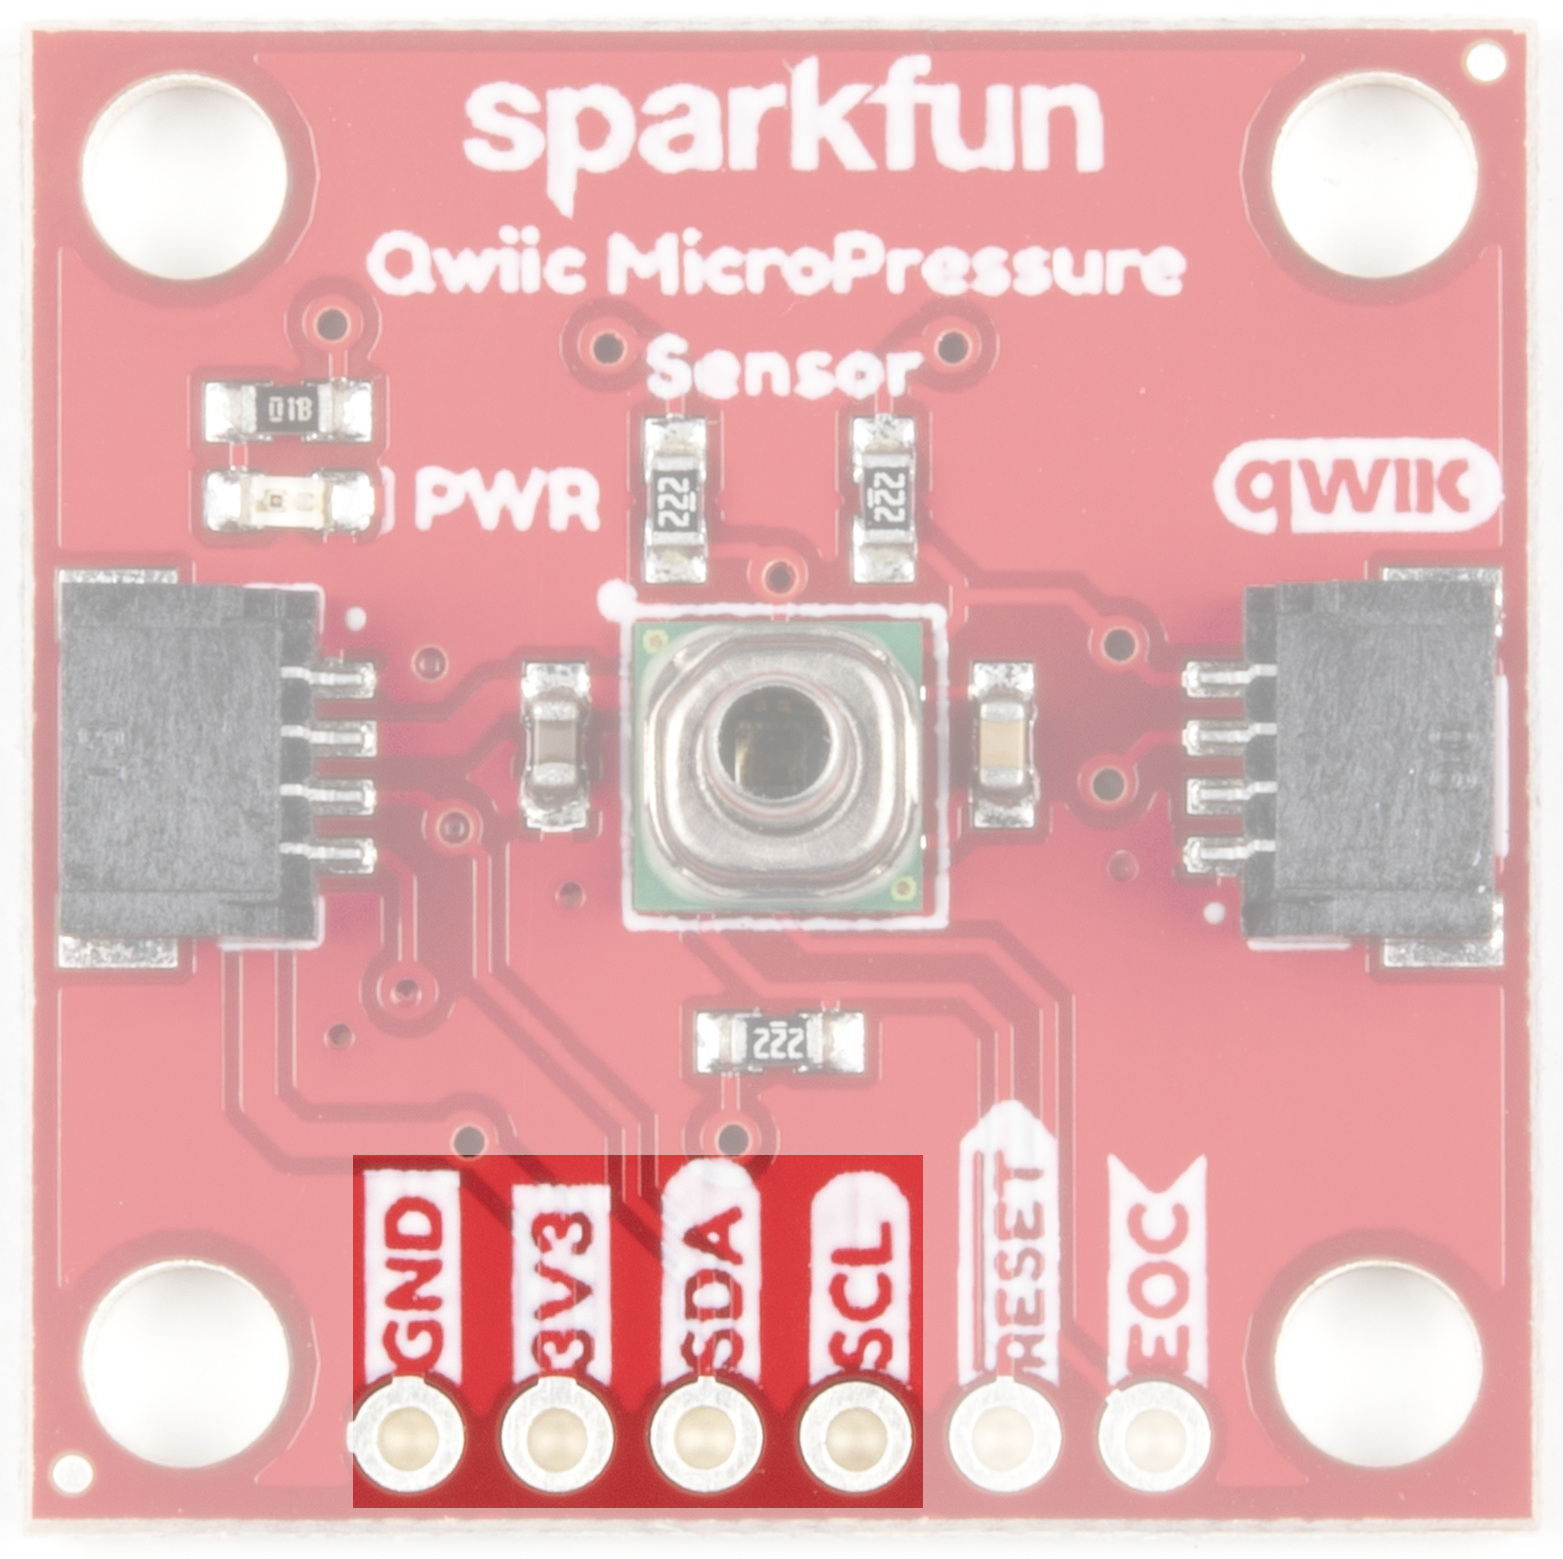
The I2C pins break out the functionality of the Qwiic connectors. Depending on your application, you can connect to these pins via the plated through holes for SDA and SCL.
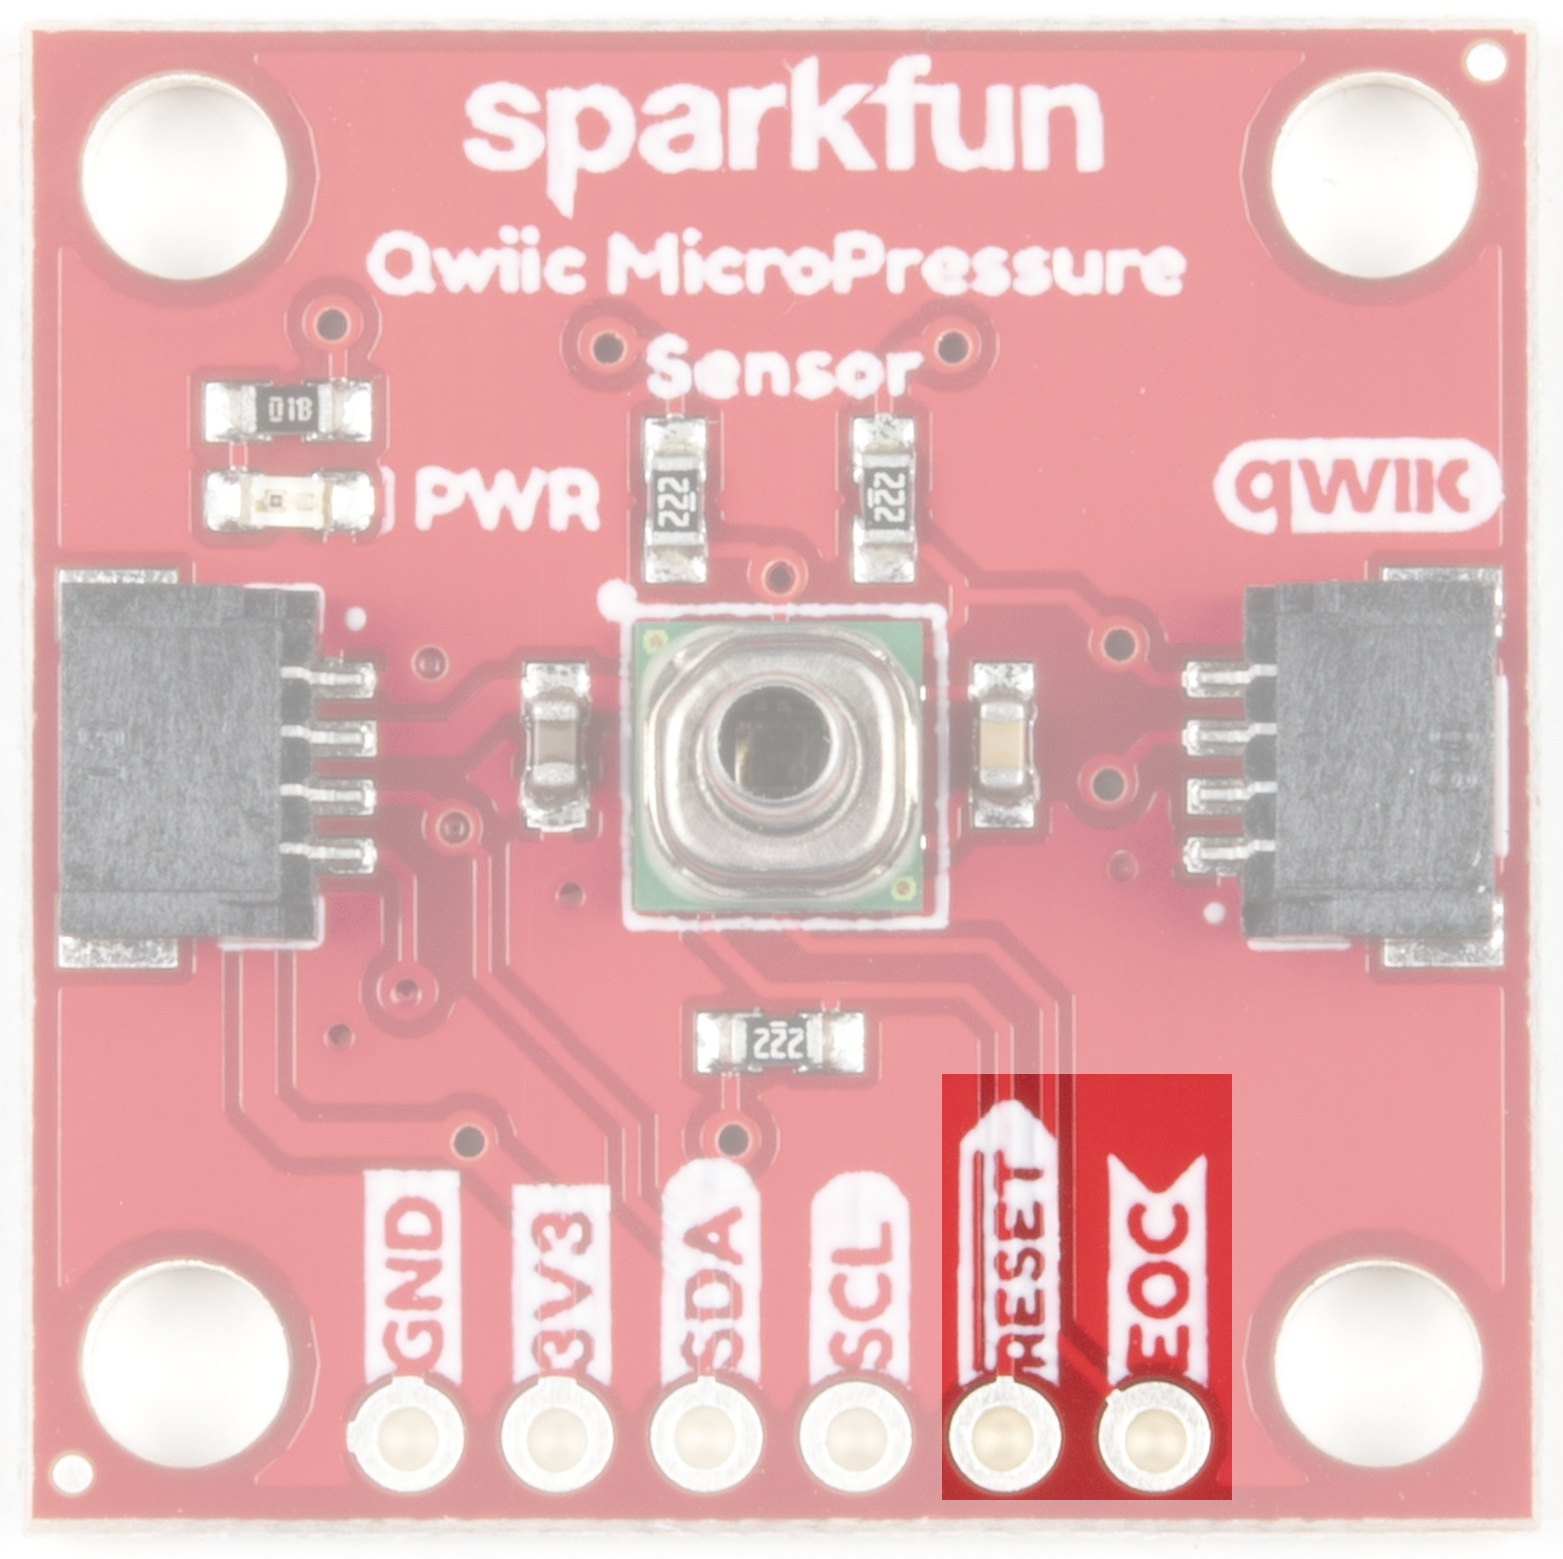
The reset pin is active low, with an external 2.2 kΩ pull-up resistor on board. While not needed for the board to work, this pin can be pulled low externally to reset the sensor.
The EOC, or End Of Conversion, pin is set high when a measurement and calculation have been completed and the data is ready to be clocked out. Alternatively the status register of the sensor can also be used to check to see when a new measurement is ready.
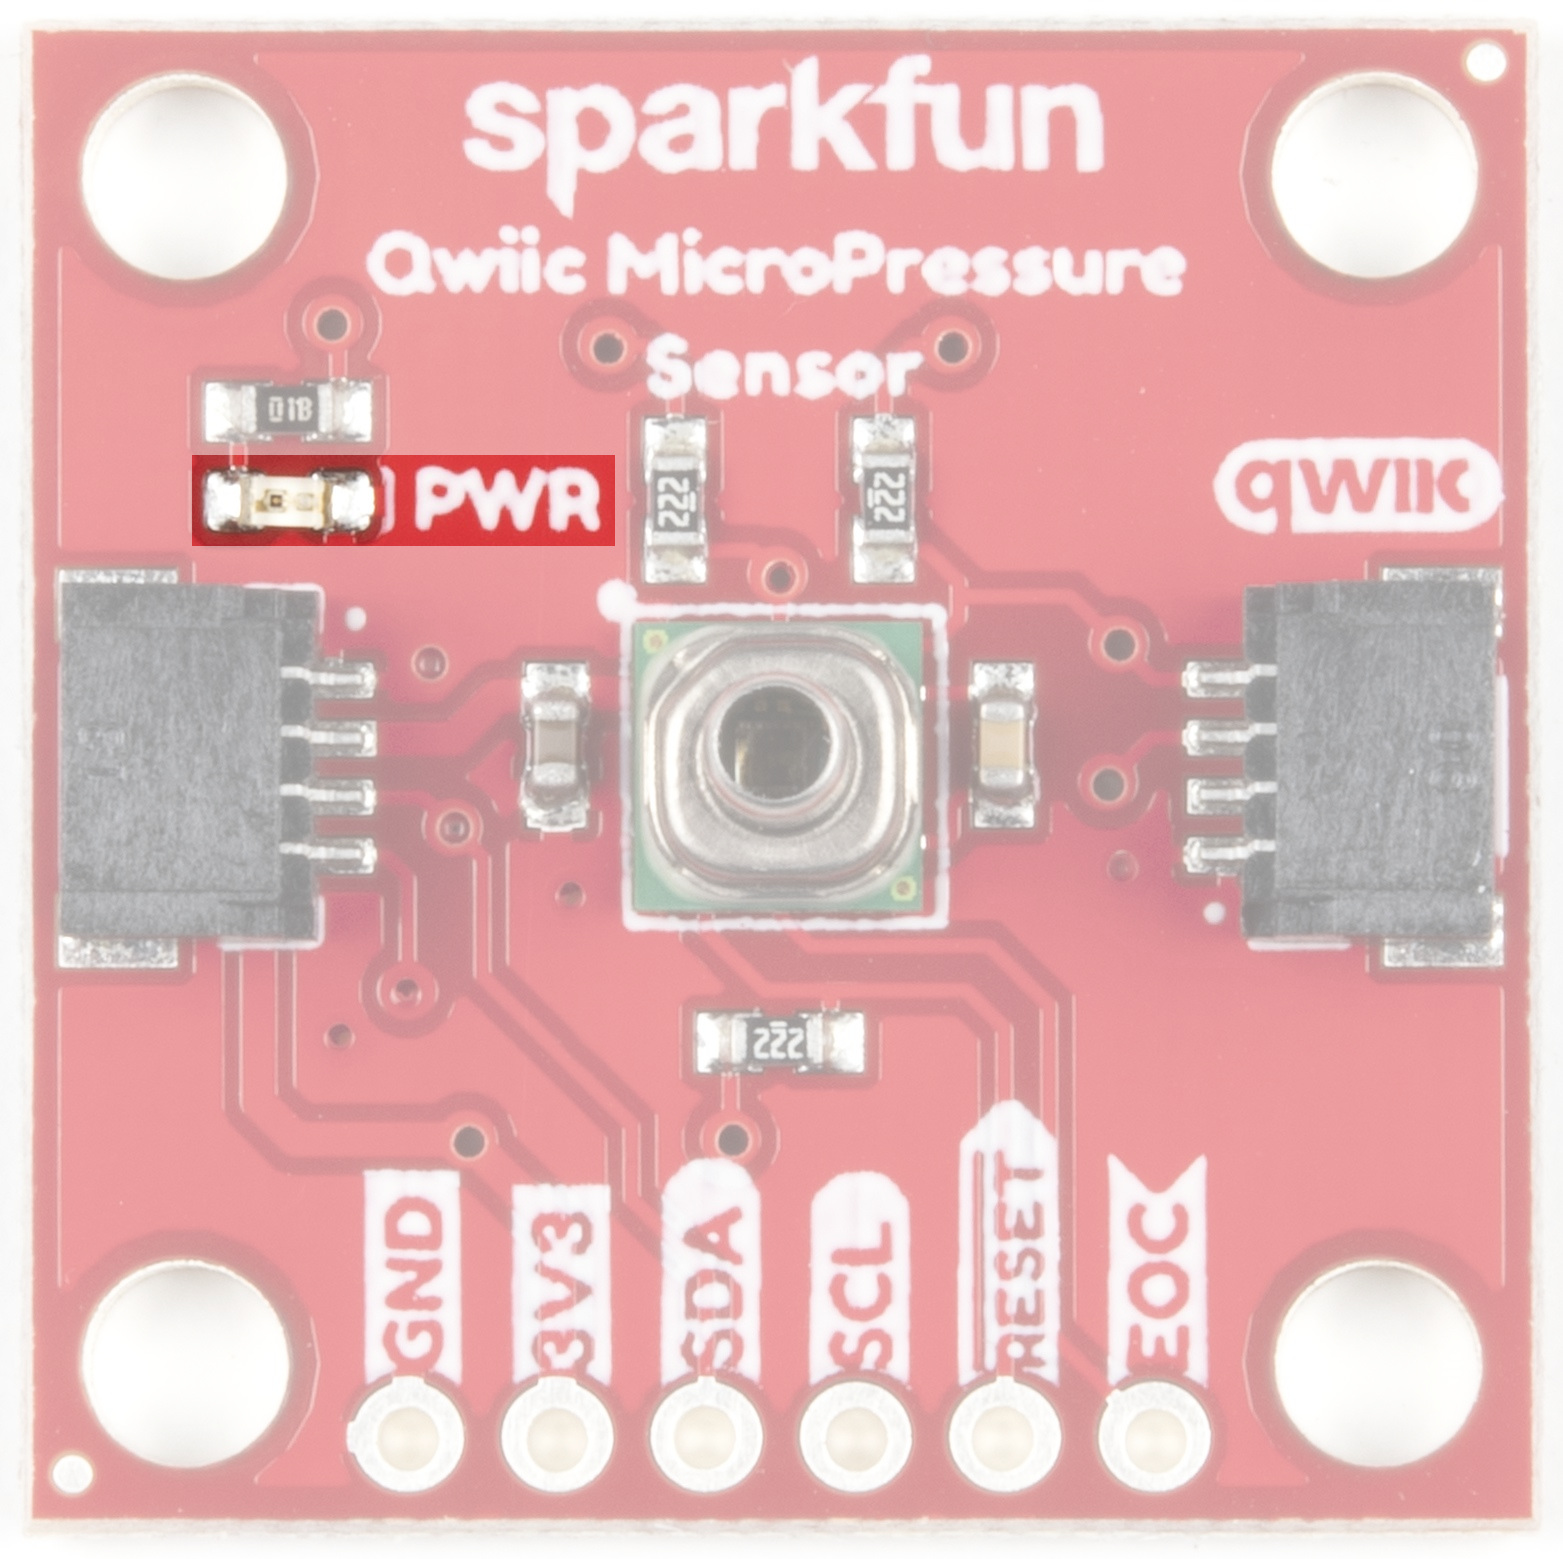
Located towards the top left of the board, the Power LED gives you visual confirmation that your board is powered and ready to go.
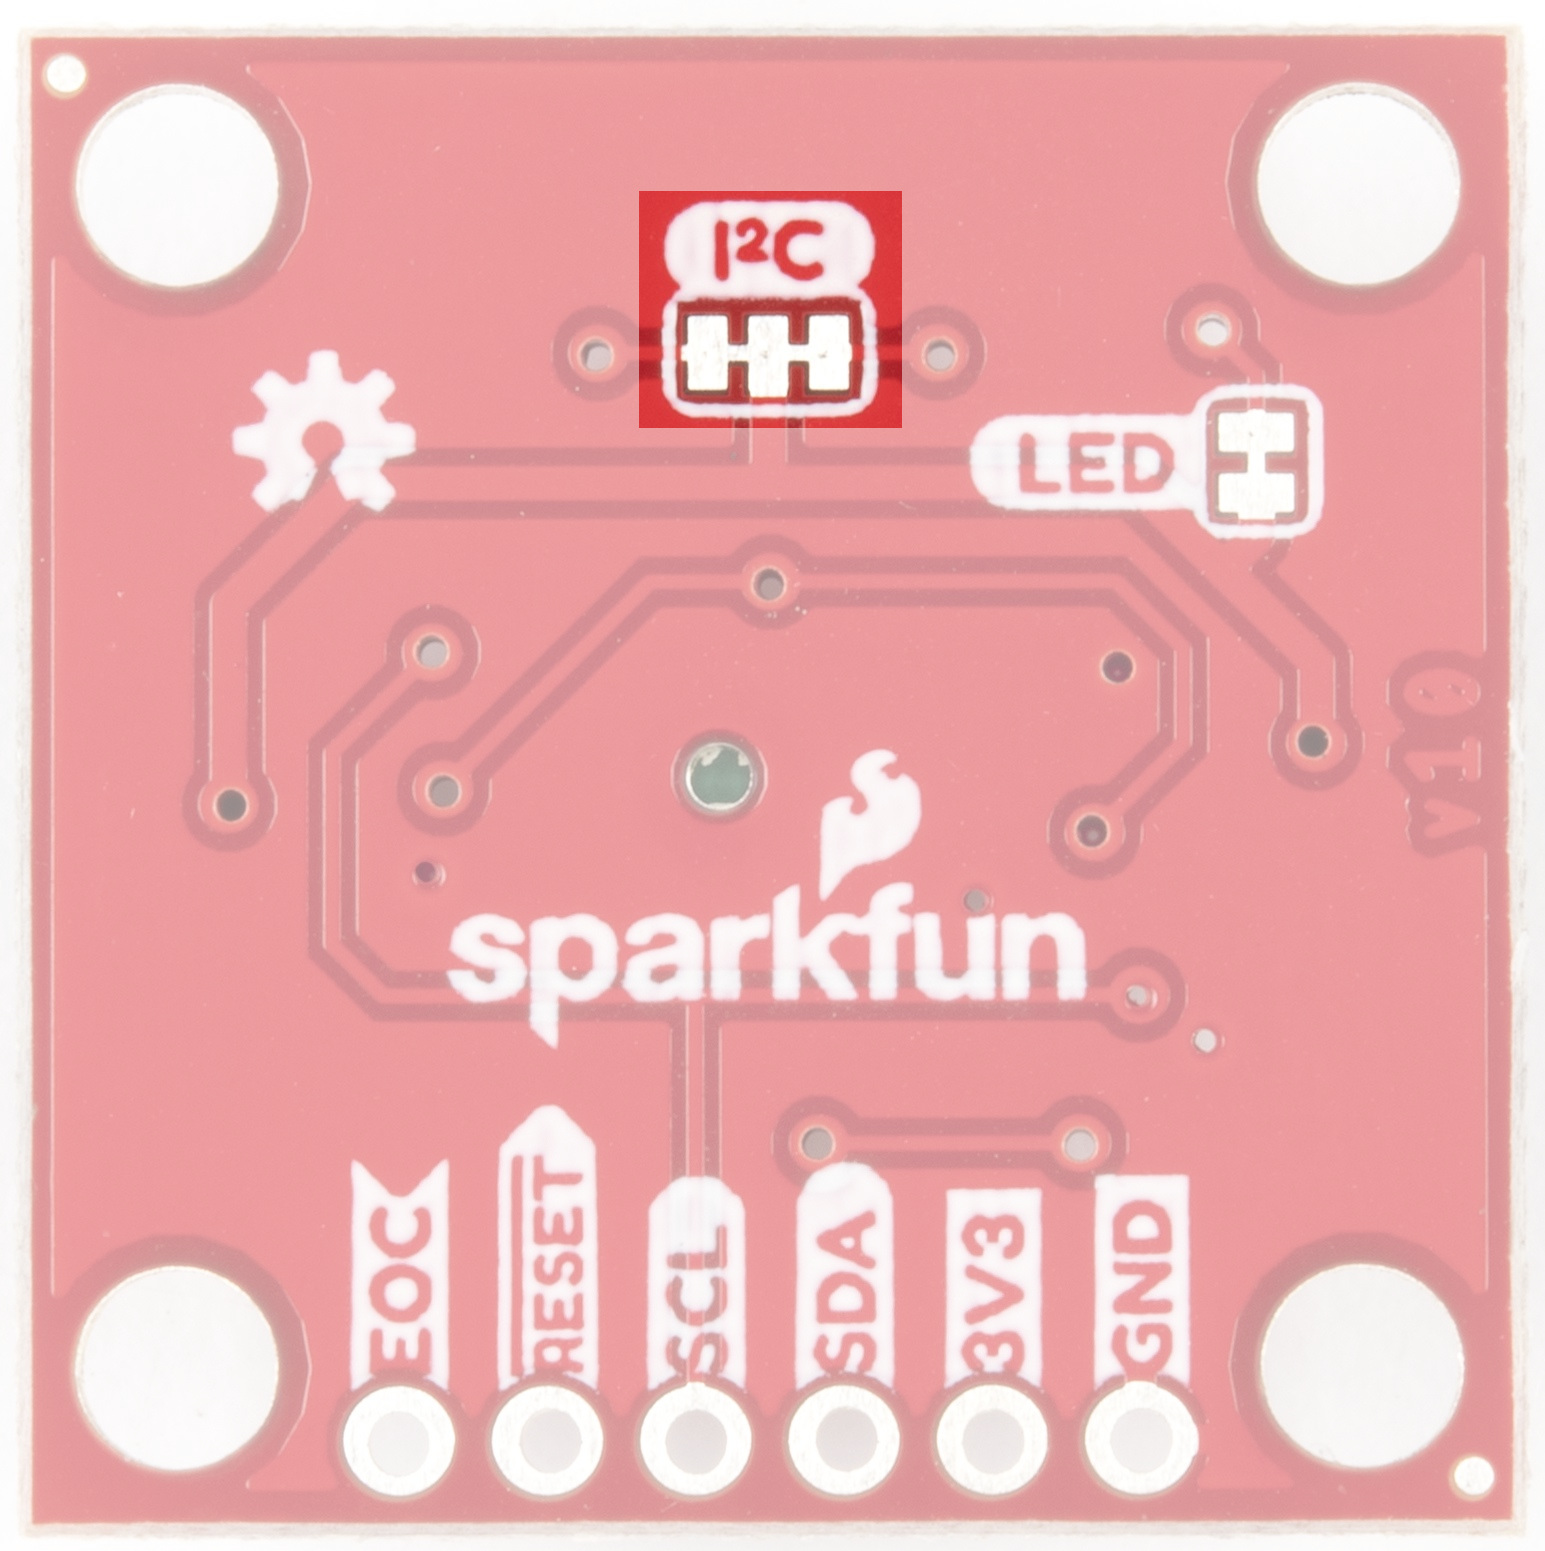
Like our other Qwiic boards, the Qwiic MicroPressure Sensor comes equipped with pull-up resistors on the clock and data pins. If you are daisy-chaining multiple Qwiic devices, you will want to cut this jumper; if multiple sensors are connected to the bus with the pull-up resistors enabled, the parallel equivalent resistance will create too strong of a pull-up for the bus to operate correctly. As a general rule of thumb, disable all but one pair of pull-up resistors if multiple devices are connected to the bus. To disable the pull up resistors, use an X-acto knife to cut the joint between the two jumper pads highlighted below.
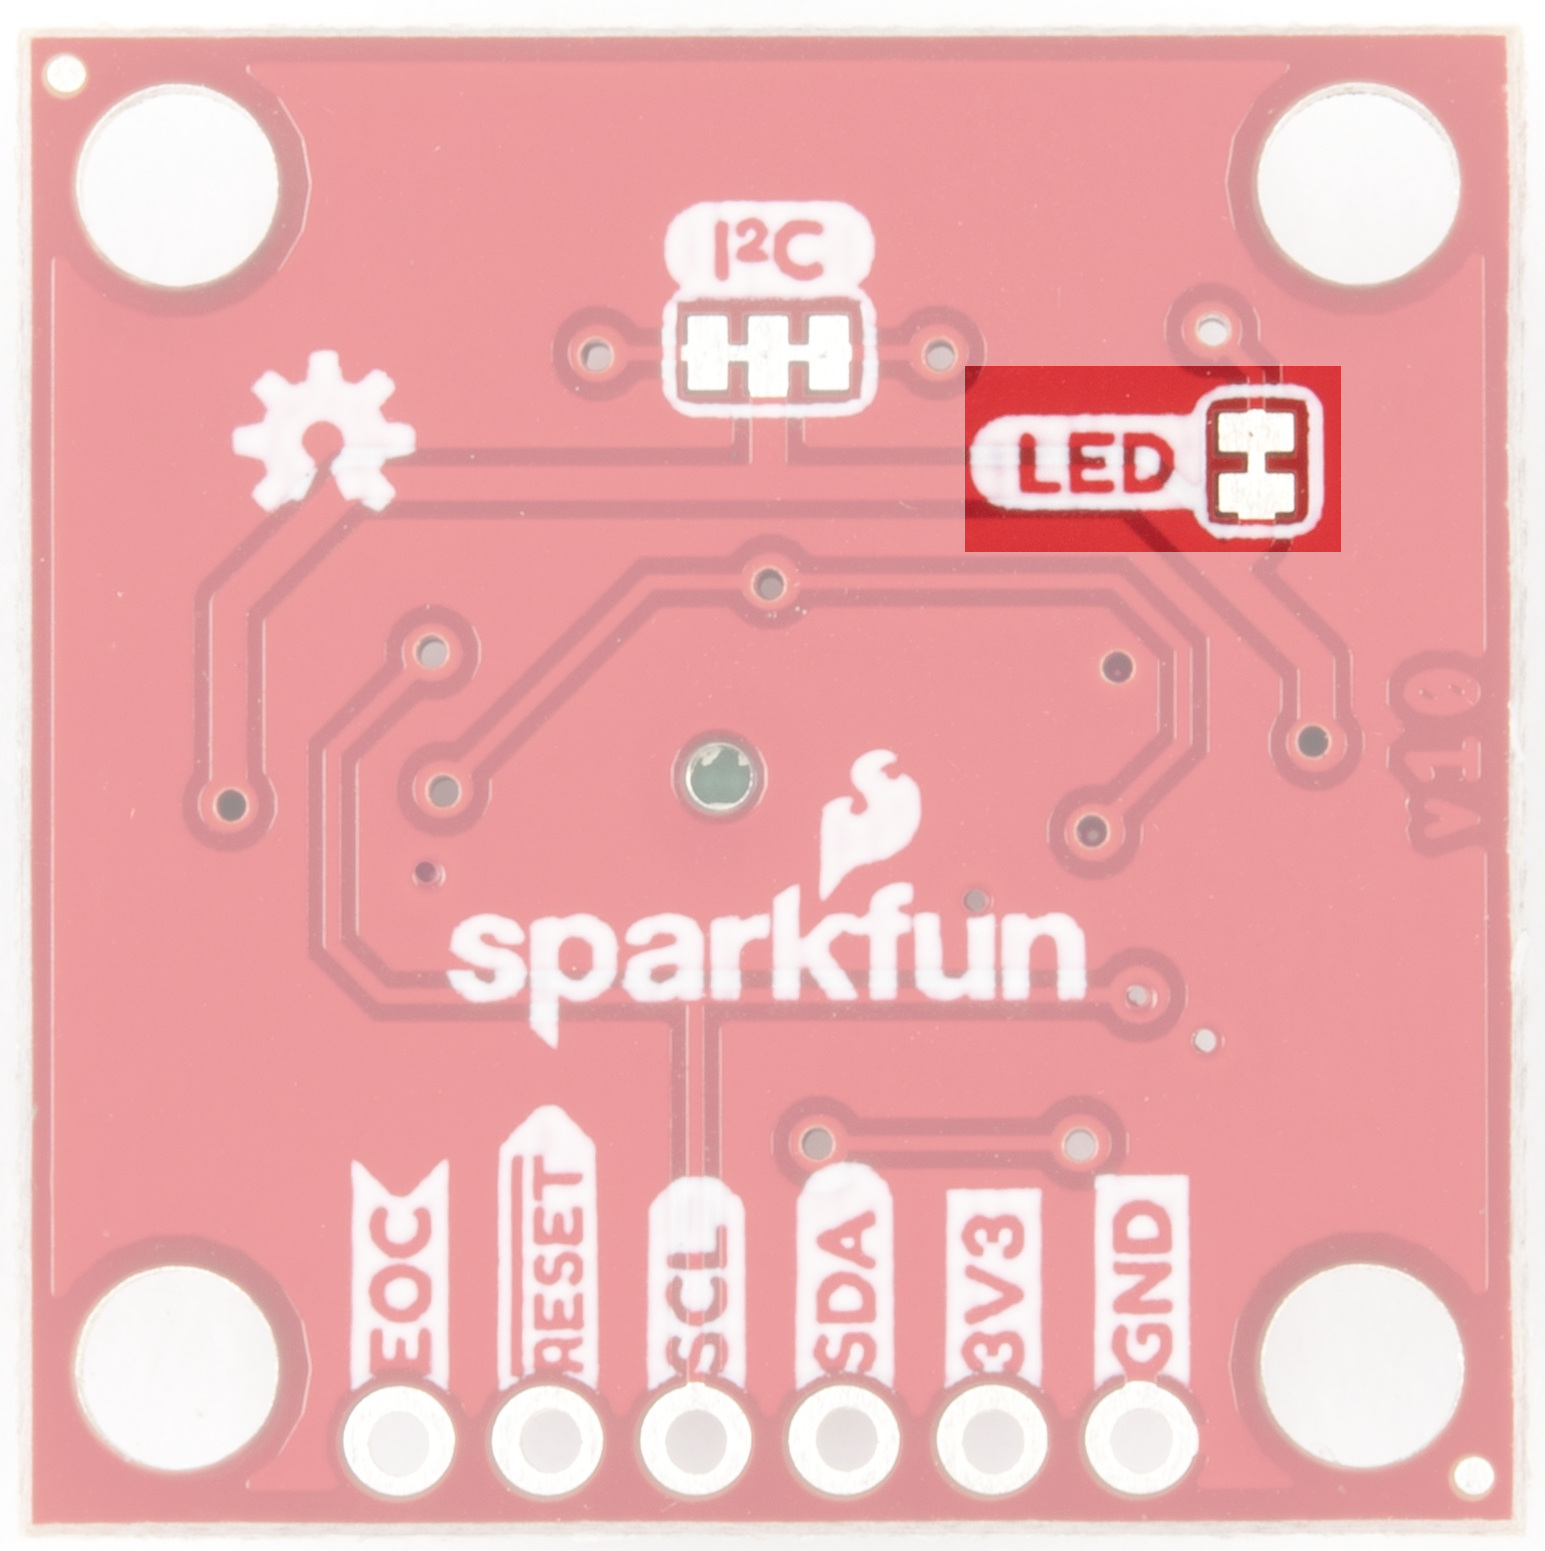
If power consumption is an issue, cutting this jumper will disable the Power LED on the front of the board.

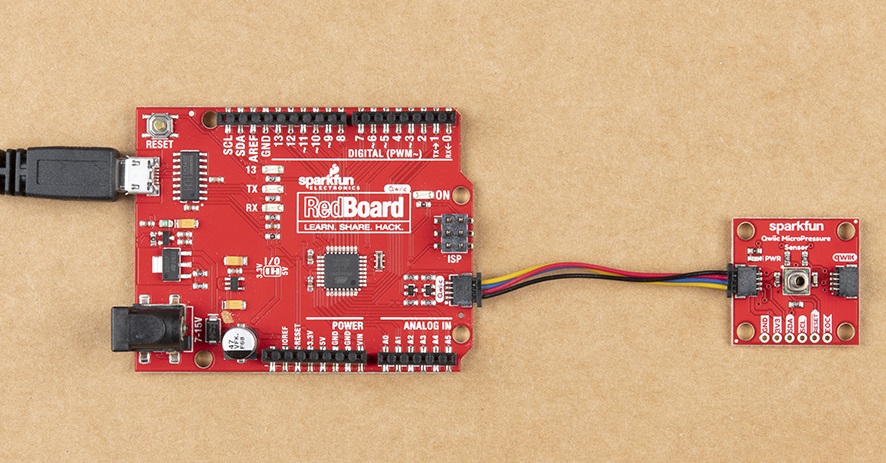
With the Qwiic System, hardware hookup is a breeze. Plug one end of the Qwiic cable into the SparkFun Redboard Qwiic port, and the other into the MicroPressure Sensor board's Qwiic port as you see below:
SparkFun has written a library to work with the Qwiic MicroPressure Sensor. You can obtain this library through the Arduino Library Manager by searching for "MicroPressure". Find the one written by SparkFun Electronics and install the latest version. If you prefer downloading libraries manually, you can grab them from the GitHub Repository.
Below is a list of the functions that can be used with the MicroPressure sensor, along with a description of what each function does and how to use it.
SparkFun_MicroPressure( int8_t eoc_pin, int8_t rst_pin, uint8_t minimumPSI, uint8_t maximumPSI ) - The constructor has four optional arguments, by default the eoc_pin, and rst_pin are not used, and the MicroPressure sensor used on the board has a pressure range of 0 - 25 PSI.
eoc_pin - The End Of Conversion pin is set high when a measurement and calculation have been completed and the data is ready to be clocked out. When set to -1, the status register is used to check when a measurement is ready to be clocked out. Default: -1rst_pin - The Reset pin is active low, and resets the sensor in the begin function. When set to -1, the board will reset after a power cycle. Default: -1minimumPSI - The minimum PSI value is used in the pressure conversion calculation for the MPR series sensor. Default: 0 PSImaximumPSI - The minimum PSI value is used in the pressure conversion calculation for the MPR series sensor. Default: 25 PSIbool begin(uint8_t deviceAddress, TwoWire &wirePort) - Call at the beginning of the sketch to intialize the device. This function takes two optional parameters: deviceAddress and wirePort. This function will return true when the device is intialized, and false if it is unable to communicate with the device.
deviceAddress - The MPR series sensor has multiple I2C addresses that are fixed as shown on page 7 of the datasheet, with the most common address being 0x18. Default: 0x18wirePort - Sets the I2C bus the sensor is connected to, such as Wire or Wire1. Default: Wirefloat readPressure (Pressure_Units units) - returns the pressure sensor reading. The sensor outputs pressure in pounds per square inch, or PSI. If you would prefer a different unit of measurement, this function can convert the reading to one of the following for you by passing the argument:
PSI - Pounds per Square Inch (default)PA - PascalsKPA - kilopascalsBAR - bar (1 bar is equal to 100,000 Pa)TORR - torr (1 torr is roughly equal to 133.32 Pa)INMG - Inches of Mercury (Mg)ATM - Atmospheresuint8_t readStatus( void ) - Reads and returns the status byte of the sensor. For more information about the status byte refer to page 15 of the datasheet.
Once the library is installed, go ahead and open up File->Examples->SparkFun MicroPressure Library->Example1_BasicReadings. Make sure to select your board (SparkFun RedBoard) and COM port before hitting upload to begin experimenting with the pressure sensor.
Alternatively, you can copy and paste the code below to a shiny new Arduino file:
language:c
/*
  Basic test of the Qwiic MicroPressure Sensor
  By: Alex Wende
  SparkFun Electronics
  Date: July 2020
  License: This code is public domain but you buy me a beer if you use this and we meet someday (Beerware license).
  Feel like supporting our work? Buy a board from SparkFun!
  https://www.sparkfun.com/products/16476

  This example demonstrates how to get started with the Qwiic MicroPressure Sensor board, and read pressures in various units.
*/

// Include the SparkFun MicroPressure library.
// Click here to get the library: http://librarymanager/All#SparkFun_MicroPressure

#include<Wire.h>
#include <SparkFun_MicroPressure.h>

/*
 * Initialize Constructor
 * Optional parameters:
 *  - EOC_PIN: End Of Conversion (defualt: -1)
 *  - RST_PIN: Reset (defualt: -1)
 *  - MIN_PSI: Minimum Pressure (default: 0 PSI)
 *  - MAX_PSI: Maximum Pressure (default: 25 PSI)
 */
//SparkFun_MicroPressure mpr(EOC_PIN, RST_PIN, MIN_PSI, MAX_PSI);
SparkFun_MicroPressure mpr; // Use default values with reset and EOC pins unused

void setup() {
  // Initalize UART, I2C bus, and connect to the micropressure sensor
  Serial.begin(115200);
  Wire.begin();

  /* The micropressure sensor uses default settings with the address 0x18 using Wire.

     The mircropressure sensor has a fixed I2C address, if another address is used it
     can be defined here. If you need to use two micropressure sensors, and your
     microcontroller has multiple I2C buses, these parameters can be changed here.

     E.g. mpr.begin(ADDRESS, Wire1)

     Will return true on success or false on failure to communicate. */
  if(!mpr.begin())
  {
    Serial.println("Cannot connect to MicroPressure sensor.");
    while(1);
  }
}

void loop() {
  /* The micropressure sensor outputs pressure readings in pounds per square inch (PSI).
     Optionally, if you prefer pressure in another unit, the library can convert the
     pressure reading to: pascals, kilopascals, bar, torr, inches of murcury, and
     atmospheres.
   */
  Serial.print(mpr.readPressure(),4);
  Serial.println(" PSI");
  Serial.print(mpr.readPressure(PA),1);
  Serial.println(" Pa");
  Serial.print(mpr.readPressure(KPA),4);
  Serial.println(" kPa");
  Serial.print(mpr.readPressure(TORR),3);
  Serial.println(" torr");
  Serial.print(mpr.readPressure(INHG),4);
  Serial.println(" inHg");
  Serial.print(mpr.readPressure(ATM),6);
  Serial.println(" atm");
  Serial.print(mpr.readPressure(BAR),6);
  Serial.println(" bar");
  Serial.println();
  delay(500);
}
Once you have the code, go ahead and click on the upload button, open your serial monitor, and watch the magic happen!
For this particular example, I purchased uxcell Pneumatic Hose 4mm OD 2.5mm from Amazon, but any tubing with an inner diameter of 2.5mm will work.
Attach the tubing over the protruding MPR sensor like so:

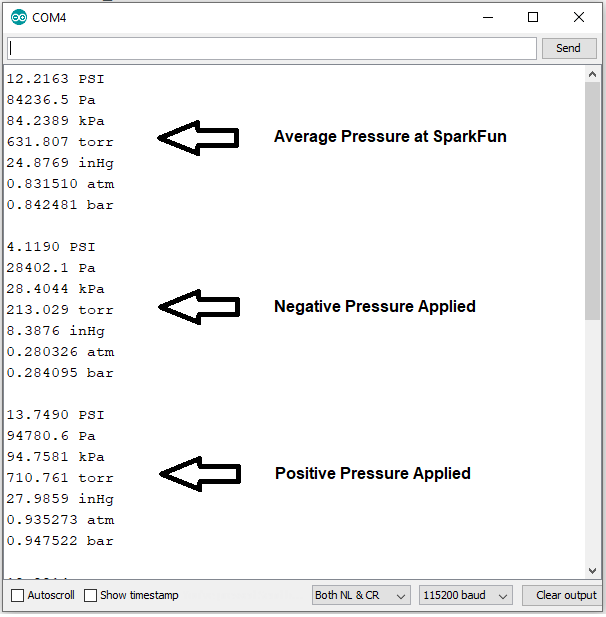
Open up your Serial Monitor and make sure your baud is at 115200. You should see the average pressure being output in multiple different measurements. If you apply negative pressure to the tubing, you'll see the measurements go down, positive pressure will show the measurements going up. Note the output below:
The possible applications of the Qwiic MicroPressure Sensor are boundless. If you need more information, check out the links below:
You can also check out these other great Qwiic sensors from SparkFun:
learn.sparkfun.com | CC BY-SA 3.0 | SparkFun Electronics | Niwot, Colorado