SCiO Pocket Molecular Scanner Teardown
 Joel_E_B
Device Teardown
Enough talk...let's get to the good stuff, the teardown!
To begin, the plastic housing was dissected. This enclosure was not meant to be taken apart and reassembled --- at least not easily.
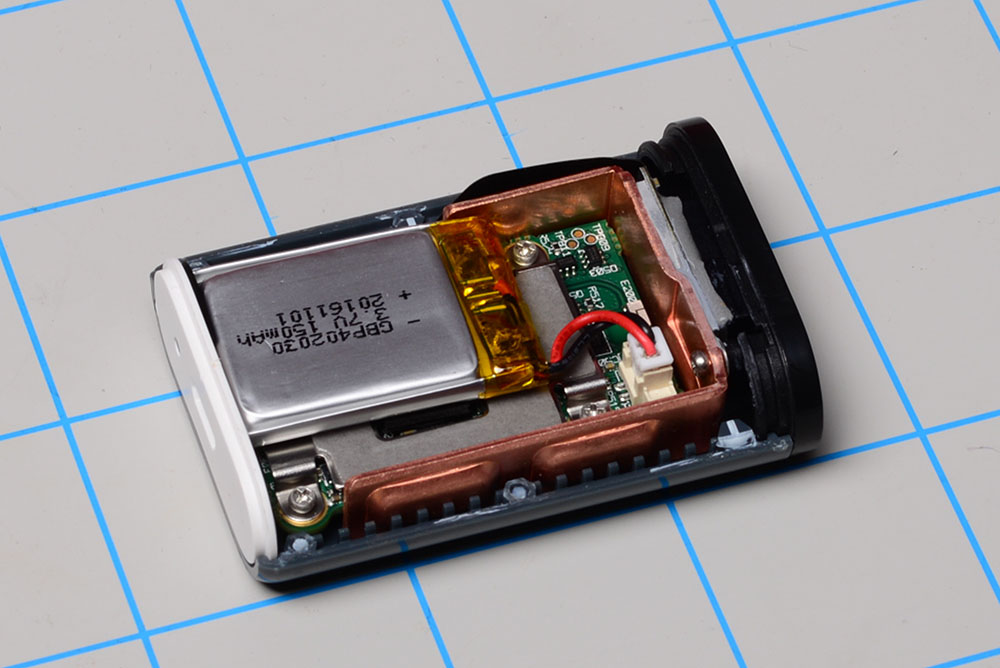
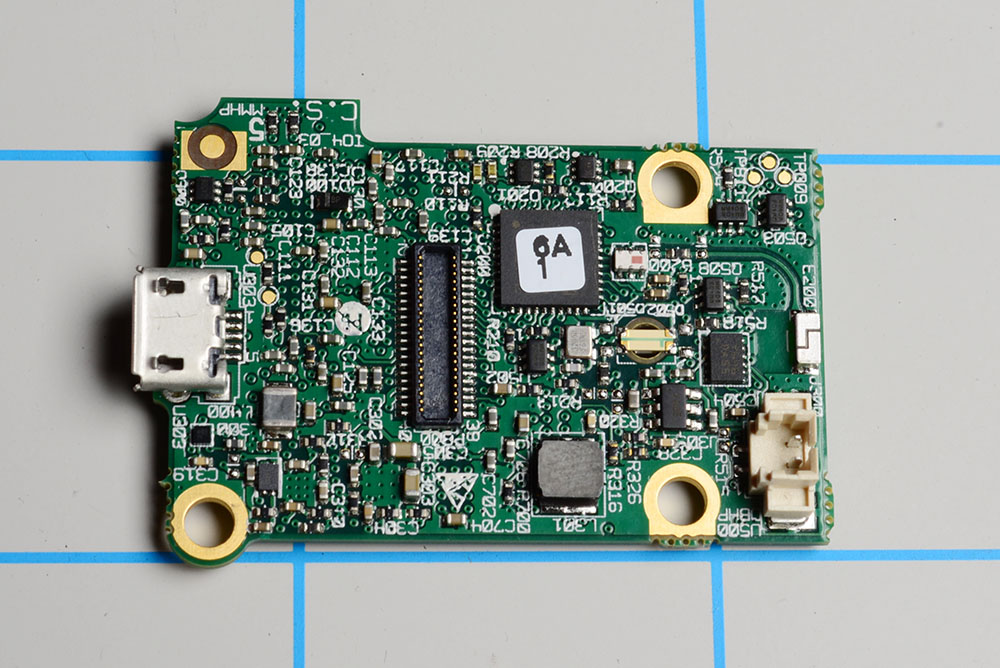
There was not a whole lot to the device inside. Three screws held the LiPo battery housing to the enclosure, with the PCB sandwiched between. The only real user interfaces were the large, singular button for powering and scanning, the microUSB slot for charging and the charging indicator LED.

The most noticeable part of the assembly was the very large heatsink that wrapped around the PCB and was affixed to the imaging sensor with heat-transferring adhesive. The only thing connecting the PCB to the sensor was a flat flex cable assembly with a socket connector on the end.

All we were left with was the bare PCB. It had an impressive amount of technology packed onto one little board. One side was populated with a majority of the ICs and the user interface button, complete with reverse-mounted LED.
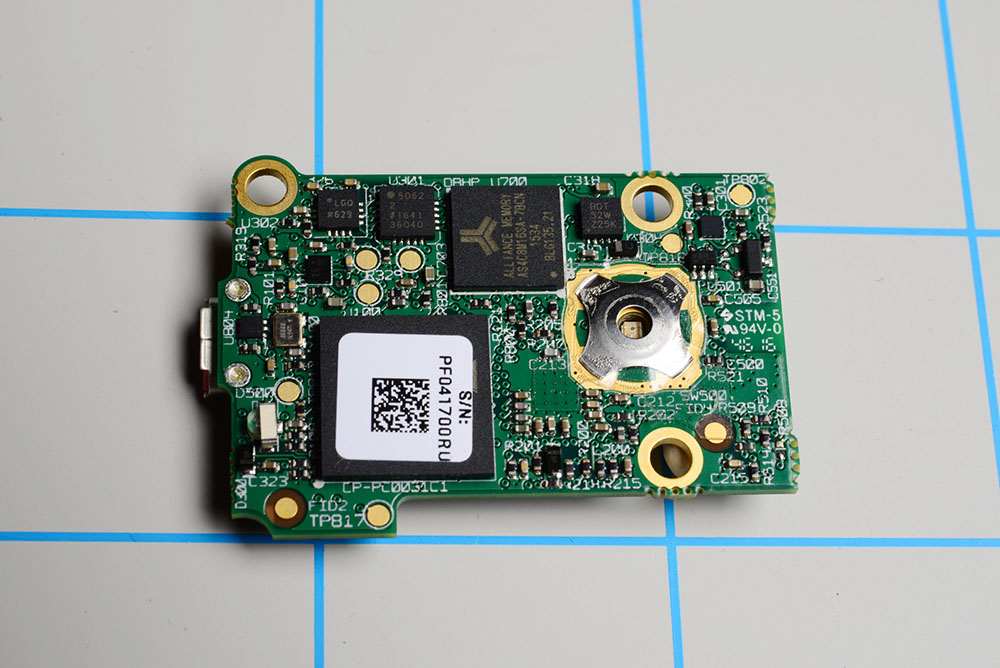
The other side was populated with the socket connector for the sensor, microUSB connector, battery connection, Bluetooth® antenna and other various bits and pieces.