nRF52840 Development with Arduino and CircuitPython
 jimblom
Arduino Examples
Using the Arduino nRF52 cores, you can program digitalWrite I/O, analogRead ADC pins, Serial print to the Serial monitor, interact with hardware serial using Serial1, and even perform more complex I2C or SPI writes with the Wire and SPI libraries. But, if you've done any Arduino development before, those may not be all that exciting. Let's do some Bluetooth stuff!
The nRF52 Arduino core includes the Bluefruit nRF52 Libraries which can be used to turn your nRF52840 into a BLE peripheral and/or central device. Browse the exhaustive list of examples by navigating to File > Examples > Adafruit Bluefruit nRF52 Libraries. One suggestion, if you want to start simple, is the peripheral/blinky_ota example.
Blinky Button BLE Example Code
As if you don't already have enough examples, we wanted to provide a simple example that demonstrates how to control and interact with the nRF52840's hardware components over a BLE connection. This example allows you to toggle the LED and read the pin-13 button status using a BLE app on your mobile phone.
To get the example, copy and paste the below into a new Arduino sketch in your IDE (or get the latest version in our GitHub repo):
language:c
/* BLE Example for SparkFun Pro nRF52840 Mini
 *
 *  This example demonstrates how to use the Bluefruit
 *  library to both send and receive data to the
 *  nRF52840 via BLE.
 *
 *  Using a BLE development app like Nordic's nRF Connect
 *  https://www.nordicsemi.com/eng/Products/Nordic-mobile-Apps/nRF-Connect-for-Mobile
 *  The BLE UART service can be written to to turn the
 *  on-board LED on/off, or read from to monitor the
 *  status of the button.
 *
 *  See the tutorial for more information:
 *  https://learn.sparkfun.com/tutorials/nrf52840-development-with-arduino-and-circuitpython#arduino-examples
*/
#include <bluefruit.h>

BLEUart bleuart; // uart over ble

// Define hardware: LED and Button pins and states
const int LED_PIN = 7;
#define LED_OFF LOW
#define LED_ON HIGH

const int BUTTON_PIN = 13;
#define BUTTON_ACTIVE LOW
int lastButtonState = -1;

void setup() {
  // Initialize hardware:
  Serial.begin(9600); // Serial is the USB serial port
  pinMode(LED_PIN, OUTPUT); // Turn on-board blue LED off
  digitalWrite(LED_PIN, LED_OFF);
  pinMode(BUTTON_PIN, INPUT);

  // Uncomment the code below to disable sharing
  // the connection LED on pin 7.
  //Bluefruit.autoConnLed(false);

  // Initialize Bluetooth:
  Bluefruit.begin();
  // Set max power. Accepted values are: -40, -30, -20, -16, -12, -8, -4, 0, 4
  Bluefruit.setTxPower(4);
  Bluefruit.setName("SparkFun_nRF52840");
  bleuart.begin();

  // Start advertising device and bleuart services
  Bluefruit.Advertising.addFlags(BLE_GAP_ADV_FLAGS_LE_ONLY_GENERAL_DISC_MODE);
  Bluefruit.Advertising.addTxPower();
  Bluefruit.Advertising.addService(bleuart);
  Bluefruit.ScanResponse.addName();

  Bluefruit.Advertising.restartOnDisconnect(true);
  // Set advertising interval (in unit of 0.625ms):
  Bluefruit.Advertising.setInterval(32, 244);
  // number of seconds in fast mode:
  Bluefruit.Advertising.setFastTimeout(30);
  Bluefruit.Advertising.start(0);
}

void loop() {
  // If data has come in via BLE:
  if (bleuart.available()) {
    uint8_t c;
    // use bleuart.read() to read a character sent over BLE
    c = (uint8_t) bleuart.read();
    // Print out the character for debug purposes:
    Serial.write(c);

    // If the character is one of our expected values,
    // do something:
    switch (c) {
      // 0 number or character, turn the LED off:
      case 0:
      case '0':
        digitalWrite(LED_PIN, LED_OFF);
        break;
      // 1 number or character, turn the LED on:
      case 1:
      case '1':
        digitalWrite(LED_PIN, LED_ON);
        break;
      default:
        break;
    }
  }

  // If our button state has changed:
  int buttonState = digitalRead(BUTTON_PIN);
  if (buttonState != lastButtonState) {
    lastButtonState = buttonState;
    // Write the new button state to the bleuart TX char
    bleuart.write(!buttonState);
  }
}
Before uploading, make sure you've selected SparkFun Pro nRF52840 as your board (or "Adafruit Bluefruit on nRF52840DK PCA10056" if you didn't install the SparkFun board definition.
Using nRF Connect to Control the Board
To test this example sketch, you'll need another device -- either computer or smartphone -- connected to your nRF52840. Nordic provides a free, handy test tool, nRF Connect for Mobile, that's available for both Android or iOS. We'll demonstrate how to control your nRF52840's LED and monitor the button using this sketch. So go download the app!
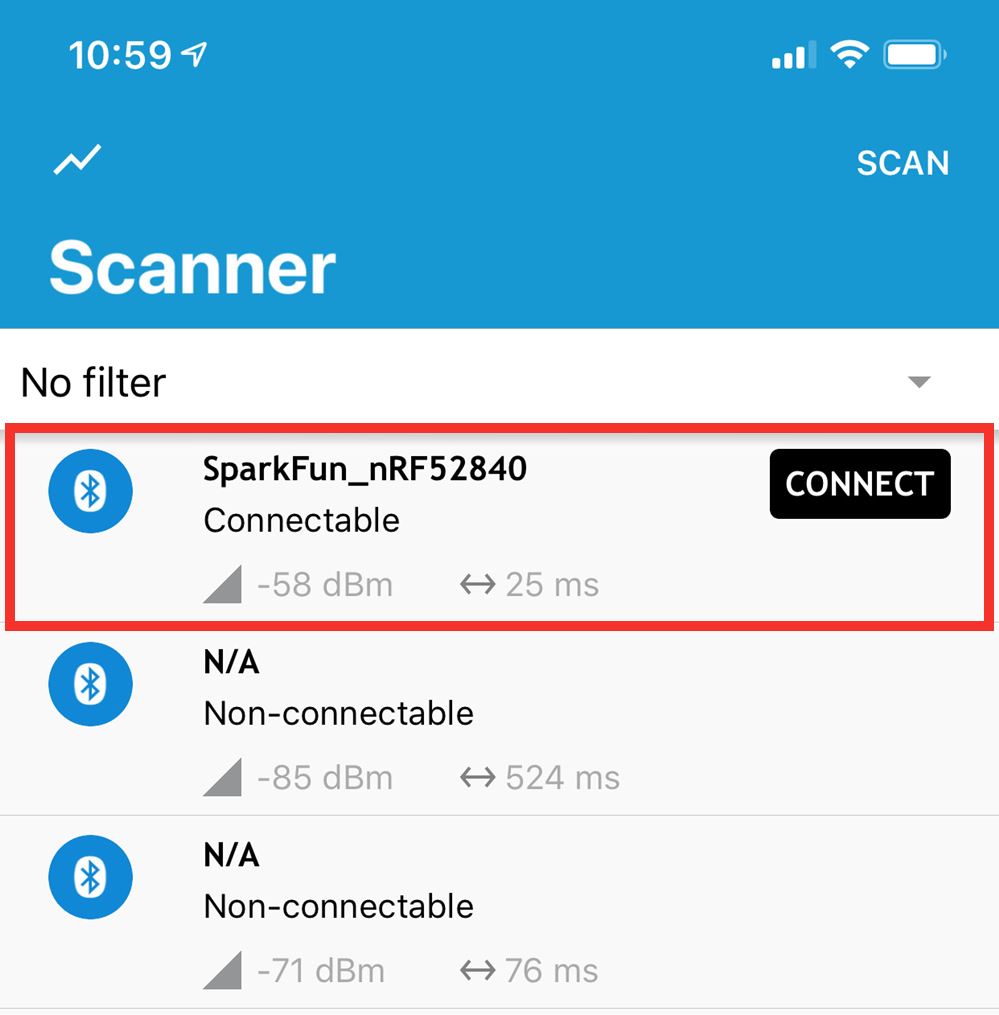
Once downloaded, open the app and begin searching for nearby Bluetooth devices. Among those with a strong signal strength, you should see SparkFun_nRF52840. Click the "CONNECT" button next to that.
Once connected, click on the Nordic UART Service, where you'll be presented with a pair of characteristics: TX and RX. Contrary to what you might expect, the "TX" characteristic is used to read the button status, and "RX" writes to the LED.
To read the button state, click the triple-down-arrow icon to the right of the "TX" characteristic. This will subscribe to notifications. If you press and release the button, you should see the "Value" change from 0x00 to 0x01 and back.
To write to the LED, click the up-arrow on the "RX" characteristic. Select "Text" as your format. Then write either "0" or "1" into the text box and press "SEND". A "0" will turn the LED off and a "1" will turn it on.
Check out the code comments to see how the bleuart service is used to control these two characteristics. And check out the rest of the examples in the Bluefruit for nRF52 library! There's some great stuff in there!