Is that too saccharine for you? Well prepare to have your heartstrings expertly twanged. With Father's Day fast approaching, we decided to put together an activity that will give your pops a warm fuzzy. All you'll need is a few craft supplies like paper, glue and a pair of scissors as well as the following electronics supplies:
Any solder and soldering iron will work and if you want a different color of LilyPad LED then feel free to substitute it in! Okay, now that we've gathered some materials, let's get started.
If you're not totally comfortable with soldering or simple circuits, that's cool. Check out these beginner guides:
Pop-up cards are great for making paper circuits because they give you places to hide batteries and switches and things like that. They also create depth, which plays nicely with the LED lighting.
There are a ton of ways to create this depth. If you're interested in designing your own card using advanced pop-up kung-fu, check out Robert Sabuda's site. The card that we're making today relies on this very simple method:
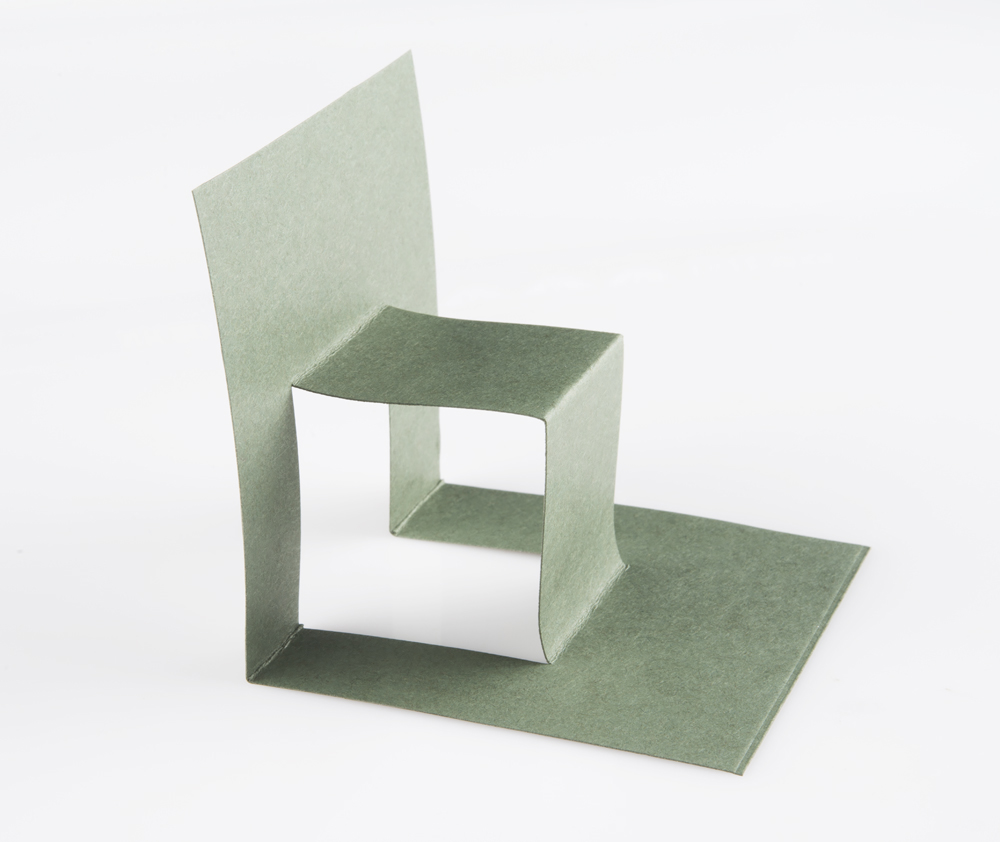
To get a pop-up layer all you have to do is fold the card, make two cuts on the folded edge, and open it back up reversing the fold on the pop-up part. If that didn't make sense then check this out. Everything after that is just cutting little layers of scenery and gluing it into place.
We're lazy and spoiled, so we used a laser cutter. This wouldn't be hard to cut out using a hobby knife, though, so don't worry if you don't have access to lasers. Just print out this template and get to cutting! The red lines in the template are where we printed on the card and the black lines are where we cut.
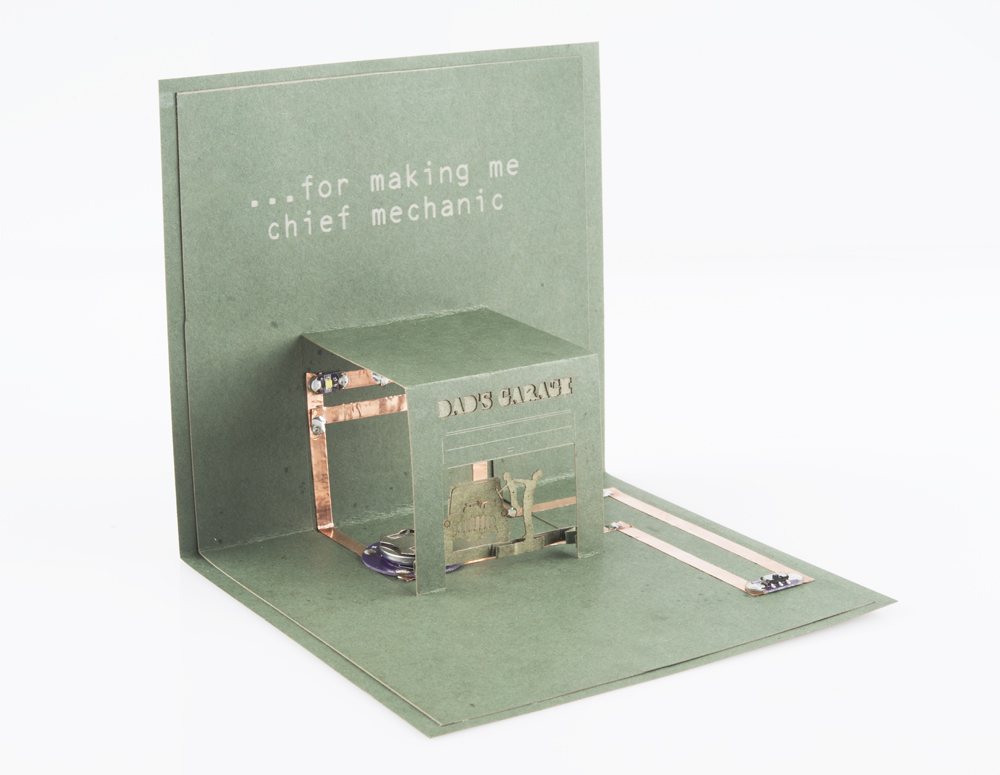
You'll notice that the card has two layers so that there won't be a big hole in the front of the card where we cut out the pop-up layer. Also, the car, dad and child cutouts are attached to the front of the garage with strips of paper folded accordion style. Once the paper portion of the card is put together, it's time to light it up! Let's get started on the paper circuit...
To make the card light up, we're going to put together the simple circuit below. Instead of using conductive thread to connect the LilyPad components, we'll be using copper tape.
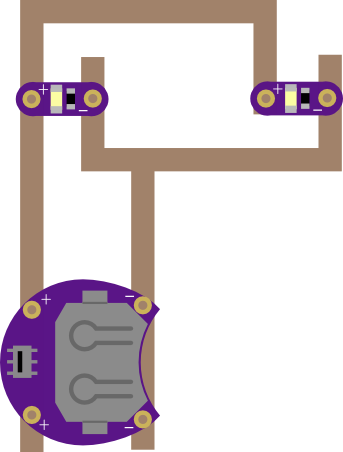
As long as all of your "+" signs are connected and all of your "-" are connected, you can lay out the tape in any pattern you want. Think about the layout of the card. We hid most of our components under the pop-up layer with the LEDs at the top so they shine out through the front. At the places where the copper tape meets, you'll need to form an electrical connection by adding a little dab of solder to the overlap.
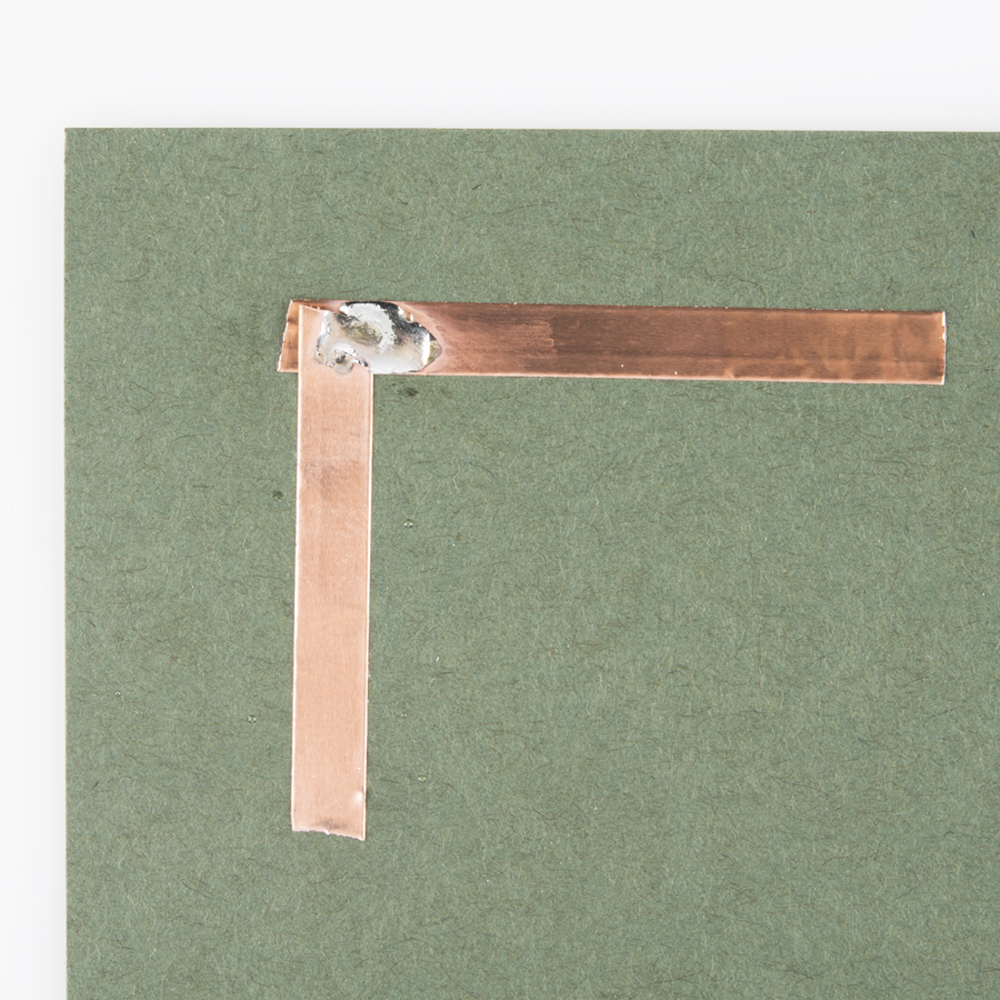
In order to secure each of the LilyPad components, simply place them and then add solder to the center of the connector. Don't be afraid to hold the soldering iron in place for a few seconds while the hot solder flows through the connector and attaches to the copper tape below.

Once all of your components are soldered in place, insert a coin cell battery and push the switch into the "on" position. Your LEDs should light up!

If your card works and looks the way you want it to then it's time to slap that thing into an envelope and give it to dad. Also, don't limit yourself to Father's Day, you can make Light-up cards for any occasion. If you make an awesome card then post a picture in the comments, we'd love to see it!
If you enjoyed this quick project tutorial, check out these other projects:
learn.sparkfun.com | CC BY-SA 3.0 | SparkFun Electronics | Niwot, Colorado