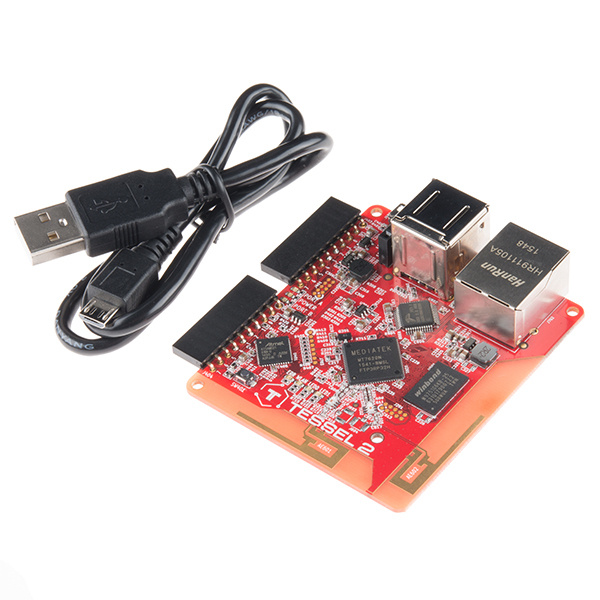
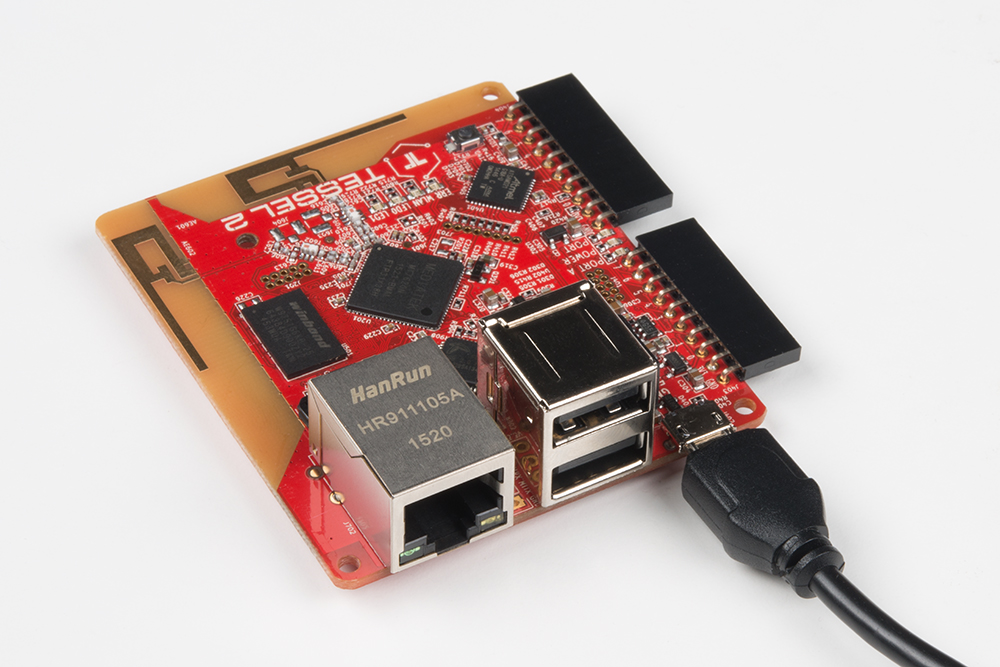
The Tessel 2 is an open source development board. It runs JavaScript and supports npm, which means scripts to control it can be built with Node.js. It's a platform for experimenting, tinkering, prototyping and producing embedded hardware, perfect for the Internet of Things (IoT).
Development boards are platforms for prototyping and building embedded systems. At the heart of (most) development boards is a microcontroller, which combines a processor and memory with I/O capabilities. Microcontrollers like the one on the Tessel 2 provide a collection of GPIO (General Purpose Input Output) pins for connecting input and output devices. The pins on the microcontroller itself — a chip — are small, too small for human fingers to work with easily (plus you'd need to solder things to them). Instead, development boards connect these GPIO pins to pin sockets that are easy to plug things into.
Other common features of boards play a supporting role: connections for programming and communicating with the board, status lights, reset buttons and power connections.
Powerful boards like the Raspberry Pi and Tessel are sometimes also called Single-Board Computers (SBCs).
The Tessel is a mighty little board. Some of Tessel 2's nifty goodies include:
Tessel has a set of Command Line Interface (CLI) tools for setting up and working with the Tessel 2 board. You'll install these and do a one-time setup provisioning of your Tessel.
You can write scripts for the Tessel 2 in any text editor, using JavaScript and including npm modules as you desire. A one-line terminal command deploys and executes your script on the Tessel.
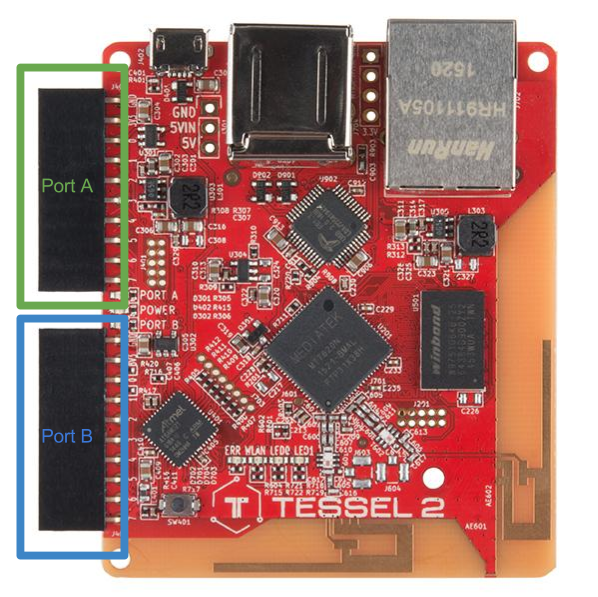
There are two primary sets of pins on the Tessel 2: Port "A" and Port "B". Each port has 10 pins: two for power (3.3V and ground) and eight GPIO pins.
Some pins support different features, which are covered in the next section.
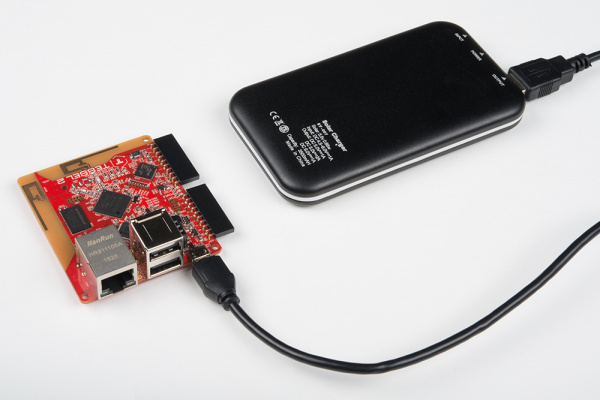
There are multiple ways to power the Tessel 2. We'll start by using the included USB cable.
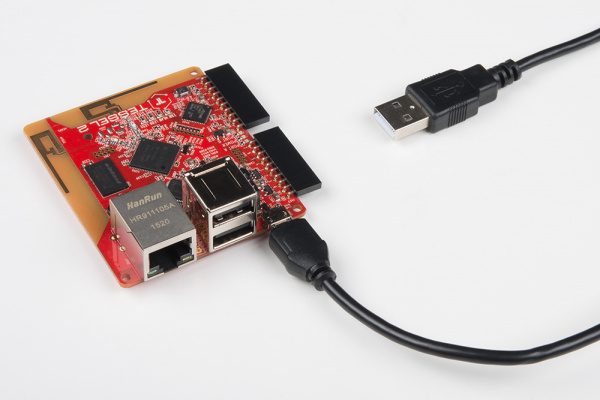
Connecting to the board directly with USB will allow you to easily modify any circuits and redeploy code from the comfort of your desk, without having to retrieve your project. This is also handy when you don't have access to the local network (for deploying code over WiFi).
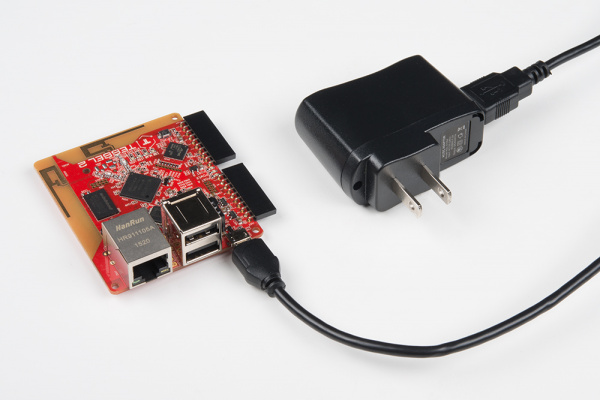
Once you have completely set up and provisioned your Tessel 2, you can deploy code through your local WiFi network. At some point you'll itch to make your Tessel free of wires and tethering, but it still needs power. We supplied a 5V USB charger in the Johnny-Five Inventor's Kit (J5IK) so you can place your project in a semi-remote location around your home or office and deploy code from anywhere on your local network.
USB battery packs are becoming quite popular as swag and giveaways at events. We collect them like candy because they allow us to power projects with minimal consideration to power management circuitry. If you have one of these handy, just use the included USB cable to plug the Tessel 2 into your battery, and away you go! That's it -- simple as pie.
The Tessel 2 has two IO modules, Port A and Port B. Each port has 8 GPIO (general-purpose I/O) pins. Here's their naming conventions and what all of them do.
The pins on the Tessel 2 are broken out across the two different ports. The naming conventions in code will be referenced with the port letter first and then the pin number of that port. The port letter is not case sensitive! As an example, the first pin on port A would be referred to as pin a0 or A0. Use this table as a reference in terms of the naming of pins.
| Port | Pin Number | Johnny-Five Name |
|---|---|---|
| A | 0 | "a0" or "A0" |
| A | 1 | "a1" or "A1" |
| A | 2 | "a2" or "A2" |
| A | 3 | "a3" or "A3" |
| A | 4 | "a4" or "A4" |
| A | 5 | "a5" or "A5" |
| A | 6 | "a6" or "A6" |
| A | 7 | "a7" or "A7" |
| B | 0 | "b0" or "B0" |
| B | 1 | "b1" or "B1" |
| B | 2 | "b2" or "B2" |
| B | 3 | "b3" or "B3" |
| B | 4 | "b4" or "B4" |
| B | 5 | "b5" or "B5" |
| B | 6 | "b6" or "B6" |
| B | 7 | "b7" or "B7" |
The pins of each port have different functionalities available to them.
Other things to know:
4 and 7 on Port A support analog-to-digital input. All pins on Port B support analog input.5 and 6 on both ports support Pulse-Width Modulation (PWM).0 and 1 on both ports can be used for I2C serial communication.5 (TX) and 6 (RX).7: Supports digital-to-analog conversion (DAC)The two ports are essentially duplicates, with the following exceptions:
7: Supports DAC.For exhaustive details, see the pin functionality reference chart below:
| Port | Pin Number | Digital I/O | SCL | SDA | TX | RX | Analog In | Analog Out | Interrupt | PWM |
|---|---|---|---|---|---|---|---|---|---|---|
| A | 0 | |||||||||
| A | 1 | |||||||||
| A | 2 | |||||||||
| A | 3 | |||||||||
| A | 4 | |||||||||
| A | 5 | |||||||||
| A | 6 | |||||||||
| A | 7 | |||||||||
| B | 0 | |||||||||
| B | 1 | |||||||||
| B | 2 | |||||||||
| B | 3 | |||||||||
| B | 4 | |||||||||
| B | 5 | |||||||||
| B | 6 | |||||||||
| B | 7 |
Let's prepare the software side of things so you're ready to do the experiments in this guide. You'll need to have a few things installed, and you'll want to set up a project area for your JavaScript programs. So, don't skip ahead!
You're going to need:
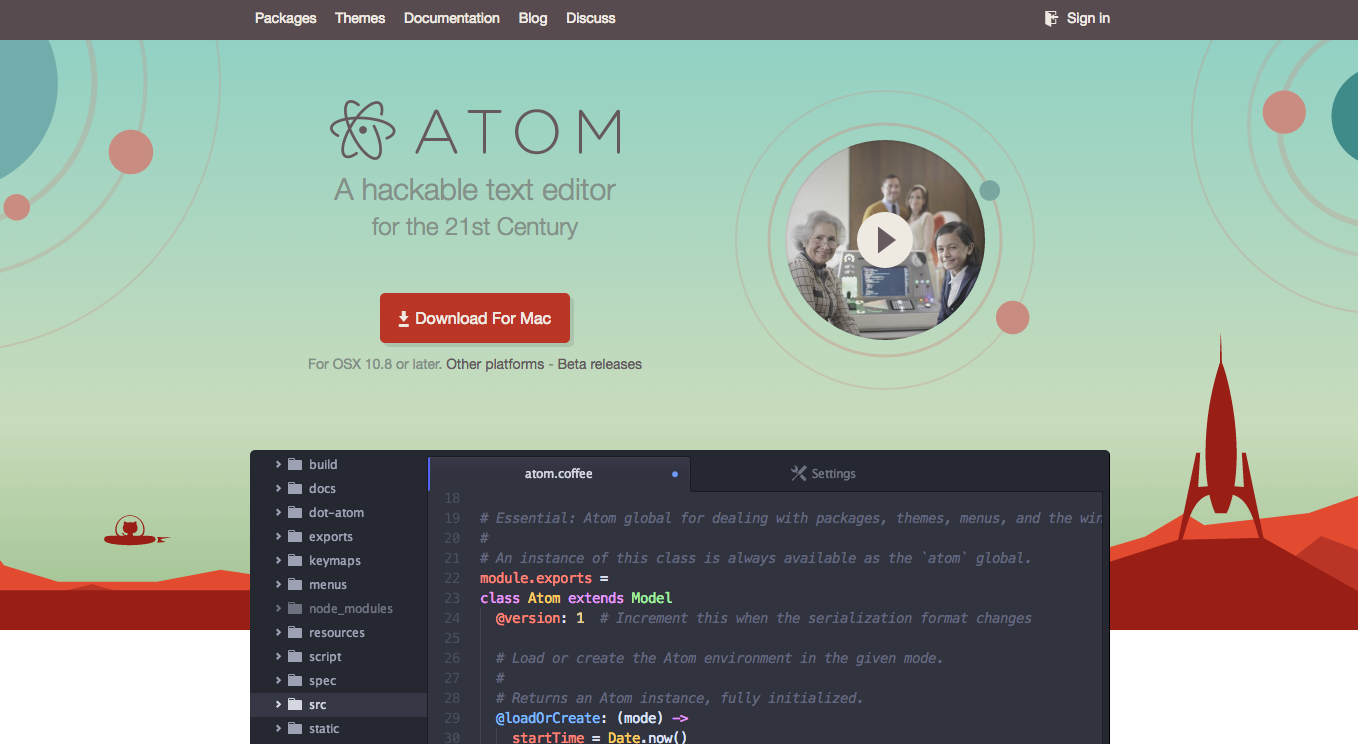
You will need a text editor in which to edit and save your JavaScript files. This means a plain text editor, not a Word document. If you've already got one -- like SublimeText, Notepad++, vim, etc. -- then groovy. If not, go ahead and install Atom.
If you have never used a text editor to write JavaScript, HTML, etc., we recommend using Atom. Atom is a free and open source text editor that works on all three major operating systems. It is lightweight and, when you get comfortable, it's hackable!
Download Atom by heading to the Atom website.

Node.js is a JavaScript runtime -- that is, it's software that can execute your JavaScript code. Node.js has special features that support some of the best potentials of the JavaScript programming language, like event-driven, non-blocking I/O. npm is Node's package manager. It's a giant repository of encapsulated bits of reusable, useful code -- called modules -- that you can use in your programs. npm will get installed for you when you install Node.js.

Installing Node.js is a straightforward download-and-double-click process. Head on over to the Node.js website. Heads up: You'll want to select the "LTS" version for download (LTS stands for Long-Term Support). At time of writing, LTS is v4.4.5:

Working with the Tessel is just like doing web development. But if you're not familiar with web development, you might want to take a minute or two to get comfortable with some key tools of the trade: the command line, which is the "terminal" where you execute commands, and the text editor, where you work on and save your programs. Tessel's site has a great resource to help you get started with terminal.
In the context of this tutorial, things that should be run in the command line look like this:
hello i am a command line command!
You'll see this when you get to the first experiment. But, don't skip ahead; you'll need the tools we install in the next step.
Take a moment to set up a working area (directory) where you can put the programs for your Johnny-Five Inventor's Kit (J5IK). You'll also need to initialize the new project with npm and install needed npm modules for both Johnny-Five and Tessel.
You can accomplish all of this by typing (or copying and pasting) the following commands in a terminal:
mkdir j5ik;
cd j5ik;
npm init -y;
npm install johnny-five tessel-io;
Running these commands will generate some output in your terminal. If everything goes smoothly, you'll see some output about edits to a package.json file, and some additional output as npm installs the needed modules. You may also see a few WARN statements about missing description or repository field. Don't worry; nothing's broken.
An example of the kind of output you'll see (though yours will differ in some particulars):
Wrote to /your/path/j5ik/package.json:
{
  "name": "j5ik",
  "version": "1.0.0",
  "description": "",
  "main": "index.js",
  "scripts": {
    "test": "echo \"Error: no test specified\" && exit 1"
  },
  "keywords": [],
  "author": "",
  "license": "ISC"
}

j5ik@1.0.0 /your/path/j5ik
├── johnny-five
└── tessel-io
npm WARN j5ik@1.0.0 No description
npm WARN j5ik@1.0.0 No repository field.
It's time to get your Tessel 2 set up. The steps we'll walk through now include:
t2-cli software toolYou interact with the Tessel 2 using a Command Line Interface (CLI) tool called t2-cli. This tool can be installed using npm (the Node.js package manager, which gets installed automatically with Node.js).
Type the following into your terminal:
npm install t2-cli -g
The -g piece of that command (a flag) is important; this will tell npm to install the package globally, not just in the current project or directory.
The installation will take a few moments, and you will see a bunch of stuff scroll by that looks sort of like this:
You're aiming for the LTS (Long-Term Support) version of Node.js, which at time of writing is v4.4.5. Learn more about how to upgrade and manage node versions with nvm.
Now, time to get your hands dirty and get things up and running! Connect your Tessel 2 to your computer and give it about 30 seconds to boot up.
Once your Tessel 2 has booted (the blue LED will be steady instead of blinking), type the following command in your terminal:
t2 list
The t2-cli tool will look for connected Tessels. Tessels can be connected by USB or over WiFi, but for now it should spot your single, USB-connected Tessel. You'll see something like this:

Success! You can now communicate with your Tessel 2!
Giving your Tessel 2 a name is not required to use it, but it's fun and friendly. To name your Tessel 2 use the following command:
t2 rename [name]
For example, we renamed our Tessel 2 "Bishop" by typing the following:
t2 rename bishop
The t2-cli tool will respond with the following output:

Double-check it!
t2 list

If you've ever configured and connected other embedded systems to the internet, the simplicity of this should make you grin.
You'll need to be connected to your local WiFi network first. To connect your Tessel to a WiFi network, type the following command into your terminal:
t2 wifi -n [SSID] -p [password]
Replace [SSID] with the name of your wireless network (careful, it's case-sensitive!) and [password] (well, I bet you can figure that out!).
You'll see some output that looks something like the following:
INFO Looking for your Tessel...
INFO Connected to bishop.
INFO WiFi Enabled.
INFO WiFi Connected. SSID: your-network-ssid, password: your-network-password, security: psk2
That's it -- simple as pie!
You can do a bunch of other stuff with your Tessel and network connectivity. Tessel's website has in-depth documentation on WiFi connection options.
Note: Like Kindles and some Androids, Tessel 2s don't play nice with 5GHz WiFi networks.
Your Tessel exists, has a name, and is connected to your WiFi network. The next step is to provision the Tessel. That creates a secure, trusted connection between your computer and the Tessel, whether it's connected by wire or over the air (WiFi). You'll need to do this before you can deploy code to the Tessel.
Type the following command in your terminal:
t2 provision
You'll see something like:
INFO Looking for your Tessel...
INFO Connected to bishop.
INFO Creating public and private keys for Tessel authentication...
INFO SSH Keys written.
INFO Authenticating Tessel with public key...
INFO Tessel authenticated with public key.
Verify it worked:
t2 list
You'll see your Tessel twice! That's because it's connected via USB and WiFi.
INFO Searching for nearby Tessels...
USB bishop
LAN bishop
Great! We have one last setup step.
The Tessel community is constantly improving the software and firmware for the Tessel 2. It's likely that in the time between your Tessel 2's manufacture and now, the firmware has been updated. To update your Tessel, type the following command in your terminal:
t2 update
The update process can last some time, so I would recommend a snack break or checking up on some news feeds while this happens. When the update is finished you will get the command prompt back, and you are all ready to go with your Tessel 2!
Making an LED (Light-Emitting Diode) blink is the most basic "Hello, World!" exercise for hardware, and is a great way to familiarize yourself with a new platform. In this experiment, you'll learn how to build a basic LED circuit and use Johnny-Five with your Tessel 2 to make the LED blink and pulse. In doing so, you'll learn about digital output and Pulse Width Modulation (PWM).
Perhaps you've controlled LEDs before by writing Arduino sketches (programs). Using Johnny-Five + Node.js to control hardware is a little different, and this article will illustrate some of those differences. If you're totally new to all of this — not to worry! You don't need any prior experience.
If you have had experience with the Tessel 2 then you know that it is programmed with JavaScript and the Johnny-Five framework to be able to control the I/O on the board. If you have never programmed with JavaScript before or the Tessel 2, we highly recommend that you check out the Johnny-Five Inventor's Kit Experiment Guide for a more in-depth explanation and exploration.
To get you started, here is an example of a blink script using Node.js and Johnny-Five.
language:javascript
var Tessel = require("tessel-io");
var five = require("johnny-five");

var board = new five.Board({
  io: new Tessel()
});

board.on("ready", () => {
  var led = new five.Led("L2");
  led.blink(500);
});
To make sure that everything is up and running on your Tessel 2, let's create a project directory as we did in the software setup portion, install the required Node.js modules and add this file to our directory. We can do this through our console by using these commands:
mkdir myProject;
cd myProject;
npm init -y;
npm install johnny-five tessel-io;
touch blink.js;
These commands do the following in order:
myProjectmyProjectmyProject, which creates a package.jsonjohnny-five and tessel-io, using npm to install them for us; these will be placed in a directory called node_modulesblink.js in the myProject directory using the touchcommandWith that complete, open your favorite text editor (one choice is atom) and navigate to your blink.js file. Copy and paste the blink code above into your file and save it.
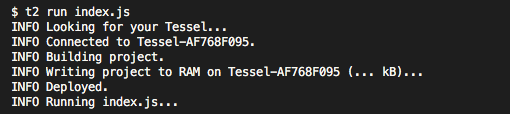
From here you can run blink.js by navigating to your myProject directory and typing the following command in your terminal prompt:
t2 run test.js
Your terminal should output some information that will look similar to this...
Then the REPL prompt should appear...

... and one of your onboard LEDs should be blinking...
Success! Your Tessel 2 is up and running, and you have taken your first step into JavaScript-based robotics and IoT applications. Go forth and hack away with your newfound superpower.
learn.sparkfun.com | CC BY-SA 3.0 | SparkFun Electronics | Niwot, Colorado