$124.95
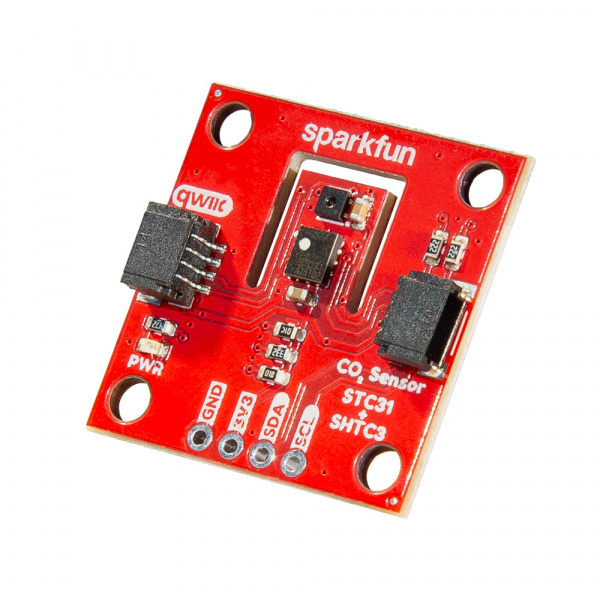
The SparkFun CO2 Sensor - STC31 is a Qwiic breakout featuring the STC31 CO2 sensor and the SHTC3 Temperature and Humidity sensor from Sensirion, which accurately measures CO2 concentrations up to 100% with high repeatability and long-term stability, thanks to humidity and temperature compensation provided by the built-in SHTC3.
The STC3x sensor family is Sensirion’s series of Gas Concentration sensors designed for high-volume applications. The STC3x utilizes a revolutionized thermal conductivity measurement principle, which results in superior repeatability and long-term stability. This makes the STC31 an ideal choice for applications where reliability is crucial. The outstanding performance of these sensors is based on Sensirion’s patented CMOSens® sensor technology, which combines the sensor element, signal processing, and digital calibration on a small CMOS chip. The well-proven CMOS technology is ideally suited for high-quality mass production and is the ideal choice for demanding and cost-sensitive OEM applications.
This tutorial covers how to get CO2 and other environmental readings from the STC31 using both Arduino and MicroPython when connecting the CO2 Sensor Breakout to a compatible development board over Qwiic. To follow along with this guide, you'll need the CO2 Sensor - STC31 along with the following materials:

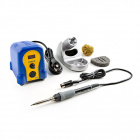
If you prefer a soldered connection, you may need one or more of these materials along with a soldering iron and solder:
This document contains two main sections: Quickstart Guide and Project Setup.
The Quickstart Guide assumes a working knowledge of how to use a development board and the required software to program them for your project's needs. It covers a quick assembly and then jumps right into getting the necessary software packages installed to start getting spectral data in just a few short minutes.
The Project Setup pages are split into sections covering the SparkFun STC31 Arduino Library and STCx Python driver. Each software page gives instructions on how to download install the software package (Arduino library or Python driver), as well as detailed looks at the examples included in the software packages.
If you are looking for the full Hookup Guide for the SparkFun CO2 Sensor - STC31, click the button bellow. This basic tutorial only covers the project that get this CO2 sensor up and running as fast as possible thanks to our Qwiic connect system.
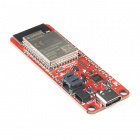
In this Quick Start guide we'll connect the SparkFun CO2 Sensor - STC31 to a SparkFun IoT RedBoard - ESP32 and use the SparkFun STC31 and SHTC3 Arduino libraries to report environmentally compensated CO2 percentages. This example takes the humidity and temperature data reported by the SHTC3 environmental sensor on the breakout and feeds them to the STC31 to provide accurate CO2 measurements that are compensated with live environmental data.
If you're not familiar with using sensor breakouts, development boards or the development environments covered in this guide, refer to the Project Setup section of this guide for instructions on setting up and using the SparkFun STC31 and SHTC3 Arduino Libraries and Python Package.
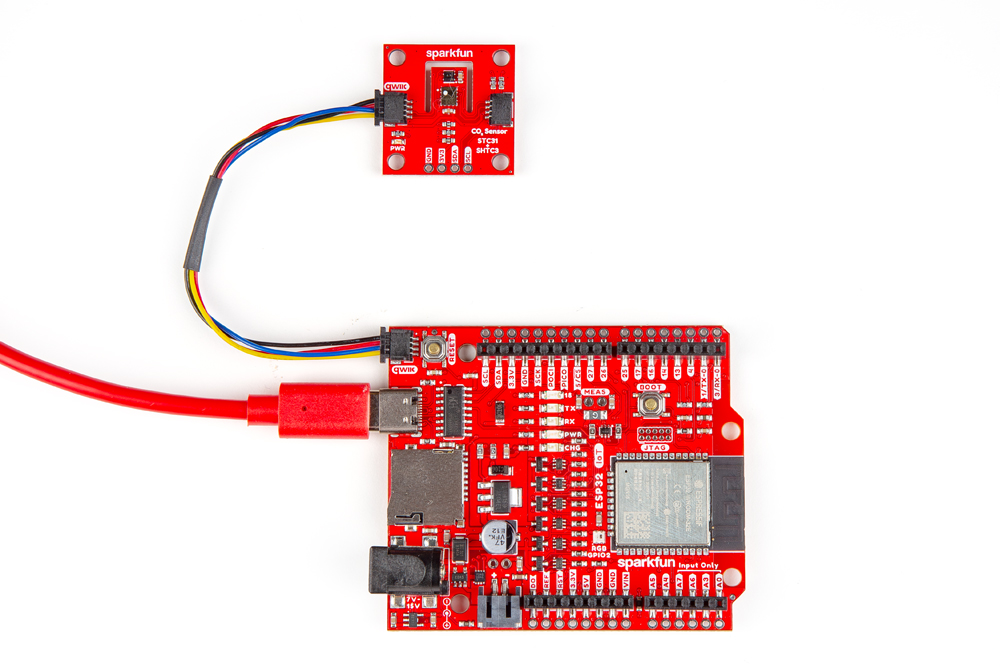
Since this is a Qwiic breakout, assembling the circuit only requires connecting the sensor breakout to a Qwiic-compatible development board like the IoT RedBoard - ESP32. Connect the STC31 Breakout to the IoT RedBoard with a Qwiic cable and then connect the RedBoard to your computer with a USB-C cable like the photo below:
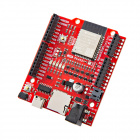
Note: If you are looking to follow along with the video, we used an SparkFun Thing Plus - ESP32-S2 WROOM with the Arduino Libraries: STC3x (ZIP) & SHTC3 (ZIP)
Arduino Setup: This example assumes you are using the latest version of the Arduino IDE on your desktop. If this is your first time using Arduino IDE, library, or board add-on, please review the following tutorials.
The SparkFun STC3x Arduino library helps you configure and get CO2 data from the STC31 sensor. This Arduino example prints out CO2 concentration percentages compensated with humidity and temperature data measured by the SHTC3 along with a static value for barometric pressure.
Let's take a closer look at a few of the examples included in the STC3x Arduino Library
Note: This is the same code we used in the video seen on the Introduction Tab.
The first example demonstrates how to get basic CO2 data from the sensor along with temperature measurements from the on-chip temperature sensor. It initializes the STC31 with default settings to measure CO2 in air up to 25% concentration. Open the example by navigating to File > Libraries > SparkFun STC3x Arduino Library > Example1_BasicReadings. Select your Board (Sparkfun RedBoard IoT if you're following along to the letter) and Port and click the "Upload" button. After the code finishes uploading, open the serial monitor with the baud set to 115200 and you should see CO2 concentrations and temperature (in °C) print out every second. Try breathing on the sensor and you should see the values move slightly (we only breath out roughly 4% CO2).
The STC31 has four measurement modes to adjust what gas/environment it's measuring in along with the percentage volume of CO2. Possible values for setBinaryGas are
//  STC3X_BINARY_GAS_CO2_N2_100   : Set binary gas to CO2 in N2.  Range: 0 to 100 vol%
//  STC3X_BINARY_GAS_CO2_AIR_100  : Set binary gas to CO2 in Air. Range: 0 to 100 vol%
//  STC3X_BINARY_GAS_CO2_N2_25    : Set binary gas to CO2 in N2.  Range: 0 to 25 vol%
//  STC3X_BINARY_GAS_CO2_AIR_25   : Set binary gas to CO2 in Air. Range: 0 to 25 vol%

if (mySensor.setBinaryGas(STC3X_BINARY_GAS_CO2_AIR_25) == false)
{
  Serial.println(F("Could not set the binary gas! Freezing..."));
  while (1)
The second example shows how to use the SHTC3 to send actual temperature and humidity data to the STC31 to improve the accuracy of the CO2 data from the sensor. The example initializes the STC31 to measure in air at concentrations up to 25% volume, sets the temperature and humidity values to those measured by the SHTC3 and then sets the barometric pressure to an arbitrary value (840 millibars). Open the example by navigating to File > Libraries > SparkFun STC3x Arduino Library > Example2_PHTCompensation. After uploading, open the serial monitor with the baud set to 115200 and you should see the values set for pressure, temperature and humidity followed by CO2 measurements print out every second:

Since we don't have a pressure sensor to provide real-time pressure data the example sets the barometric pressure to match the pressure at SparkFun headquarters (840 millibars). You'll most likely want to adjust this value to the pressure in millibars (mbar) to your location. For example, typical barometric pressure at sea level is typically ~1013 millibars.
//If we have a pressure sensor available, we can compensate for ambient pressure too.
//As an example, let's set the pressure to 840 mbar (== SF Headquarters)
uint16_t pressure = 840;
If you are interested in picking up a dedicated pressure sensor, we have plenty to choose from. Click the button below to find all of our options!
We are going to jump to the fifth example that demonstrates how to enable the STC31's automatic self calibration feature. Automatic calibration helps improve the STC31's accuracy when used in applications where the target gas is not present most of the time. Refer to the STC31 Field Calibration Guide for more information. Open the example by navigating to File > Libraries > SparkFun STC3x Arduino Library > Example5_AutomaticSelfCalibration. Once the code upload completes, open the serial monitor with the baud set to 115200 and after the sensor initializes, you should see "Forced Recalibration was successful" print out followed by "Automatic self calibration is enabled!". After these prints, the code will begin to print out CO2 and temperature data from the STC31 once every second.
Before running the STC31 in automatic calibration mode, the example attempts to perform a forced recalibration with a concentration of 0%. This is used to improve the sensor's accuracy with a known reference value.
if (mySensor.forcedRecalibration(0.0) == true) // Force a recalibration with a concentration of 0%
{
  Serial.println(F("Forced Recalibration was successful!"));
}
else
{
  Serial.println(F("Forced Recalibration FAILED! Please check the debug messages for more details"));
}
The SparkFun STC3x Python Package is based off the Arduino libraries for the STX3x family of CO2 sensors from Sensirion™. It works for Python, MicroPython and CircuitPython so you can choose which "flavor" of Python to use. This section goes over how to install the package in each supported Python environment along with the necessary tools for installation and running examples.
For users on a Linux-based system (Raspberry Pi, etc.), install this package in Python with PyPi using the pip3 command with the following steps:
venv: `python3 -m venv path/to/venv (You can use any path here just remember to use the same one for each step).That's it. Now you can run any example (or your own custom scripts) by running it with a command like: path/to/venv/bin
If you prefer to use MicroPython to run the examples on a microcontroller running MicroPython, follow these steps to install the package on your computer:
mpremote mip install github:sparkfun/qwiic_stcx_pympremote mip install github:sparkfun/qwiic_stcx_py@examplesLastly, users who prefer CircuitPython can install the package with the following steps:
circup bundle-add sparkfun/Qwiic_pycircup install --py qwiic_stcxIf you want to install specific examples from the repository, use the corresponding circup command from below:
circup example qwiic_stc3x\qwiic_stc3x_ex1_basic
circup example qwiic_stc3x\qwiic_stc3x_ex2_PHT_compensation
circup example qwiic_stc3x\qwiic_stc3x_ex4_self_test
circup example qwiic_stc3x\qwiic_stc3x_ex5_auto_calibration
Note: The syntax used here are for Windows commands; Linux and Mac have different path separators. Refer to the CircUp "example command documentation for more information.
Example 1 shows how to get basic CO2 and temperature data from the STC31. It initializes the sensor with default settings to measure CO2 in air up to 25% concentration. Open the example in your preferred Python interpreter and run it. You should see some initialization messages print out followed by CO2 concentration and temperature data every second. Try breathing on the sensor or holding it up to a different CO2C source and you should see the values change.
The STC31 has four different measurement modes available for the set_binary_gas() function. This lets you change between measuring either up to 25% or 100% CO2 concentration measured either in nitrogen (N2) or air. You can adjust the measurement mode by modifying the line of code below with the corresponding concentration/gas:
# Possible values are:
# kBinaryGasCO2N2_100   : Set binary gas to CO2 in N2.  Range: 0 to 100 vol%
# kBinaryGasCO2Air_100  : Set binary gas to CO2 in Air. Range: 0 to 100 vol%
# kBinaryGasCO2N2_25    : Set binary gas to CO2 in N2.  Range: 0 to 25 vol%
# kBinaryGasCO2Air_25   : Set binary gas to CO2 in Air. Range: 0 to 25 vol%
if mySTC31.set_binary_gas(mySTC31.kBinaryGasCO2Air_25):
The second example shows how set values for temperature, humidity and pressure to improve the accuracy of the CO2 data. The example initializes the STC31 to measure in air at concentrations up to 25% volume and then sets the temperature, humidity and barometric pressure to fixed reference values.
As mentioned above, this example sets static compensation values for temperature, pressure and humidity. You may want to adjust these values for your testing environment:
# These are example compensation variables and you can change them as needed to fit your environment
pressure = 840
humidity = 25
temperature = 25
We are going to jump to Example 5 which demonstrates how to enable the STC31's automatic self calibration feature as well as how to perform a forced recalibration. Automatic calibration helps improve the STC31's accuracy when used in applications where the target gas is not present most of the time. Refer to the STC31 Field Calibration Guide for more information on calibrating the STC31.
After initializing the sensor, the code attempts to perform a forced recalibration of the STC31 with a CO2 value of 0. After performing the forced recalibration, the code enables the STC31's automatic calibration feature and then prints out CO2 and temperature data every second.
If you're looking to optimize this breakout board to pull as little current as possible we recommend starting by opening the LED solder jumper to disable the power LED. To further reduce the current draw, you'll want to refer to the datasheet for complete information on power consumption with various settings.
If you need technical assistance and more information on a product that is not working as you expected, we recommend heading on over to the SparkFun Technical Assistance page for some initial troubleshooting.
If you can't find what you need there, the SparkFun Forums is a great place to search product forums and ask questions.
Account Registration Required: If this is your first visit to our forum, you'll need to create a Forum Account to post questions.
All of our documentation can be modified by you! Please help us make it better.
docs folder of the SparkFun CO2 Sensor - STC31 repository.All of our designs are open-source! Please help us make it better.
Hardware folder of the SparkFun CO2 Sensor - STC31 repository.learn.sparkfun.com | CC BY-SA 3.0 | SparkFun Electronics | Niwot, Colorado