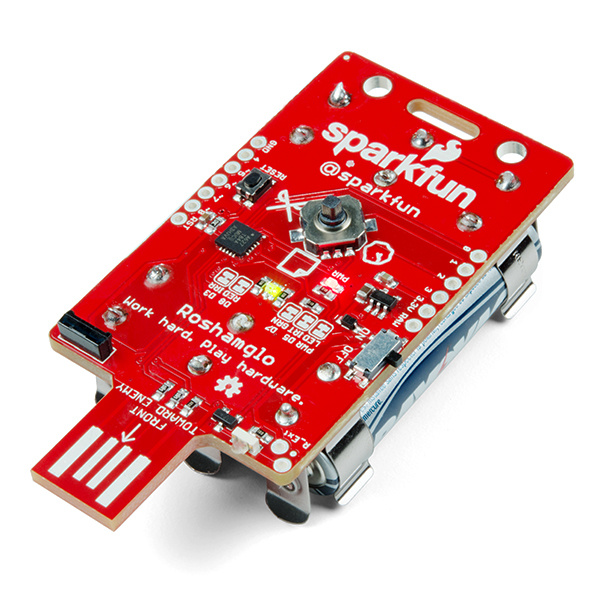
The Roshamglo Badge Kit is an easy to assemble badge that allows you to play Rock-Paper-Scissors with an opponent using infrared (IR) communication. The Roshamglo will also keep track of your score, which you can upload to the scoreboard station and see how you're doing against other people at the event.
To follow along with this hookup guide, you will need the following:
If you aren't familiar with the following concepts, we recommend checking out these tutorials before continuing.
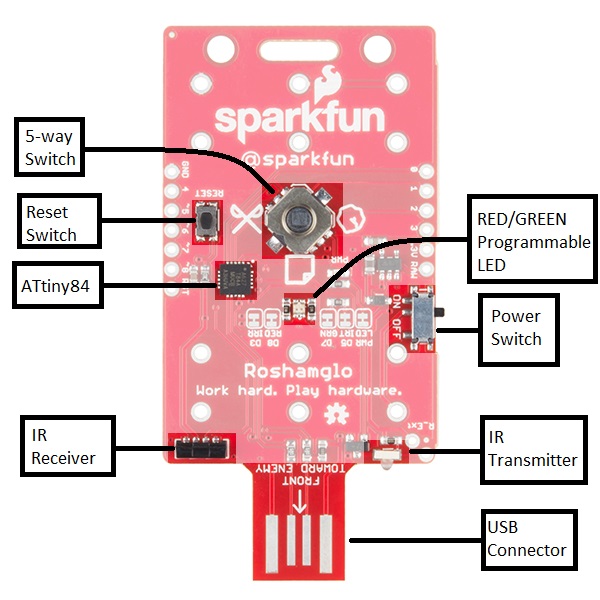
The Roshamglo uses the following:
The brains behind the Roshamglo is an ATtiny84, a light weight Arduino compatible microcontroller. The ATtiny84 comes with the following:
For details about what each pin is able to do, refer to the table below.
| Pin | Analog or Digital | Additional Uses | Roshamglo Uses |
|---|---|---|---|
| 0 | Both | Analog Reference | 5-way switch down |
| 1 | Both | -- | 5-way switch right |
| 2 | Both | -- | 5-way switch up |
| 3 | Both | -- | IR Receiver |
| 4 | Both | SCK, SCL | 5-way switch left |
| 5 | Both | MISO, PWM | IR LED |
| 6 | Both | MOSI, SDA, PWM | 5-way switch center |
| 7 | Both | PWM | Green LED |
| 8 | Digital | PWM | Red LED |
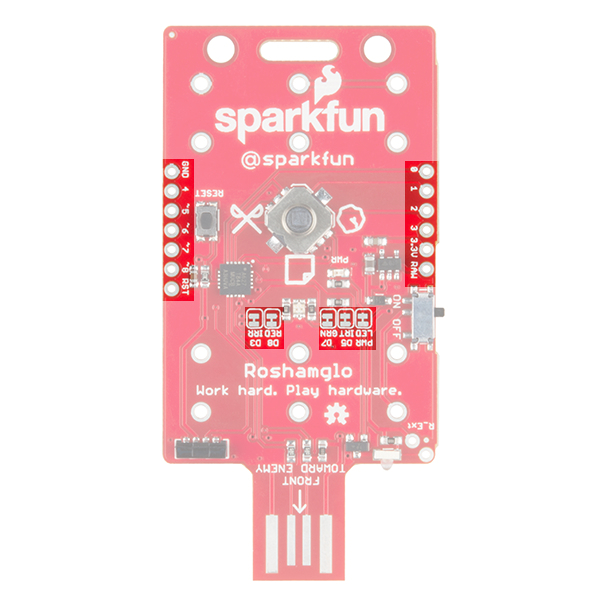
Each of these pins have been broken out to edge of the board to make customization easy! If you would like to use any of these pins for something other than what it's currently connected two, we provided jumpers that can easily be cut with a hobby knife. The only pins that do not have a jumper on them are the pins used for the 5-way switch. The pins for the switch use the ATtiny's internal pull up resistors, so as long as the switch is not closed, the pin can be configured in any way you'd like without having to cut traces.
If you hadn't noticed in the pin description, there was no mention of RX or TX pins. This is because unfortunately the ATtiny84 doesn't have a hardware UART. The UART is used for serial communication, whether it's for programming, or printing messages to the serial window. You might be thinking "But doesn't the USB connector provide communication between the ATtiny and computer?", and you're right; it does. To keep the bootloader size as small as possible, the bootloader only allows for USB programming. For serial debugging, you'll need a USB cable and a USB-to-Serial adapter, and Software Serial library to send messages to a computer. You can learn more about serial communication here.
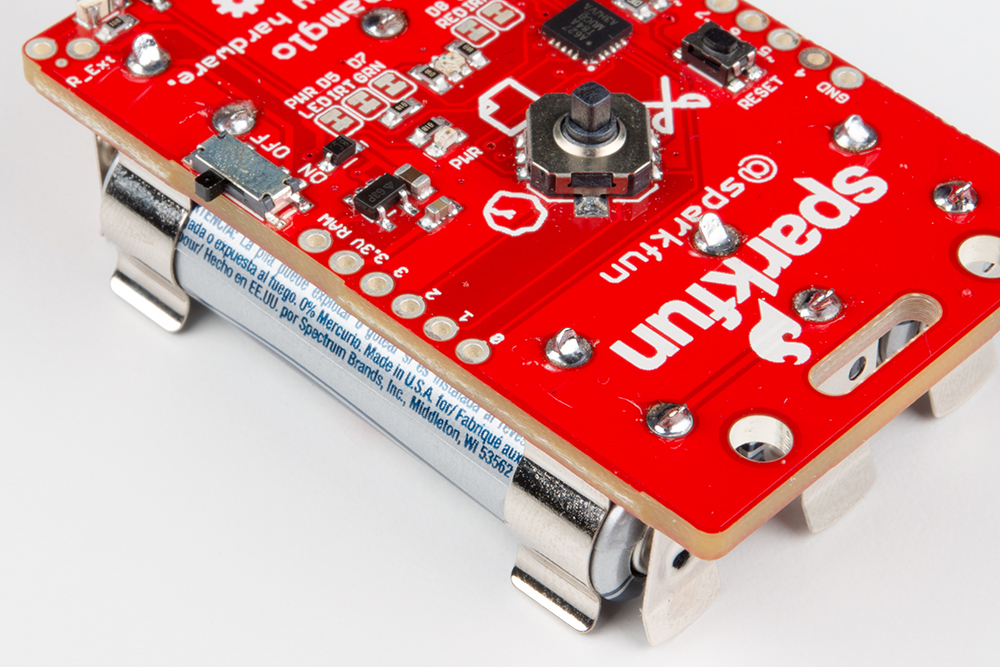
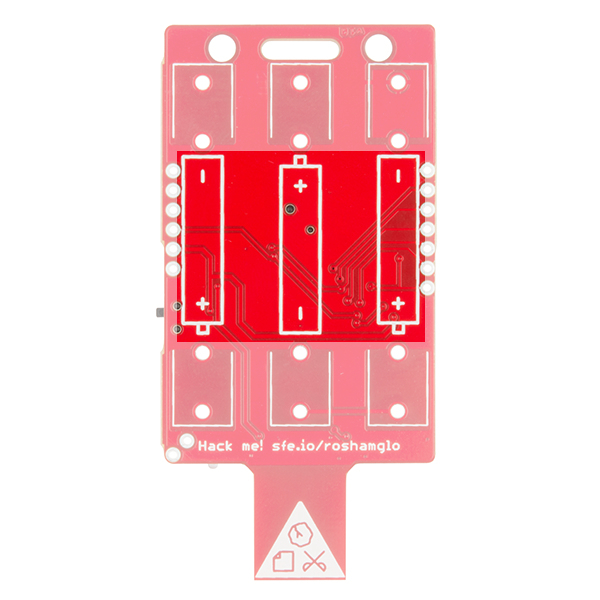
To use your Roshamglo, all that's needed is to solder in the battery clips. To insert the battery clips, you'll need to turn the board to the side with the pictures of the batteries and push the battery clips into the holes. Make sure that the metal tab on the ends are facing away from the center of the board.

Make sure the battery clips aren't touching each other! To make sure they won't short against each other, make sure the clips sit flat against the circuit board.
After the clips are installed, you can turn the board over and solder all of the joints on the top side of the board. When they're all soldered together, they should look like this:
Installing the batteries are easy, but as you install the batteries, make sure you insert the batteries in the same orientation as the silkscreen image between each pair of battery clips. After the batteries are installed, you're all set! You can move the switch on the left side of the board to "ON", and you should see the red power LED come on.
To use the Roshamglo, first make sure that the board is on. When you move the power switch to "ON", the red LED should illuminate.
Playing the game is very straight forward, next to the 5-way switch are three images that correspond to your three possible moves: rock, paper, and scissors. To set your move as rock, you will push the switch to the left towards the rock image. Paper and scissors are played the same way, but this time towards their corresponding images. When you move the switch, the green LED will flash quickly every time the IR LED sends a signal. Once the LED starts to blink, you'll want to point the USB connector towards your opponent's controller.
If you've pressed the button by mistake, you can press the switch in any direction to cancel the move. Once you select your move though, the green LED will blink for a few seconds. After both sides have received their opponent's move, the center LEDs will display one of the following:
A blinking red LED could mean one of two things. One possibility is that you have played against an opponent too many times. Each controller has a unique ID and your Roshamglo will not function with the same opponent after 15 rounds. We want the Roshamglo to start a conversation with people around you, and the Roshamglo can be used to help break the ice. So walk around and continue on your quest of total domination! Another possibility is that the score saved to your controller is full. You can dump your points by heading over to the scoreboard station.
You can view your score by closing the 5-way switch's center switch (push the switch straight down towards the top of the board). Each time the green LED turns on, represents one point. The score is saved to a 8-bit register, which means that the maximum score you can have saved is 255 points. You can clear your score by uploading it to the scoreboard station. If the LED is red, it means that your current saved score is 0.
To upload your score, head over to the scoreboard station. With the board powered on, insert the board to the station and move the 5-way switch to the down position (towards the SparkFun Logo and lanyard clip). Just like when you're playing a game, the green LED will flash a few times. The score will be successfully read when the LED changes to solid green. If the LED is solid red, that means that it was not able to read the score.
If the center LED is fading on and off, it means you're in standby mode. In standby, the board will go into a deep sleep for two seconds, and then wake up to fade LED on and off. Pressing the 5-way switch in any direction will wake up the Roshamglo and perform the function attached to that switch. There are three other modes that control the LED, those LED patterns are described below.
Playing a game:
| LED Color | Meaning |
|---|---|
| Blinking Green | Transmitting IR. |
| Solid Green | You won! |
| Solid Red | You lost. |
| Alternating Red and Green | It's a tie! |
| Blinking Red | Case 1: Played this person too many times. Case 2: Saved score is too high. Upload score to reset. |
Checking your score:
| LED Color | Meaning |
|---|---|
| Blinking Green | Each blink represents 1 point. |
| Red | Your saved score is 0. Go find someone to play against! |
Uploading your score:
| LED Color | Meaning |
|---|---|
| Blinking Green | Transmitting IR. |
| Solid Green | Score uploaded successfully. You can now remove your controller. |
| Red | Unable to upload score. |
Now that you've successfully got your Roshamglo up and running, it's time to incorporate it into your own project! If you'd like to hack your Roshamglo, you should check out the Hack Your Roshamglo Badge tutorial.
For more information, check out the resources below:
If you don't have a scoreboard available to reset the play counter, you can download the firmware here. Commenting out gameResult = 3; on line 279 will remove the play count limitation.
Need some inspiration for your next project? Check out some of these related tutorials:
learn.sparkfun.com | CC BY-SA 3.0 | SparkFun Electronics | Niwot, Colorado