If you have been playing with the Edison, you might have noticed that the Yocto Project can be difficult to work with. Namely, they want you to re-build Linux from scratch every time you need to enable a package. This is great if you are making the Edison into end product, and you need a fast, stripped-down version of Linux. However, if you want more features and a full-fledged package manager, it is worth installing a different version of Linux on the Edison.
For this tutorial, we are going to install Ubilinux on Edison and enable a few important features (like WiFi). Ubilinux is a custom Linux image based on Debian. This version of Linux was used in the SparkFun Live! episode Tweeting Turkey Temperature Timer.
You will need an Intel Edison and one of the boards that allow you to re-program the Edison, such as the SparkFun Base Block, the Mini Breakout Kit, or the Arduino Breakout Kit.
IMPORTANT: You can potentially brick your Edison by following this tutorial. Do so at your own risk! Be especially careful at the part where it says to not unplug your Edison for at least 2 minutes. If you do brick your Edison, read the Troubleshooting section for possible solutions.
We need to download the Ubilinux image, which we will install on the Edison, and some software depending on your current operating system.
IMPORTANT: Make sure the Edison is not powered or connected to your host computer at this time.
If you have not previously installed Intel's Edison drivers for Windows, you will need to do that first.
Download and install 7-zip from the 7-zip.org page. You will probably want the .msi version.
Download dfu-util for Windows (this executable came from the spark.io community).
Download the Ubilinux image by navigating to http://www.emutexlabs.com/ubilinux and click on "ubilinux for Edison."
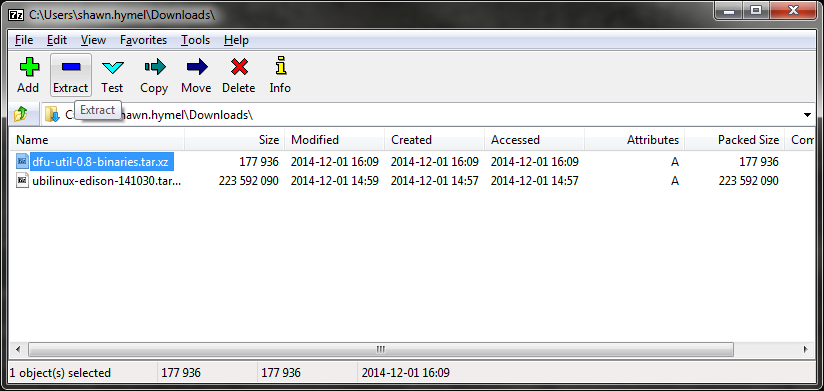
Go to Start → All Programs → 7-Zip → 7-Zip File Manager. Within the file manager, navigate to your downloads folder. Select "dfu-util-0.8-binaries.tar.zx" and select "Extract."
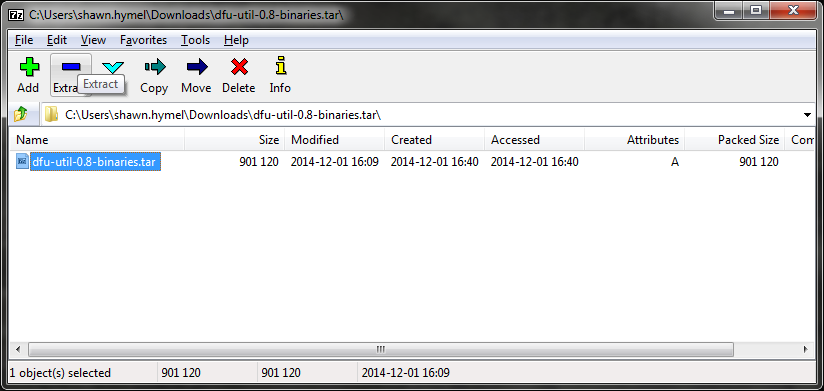
Click "OK" when prompted on where to extract the files to accept the defaults. "dfu-util-0.8.binaries.tar" will appear in the 7-Zip File Manager. Double-click on it to enter the folder. Select "dfu-util-0.8-binaries.tar" and click "Extract" to extract dfu-util one more time.
Click "OK" when prompted again. Press the "Up One Folder" button to navigate back to your Downloads folder.
Perform the same steps again to extract the Ubilinux image:
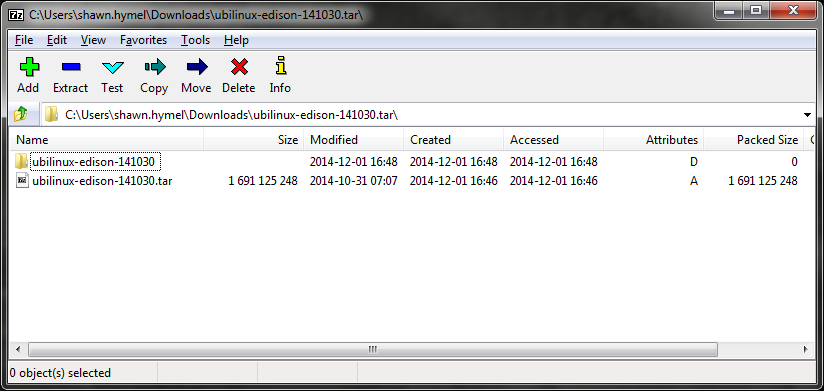
Open up a File Explorer window and navigate to \

Navigate to the toFlash folder, which is in the unzipped Ubilinux folder (\

In the \toFlash folder, scroll down to find the file "flashall.bat." Double-click it to start the install process.

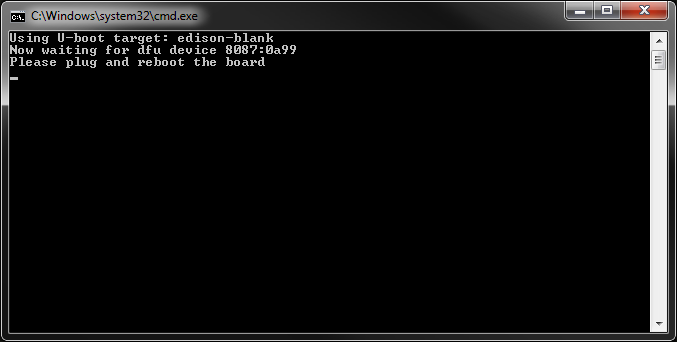
A command window will open up and ask you to plug in your Edison.
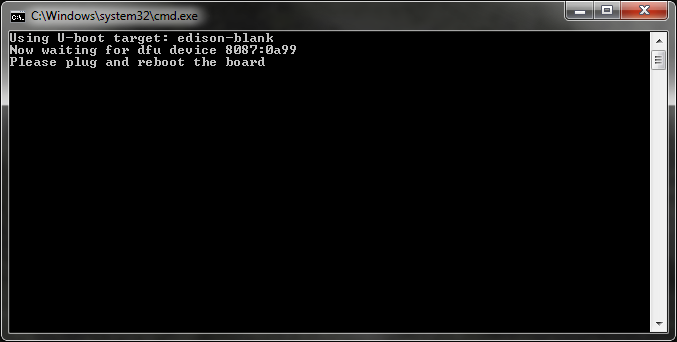
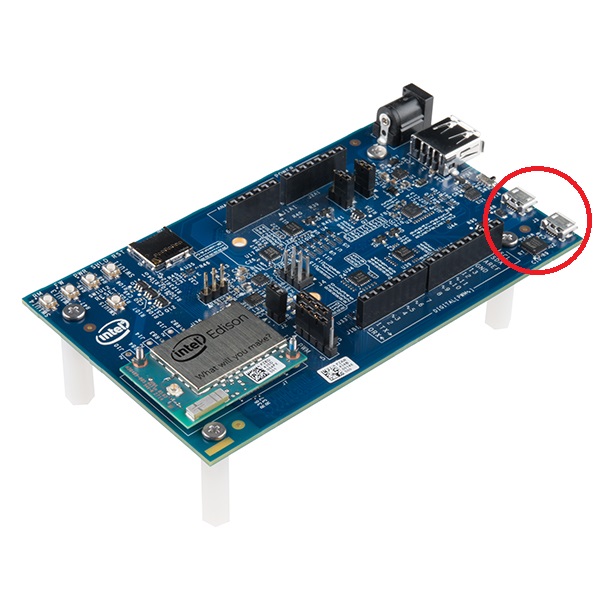
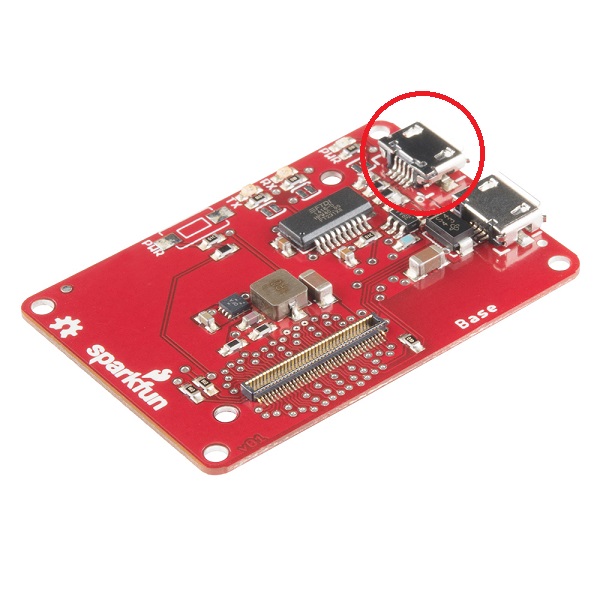
Plug in your Edison (Use J16 for the Intel Arduino and Mini-Breakout boards. Use "OTG" for the SparkFun Edison Base Block), and the installation process will begin!
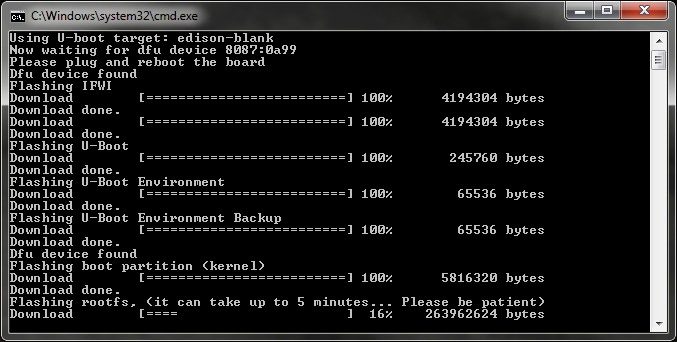
WARNING: Once the command prompt window closes, you will need to wait at least 2 minutes for the installation to complete. The Edison should reset a couple of times to finalize its installation. Do not unplug the Edison! It's probably a good idea to walk away for those 2 minutes.
[Update 3/19/15] I've had several people note that this does not work on OS X 10.10 (Yosemite). I will look into it and update the tutorial if I find a solution. In the meantime, I recommend trying another operating system. If you happen to have any luck with Yosemite, please let us know in the comments!
[Edit 3/18/15: Added section on installing Homebrew and utilities] Many thanks to the following users for helping to figure out how to flash Edison from Mac OS X:
Download the Ubilinux image by navigating to http://www.emutexlabs.com/ubilinux, and click on “ubilinux for Edison.”
Open a Finder window and navigate to your Downloads directory. Find the Ubilinux file (e.g. ubilinux-edison-150309.tar.gz), and double-click it to extract it. It will create a toFlash directory.

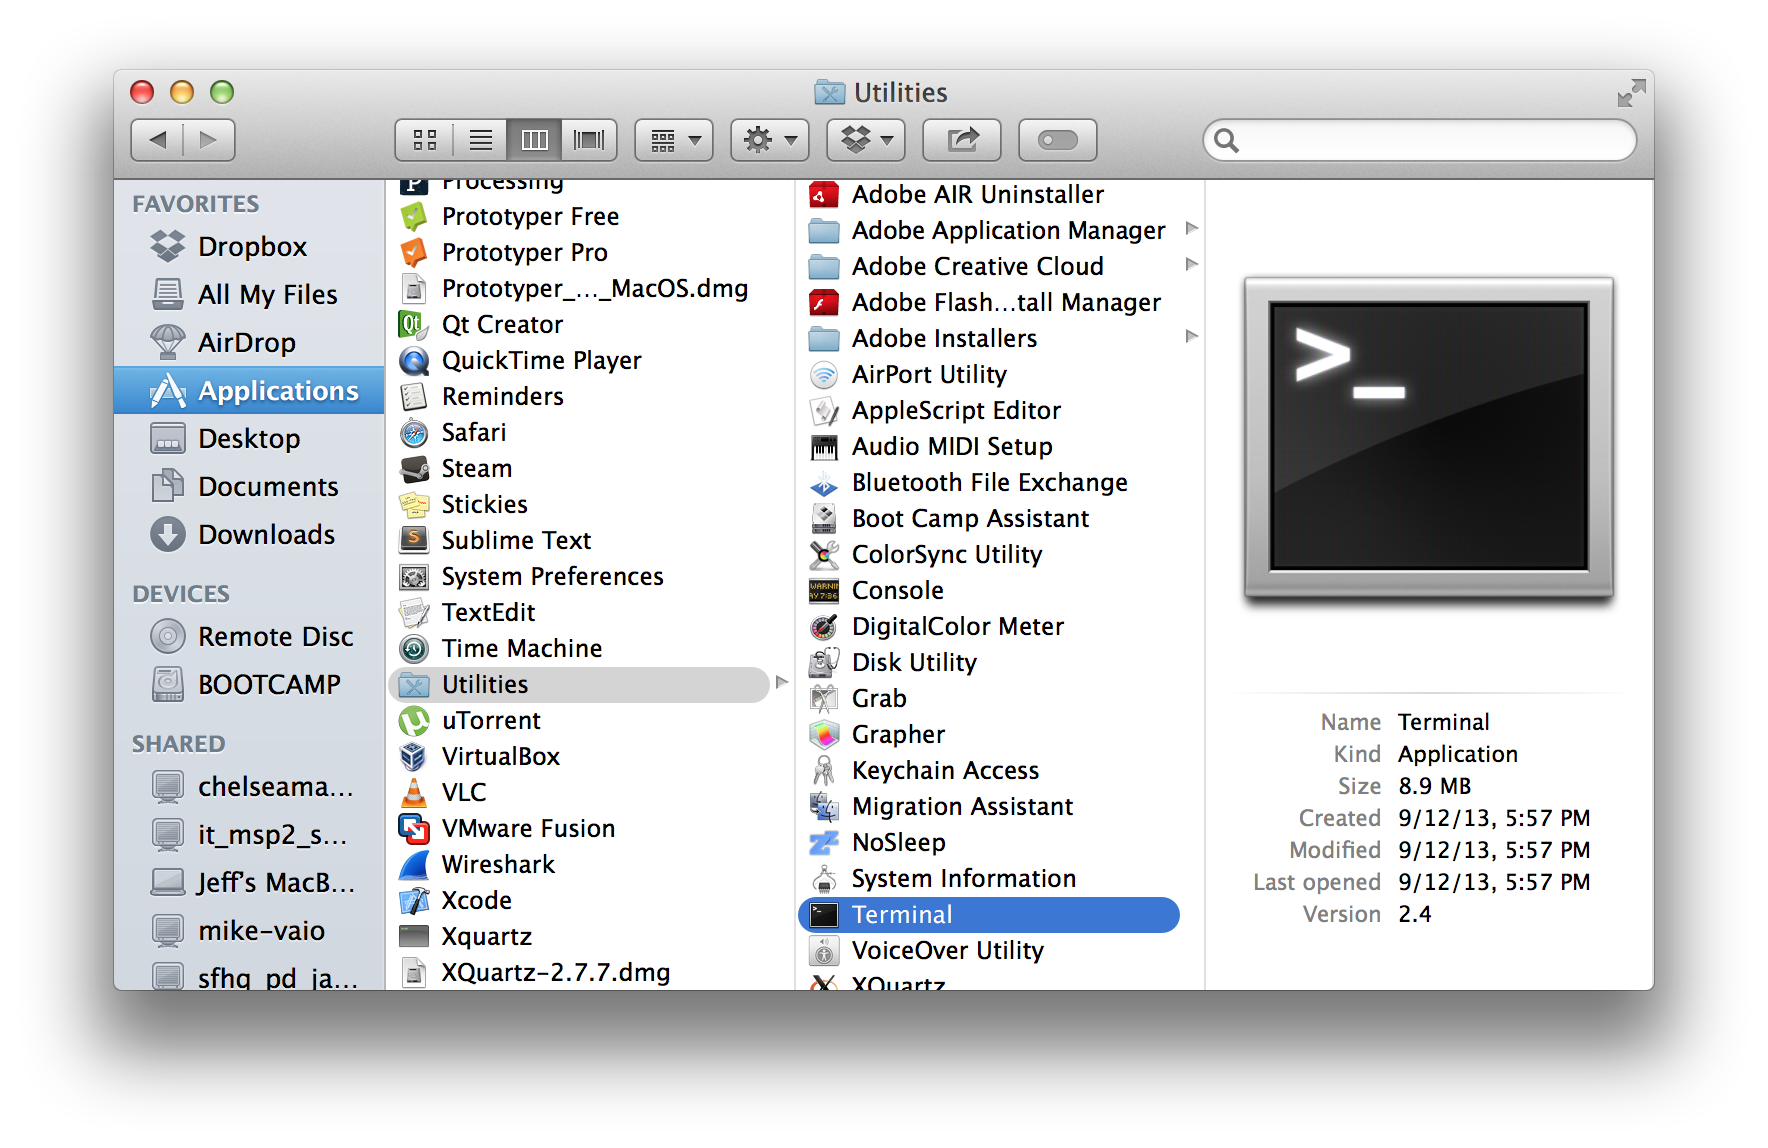
Open a terminal (Finder → Applications → Utilities → Terminal).
We need to install a few utilities in to flash the Edison from OS X.
Install Homebrew:
ruby -e “$(curl -fsSL https://raw.githubusercontent.com/Homebrew/install/master/install)”
Press RETURN and enter your password when asked to continue the installation process.
Homebrew might need to clean or check things before we use it. Run:
brew doctor
Once Homebrew has been installed and cleaned, use it to install a few other utilities:
brew install coreutils gnu-getopt dfu-util
Change to the toFlash directory in your Downloads.
cd ~/Downloads/toFlash/
Run the install script.
sudo ./flashall.sh
You will see a message like "Now waiting for dfu device." At that, plug in your Edison (Use J16 for the Intel Arduino and Mini-Breakout boards. Use "OTG" for the SparkFun Edison Base Block). You should see the script start to flash the Edison in the terminal. Wait while that finishes (it could take a few minutes).
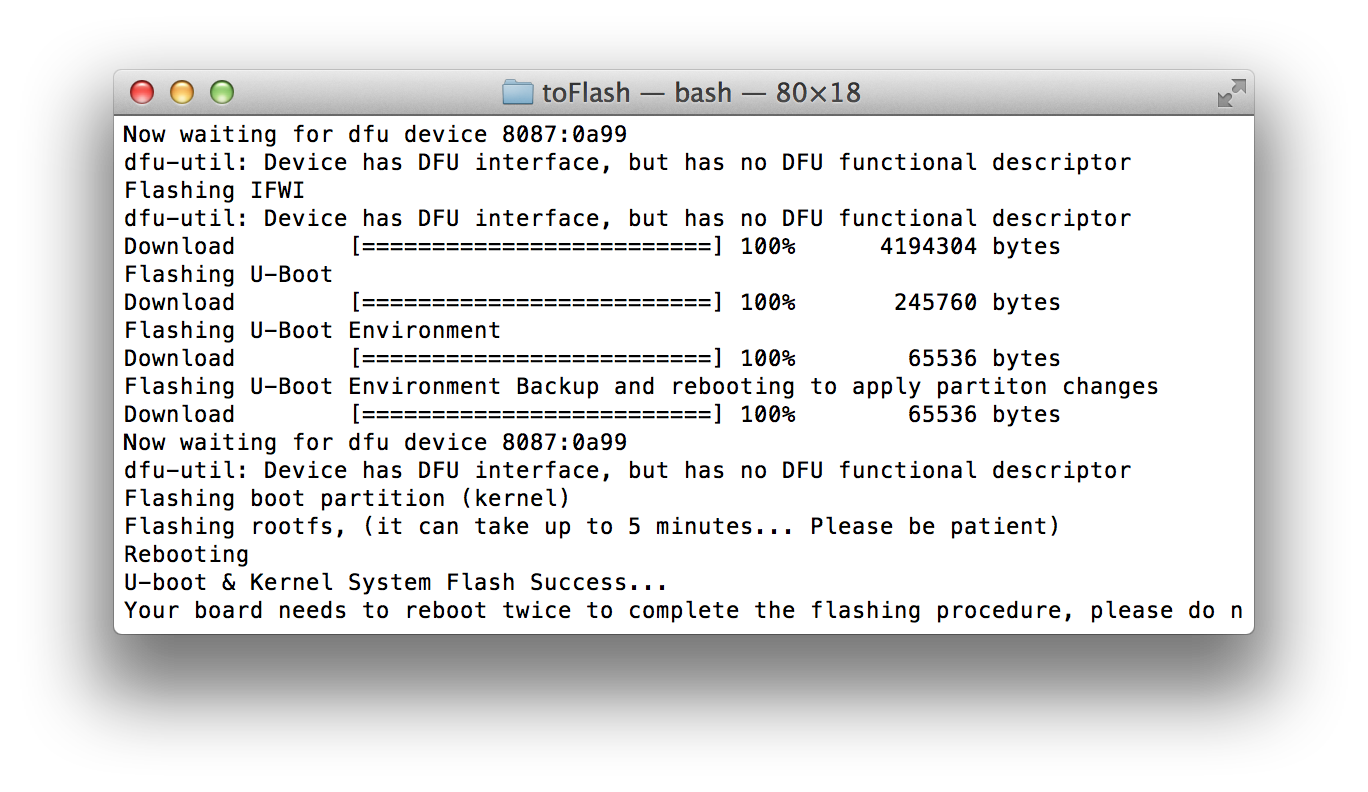
Once the flashing process is complete, you will get a message like "Your board needs to reboot twice to complete the flashing procedure, please do not unplug it for 2 minutes." You will want to wait those 2 minutes to make sure the flashing process is complete.
Download the Ubilinux image by navigating to http://www.emutexlabs.com/ubilinux and click on "ubilinux for Edison."
Open a terminal and navigate to your downloads directory. For example:
cd Downloads
Extract the contents of the downloaded file:
tar xvfz ubilinux-edison-XXXXXX.tar.gz
Note that the version number (XXXXXX) will be whichever version you downloaded (e.g. ubilinux-edison-141030.tar.gz).
Move into the "toFlash" directory:
cd toFlash
Run the install script:
sudo ./flashall.sh
You will see a message like "Now waiting for dfu device." At that, plug in your Edison (Use J16 for the Intel Arduino and Mini-Breakout boards. Use "OTG" for the SparkFun Edison Base Block). You should see the script start to flash the Edison in the terminal. Wait while that finishes (it could take a few minutes).

Once the flashing process is complete, you will get a message like "Your board needs to reboot twice to complete the flashing procedure, please do not unplug it for 2 minutes." You probably want to wait that 2 minutes (I know I would not want to risk bricking my Edison).
Once you have flashed your Edison, you can log in over a serial connection.
IMPORTANT: If you are using the Intel Arduino or Mini-Breakout board, plug in the other USB cable at this time (you should have 2 USB cables running from your Edison to your computer). If you are using one of the SparkFun Edison Blocks with a "Console" port, you can use that port to power the Edison and receive a serial console.
Download a serial terminal, such as PuTTY.
You will also likely need to download and install the Virtual COM Port Drivers from FTDI (download the "setup executable" version).
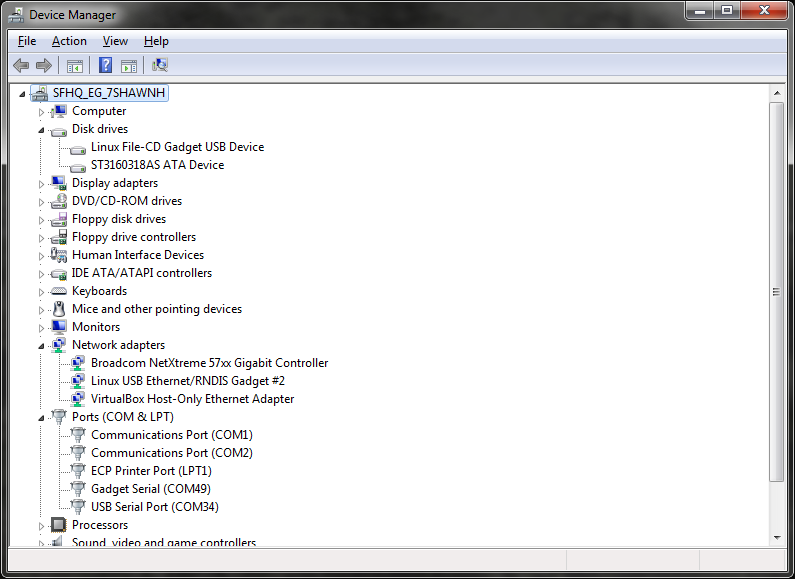
Open the Device Manager. Expand "Ports (COM & LPT)" and you should see a "USB Serial Port." Make a note of the COM number.
Run PuTTY, select the "Serial" option, change the COM port number under "Serial line," and set the "Speed" to 115200.
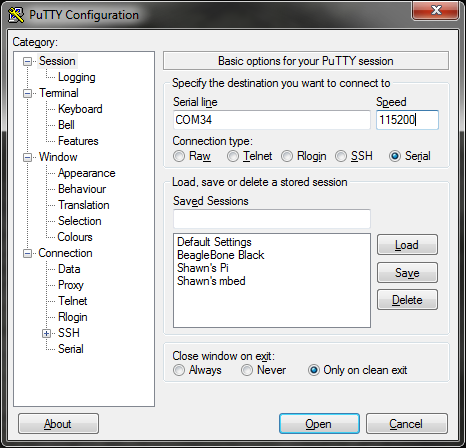
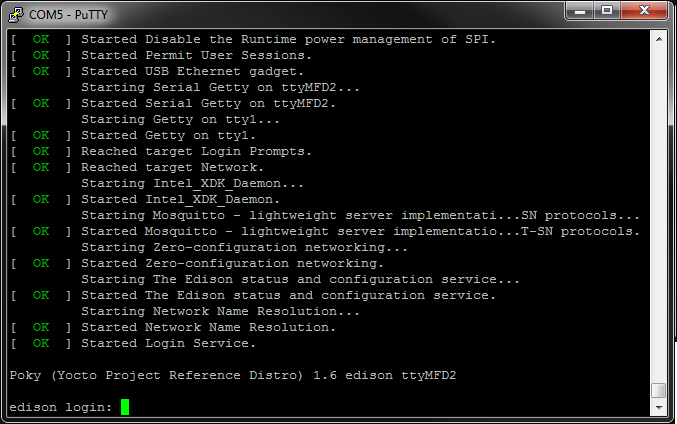
Click "Open." You will see a blank terminal. Hit 'enter' and you will be prompted with a login screen.
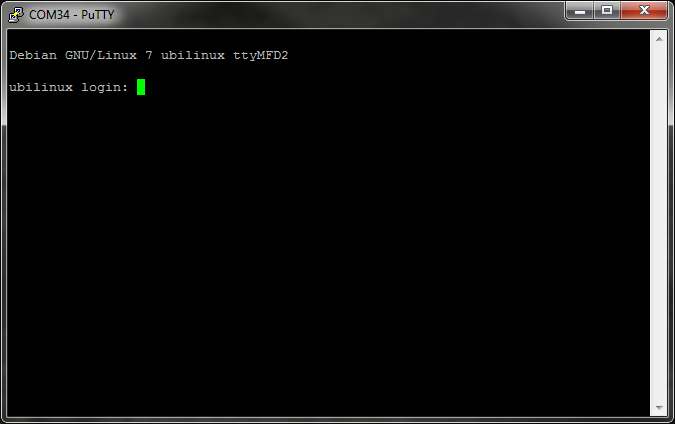
Enter the default login credentials:
ubilinux login: edison
Password: edison
And that's it! You are now logged into Ubilinux running on your Edison.
Before you plug in your Edison, you need to find the location of the USB serial device. Open a terminal and enter:
ls /dev/tty.usb*
Make a note of which devices appear. Plug in your Edison (both cables for Intel breakout boards or the "Console" port for the SparkFun Blocks) and enter the command again:
ls /dev/tty.usb*
An extra file should appear. Remember the file name and use the screen command to connect:
screen /dev/tty.usbserial-XXXXXXXX 115200
Where -XXXXXXXX is the string of numbers and letters of the USB serial device. For example:

Press 'enter' to see the login screen.
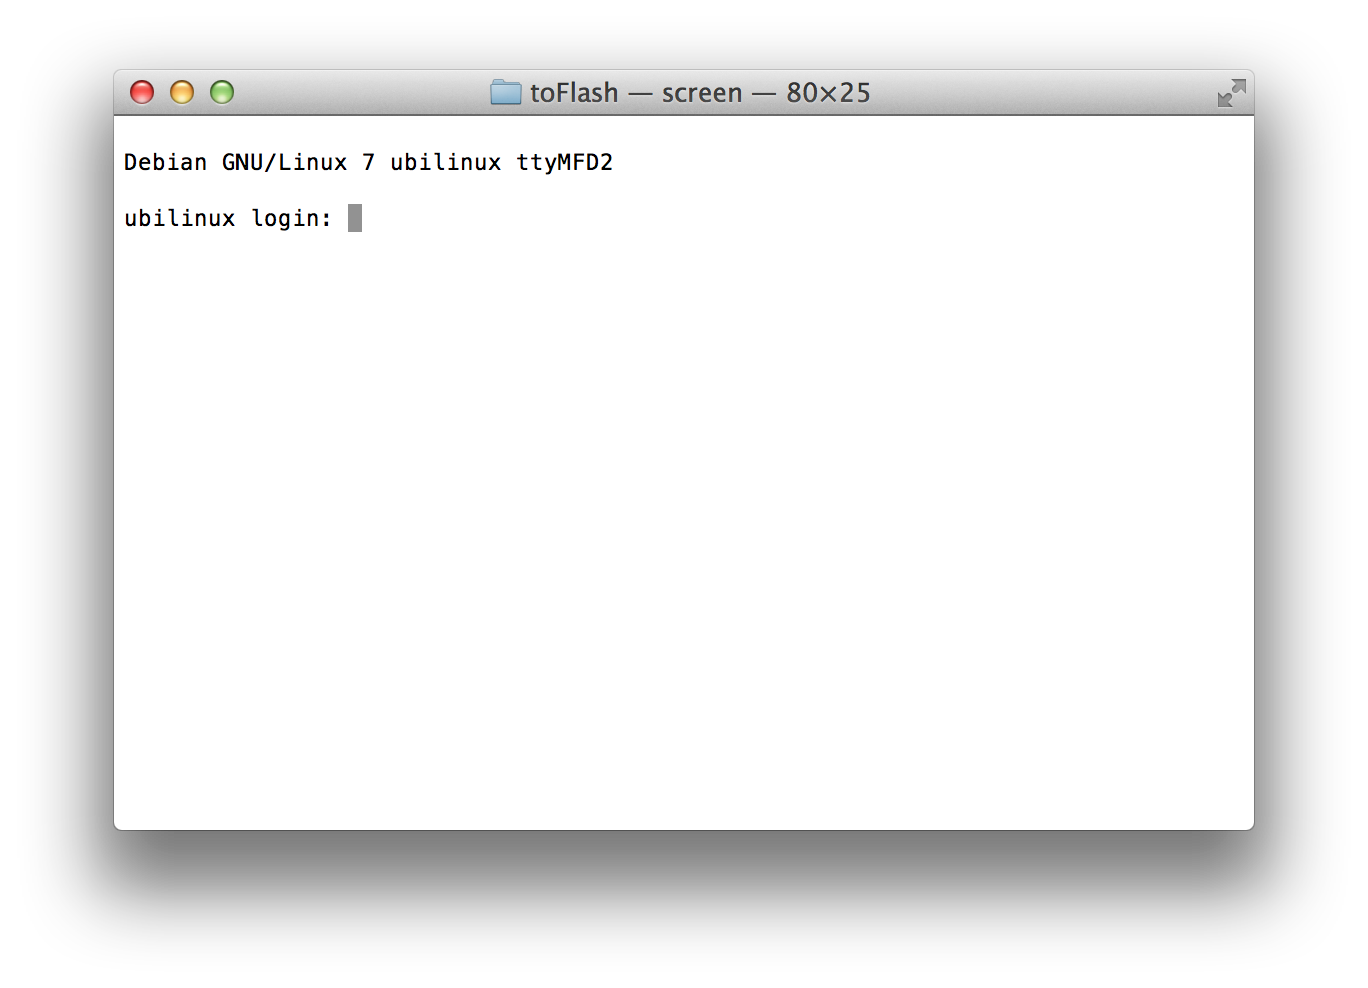
Enter the default login credentials:
ubilinux login: edison
Password: edison
You should now be logged into Ubilinux.
Open a terminal and connect using the screen command:
sudo screen /dev/ttyUSB0 115200
Note that your USB serial device may not be exactly ttyUSB0. If you have other USB serial devices plugged in, it could be ttyUSB1, ttyUSB2, and so on.
Press 'enter' to see the login screen.
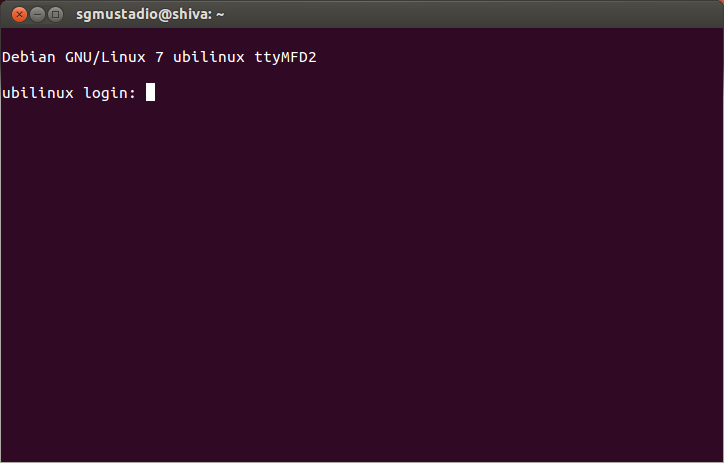
Enter the default login credentials:
ubilinux login: edison
Password: edison
You should now be logged into Ubilinux.
By default, Ubilinux gives you access to the root account and a user account called "edison." This is a great starting point, as it allows you to do anything in the operating system. However, it is not secure. If someone finds out the IP address of the Edison, they could log in with the default username and password.
One of the easiest fixes for improving security is to create a unique user account, change the edison user password (or delete the whole account!), and change the root password. You can skip creating a new user if you like, but it is still highly recommended that you change passwords for both root and edison.
If you are logged in on the "edison" account, run:
logout
At the login screen, log back in using the root account:
ubilinux login: root
Password: edison
Choose a username for your new account and think of a memorable password. Run the command:
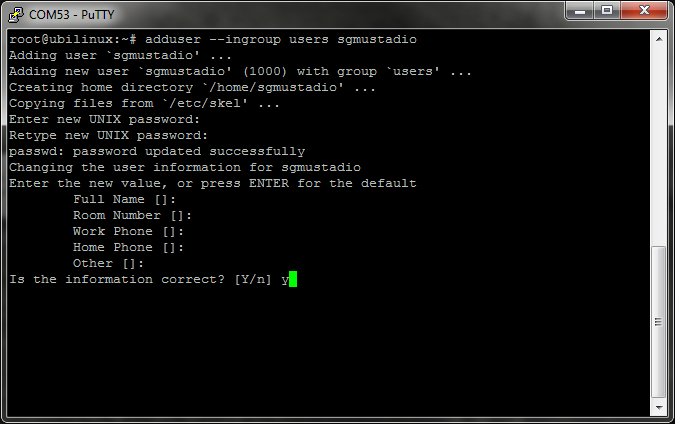
adduser --ingroup users <USERNAME>
You will be prompted to enter your password twice and asked for some identifying information. Feel free to fill them in or hit 'enter' to accept the default of blank (no information). Type 'y' and press 'enter' when prompted about the information being correct.
It is advisable that you either remove the "edison" account or at least change the password.
If you want to keep the "edison" account, then you should consider changing the password to something more secure:
passwd edison
You will be prompted to enter the new password twice.
The better option is to remove the account altogether, as guessing a non-default username is more difficult. While logged in as root, enter:
deluser --remove-home edison
The last step is changing the default root password. This is crucial in preventing unauthorized people from easily signing in to your Edison with root access. While logged in as root, run the command:
passwd
You will be prompted to enter the new password twice.
After logging into Ubilinux, you will probably want an Internet connection so you can download and install packages at your whim. There are a few ways to connect to the Internet over WiFi. We will show two of them. The first one is the quick and easy way, but it leaves your WiFi password stored in plain text in a file. The second is the preferred method, as it encrypts your password, but the steps are slightly more involved.
If you are logged in as a regular user, run the command:
su
And enter the password for root to gain superuser abilities. As a side note, "su" stands for substitute user.
The easiest way to get on a local WiFi Access Point is to store the SSID and password in a file. The problem is that your password will be stored in plain text, so it is not very secure.
Use your favorite Linux text editor (I'm still a fan of nano) to open the interfaces file:
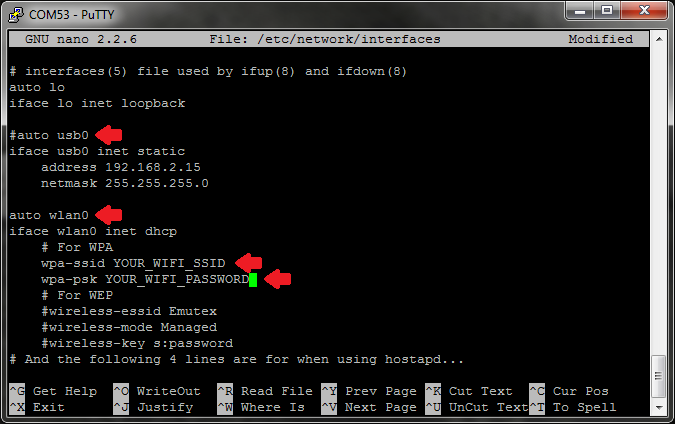
nano /etc/network/interfaces
Use the arrow keys to navigate to "auto usb0" and add a "#" in front of the line to comment it out.
Navigate down and remove the "#" in front of "auto wlan0" so that our Edison will try to automatically connect to WiFi on boot.
Go down to the "wpa-ssid" and "wpa-psk" lines. Change the default SSID and password (PSK) to your desired WiFi SSID and password.
Press 'Ctrl-X' to exit and press 'y' to save the file when prompted.
We recommend following the directions in "The Better Way" below, but if you are happy with the quick method, skip to "Test WiFi Connection."
We can store our WiFi password more securely by creating a hash and locking down the /etc/network/interfaces file so that only root has access to it.
With the root account, change the permissions of the /etc/network/interfaces file:
chmod 0600 /etc/network/interfaces
Create a hash of your WiFi password:
wpa_passphrase <YOUR_WIFI_SSID> <YOUR_WIFI_PASSWORD>
That will print out a "network" section in the console.
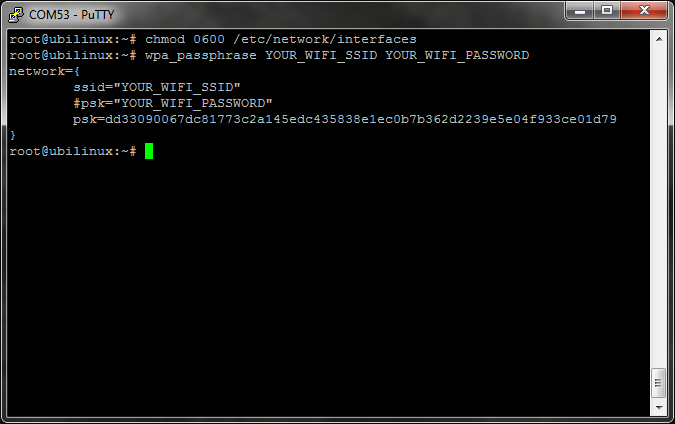
Copy the long string of letters and numbers after "psk=" (On PuTTY and many Linux consoles, you just need to highlight the string to copy it). Open the /etc/network/interfaces file:
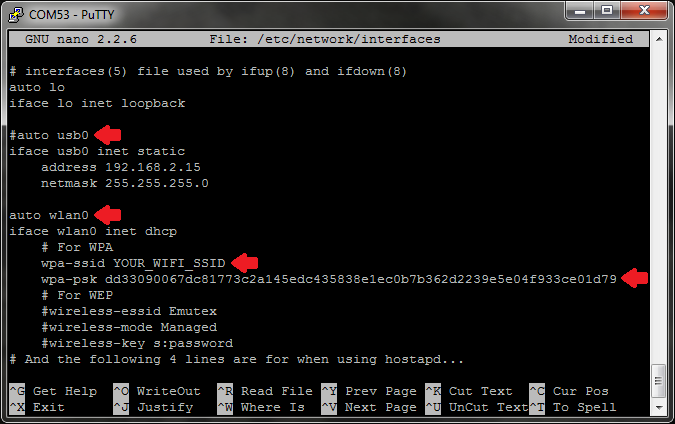
nano /etc/network/interfaces
Use the arrow keys to navigate to "auto usb0" and add a "#" in front of the line to comment it out.
Navigate down and remove the "#" in front of "auto wlan0" so that our Edison will try to automatically connect to WiFi on boot.
Go down to the "wpa-ssid" line. Change the default SSID to your WiFi's SSID.
Move your cursor to the "wpa-psk" line, delete the default string after "wpa-psk," and paste in the long hash that we generated earlier (you just need to right-click for PuTTY and many other Linux consoles).
Press 'Ctrl-X' to exit and press 'y' to save the file when prompted.
Restart the wireless driver by entering:
ifup wlan0
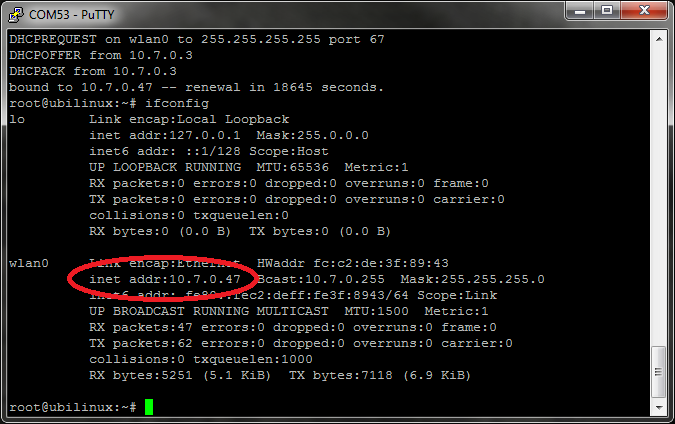
Once that configures, your Edison should be connected to your local WiFi. You can check by entering:
ifconfig
You should see an "inet addr" entry under "wlan0" that shows your IP Address.
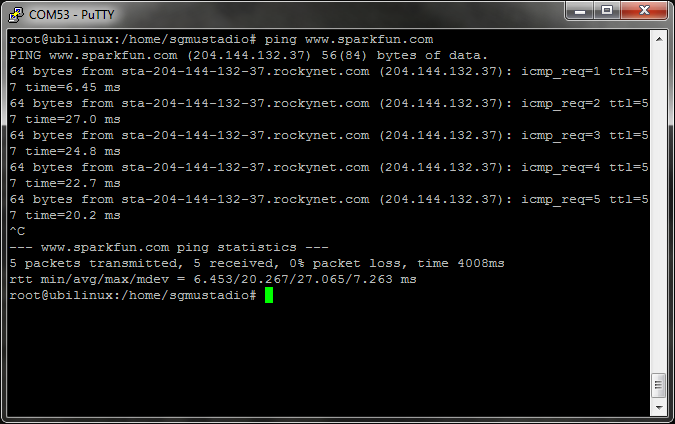
To ensure you have access to the Internet, you can ping a known site, such as www.google.com or www.sparkfun.com:
ping www.sparkfun.com
You should see several pings and responses. Press 'Ctrl-C' to stop.
Now that your Edison is connected to a network, you can use SSH to connect to your Edison from another computer. You just need to know the IP Address.
The first thing we want to do is update our package manager with apt-get. Make sure you are logged in as root (or use the "su" command), and enter:
apt-get update
Wait while that downloads and updates your package lists.
If you want to install a package, like sl, you just need to apt-get install:
apt-get install sl
If prompted, press 'y' when asked to install the package, and your package will be automatically downloaded and installed!
NOTE: "sl" installs a fun little demo. Enter:
/usr/games/sl
To see it!
This part is completely optional. Some people like to use the "sudo" command in order to execute actions that require superuser privileges (such as "sudo apt-get install"). Others prefer to switch users with "su" to execute commands. It is an ongoing debate.
If you would like to add the sudo command, we first need to install it. With the root account, run the command:
apt-get install sudo
Add your user account (not root!) to the sudo group:
adduser <YOUR_USERNAME> sudo
Logout with the "logout" command (you might have to type it twice if you are using "su"):
logout
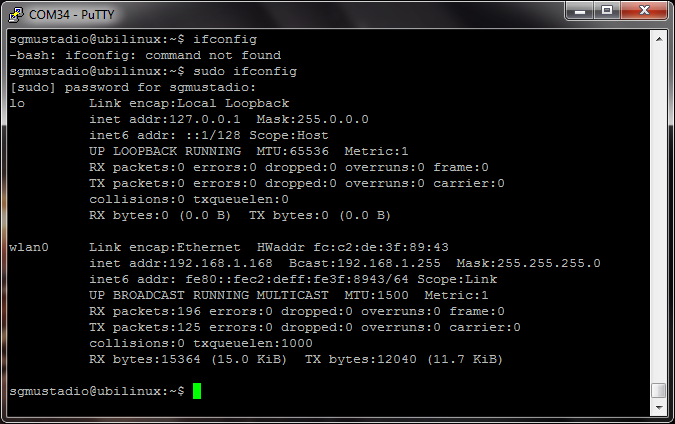
Log back in with your regular user account. Try a command such as:
ifconfig
You should get an error like "-bash: ifconfig: command not found." Try the same command again with "sudo" in front:
sudo ifconfig
You should get a print out of your network status.
You can now use sudo to run commands that require administrative privileges without having to log in to your root account. It lowers security some by allowing a regular user to run commands with escalated privileges. However, it means that you do not need to sign into your root account if you are using something like SSH.
Ideally, you would figure out which commands your user account would need to run and enable only those in the sudoers file. This can be done with the "visudo" command. To learn more about how to edit the sudoers file, read this article.
This is very much a possibility when loading new firmware. If you find that you have put the Edison in an unrecoverable state, it should be possible to recover (unbrick) it.
If you see the Edison begin to POST to your serial terminal, look for the line (it will count down to 0):
Hit any key to stop autoboot: 0
Press 'enter' and enter the command:
run do_flash
This will put the Edison into DFU mode. You can now run the flashall.bat or flashall.sh script from your host computer to re-image the Edison.
Many thanks to user ddewaele for finding this solution. You can see an example of his error (bricked Edison) and his solution as a gist on GitHub.
On Linux, if you get an error like "dfu-util: command not found" when trying to install Ubilinux then you need to install dfu-util. Run the command:
sudo apt-get install dfu-util
For installing Ubilinux, if you are using the Intel Arduino Breakout or Mini-Breakout, you need to use the USB port labeled "J16." If you are using the SparkFun Edison Base Block, use the port labeled "OTG."
For logging into Ubilinux, you need to use both USB ports on the Intel Arduino or Mini-Breakout. You only need to use the port labeled "Console" on the SparkFun Base Block.
In Windows, if you see an error message such as "The program can't start because libusb-1.0.dll is missing from your computer", then you need libusb-1.0.dll, which can be found in the dfu-util download. Navigate to \
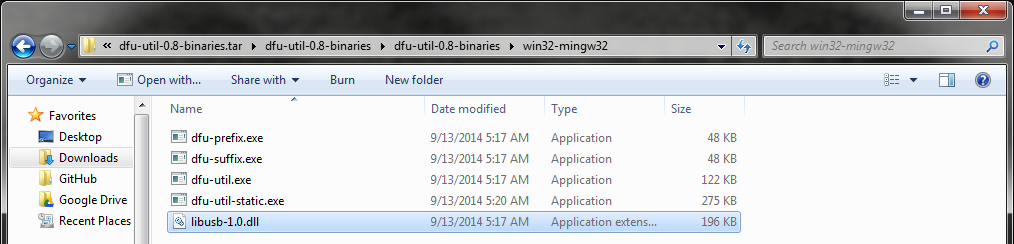
Navigate to \
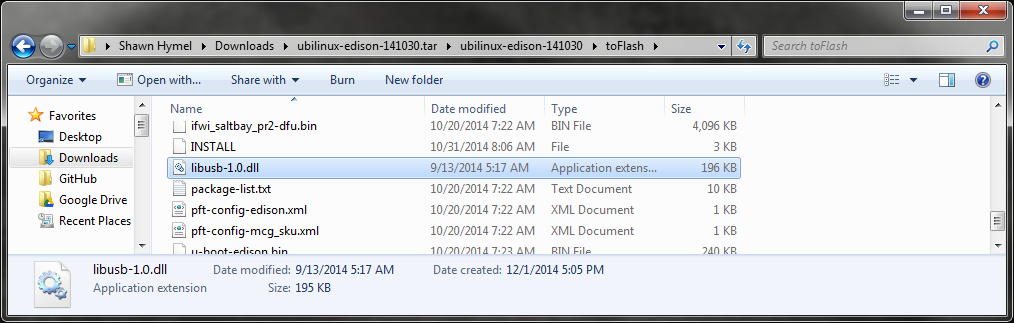
NOTE: You can permanently install dfu-util.exe and libusb-1.0.dll on your Windows computer if you like. Read into modifying PATH and installing a .dll. For now, they were just copied into the Ubilinux path for brevity.
On Linux, a message such as "E: Unable to locate package" could mean a few things:
If you use the "sudo" command and get an error like:
sudo: unable to resolve host ubilinux
Then it means that the hostname of your Edison (in the file /etc/hostname) is not found in the /etc/hosts file. Open up an editor:
sudo nano /etc/hostname
And make a note of the name (it should be "ubilinux" by default). You can change it if you would like (it will change the name of your Edison when it is connected to a network).
Exit and open up /etc/hosts:
sudo nano /etc/hosts
And add your hostname (e.g. "ubilinux") afte "localhost" in the first line.
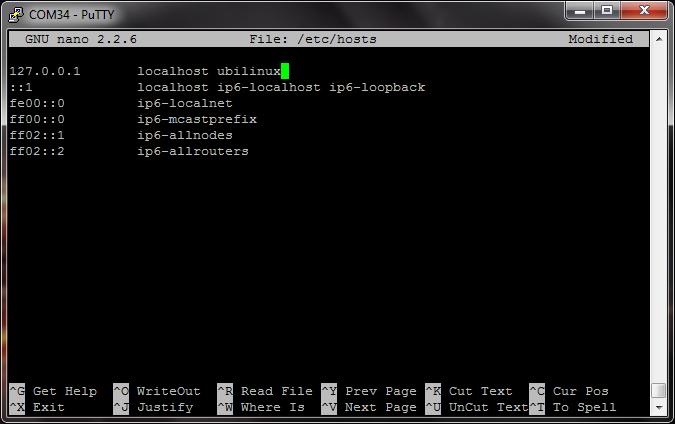
Save and exit with "Ctrl-X" and 'y.' Restart the Edison with:
sudo reboot
You should no longer get the warning with sudo.
Many Edison guides on the Internet focus on using the default Yocto build. If you installed Ubilinux and decide that it is not for you, don't worry! You can easily reinstall Yocto.
Navigate to Intel's Edison download page and download "Edison Yocto complete image."
Follow the instructions found in the Install Ubilinux section, but instead of navigating to the Ubilinux directory to run "flashall.bat" or "flashall.sh," go to the Yocto directory. Here is brief reminder of what we did in that section:

After waiting for some time, open up a serial console into your Edison, and you should be greeted with a Yocto login prompt:
Now that you have Debian installed on your Edison, you have many tools at your disposal. For example, aptitude is a powerful package manager that lets you install libraries and Linux packages from the Internet.
Check out our Installing libmraa on Ubilinux for Edison tutorial for more info interfacing with other boards.
Here are some additional resources to help you with the Edison:
If you're new to Linux, we highly recommend checking Userland, a guide to all things shell.
Check out these other Edison related tutorials from SparkFun:
learn.sparkfun.com | CC BY-SA 3.0 | SparkFun Electronics | Niwot, Colorado