Arduino is awesome! It's our go-to electronics education platform, and it's our top choice for rapid prototyping, but it isn't for everyone. Maybe it's the cryptic language, or the Java-based IDE, or maybe it's just the teal window border -- regardless of your reasoning, if you're trying to escape the Arduino IDE, here are a few alternatives we'd like to share.
The Arduino alternatives covered in this tutorial range from simple, introductory graphical programming to web-based Arduino interfaces for your web browser. Here's a quick overview of each interface covered, we'll go into further detail later on:
ArduBlock is a graphical programming add-on to the default Arduino IDE. Instead of memorizing cryptic functions, forgetting semicolons, and debugging code, ArduBlock allows you to build your Arduino program by dragging and dropping interlocking blocks.
ArduBlock is a perfect interface if you're just getting into programming, electronics, or Arduino. Check out the ArduBlock section of this tutorial for an introduction and quick getting started guide.
In the same vein as ArduBlock, Minibloq is a graphical programming environment where groups of blocks are stacked on top of each other to create your program. Unlike ArduBlock, however, Minibloq is a stand-alone program -- no Arduino install required.
One of Minibloq's most powerful features is its real-time code generation -- as you drag blocks into your program, the equivalent code is generated concurrently. This makes Minibloq an excellent tool for beginners to intermediate programmers.
Check out the Minibloq section of this tutorial for an introduction to the interface.
Those are the alternatives we'll be discussing in this tutorial, but there are many others worth checking out, including:
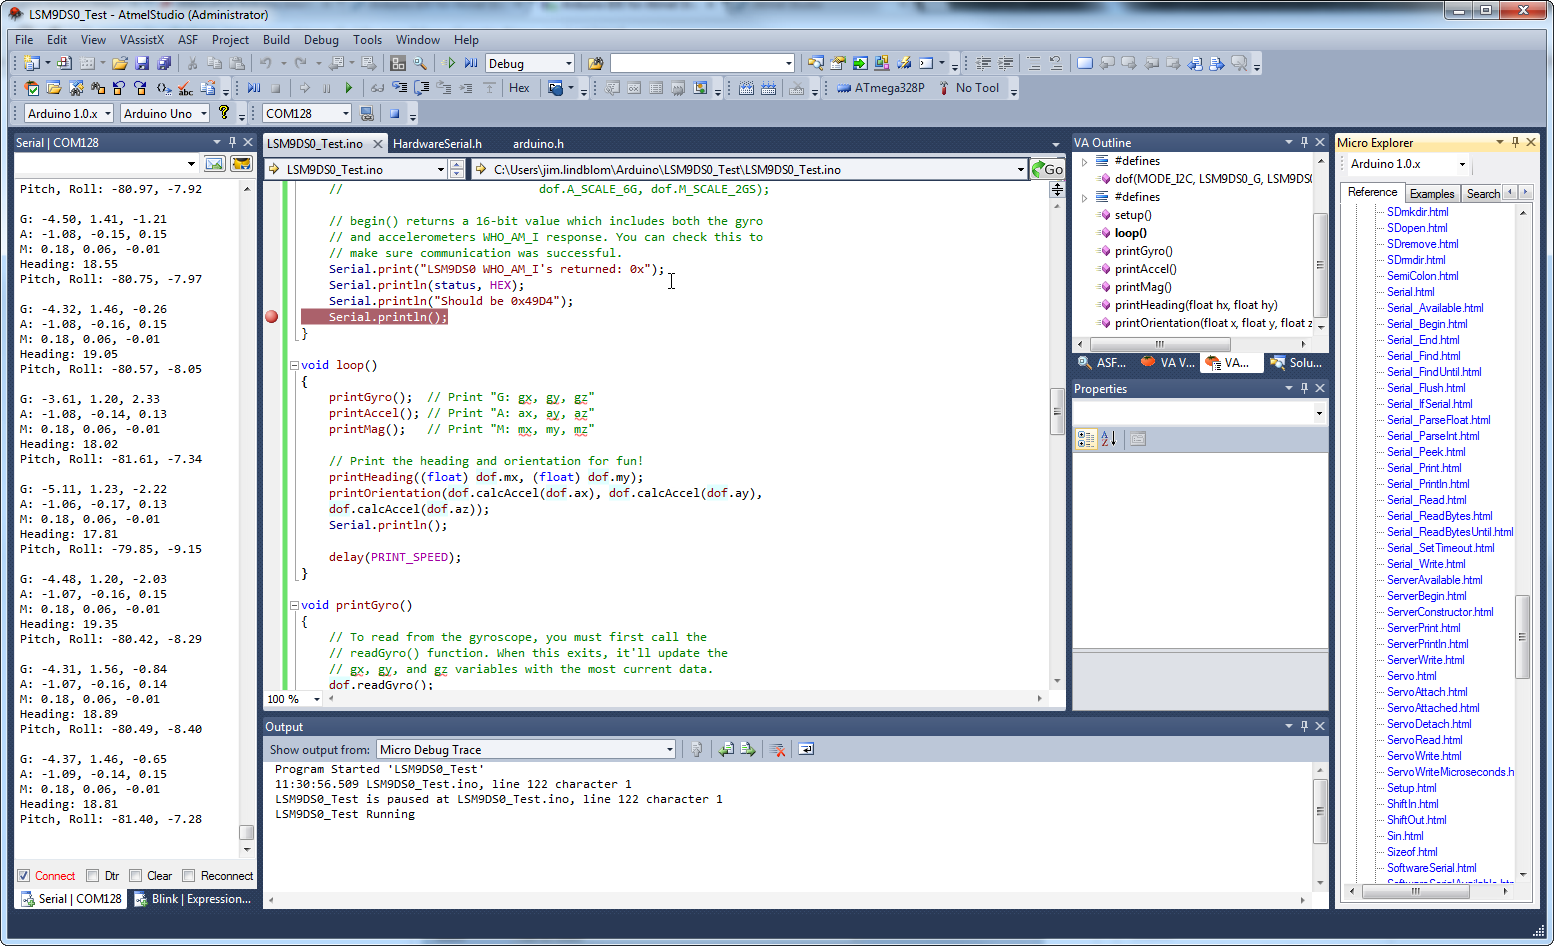
This extension can be an extremely powerful tool -- complete with breakpoint implementation and a host of features you may be used to from more advanced IDE's.
ArduBlock is a programming environment designed to make “physical computing with Arduino as easy as drag-and-drop.” Instead of writing code, worrying about syntax, and (mis)placing semicolons, ArduBlock allows you to visually program with an snapped-together list of code blocks.
ArduBlock builds on the simplicity of Arduino, and creates a perfect beginner gateway to physical computing. Instead of tearing your hair out debugging, you can spend your time creating!
ArduBlock is something of an "add-on" to Arduino, so it requires that you have the Arduino IDE installed. The benefit of that, though, is -- because Arduino is multi-platform -- ArduBlock works on Windows, Mac, or Linux. Plus, having Arduino already present makes the transition from visual programming to text programming easier, when the inevitability approaches.
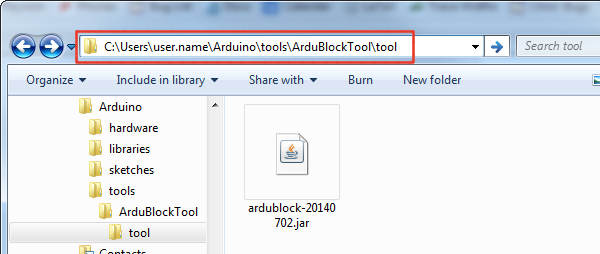
Installing ArduBlock can be a little tricky -- there's no installer, just a Java file that needs to be stored in a very specific location. Follow the steps below to install it:

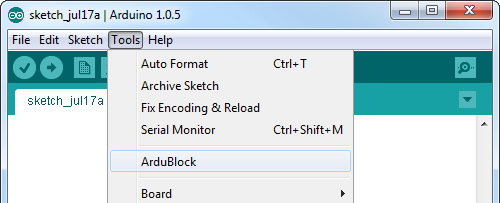
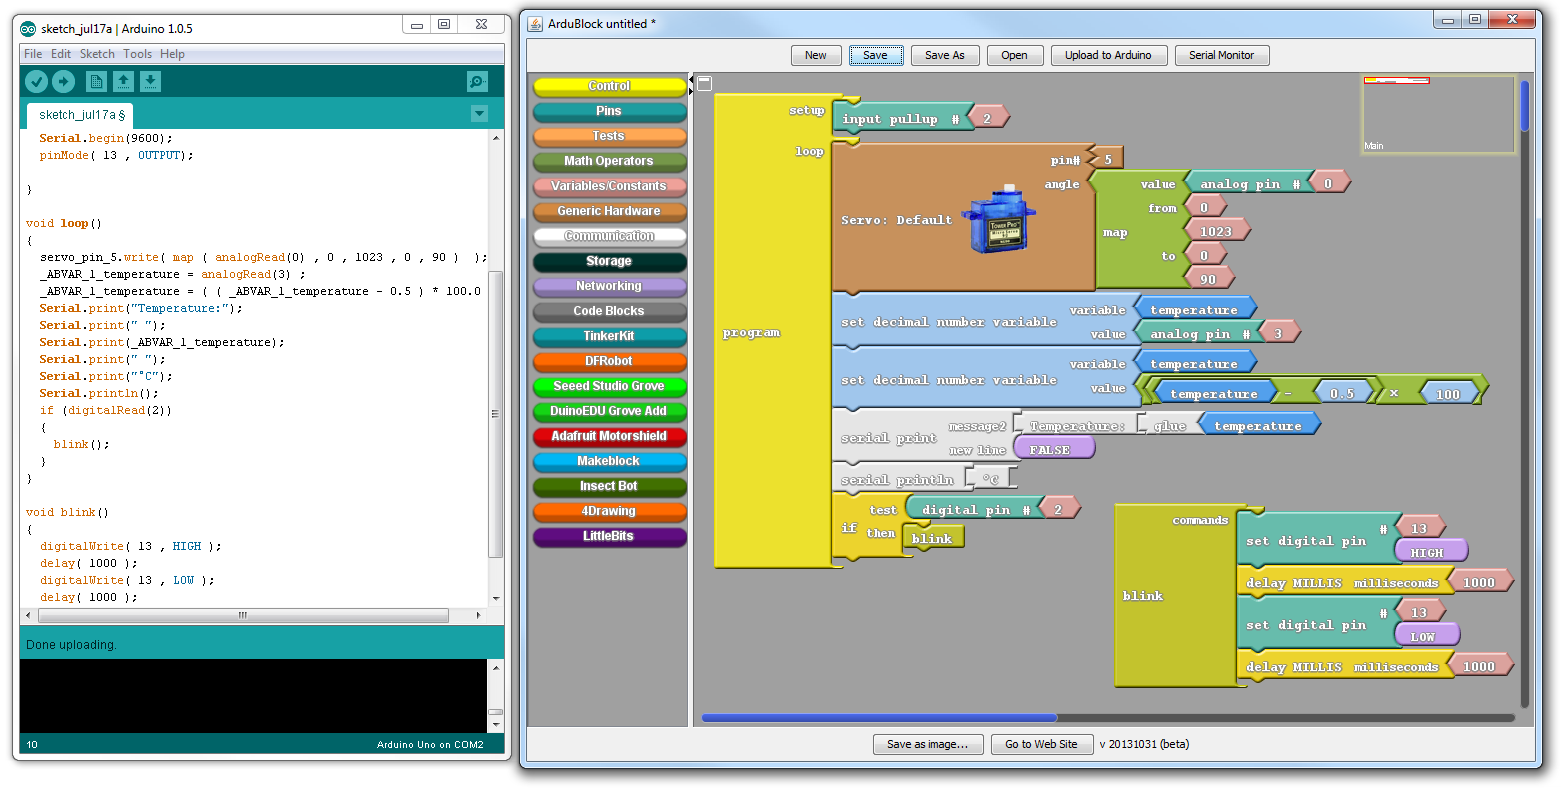
ArduBlock works hand-in-hand with the Arduino IDE -- it relies on the IDE being open in the background, so don't close the Arduino window!
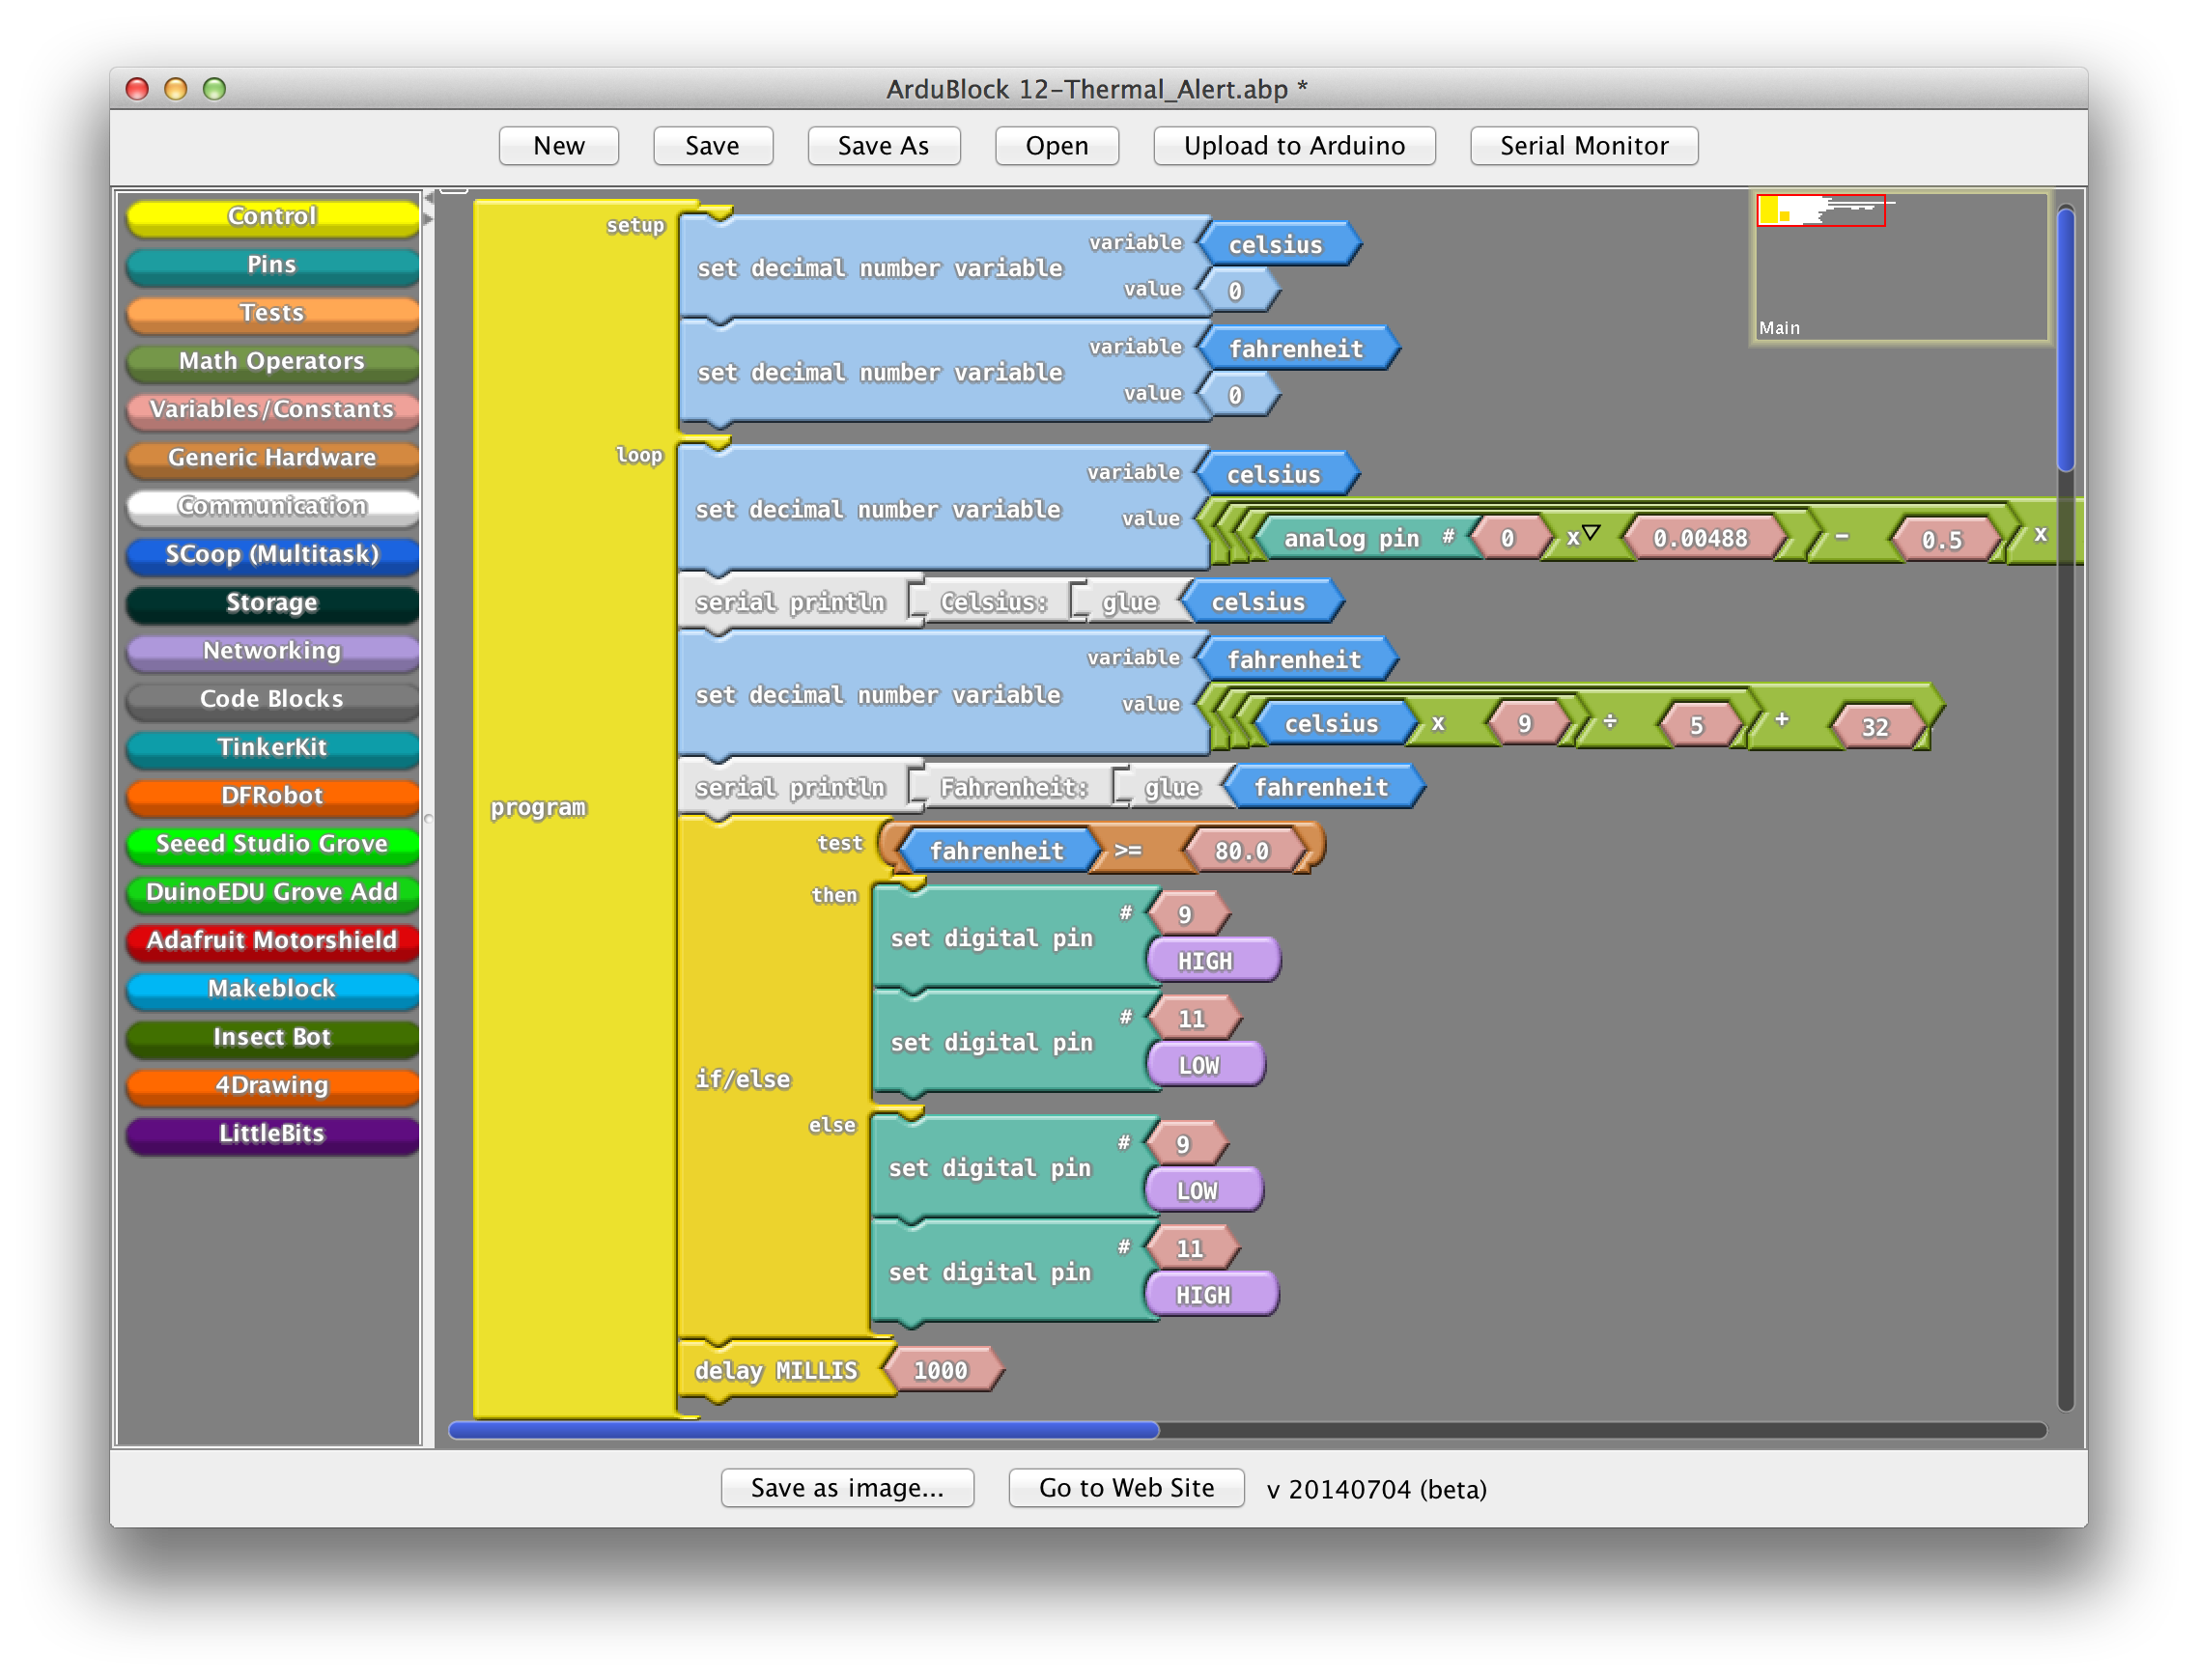
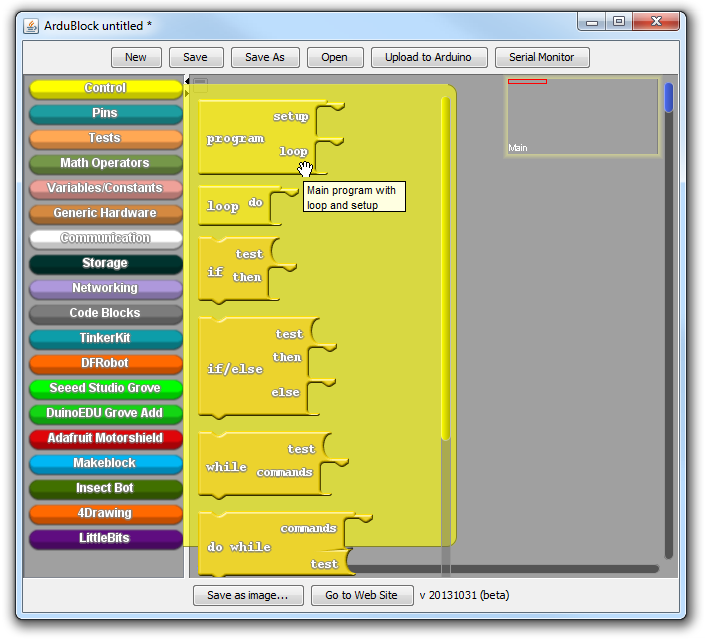
The ArduBlock window is split into two halves. On the left there are "bins", which store every possible block you can add to your sketch. The blank, gray slate to the right of that is where you "draw" your sketch. To add a block to your sketch, simply drag it from the bin into the blank, gray area.
To begin, every ArduBlock sketch requires a Program block, which you can find in the "Control" bin. The Program block defines the setup and loop functions that every Arduino program requires.
From there, you can drag more Blocks over, snapping them into either the loop or setup sections. Here, try making a blink program. The set digital pin blocks, which effect a digital output (analogous to Arduino's digitalWrite function), are found under the "Pins" bin. The delay milliseconds block, found under "Control", is analogous to a delay Arduino function.

Then click Upload to Arduino to send your drawing off to your Arduino board. You can ALT+TAB back over to the Arduino window to check your code upload status.

After you've successfully uploaded your first sketch, continue to play around and explore the contents of the other bins!
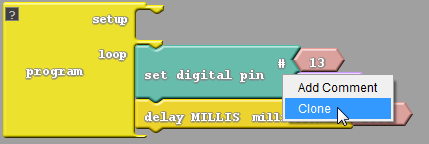
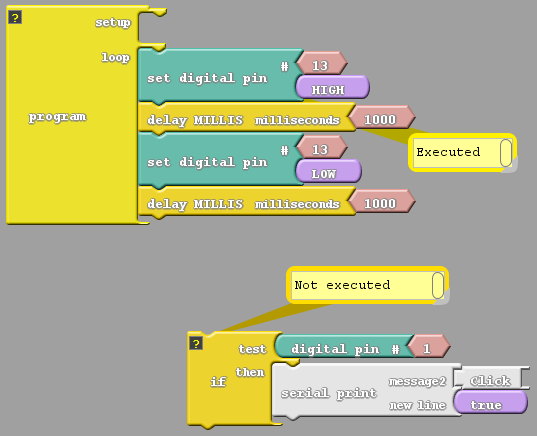
You can clone blocks, or groups of blocks, by right clicking and selecting "Clone". Everything from the block you right-clicked to the bottom of that "group" will be copied and pasted into the top-left corner of the window. This is a huge timesaver for bigger drawings.
You can temporarily remove code from your sketch by dragging it out of the entirety of the "Program" block. Anything not connected to the main Program block will be ignored when your code is compiled. This is a great debugging tool -- you can remove a block of code from program execution, while not actually deleting it, much like commenting out code.
Finally, if you peek back over at the Arduino window, after you've uploaded an ArduBlock drawing, you may notice something different. To create your code, the ArduBlock program simply parses your blocks and spits the equivalent Arduino code over into the Arduino window.
This becomes a great learning tool if you're interested in transitioning from graphical programming to text.
Minibloq is a visually-driven programming environment for Arduino and other physical computing devices. Instead of tearing your hair out over syntax, variable types, compilation errors, and the other annoyances of code, Minibloq allows you to construct your program using a series of graphic blocks.
Beyond the gentle, visual introduction to programming, one of Minibloq's coolest features is its real-time code generator. As you add blocks to the Minibloq drawing, an equivalent line of code will be generated in the next window over. This is an excellent tool if you're looking to make the leap from graphic programming languages to text.
Minibloq has a major focus on robotics. It includes support for popular robotics platforms, like Multiplo and our RedBot Kit.
Head over to the Minibloq download page to grab the latest version. Be aware that, for now at least, Minibloq is (mostly) only Windows compatible.
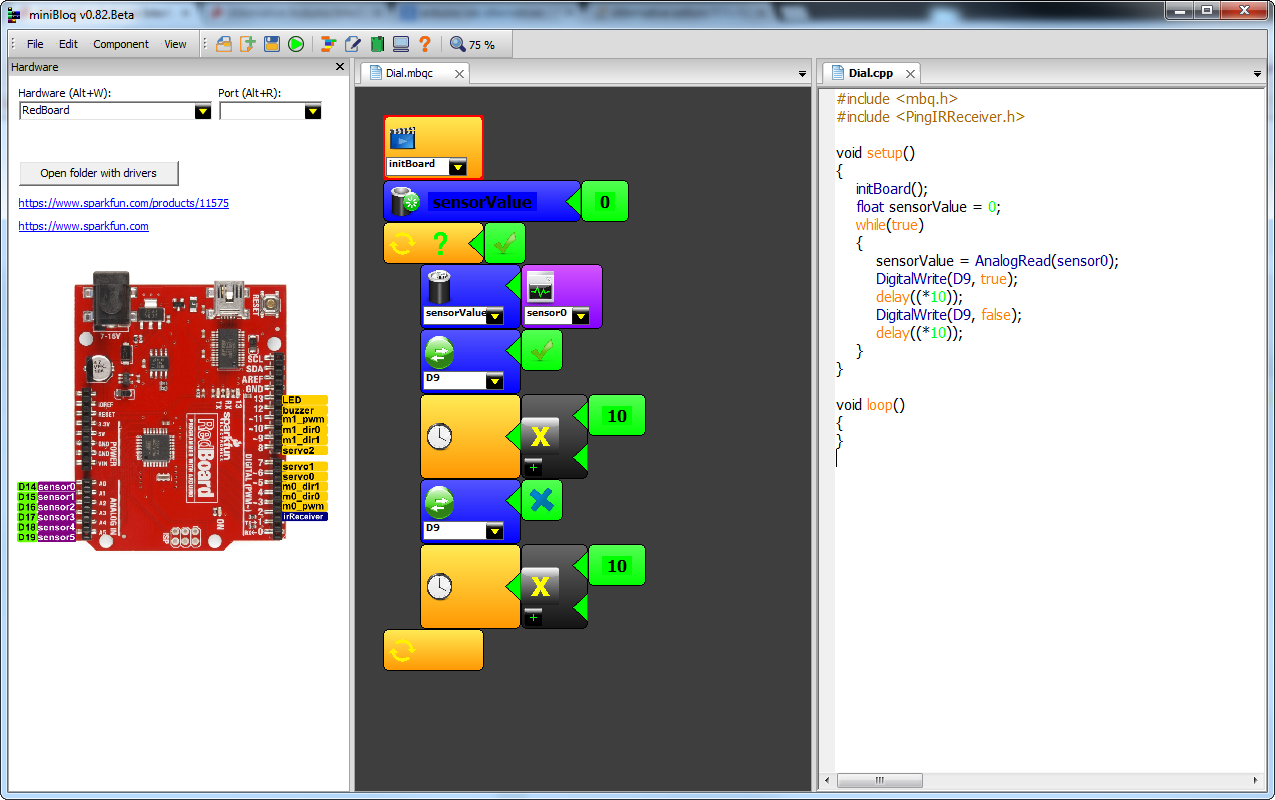
By default the interface is split into three columns -- hardware view, Minibloq editor, and code editor. On the main toolbar up top, you can choose which columns you want to display or hide.
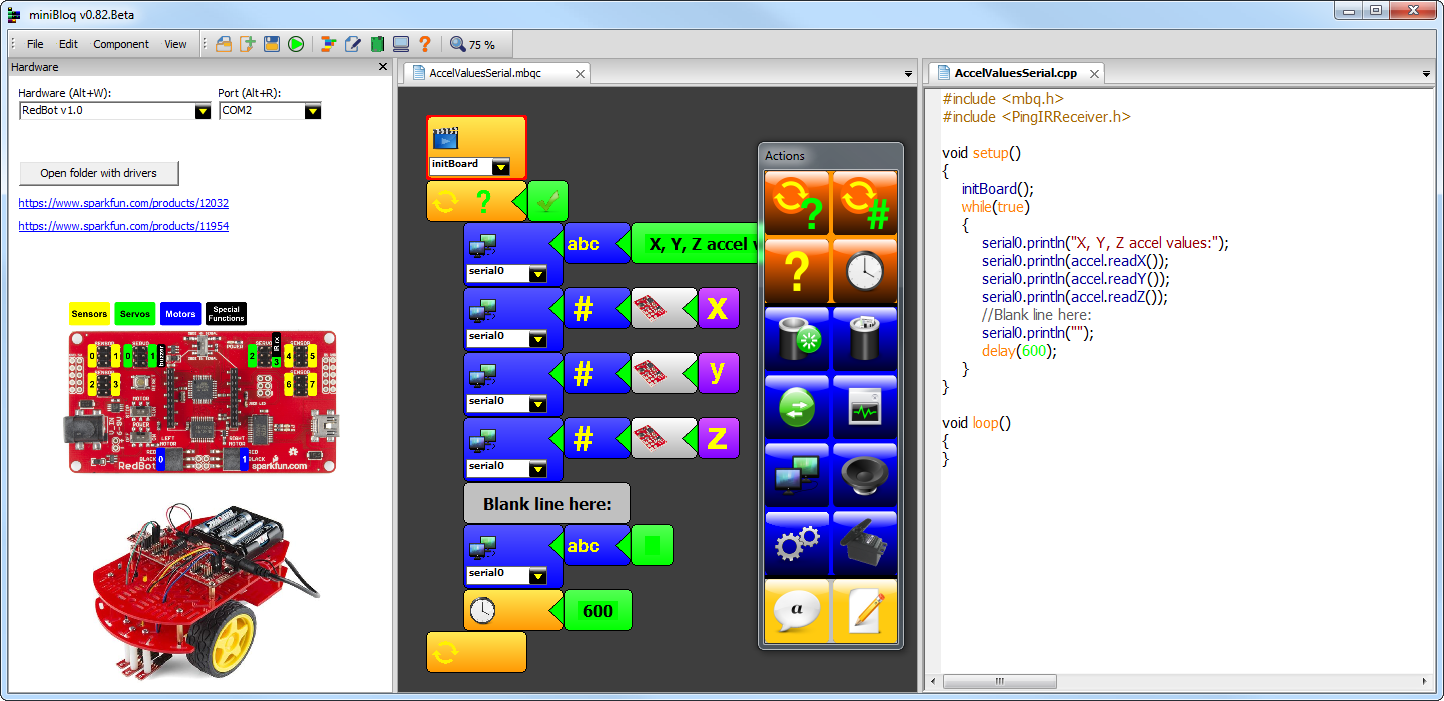
The hardware section allows you to pick your Arduino-compatible board among options including RedBoard, Arduino Uno, Arduino Leonardo, RedBot Kit, and others.
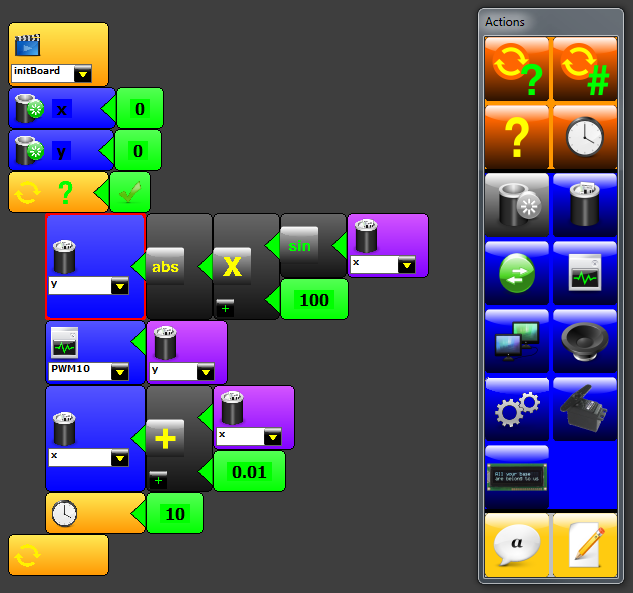
The middle, Minibloq editor window is where you'll spend most of your program-building time. This view works hand-in-hand with the detatched "Actions" window, where you click buttons to add blocks to your program.
Finally, there's the "Generated code" view on the right, which is the most powerful learning feature of Minibloq. It's a huge aide in easing the transition from visual programming to "coding" programing.
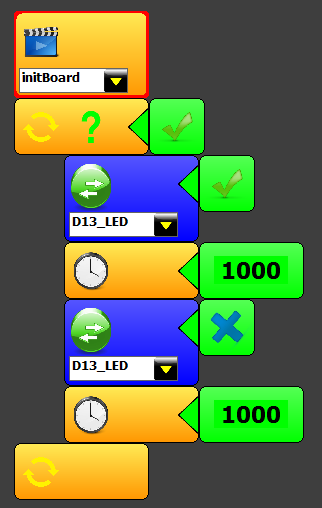
Creating a Minibloq drawing takes some time to get used to. Try creating a blink program to get a feel for it:
Then check out some of the included examples by going to File > Examples. Among the many example sketches are a collection of SparkFun Inventor's Kit and RedBot Kit specific programs. Check 'em out!
Check out our Arduino Comparison Guide! We've compiled every Arduino development board we carry, so you can quickly compare them to find the perfect one for your needs.
learn.sparkfun.com | CC BY-SA 3.0 | SparkFun Electronics | Niwot, Colorado