Nearly every computer needs an internet connection these days, and more and more of those connections are via WiFi to keep things from being tethered to a router switch or the wall. A wireless internet connection is particularly helpful for single board computers that many applications need to be mobile. The NVIDIA Jetson Nano Developer Kit is no exception to that trend in terms of keeping the board as mobile as possible, but still maintaining access to the internet for software updates, network requests and many other applications. Unfortunately, it doesn't come with WiFi built in so we need to add it ourselves.
There are a number of WiFi solutions that work with the Jetson Nano out there but we will focus on the Edimax N150 2-in-1 Combo Adapter we sell on its own and is included in our JetBot AI Kit. This adapter is small, low power and relatively cheap, but it does take a little bit of elbow grease to get working from a fresh OS image install or if you are looking to add WiFi once you have completed the DLI Course provided by NVIDIA. No matter, let’s take a look and get your Jetson Nano on the web!
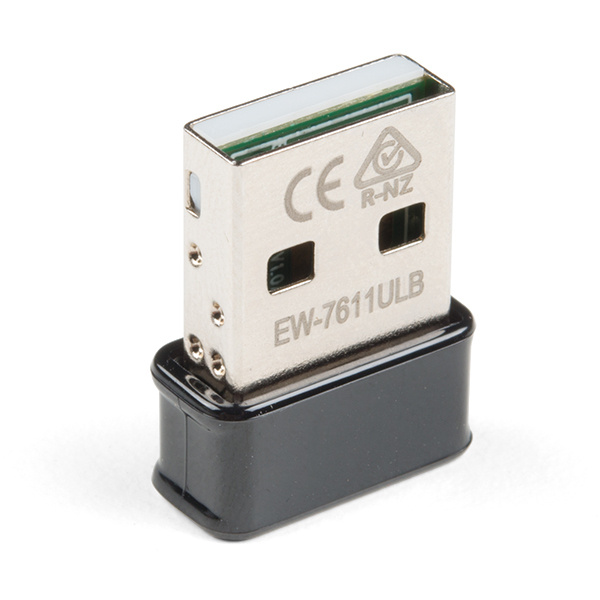
The Edimax N150 that we carry is specially model E-7611ULB USB WiFi / Bluetooth combination adapter.
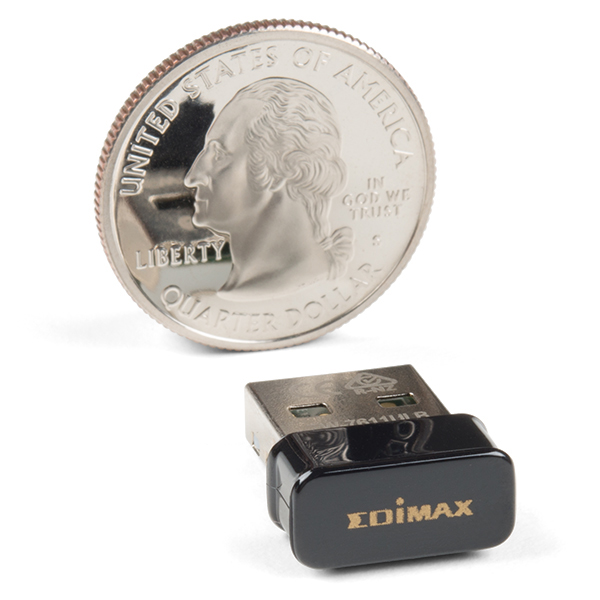
The Edimax 2-in-1 WiFi and Bluetooth 4.0 Adapter (EW-7611ULB) is a nano-sized USB WiFi adapter with Bluetooth 4.0 that supports WiFi up to 150Mbps while allowing users to connect to all the latest Bluetooth devices such as mobile phones, tablets, mice, keyboards, printers and more. Supporting the latest Bluetooth 4.0 version with Bluetooth Smart Ready, this adapter offers ultra-low power consumption with Bluetooth Low Energy (BLE) while transferring data or connecting devices. And with a tiny nano-size design you can easily plug it in without blocking any surrounding USB ports which makes it perfect for adding a WiFi connection to the NVIDIA Jetson Nano
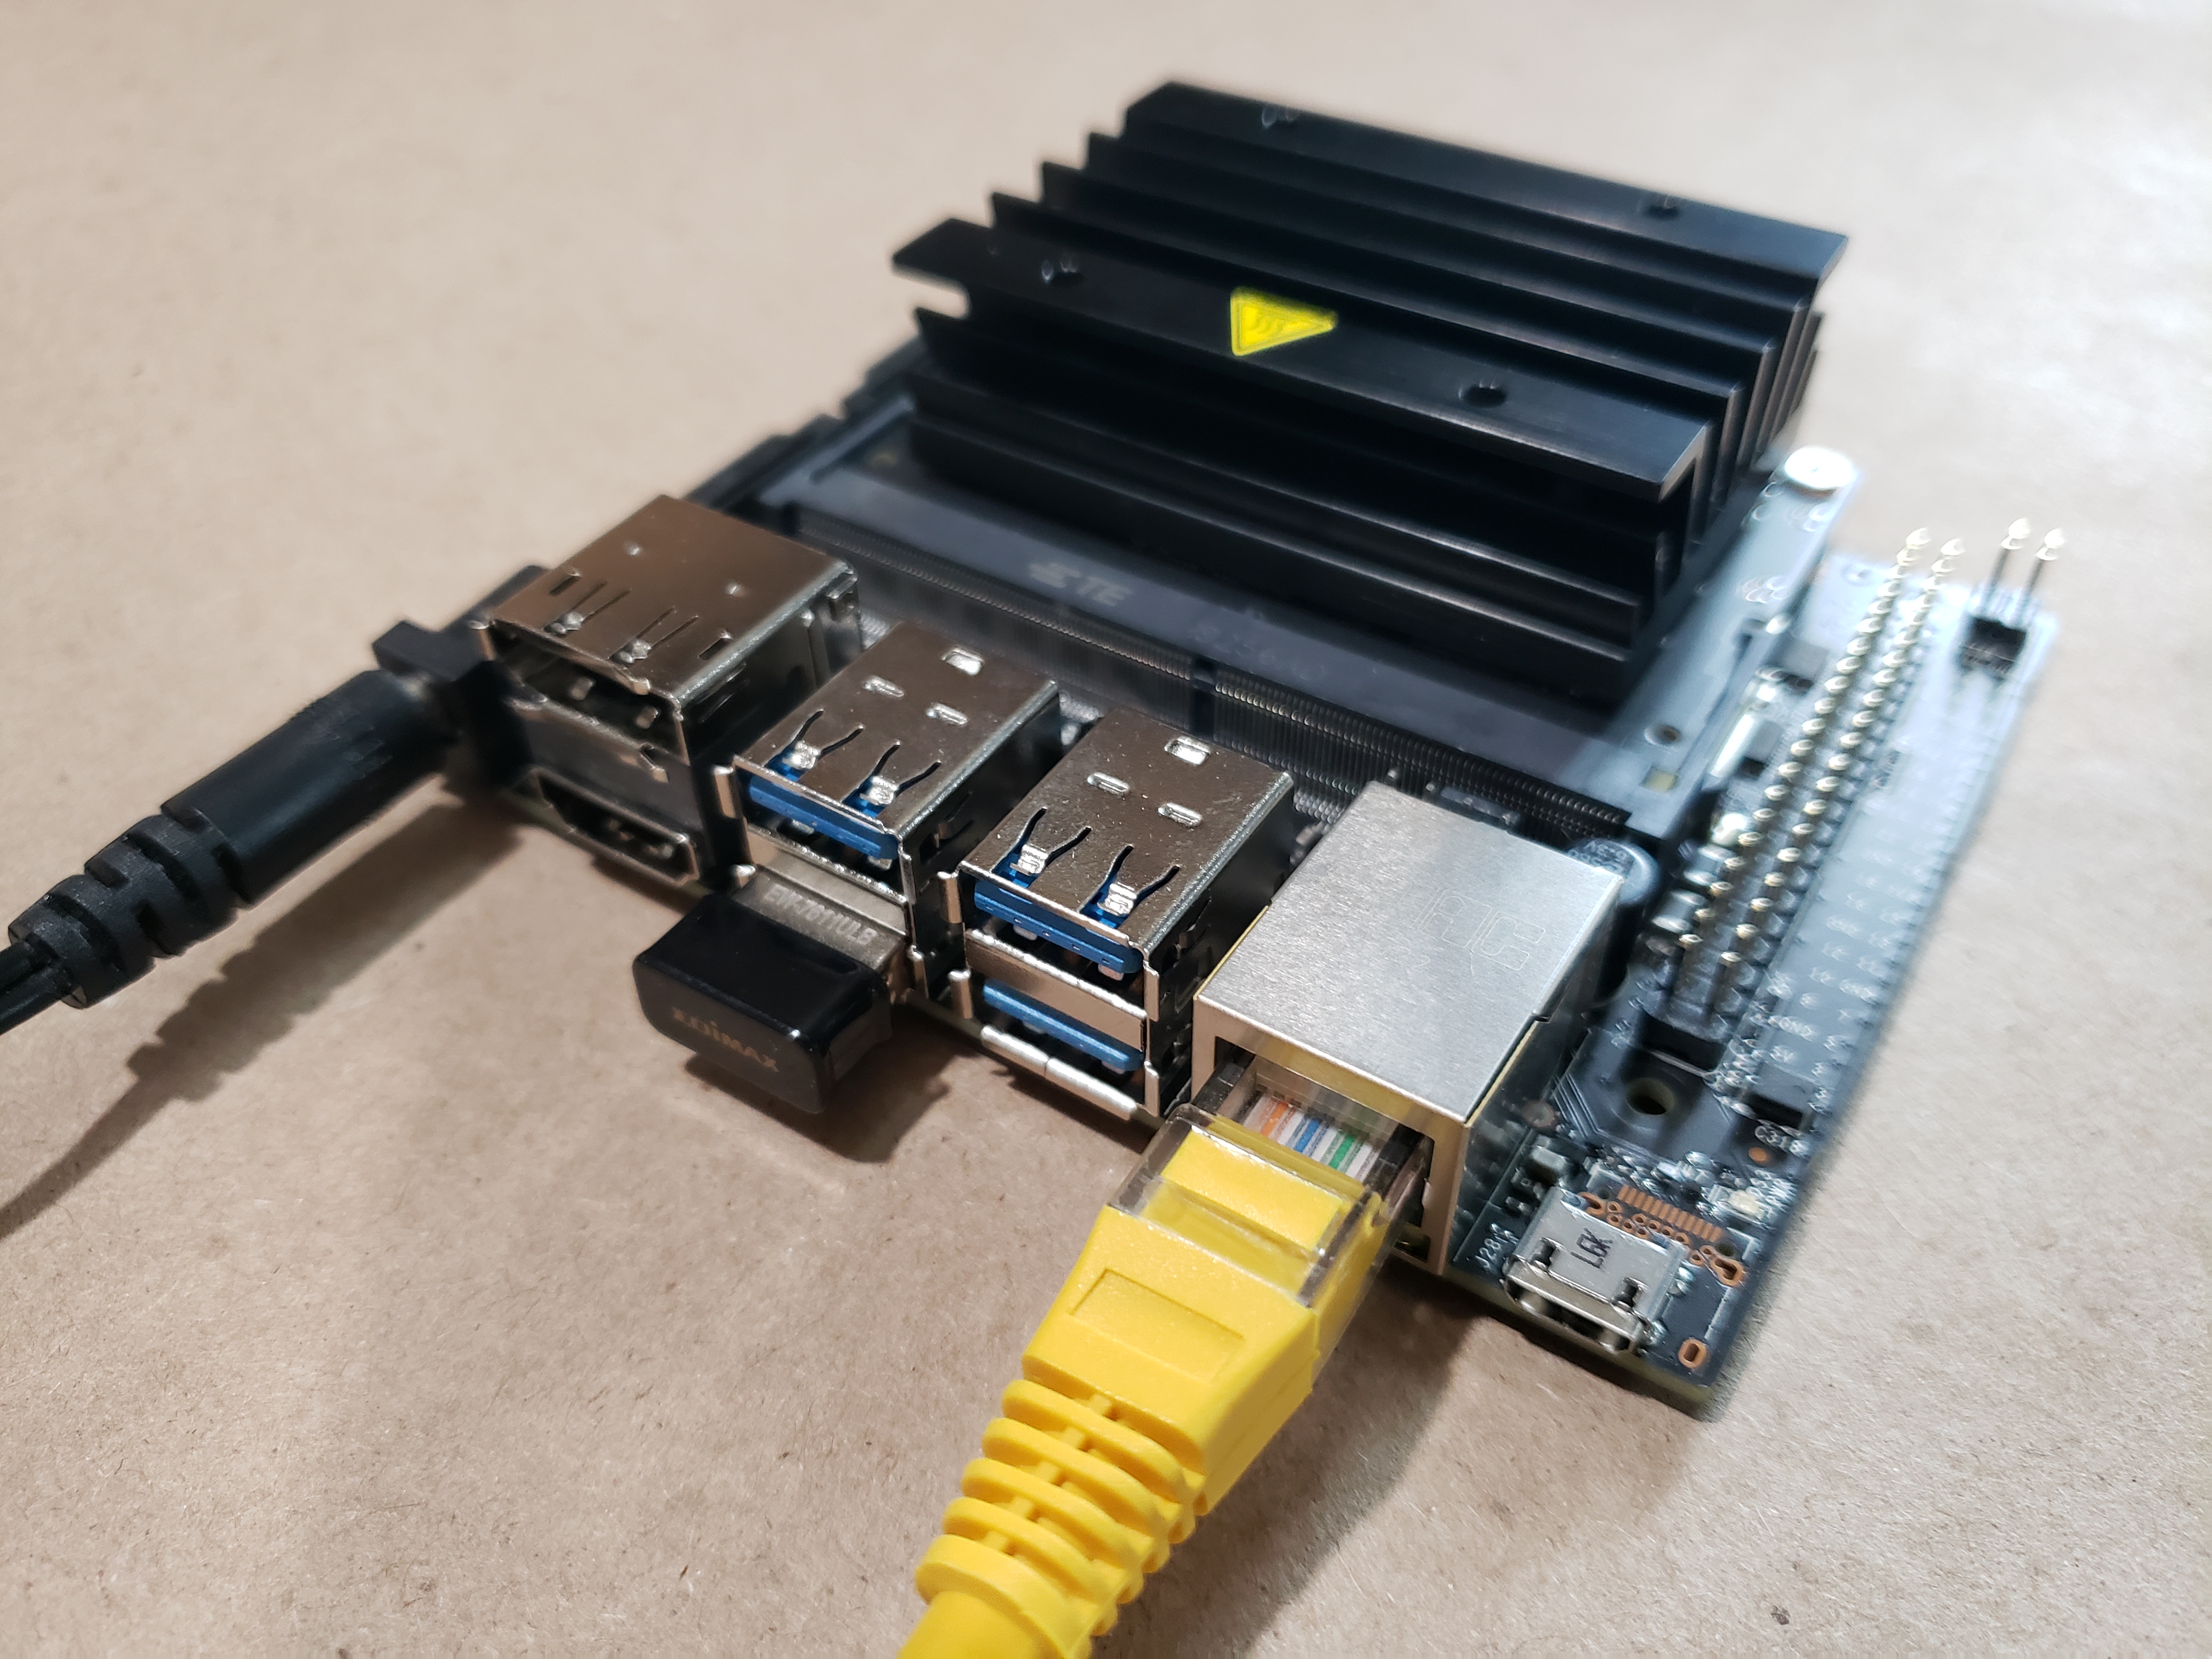
First up we need to connect our network peripherals to the Jetson Nano. The WiFi adapter is a USB key, but we will need an Ethernet cable and of course our NVIDIA Jetson Nano Developer Kit as well as a 5V 4A power supply. If you are looking for these parts, our DLI Course Kit for the Jetson Nano is a great place to get all of the parts in one purchase! But, we do sell all of the parts of the kit individually as well.
Before you get started plugging things in, we recommend as a best practice to disconnect your power supply to Jetson Nano Developer Kit while connecting any peripheral devices to it to prevent any potential damage to the Dev Kit or peripheral device.
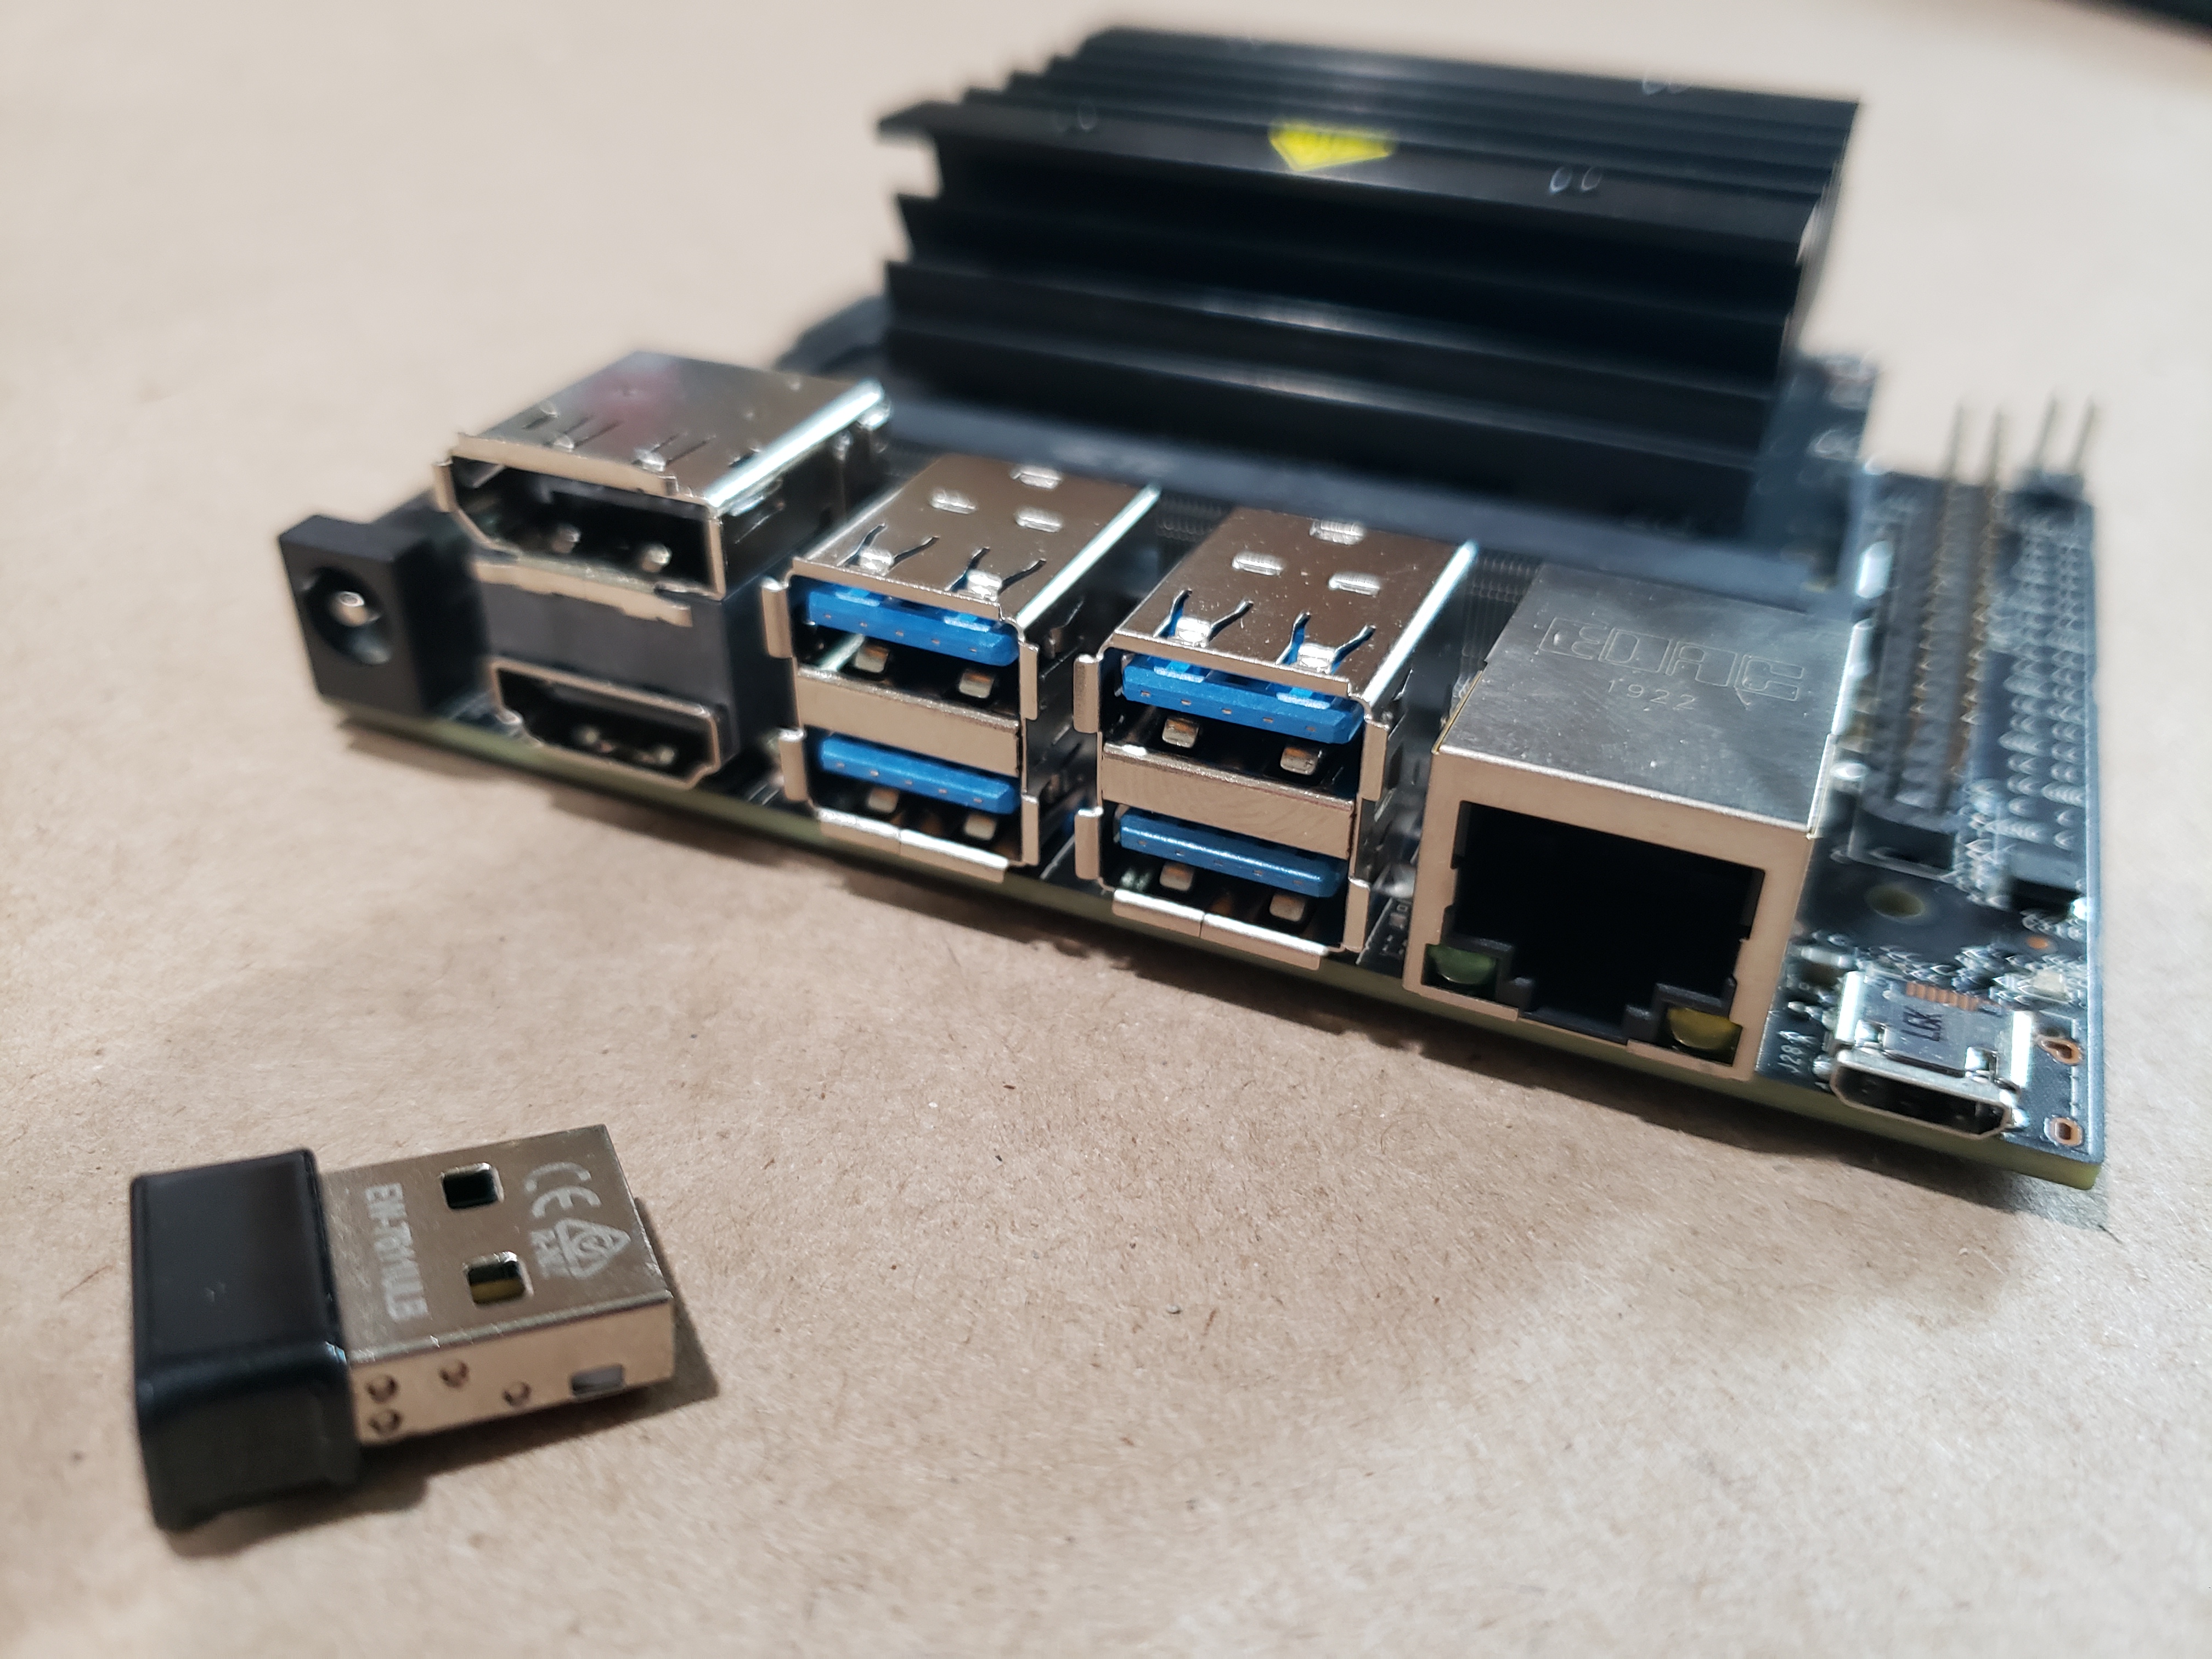
Unpackage the adapter from its box and insert it into one of the four USB 2.0 ports on your NVIDIA Jetson Nano Developer kit. Your preference as to which port is up to you, but we recommend one of the bottom ports here as you will probably never remove this adapter and it will not block visibility or access to other USB ports in the future.
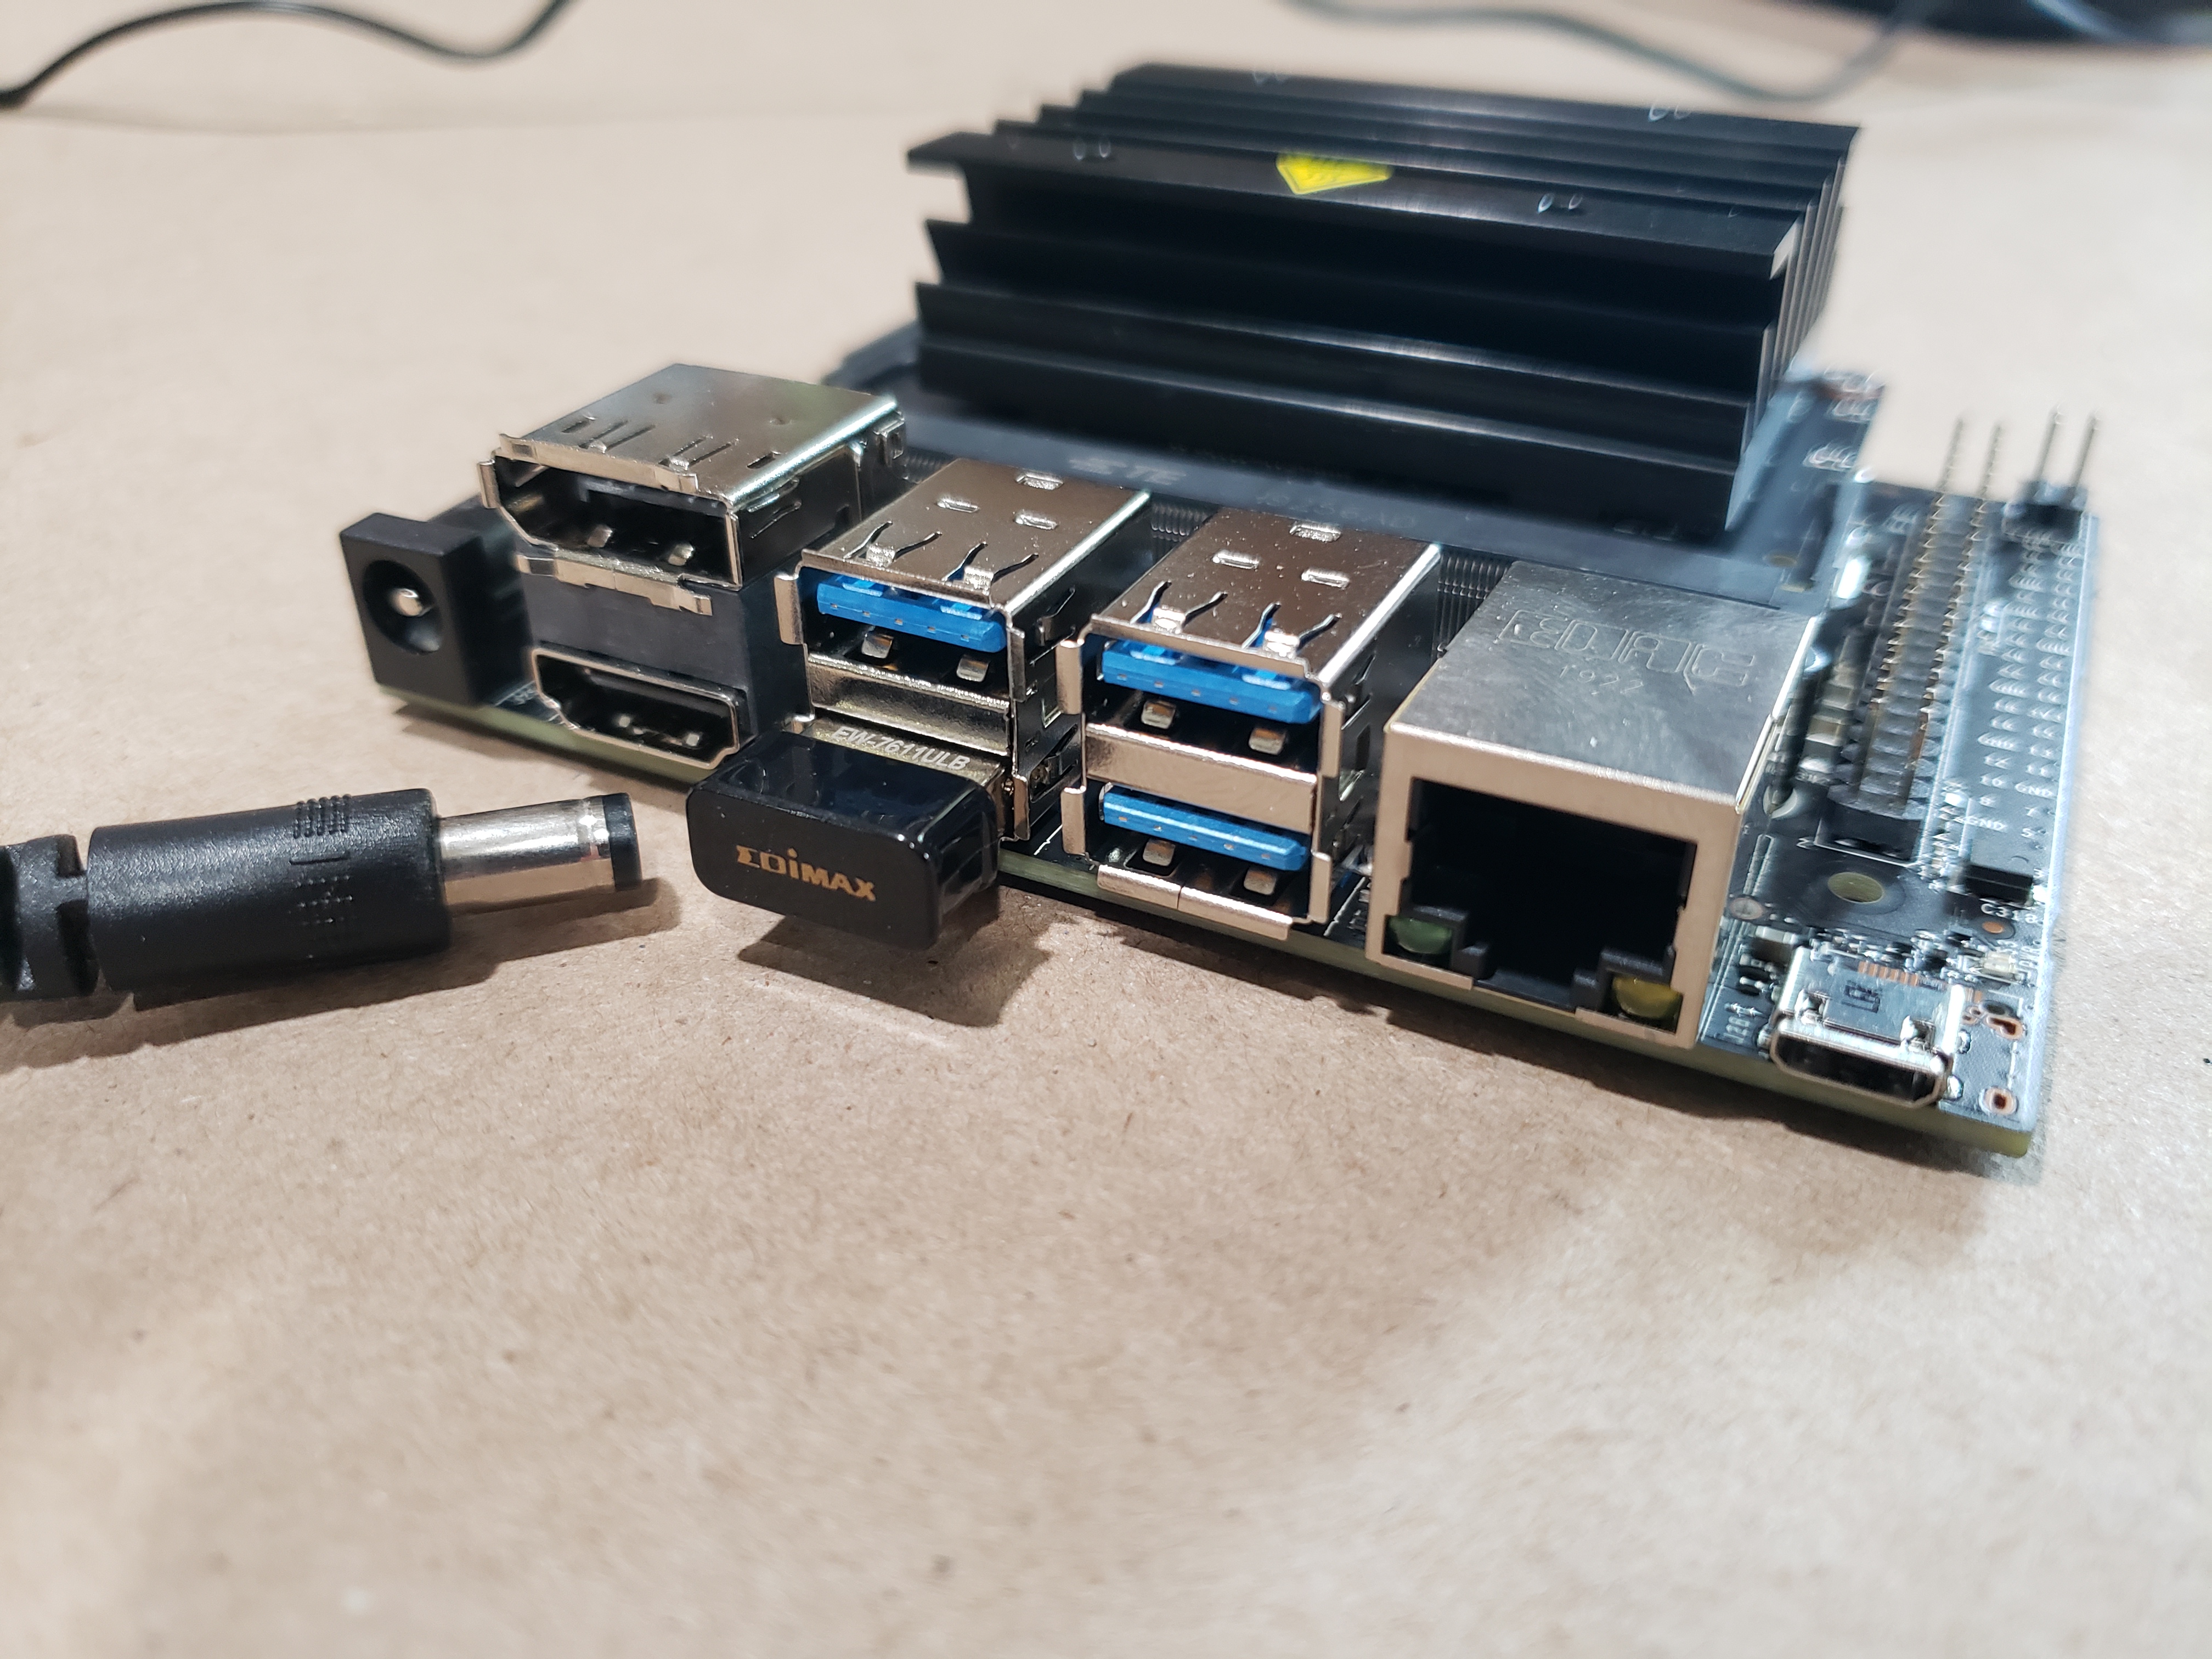
Next, connect your Jetson to an open port on your router with your Ethernet cable. Now that everything is connected, you can power the board using the 5V 4Amp barrel jack power supply included with the DLI Course Kit.
The driver installation and setup for the Edimax N150 is pretty straightforward, but it does require some housekeeping before we can download and install it. If your Operating System is already up to date, go ahead and skip to "Driver Installation".
We will need to update and upgrade the Linux OS that is on the board before doing anything else and that is where the hardwired Ethernet connection we established in the previous section comes into play.
There are two ways to access your Jetson Nano once it is connected to your network via Ethernet:
Keyboard, Mouse and Monitor - Though clunky it is probably the easiest way to work with your Jetson Nano outside their Jupyter Notebooks USB access.
SSH into your Nano - Find your Nano on your network and SSH into its IP address. For more information on how to do this on a Jetson Nano please see this tutorial from jetsonhacks.com here.
If you are using the DLI Course image for the Jetson Nano the username and password will both be: dlinano
Once you have established connection and are working on your Jetson Nano you will need to update your and upgrade your OS.
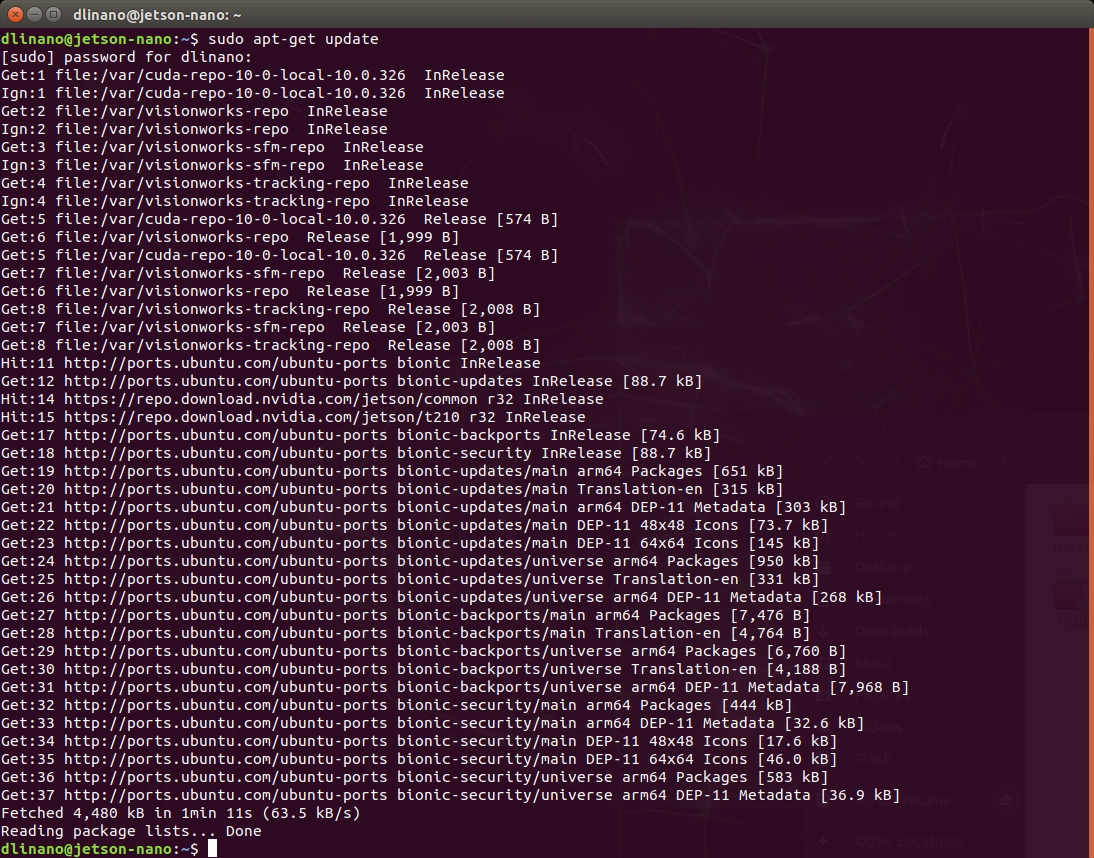
Open a terminal window and type the following: sudo apt-get update. The terminal should prompt you for your password. Type in: dlinano if you are using the DLI course image and hit [Enter] (If you have changed your password or your image uses a different password, enter that instead). This will update all of the updated package information for the version of Ubuntu running on the Jetson Nano. Your terminal should print out something similar to the screenshot below.
Once the command line prompt is returned to you it is now time to upgrade your system. This will take a significant amount of time if this is the first time running this command. The OS will download all of the updated packages and install them for you, essentially getting everything up to date with where your image “should be”. To upgrade your system type the following: sudo apt-get upgrade. The prompt will again ask for your password and will also ask for permission to install all of the packages. Type y and hit [Enter].
Now you get to wait and watch the install process fly by on your screen. Or, play a game, respond to email or eat lunch as this will take some time.
Once your Jetson Nano has completed its upgrade (assuming you did not receive any errors during the process), reboot your Nano by typing the following: sudo reboot now [Enter].
Your Nano will reboot itself. If you are using SSH you will need to reestablish a connection with the Nano (The IP address should still be the same)
With your operating system up to date and after your NVIDIA Jetson Nano has rebooted, it is time to download and install the drivers for the Edimax N150 WiFi adapter. We will cover how to do that in detail in this section.
You can download the appropriate drivers by opening a terminal and entering the following command:
git clone https://github.com/lwfinger/rtl8723bu.git [Enter]
Once the download is complete you can navigate into the drivers directory with the following command:
cd rtl8723bu and then [Enter]
You are now in the the directory (folder) to start the install process for the drivers!
There are a couple of methods to install these drivers on a single board computer or really any other Linux computer. You can check out the README file of the GitHub repository to compile and install them from scratch, but we are going to install them through Dynamic Kernel Module Support (DKMS). These instructions can be found at the bottom of the README for the drivers, but we will reiterate them here.
Assuming you are still in the driver directory named “rtl8723bu” type the following command:
source dkms.conf [Enter]
Once you get the command prompt back (which should almost be instantaneous) type the following command to create a working project directory:
sudo mkdir /usr/src/$PACKAGE_NAME-$PACKAGE_VERSION [Enter]
With the directory created, type the following to move a number of files to your working project directory:
sudo cp -r core hal include os_dep platform dkms.conf Makefile rtl8723b_fw.bin /usr/src/$PACKAGE_NAME-$PACKAGE_VERSION [Enter]
We finally add those files to DKMS with by executing the following command:
sudo dkms add $PACKAGE_NAME/$PACKAGE_VERSION [Enter]
Now that everything is ready and in its place we can finally install the drivers by typing the following command:
sudo dkms autoinstall $PACKAGE_NAME/$PACKAGE_VERSION [Enter]
DKMS will take a number of actions to install the drivers including cleaning up after itself and deleting unnecessary files and directories. Once the DKMS completes the installation you should get a positive confirmation of the installation!
With the installation complete it is a good idea to reboot your Nvidia Jetson Nano with this command:
sudo reboot now [Enter]
Upon reboot of your system, you should now have WiFi connection available to you! Open a command prompt to verify a succefful driver installation by checking if you have a wireless network device installed. Open a terminal and type the following command:
ifconfig wlan0 [Enter]
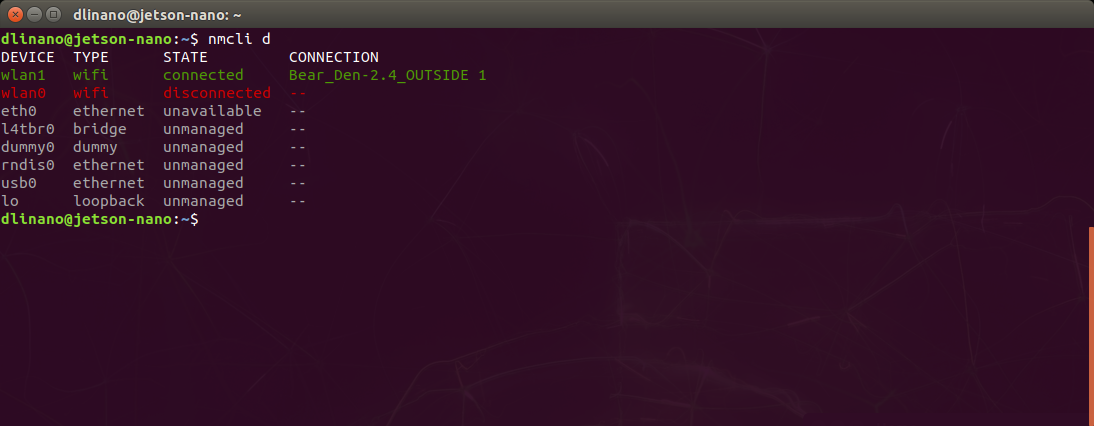
You should get a response similar to the screen capture below. Notice that we have two wlan connections... wlan0 and wlan1 with only one connected and an IP address assigned to it.

To set up your connection from the command prompt you can use the NetworkManager tool from Ubuntu as outlined here. First, we will list all of our possible network connections by typing the following command:
nmcli d [Enter]
You should get a connection listing similar to something like this screen capture:
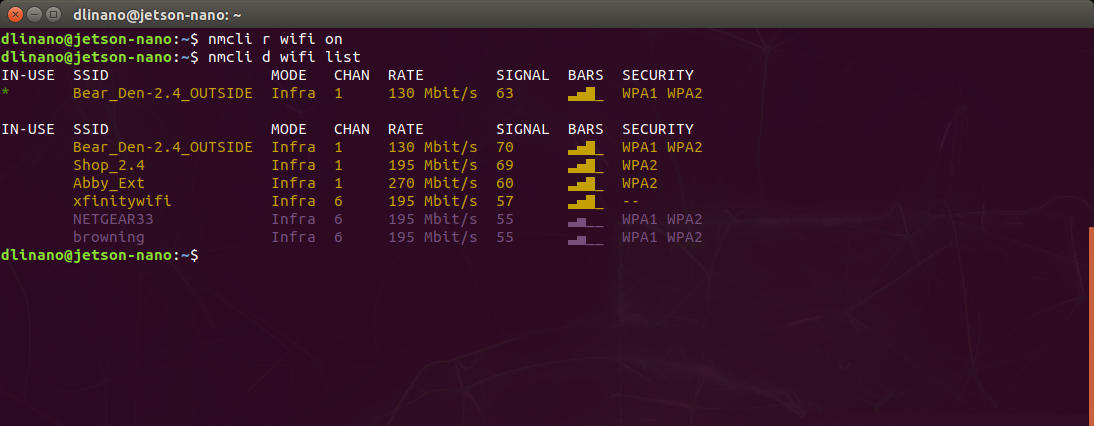
Next we will make sure that the WiFi module is turned on by typing the following command:
nmcli r wifi on[Enter]
Now we can scan and list off all visible WiFi networks available to us by typing the following command:
nmcli d wifi list [Enter]
You should get a list of possible networks available to you including current status in terms of signal strength, data rate, channel, security, etc.
Make sure that you see the wireless network that you are going to connect to.
To connect to a given network make sure you have its SSID and password ready. Both are case sensitive! Type the following command with [SSID] being your SSID and [PASSWORD] being the password for that network:
nmcli d wifi connect [SSID] password [PASSWORD] [Enter]
If all goes according to plan, you should get a connection confirmation!
With your WiFi adapter connected to the internet you can now test it! Obviously in desktop mode with a keyboard and mouse you can open your browser and navigate to your favorite website.
If you are using SSH and able to connect SSH over WiFi and your laptop, you have also scored a win in terms of the WiFi adapter and its connection. Either way you can also test your Nano's connection and ability to access the internet with a simple ping command pointed at Google. Run the following command from the terminal on your Nano:
ping 8.8.8.8 [Enter]
You should get a response every few seconds reporting the data that comes back from the ping. You should be looking for packets both sent and received. If received packets is returned as 0, you do not have a connection established to the internet and should repeat the process of connecting above.
If you experience intermittent WiFi connection through this adapter open a terminal window and enter the following command to turn Power Saving Mode off:
sudo iw dev wlan0 set power_save off [Enter]
You may also have a second wireless device present when using the Edimax WiFi adapter. This will show up as wlan1. Repeat the command for wlan1 as well if the issue continues:
sudo iw dev wlan1 set power_save off[Enter]
Then reboot your Jetson Nano:
sudo reboot now [Enter]
If you try this and a number of the Troubleshooting methods, try burning our JetBot image to your SD Card. This image already has the drivers for the USB WiFi adapter installed and should work out of the box. For detailed instructions on how to install the JetBot image, please read through the Troubleshooting steps in this section of our JetBot Assembly Guide.
Need help?
If your Edimax N150 WiFi Adapter (or other SparkFun product) is not working as you expected or you need technical information, head on over to the SparkFun Technical Assistance page. Otherwise, if you have already tried the troubleshooting tips above, the SparkFun Forums are a great place to find and ask for help. (If this is your first visit, you'll need to create a Forum Account to post questions.)
Now that your Jetson Nano is connected wirelessly to your network, it's time to incorporate it into your project!
If you are looking for a little more power and bandwidth in terms of WiFi for your Jetson Nano check out the Intel dual band wireless card here.
For more information, check out the resources below:
Get a background in how WiFi works as well as the hardware available to help you connect your project wirelessly.
Take me there!
learn.sparkfun.com | CC BY-SA 3.0 | SparkFun Electronics | Niwot, Colorado