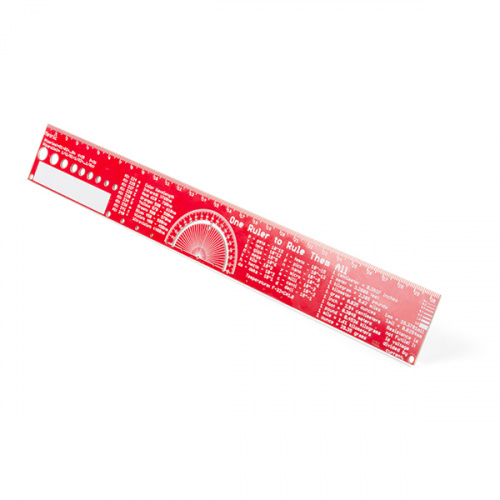
How to Use a Ruler
 M-Short
 Introduction
I know what you are asking? Why is there a guide for a ruler? It's a ruler, I've been using one of these since 3rd grade. That is true, but really I wanted a little extra room to talk about some of the features of the ruler, what they are, and why they are there. A while ago, we got some nice swag from our friends at Digi-Key, a PCB ruler with a lot of information on it. We realized a few things. First, PCBs make good rulers, they are sturdy while still being a bit bendable, and they are designed with precision. The precision of PCB traces is much more accurate than you would need in a ruler. Second I realized that usually when I need a ruler I'm not worried about the size of a SOIC package, there has to be information I would rather have on my ruler. So, I started playing in Eagle to design one with some of the information I tend to look up the most.
The Front
Let's start with the front. Nice and big you'll see the name, "One Ruler to Rule Them All". Other than the puns and geek reference, this is just designed to let you know this is the best ruler ever. Quite a few revisions went into this, as well as asking everyone I could find what they would like on a ruler.

Metric
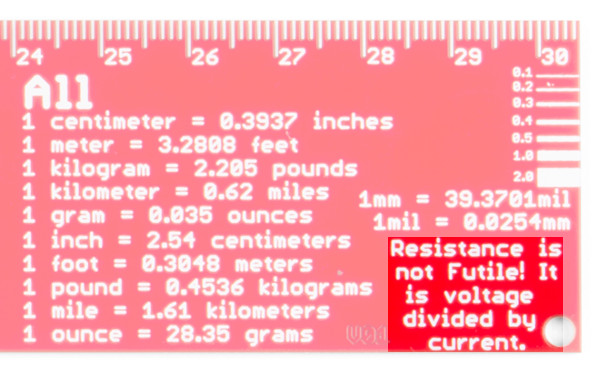
Let's go section by section starting on the left side. You'll see that this side is labeled "Metric", all the information on this side is in metric, starting with the actual ruler markings. The ruler is 12" long, that makes it 30.48cm long, so you'll see markings go just past the 30 mark.
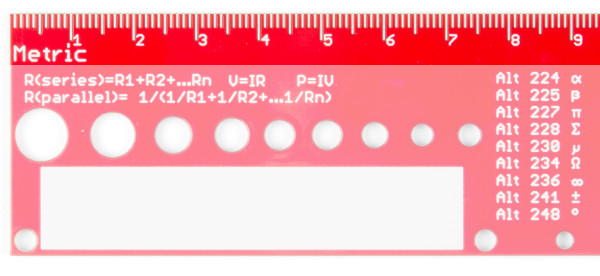
Resistor, Ohm's, and Power Equations
Under the metric label, you'll see a few equations. Forget the equation for resistors in series or parallel (who doesn't)? Well, here you go. You'll also find Ohm's Law (V=RI) and the definition of Power (P=VI).

Label
On the bottom left you'll see a big white box. That's it, it is just a box. But this is a good place to write your name so people won't steal your ruler (or more likely will be reminded of whose ruler they stole). You can also use this to add any information you might want that isn't on the ruler (not likely since we put all known knowledge on this ruler).

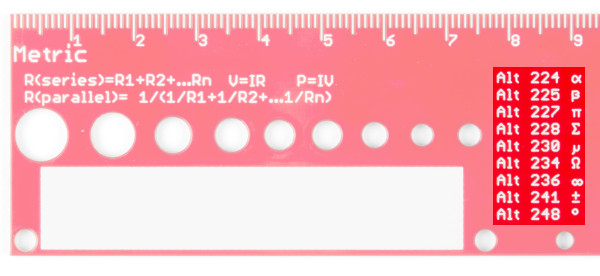
Keyboard Shortcuts
Next, you'll see the word Alt repeated over and over with numbers and weird markings. Well, that's because I never remember how to correctly type 330Ω resistor, and it can be easier to write out 3.1415926535897... than to remember how to type π. Hold down the alt key and type the number you see, and through magic forces, you can type an ∞ number of characters (see what I did there...).
Light Spectrum
Next, we'll get to the color wavelengths. I've seen too many LED datasheets that just list a wavelength. Sometimes you are very particular about which shade of green. Sometimes you just want to know if the LED is green or red. This handy chart will let you know.
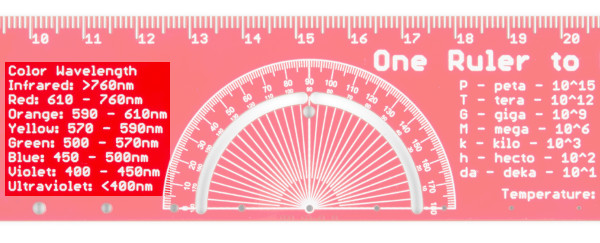
Protractor
Next is the fancy protractor. If you don't know what a protractor is I recommend finding the nearest 3rd grader and asking them. You could ask a math teacher, but you'd probably fall asleep after about 3 minutes (like you did in 3rd grade which is why you are asking what a protractor is). This is one change we had to keep making on various prototypes, the arc that is cut out is 2mm, anything smaller was too small to get a pen in, it may still be hard to get some pens in, but a pencil (especially a mechanical pencil) should work just fine. You'll also notice a small hole at the 90deg mark. This is also the exact center of the ruler which may or may not come in handy one day.
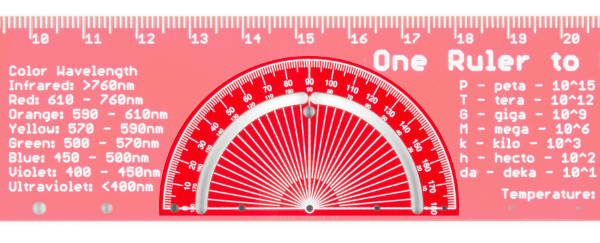
Metric Prefixes
Next, we get to the main reason I made a ruler. I can never remember all the metric prefixes, so here they are in all their glory. From 10-15 to 1015 (in multiples of 3). So next time you are trying to remember which is smaller pico or nano remember your fancy ruler. Note: The ruler will not measure picometers or nanometers, it will just help you convert.
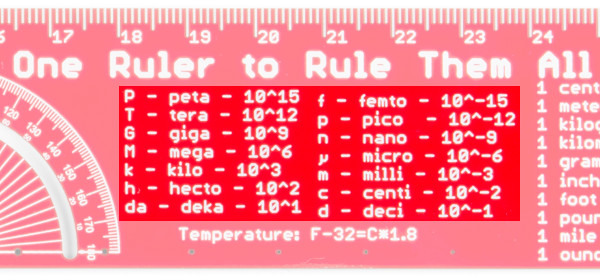
Metric to Imperial Conversions
Next, we find the other reason for the ruler. Metric to Imperial conversions. While the rest of the world may not care how many feet are in a meter, those of us in the US (and don't forget Liberia and Myanmar) on occasion need to translate from stinky feet to what the rest of the world is talking about.
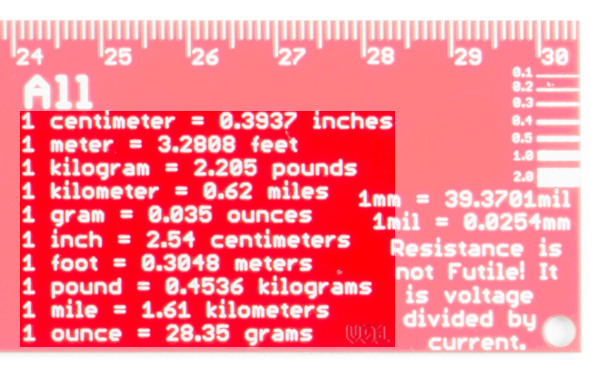
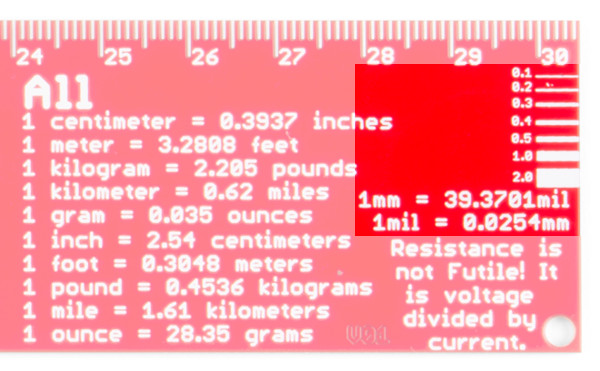
PCB Trace Widths
On the very right, you'll see markings, to help you determine what a 0.1mm line looks like vs a 2.0mm line. This is actually one of those things that are useful when designing PCBs, knowing what the width of your traces actually looks like can be helpful. We've also added a mm to mil conversion.
Ohm's Law
Last but not least, is Ohm's Law again (this time reminding us all to fight back against the conformity of the Borg). Whew, that was a lot of stuff on a ruler, but wait, that's only the front...
The Back
On to the back side of the ruler.

Imperial
Starting on the left again, we see this side is labeled "Inches", you may also notice that the markings for the ruler are not uniform. The first 2 inches are divided into 1/2" and then 1/4", 1/8", 1/16", and 1/32" since sometimes these are important. The other 10 inches are divided by into 0.5", then 0.1" and finally 0.05".

PCB Trace Widths
Under the inch designation you'll also see the definition of mil (1/1000 inch) and then more line width markings ranging from 0.005 to 0.1 inches (5mil to 100mil).
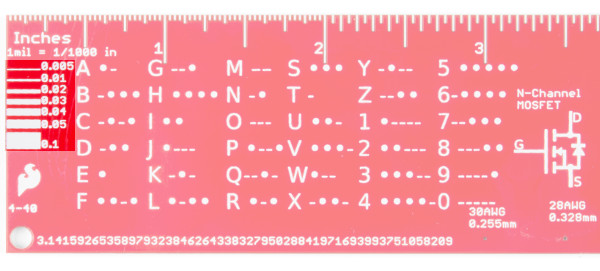
Morse Code
Next, you will see a Morse code cheat sheet. How often is it useful? Who knows, but next time someone starts banging out Morse code on your door in the middle of the night, you'll be thankful you have your ruler.
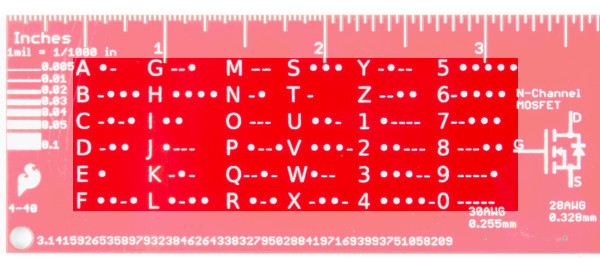
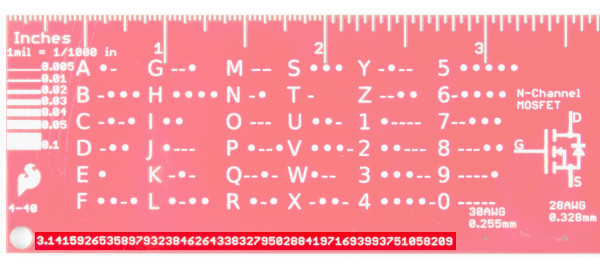
Digits of Pi
Near the bottom, you'll see π expanded out to more digits than you will need for any project and more than you will need to impress your family and friends with your knowledge of π (actually forget about memorizing π and learn to bake a pie, they'll be much more appreciative). If you are wondering how to type out the π symbol check out the front of the ruler.
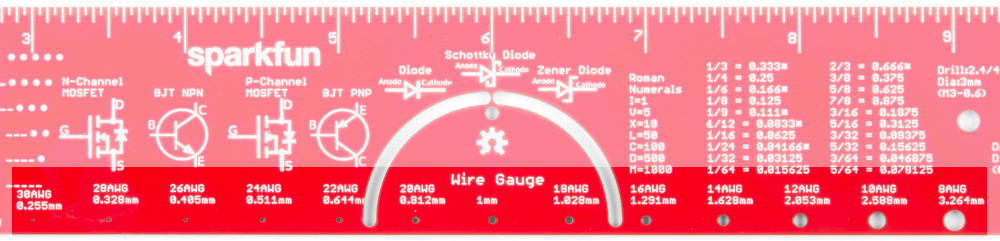
Transistor and Diode Symbols
Next, are some transistor diagrams. It seems no one I talked to ever seemed to remember the configuration for transistors, so they are here as well.
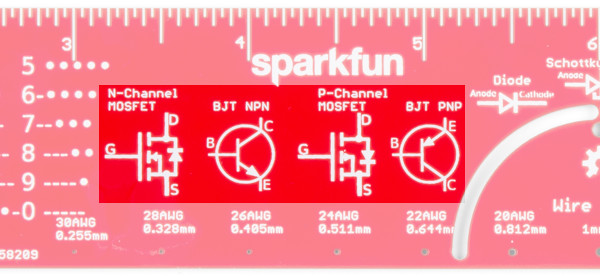
Just to the right of them, above the protractor, you'll find drawings of a few diodes as well.
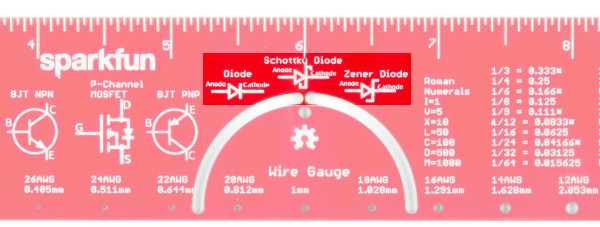
Wire Gauge
Along the bottom, you'll find some wire gauges as well as their corresponding size (in mm). I did check these out on a few and the wire will fit in pretty snuggly in the correct hole. There is also a 1mm hole in the middle even though it doesn't correspond to any wire size.
Roman Numerals
Next is Roman Numerals. Why are they there? Honestly, I don't know, I figured I needed to put something there and it seemed reasonable. To be honest, the only time I've seen Roman Numerals used in the past 5 years, is for the Superbowl. But, if you ever find yourself back in ancient Rome and have a hard time reading the numbers, your ruler can help (although reading the numbers will probably be the least of your worries).
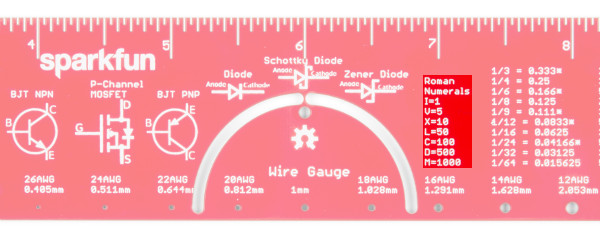
Fraction and Decimal Conversions
On the other hand, the Romans didn't have to deal with changing fractions to decimals. While you all probably know what 1/2 is, who remembers what 1/8 is or worse 5/16. Sometimes you need these numbers, so we've broken out a list of some of the more common value (and added a * for those that are repeating)
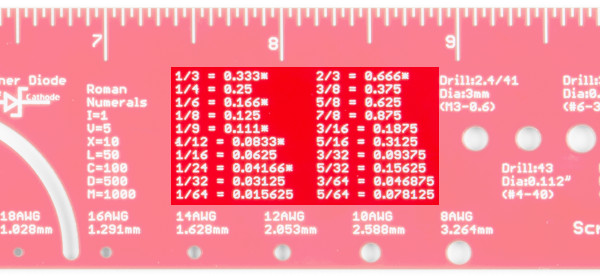
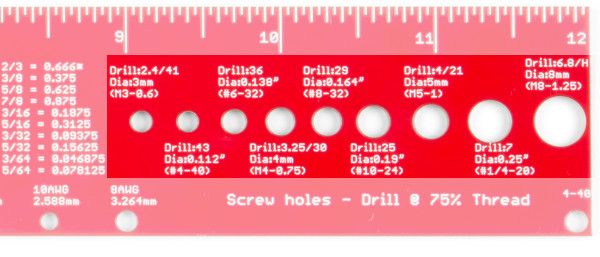
Machine Screw and Drill Sizes
Lastly, is the most confusing part of the ruler. Screw and drill sizes. This is mostly confusing, because of the complexity of the subject, you will find plenty of Tap and Drill Charts online, but this should be a decent summary of some of the more common sizes. With a given screw, the drill size you need will vary based on the material you are drilling into as well as the fit you want. The markings on the ruler give the major diameter of the screw (not the diameter of the hole), the screw name, and the drill bit required for 75% thread which is the size of the hole.
That's about it, if you look you'll also find a few logos and a version number and such, but that is the basics of the SparkFun ruler. Get out draw some straight lines, measure things, and convert lots of things.
Resources and Going Further
For more information, check out the resources below:
Need some inspiration to use the ruler for your next project? Check out some of these tutorials: