Getting Started with the micro:bit
 D___Run___, Ell C
 Introduction
So you bought this thing called a micro:bit...or even better, you've purchased the updated version, the micro:bit v2. But what is it?
The BBC micro:bit is a pocket-sized computer that lets you get creative with digital technology. You can code, customize, and control your micro:bit from anywhere! You can use your micro:bit for all sorts of unique creations, from robots to musical instruments and more.
The micro:bit is a project by the BBC in an effort to bring computer science education and STEM topics to every student in the United Kingdom. It is an open development board that works in sync with other onboard hardware components to get you started down the path of programming hardware.
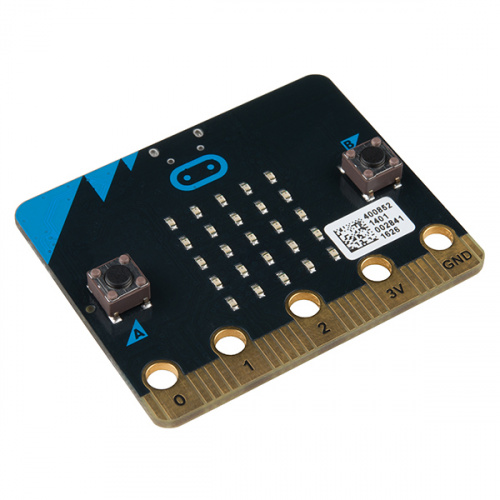
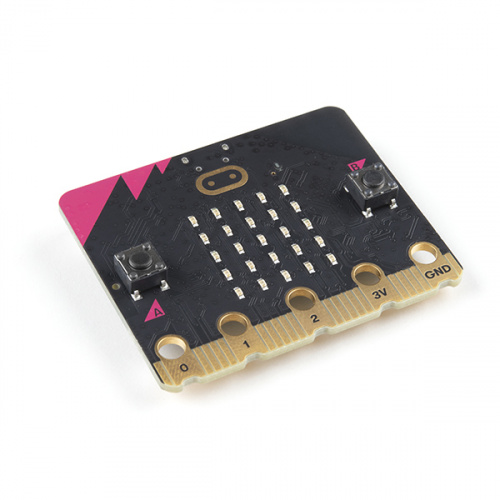
At half the size of a credit card, you will be surprised at the amount of hardware each board is equipped with, including 25 red LED lights that can flash messages. There are two programmable buttons that can be used to control games or pause and skip songs on a playlist. The micro:bit can even detect motion and tell you which direction you’re heading. It can also use Bluetooth Low Energy (BLE) to interact with other devices and the Internet.
The micro:bit features an embedded compass, accelerometer, mobile, and web-based programming capabilities. The micro:bit v2 adds an onboard speaker and MEMS microphone, as well as a touch-sensitive logo. Both boards are compatible with a number of online code editors across a number of different languages. This guide will focus on MakeCode, a block or JavaScript-based environment that was developed by Microsoft.
Required Materials
To follow along with this tutorial, you will only need a micro:bit, and a micro USB cable. Pretty simple!


Suggested Reading
We recommend checking out the tutorials below as well.
Hardware Overview
There are two versions of the BBC micro:bit and both have a lot to offer when it comes to onboard inputs and outputs. In fact, there are so many things packed onto these little boards that you would be hard pressed to really need anything else if you were looking at just exploring the basics of programming and hardware.
Front
On the front of the board there are a number of components that are pretty visible right off the bat!
LED Array
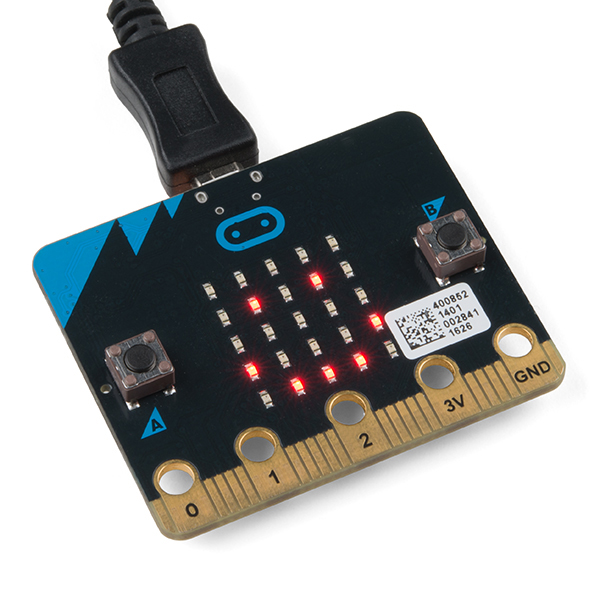
The micro:bit has a 5x5 LED array that you can use as a tiny screen to draw on and display words, numbers and other information.
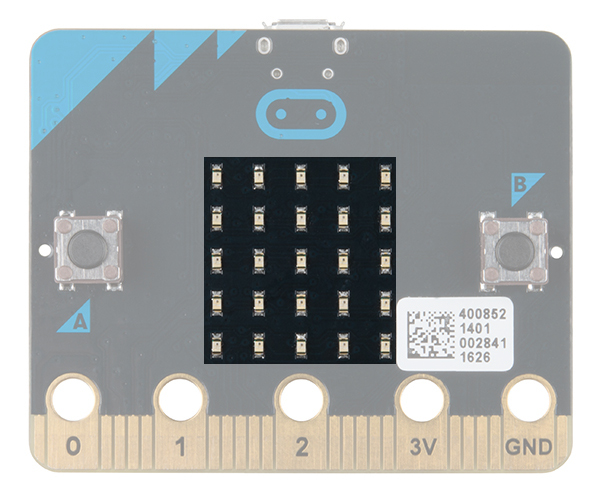 |
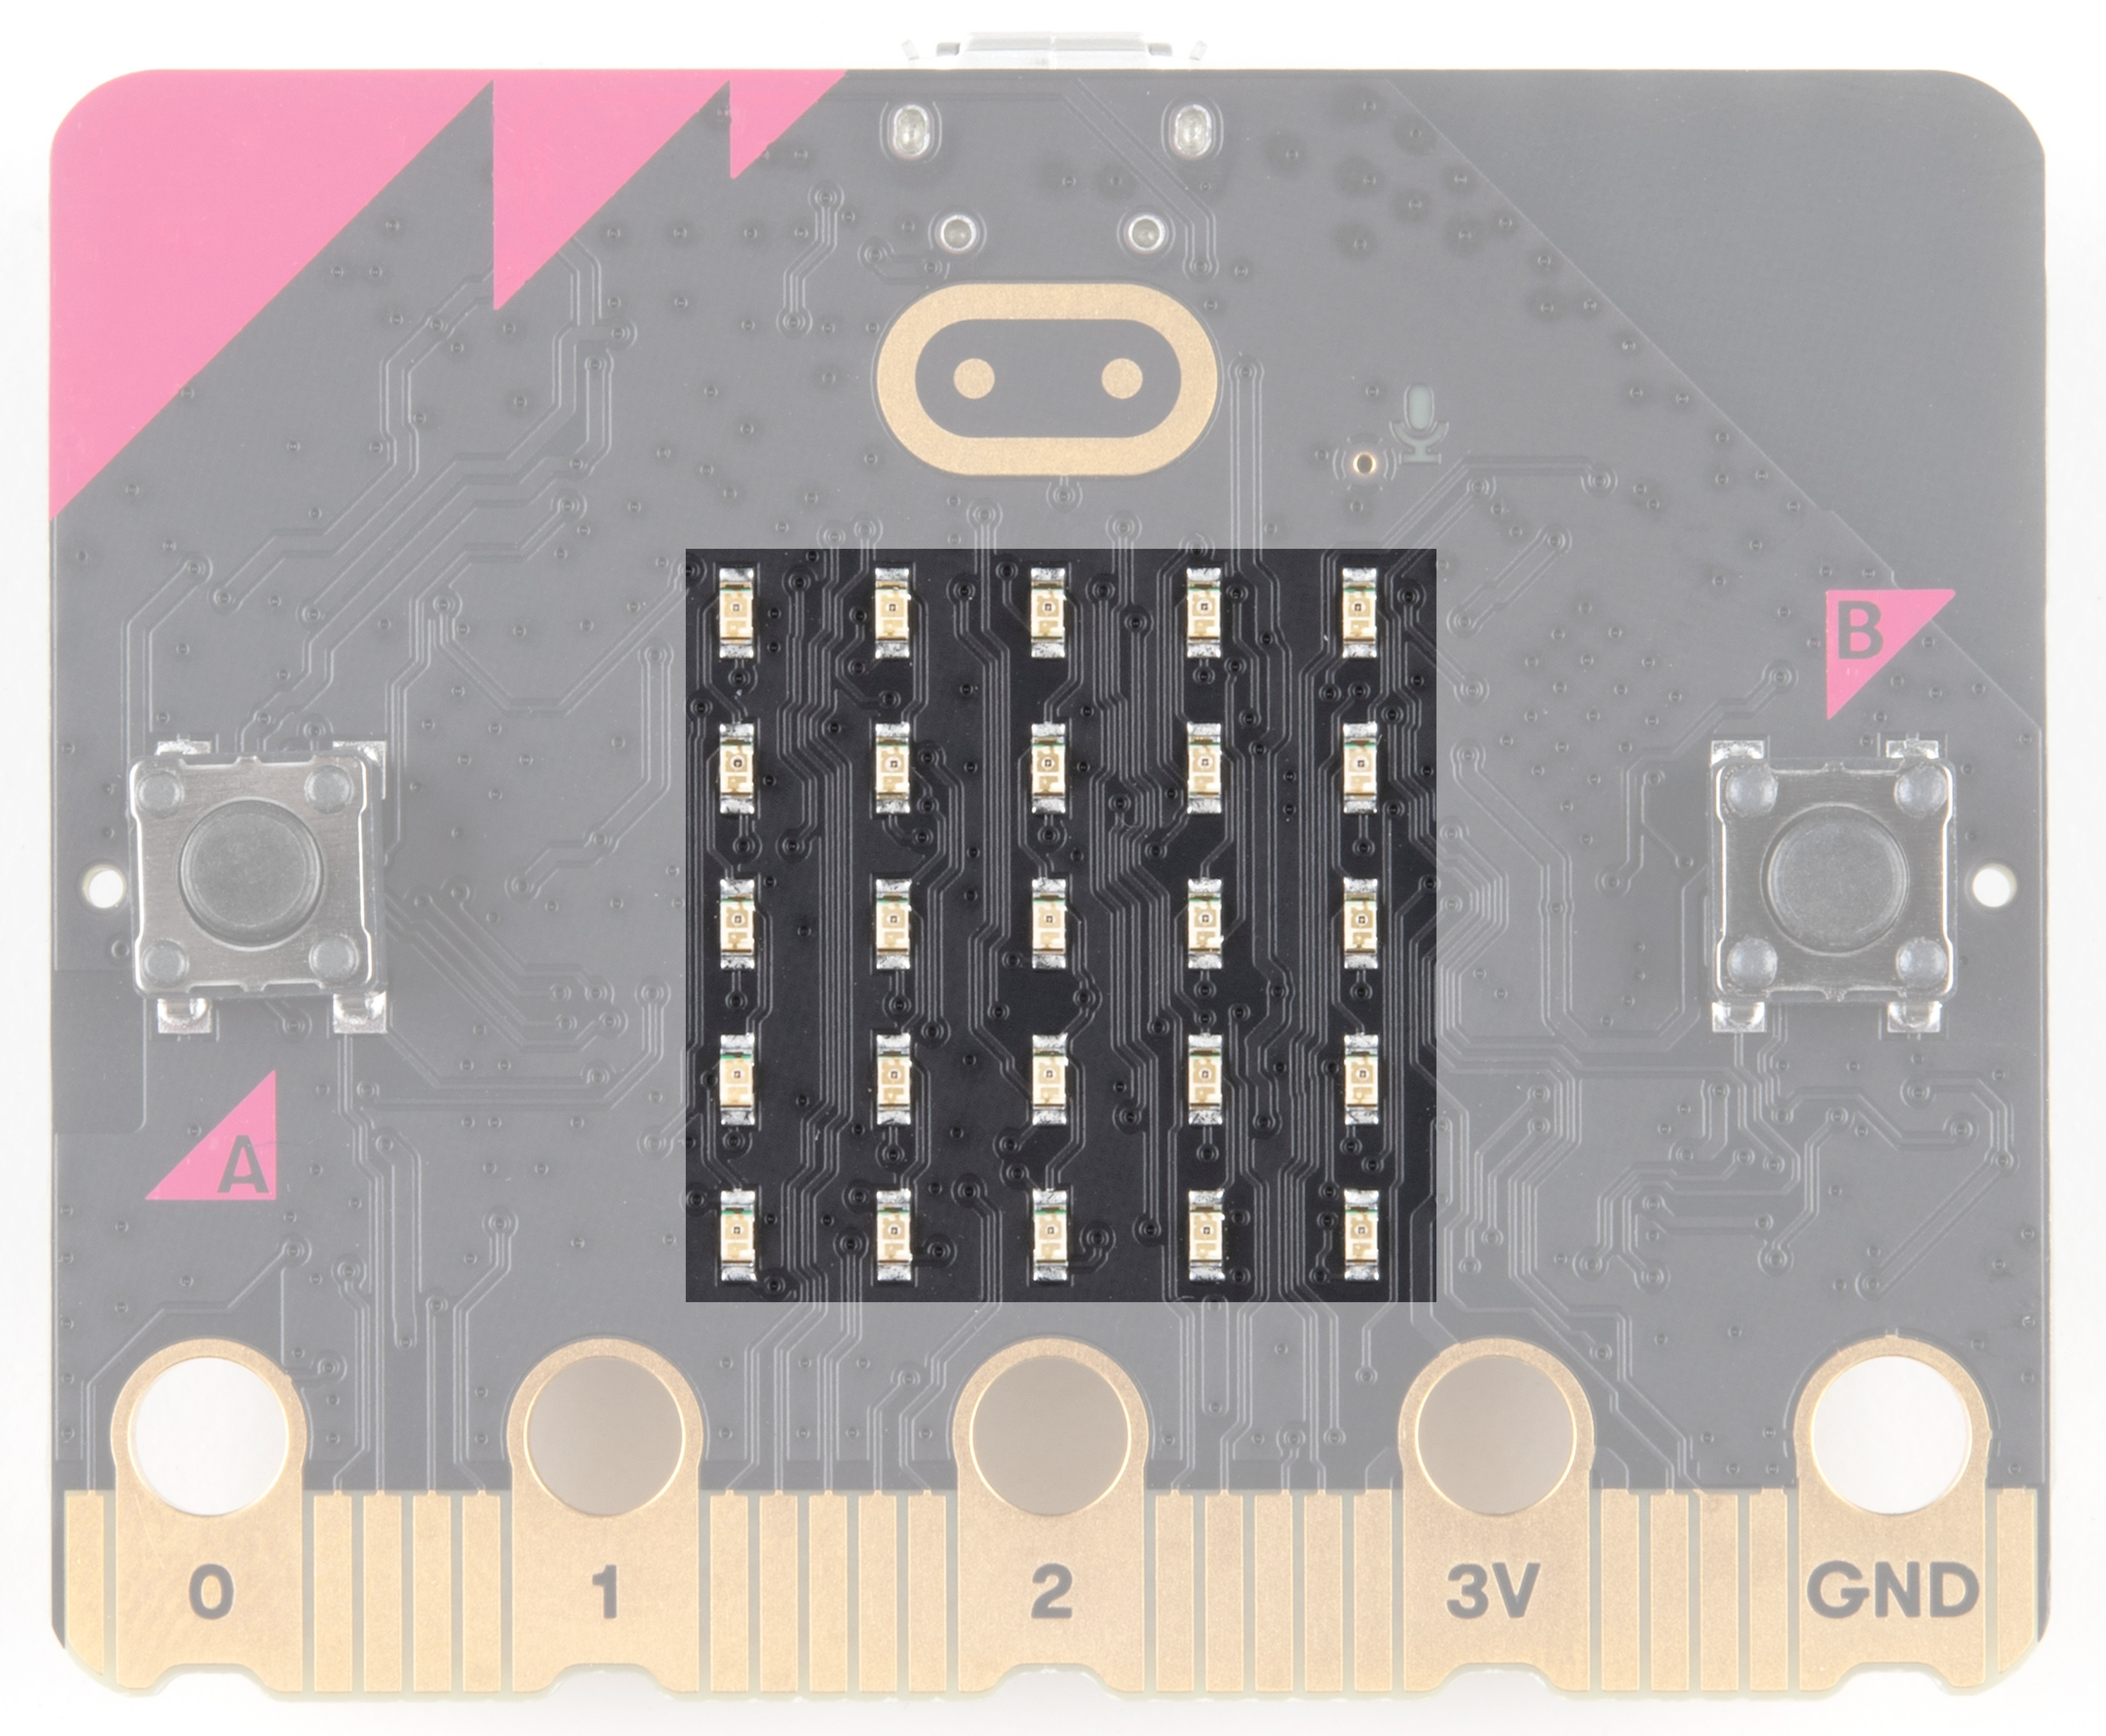 |
| LED Array on micro:bit | LED Array on micro:bit V2 |
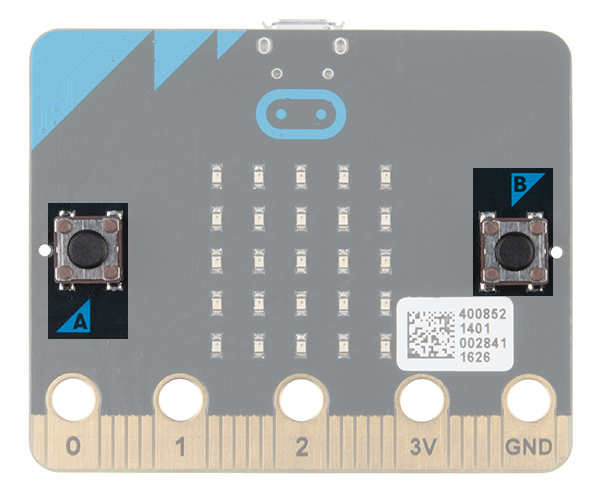
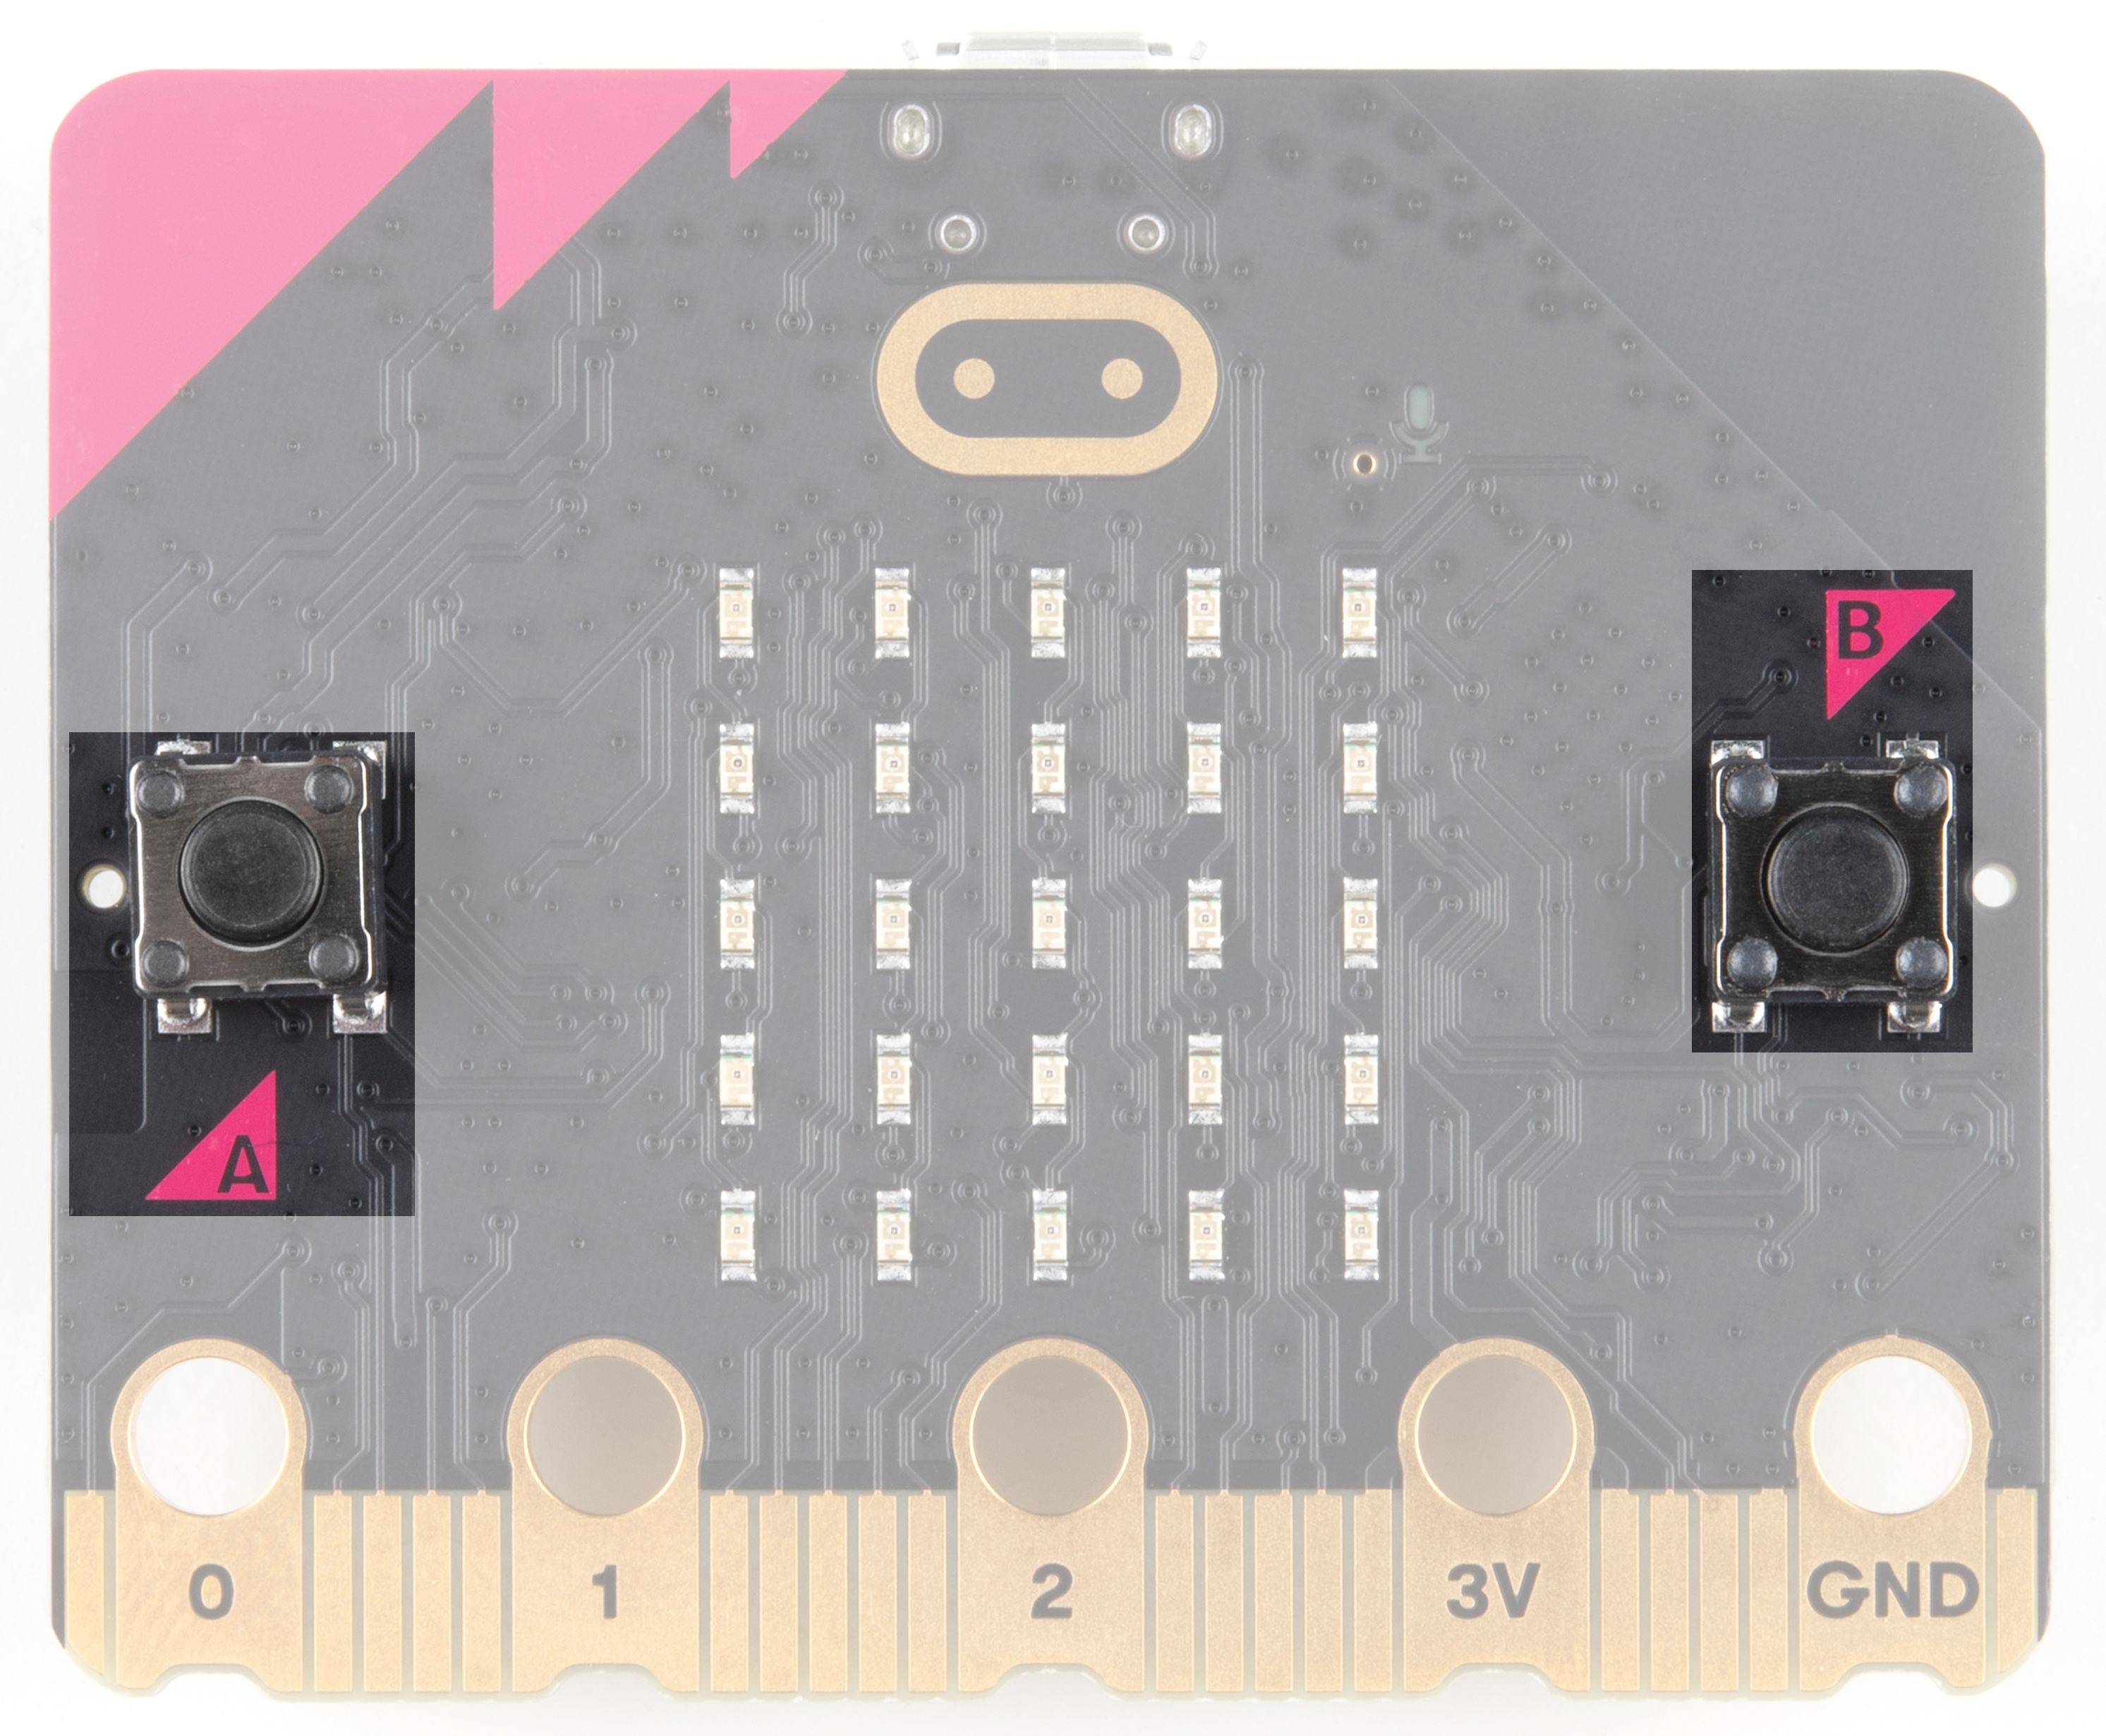
A/B Buttons
Two buttons in all of their clicky glory: A is on the left, B is on the right, and both are prime for controlling a game of your design.
 |
 |
| A/B Buttons on micro:bit | A/B Buttons on micro:bit V2 |
Edge "Pins"
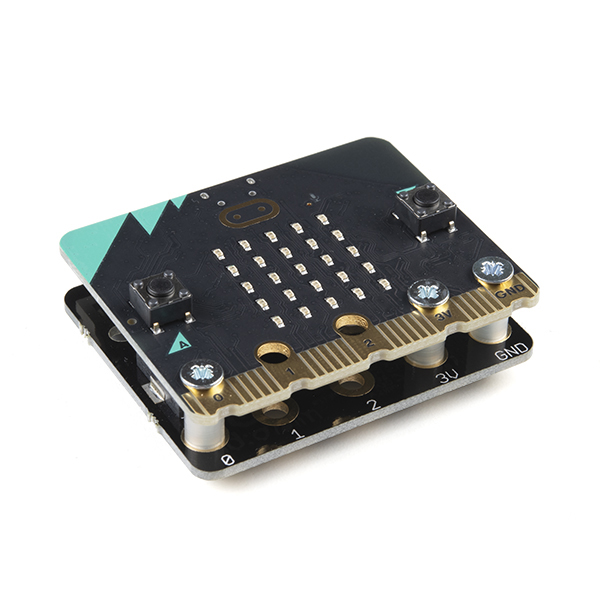
The gold tabs at the bottom of the board are for hooking up external components. The tabs with larger holes can be easily used with alligator clips to prototype things quickly! To access all the pins, you will need a board with an edge connector. For breadboard prototyping, you'll want the micro:bit breakout with headers. In micro:bit v2, you will also notice that they are notched for easier connection with alligator clips.
 |
 |
| Edge Pins on micro:bit | Edge Pins on micro:bit V2 |
 |
 |
Light Sensor
A bit of a hidden gem. The LED array doubles as a light sensor!
|
|
| Light Sensor on micro:bit | Light Sensor on micro:bit V2 |
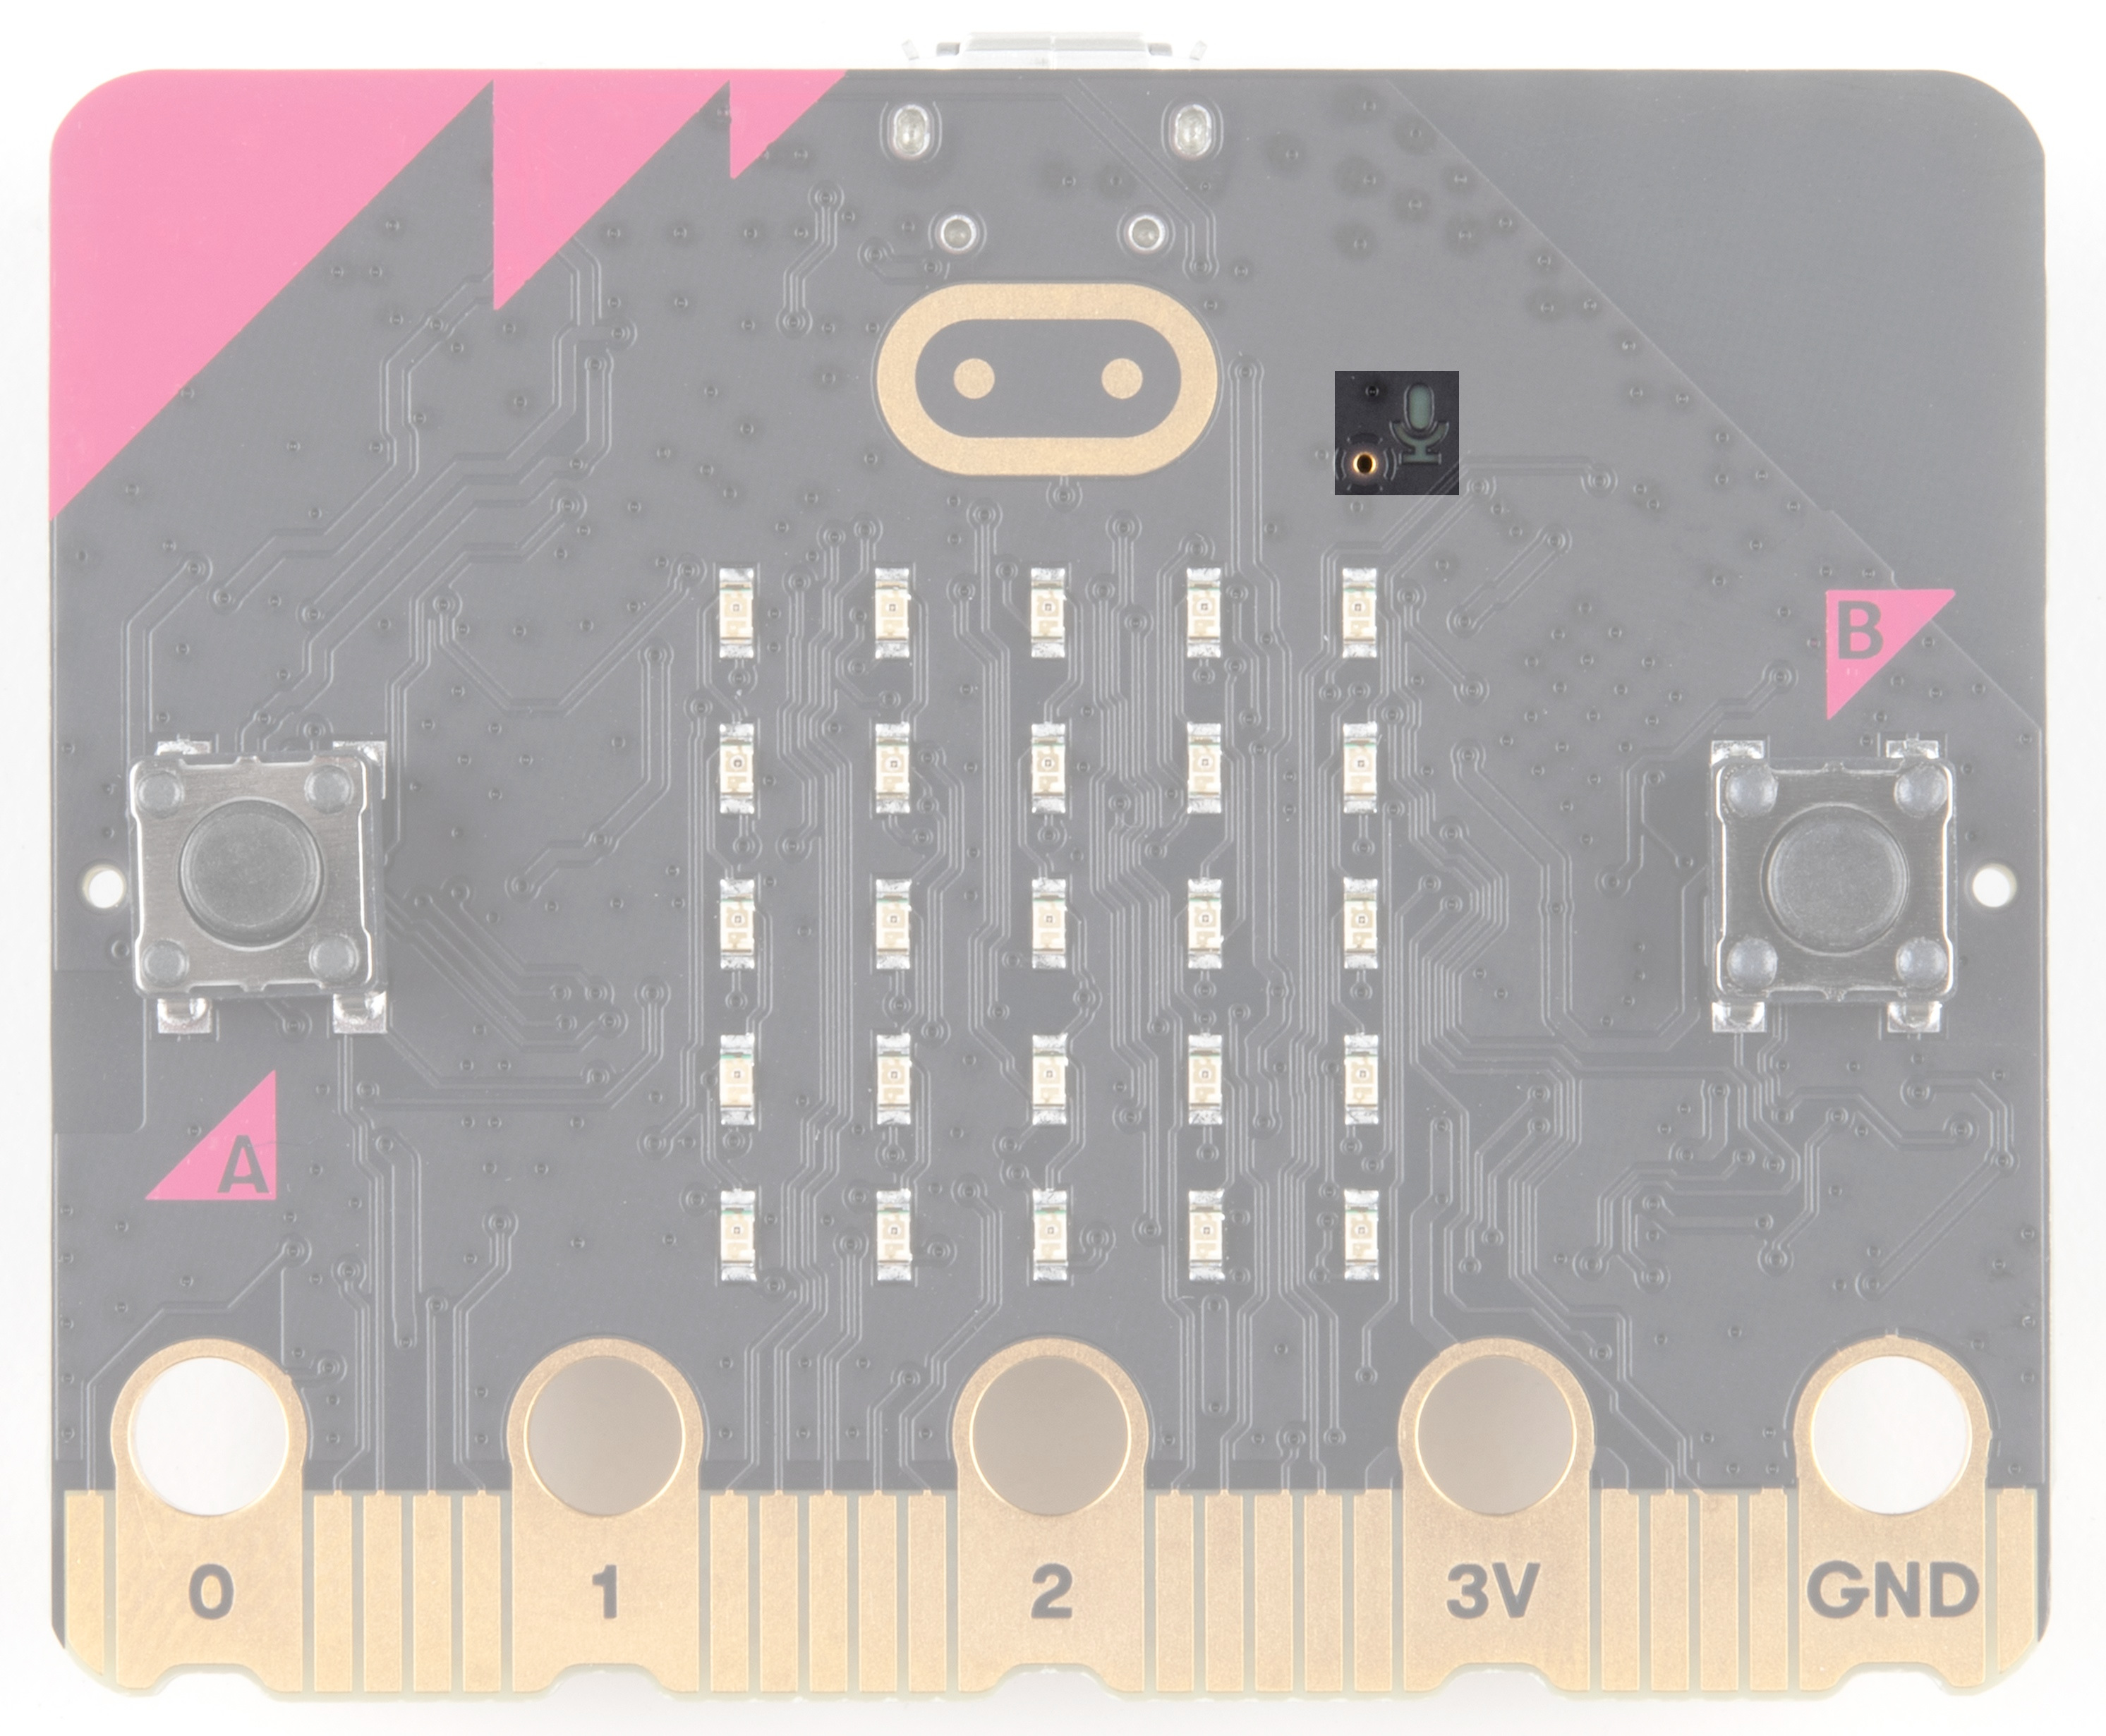
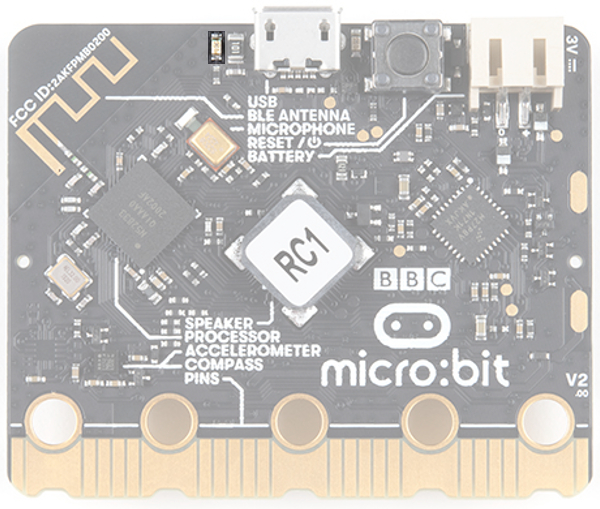
V2 Only - Microphone Input and LED Indicator
V2 Only - Touch Sensitive Logo
The gold logo is a capacitive touch sensor that works a bit like a touch screen on a mobile phone, measuring tiny changes in electricity.

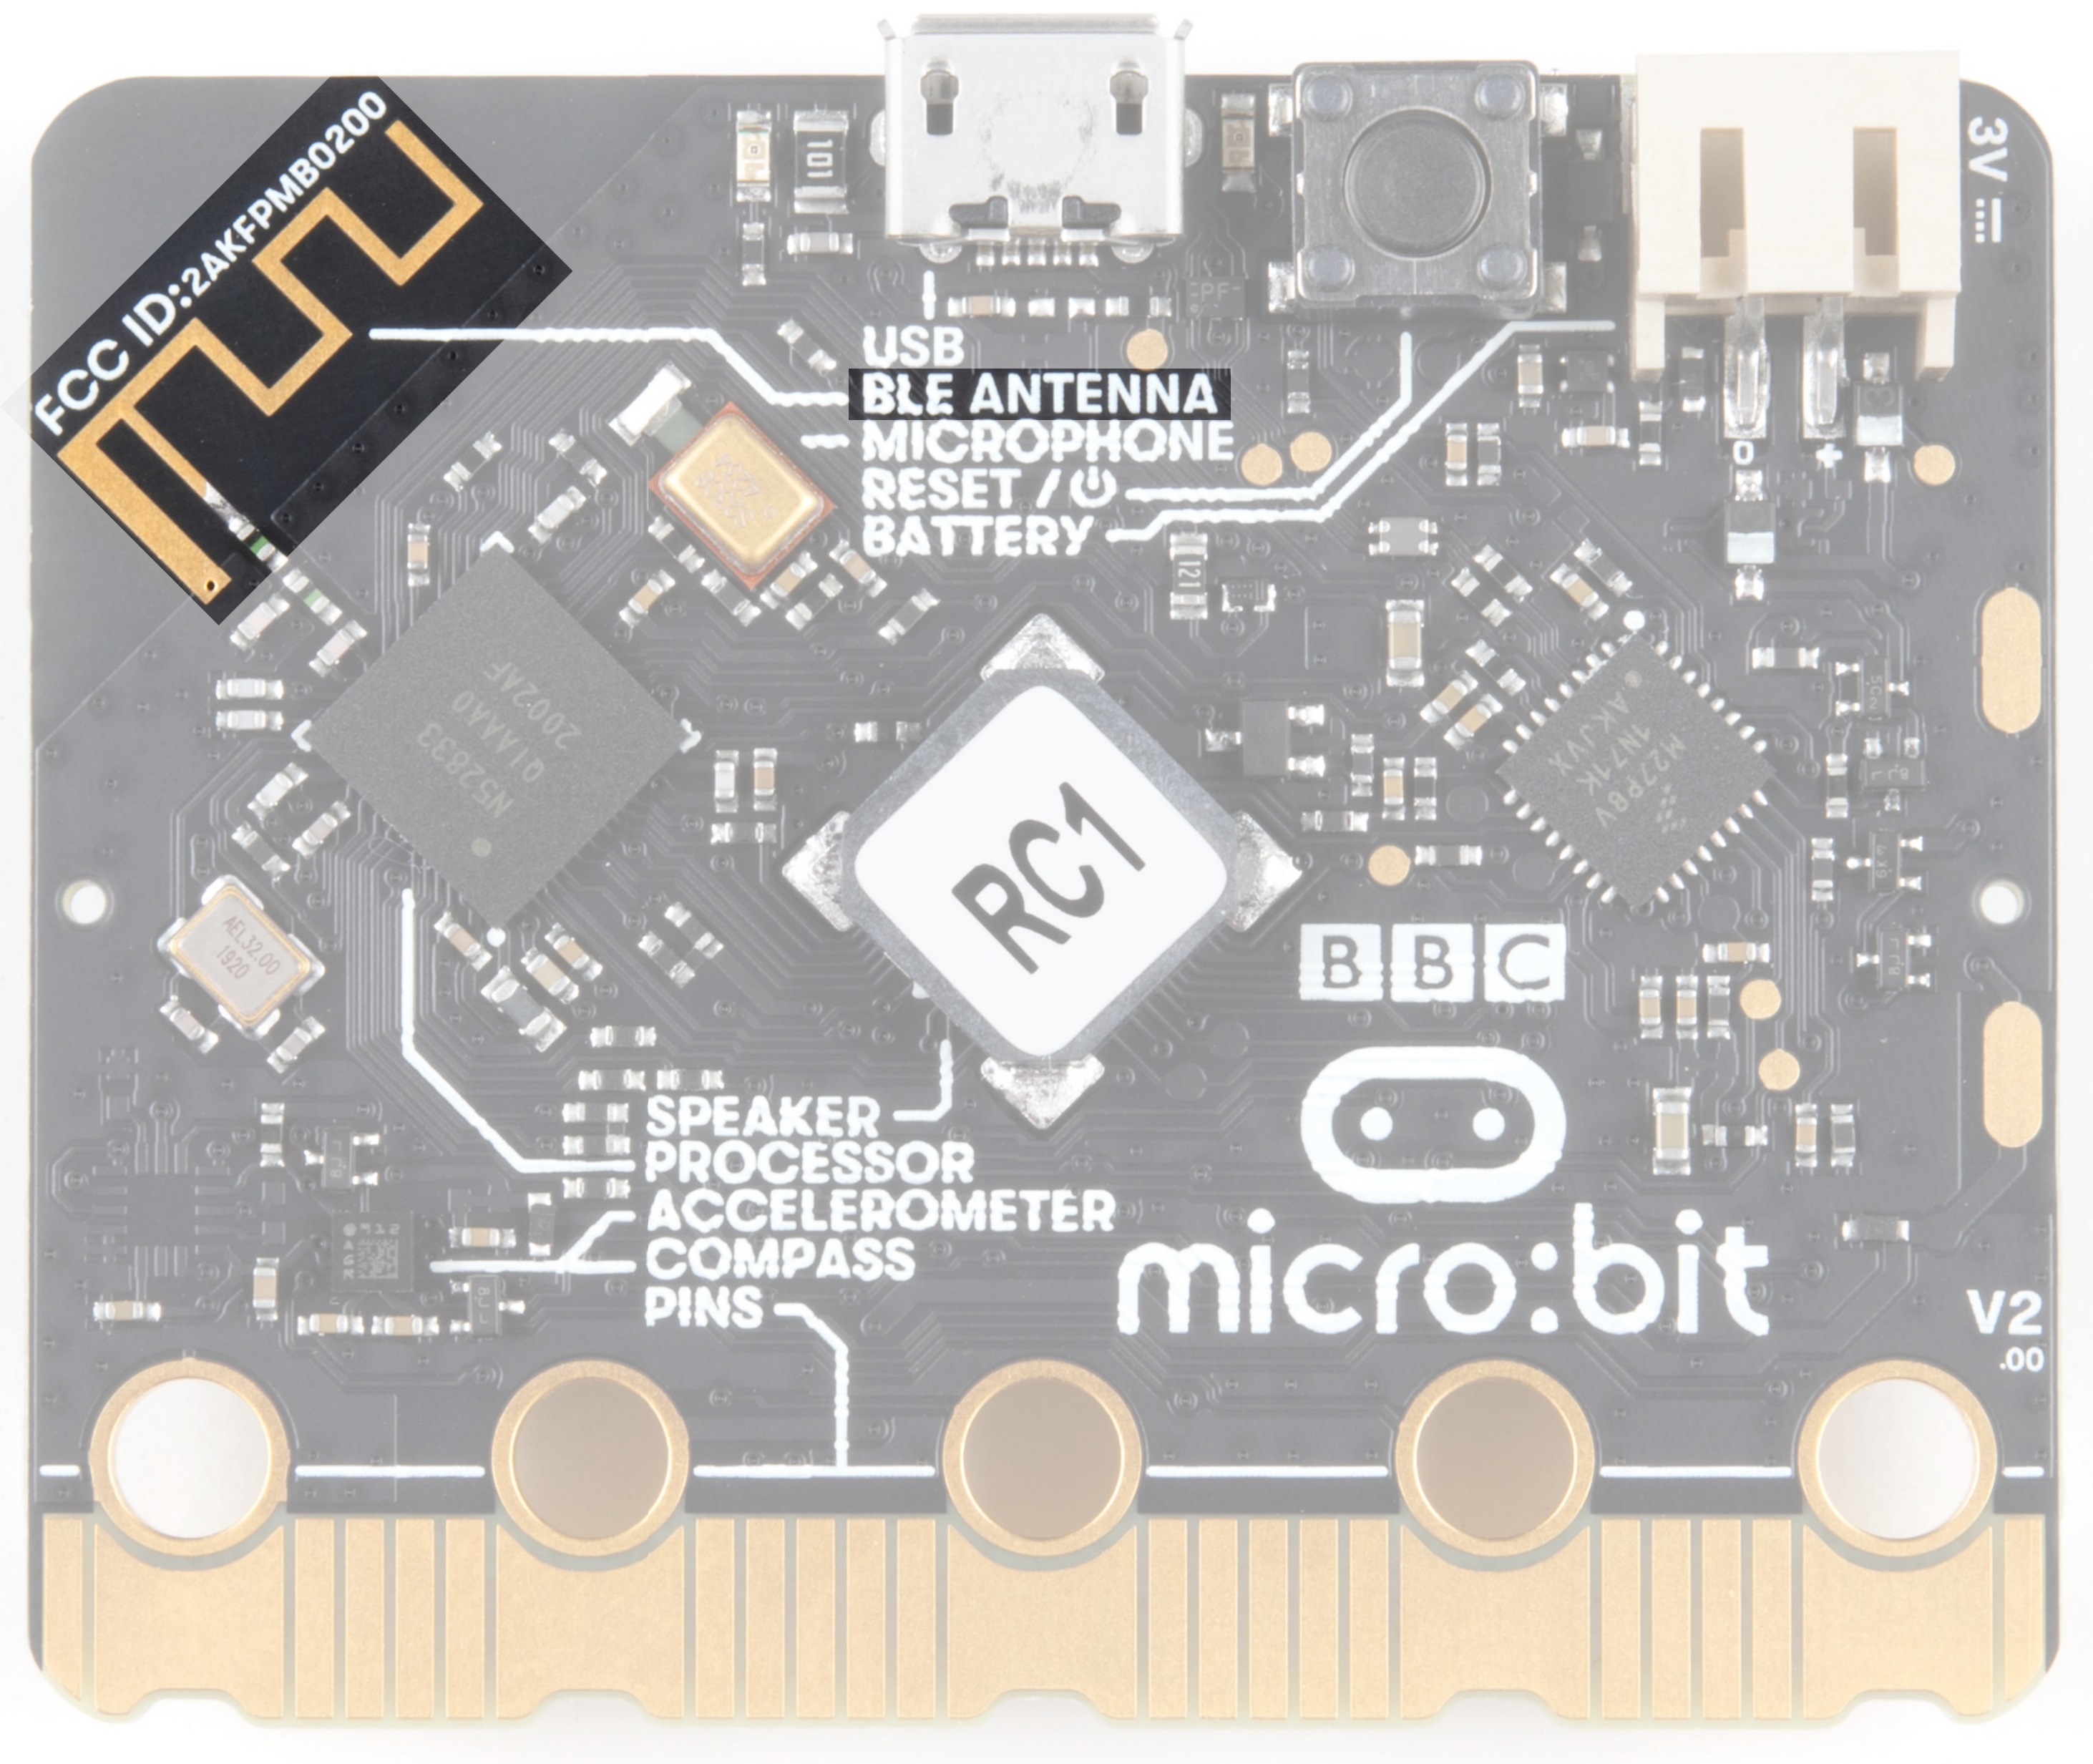
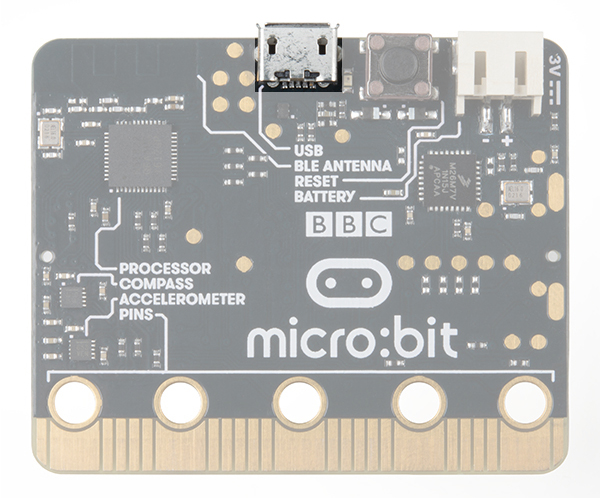
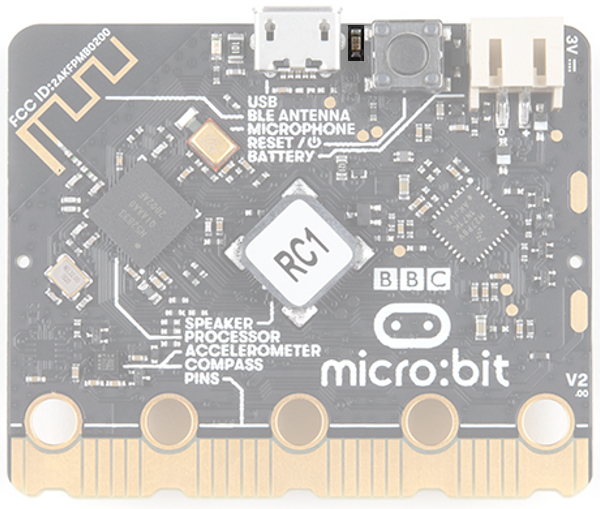
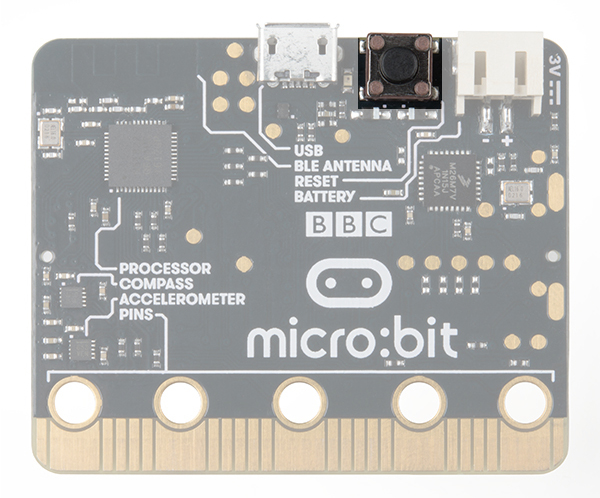
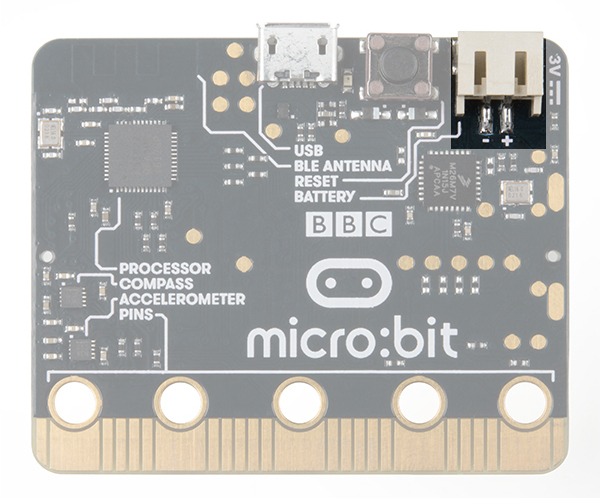
Back
The back is where a lot of the magic happens. Check it out...
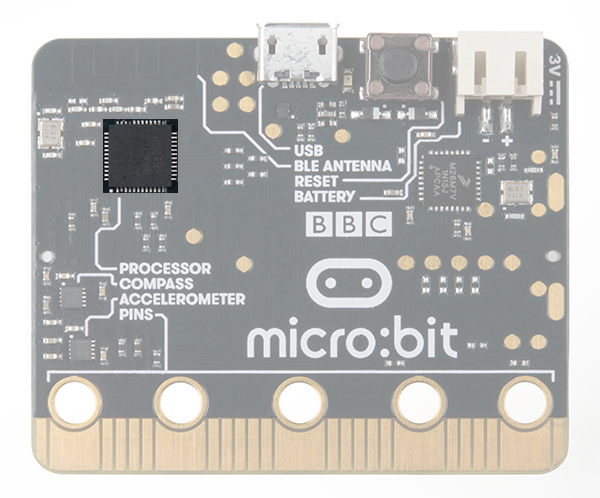
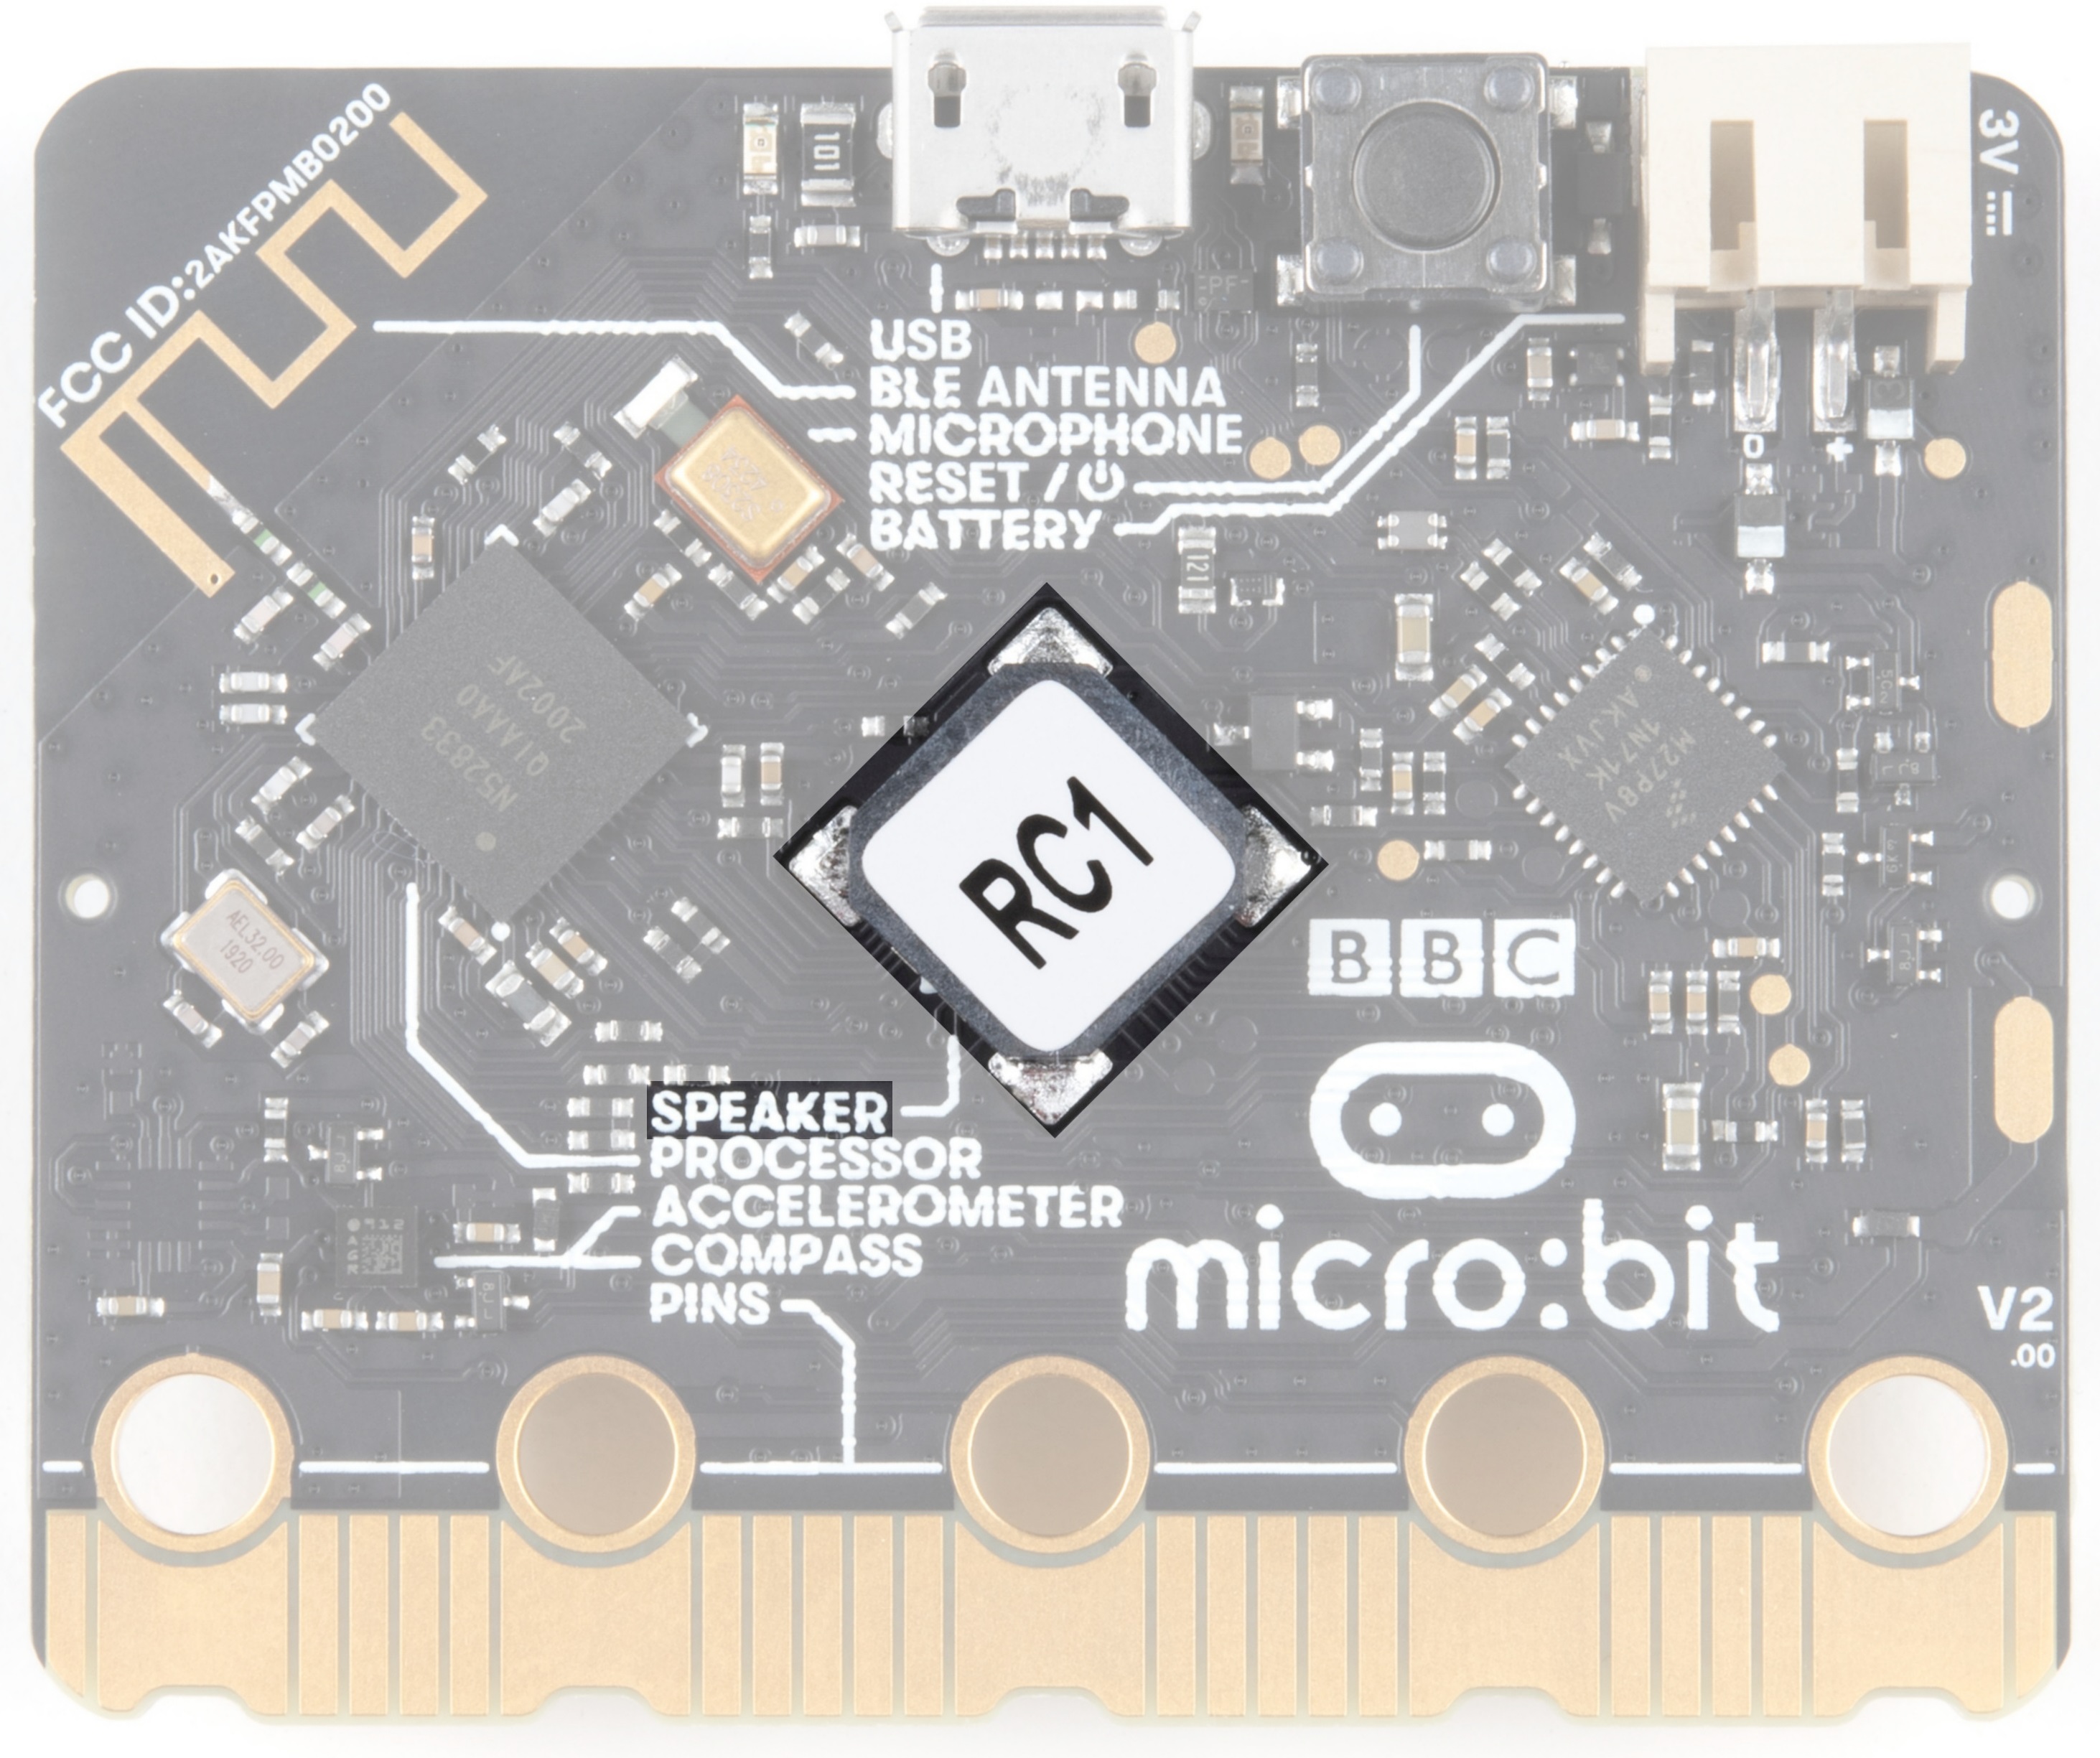
Microcontroller
The brains of the outfit.
The micro:bit is powered by a 16MHz ARM Cortex-M0 microcontroller with 256KB Flash and 16KB RAM.
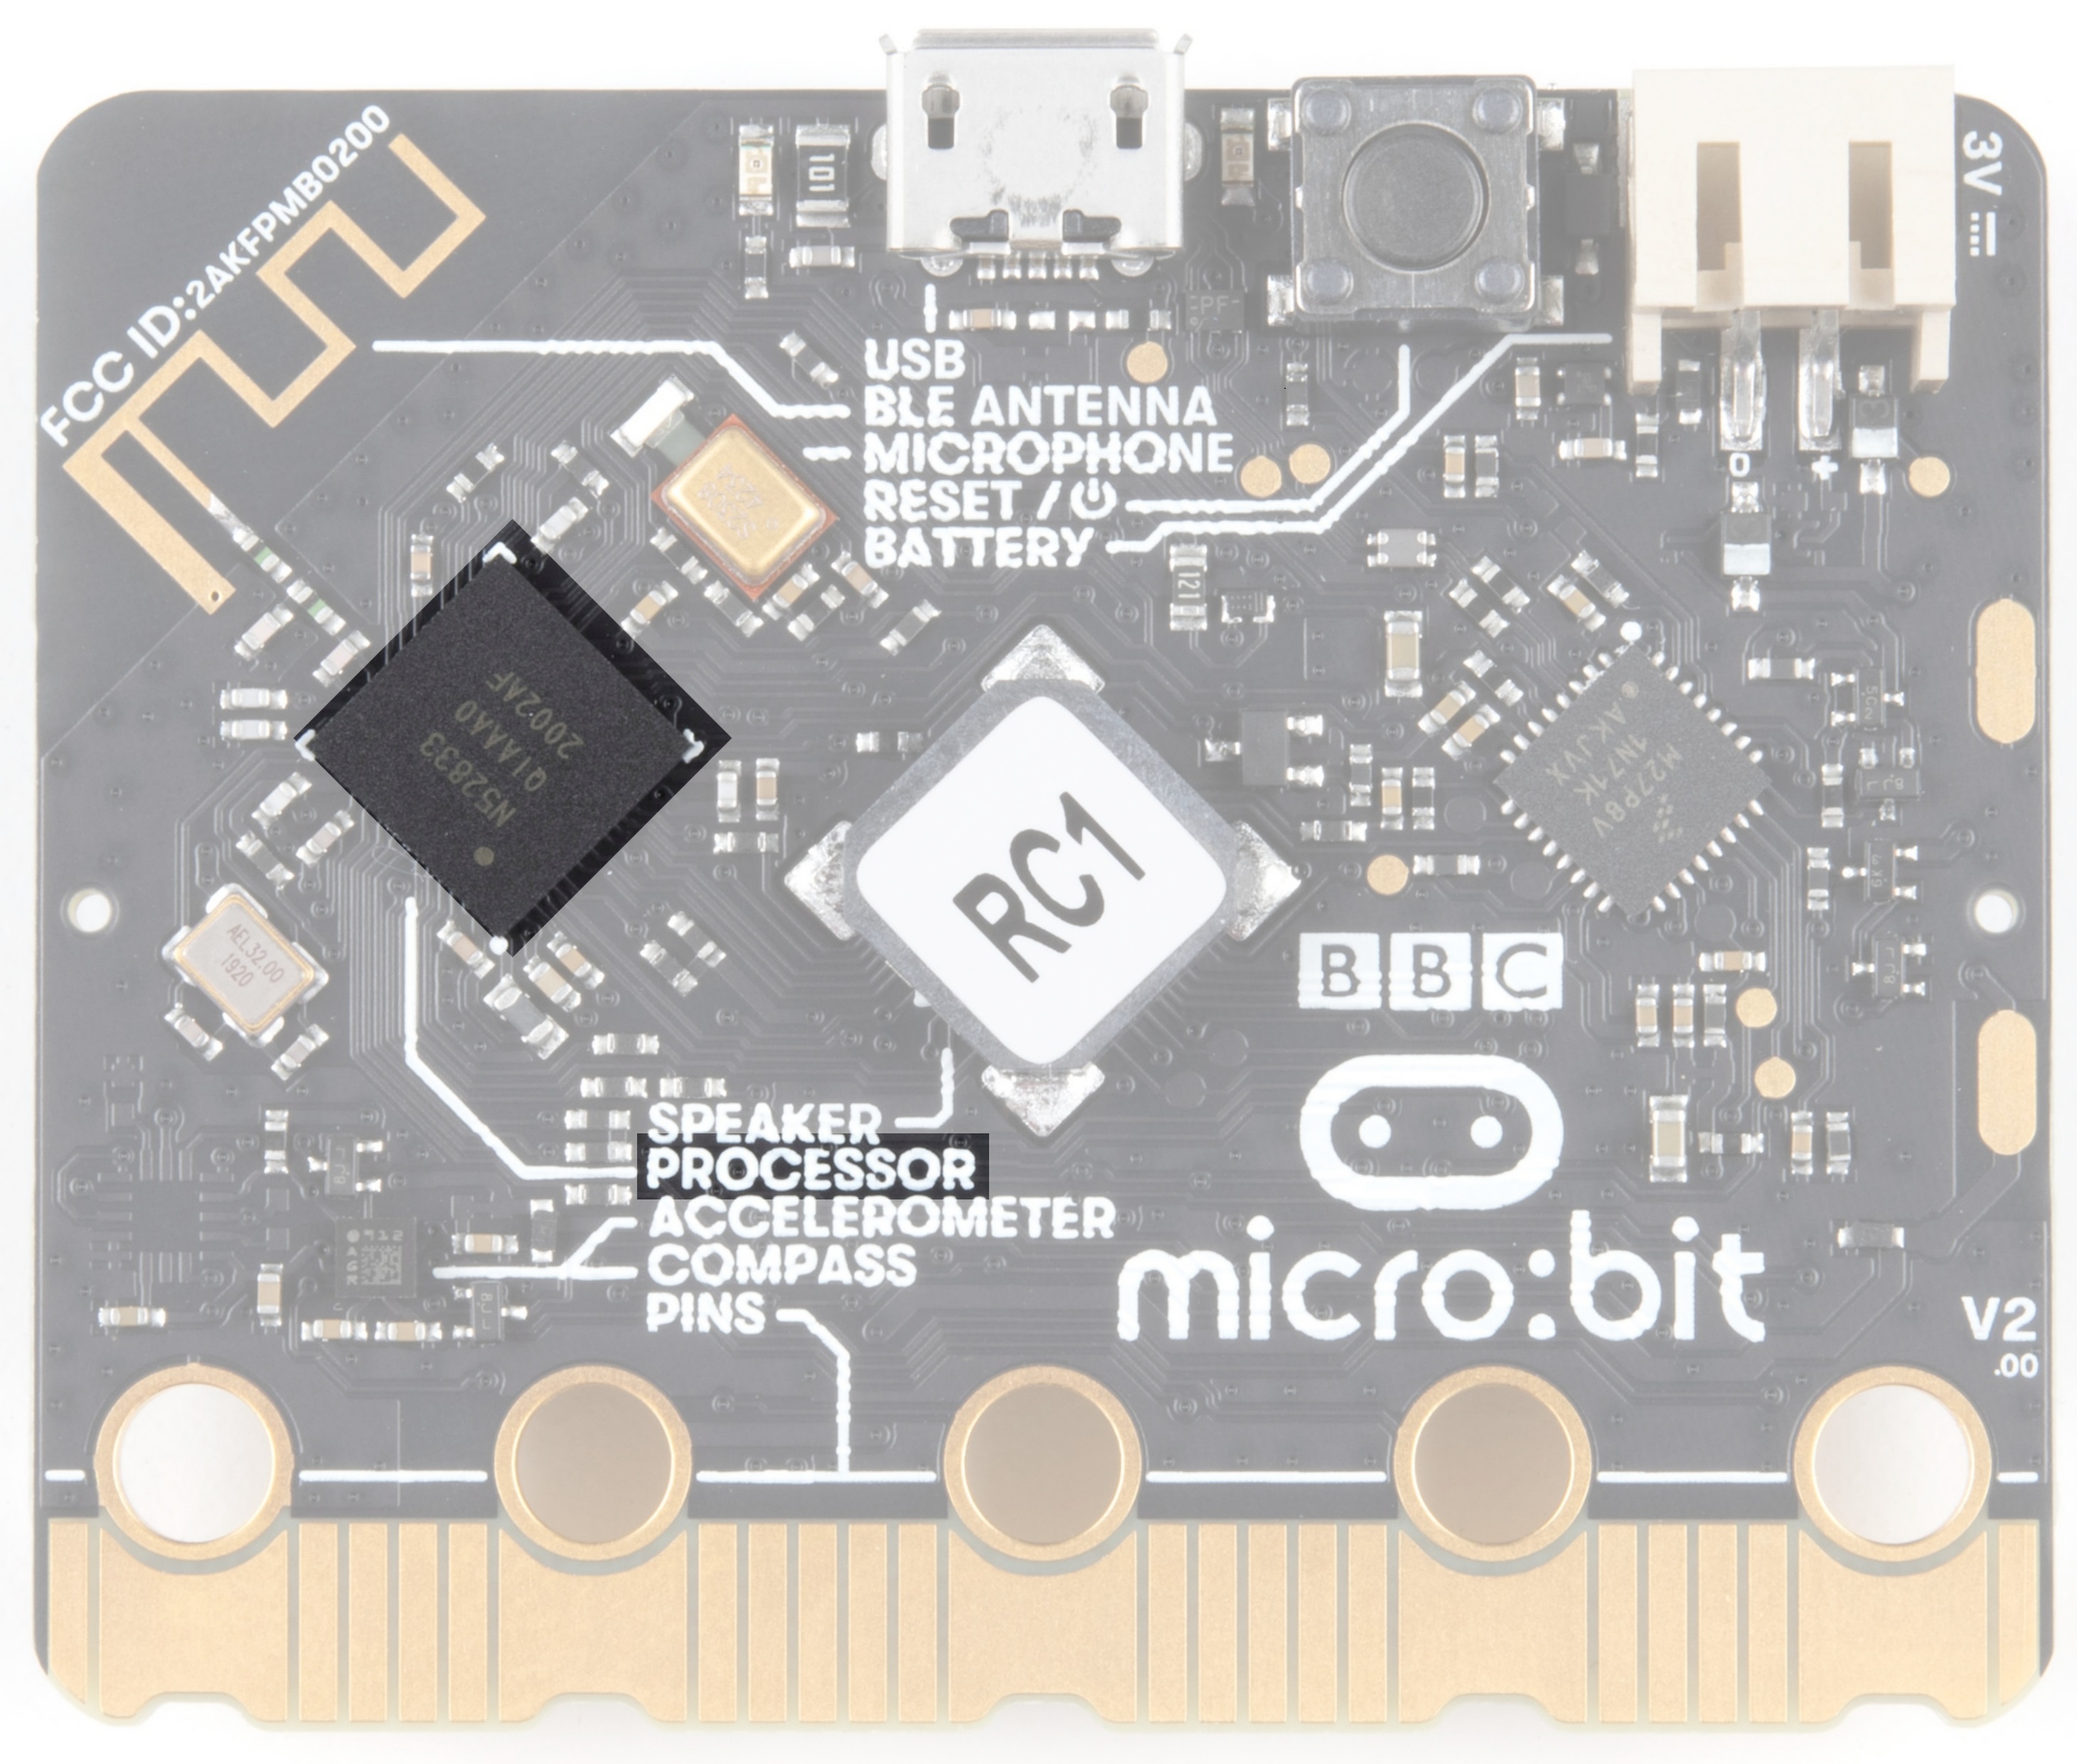
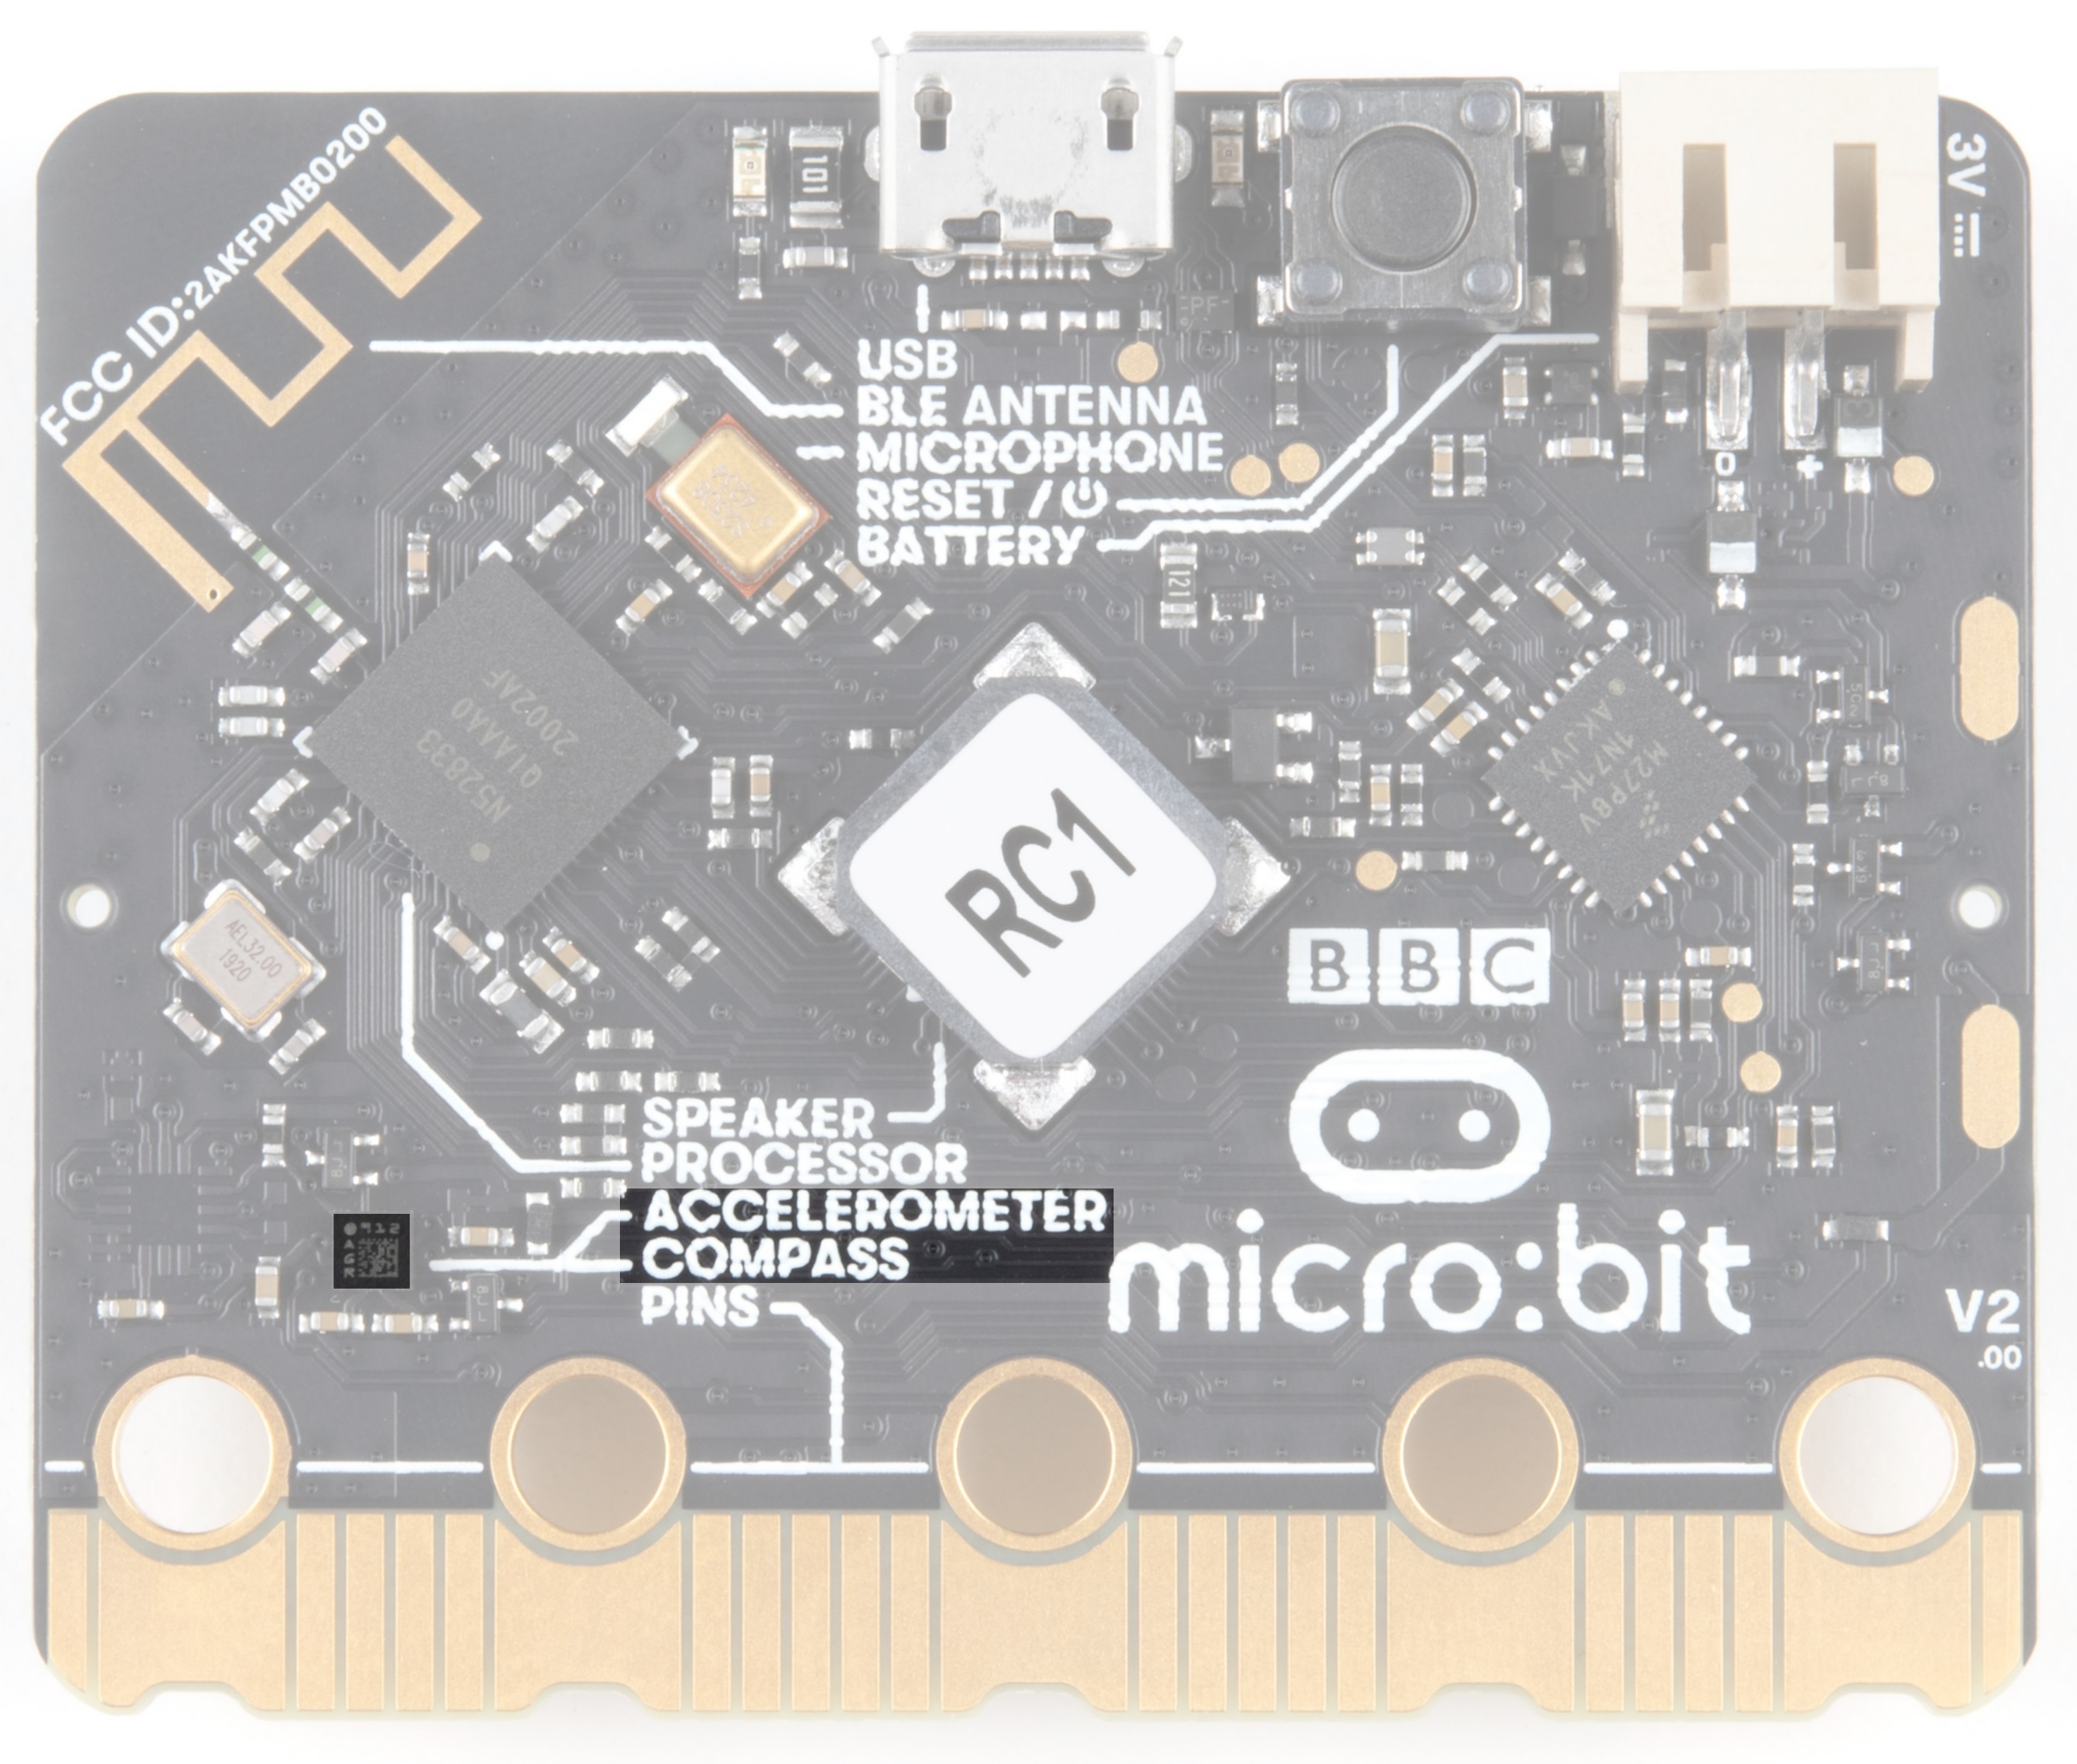
The micro:bit v2 is powered by Nordic Semiconductor's nRF52833 chip - a 64MHz ARM Cortex-M4 microcontroller with FPU, 512KB Flash, and 128KB RAM.
 |
 |
| nRF51822 Processor on micro:bit | nRF52833 Processor on micro:bit V2 |
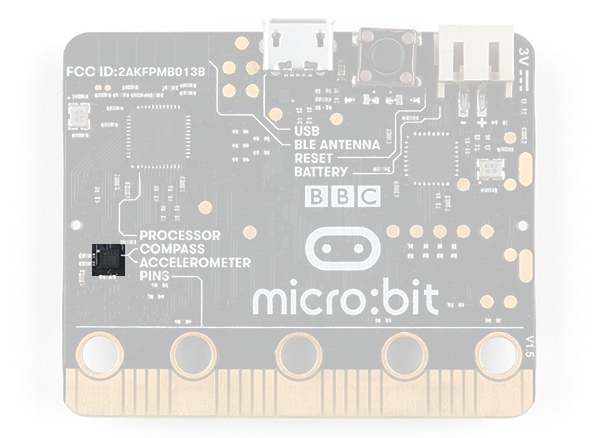
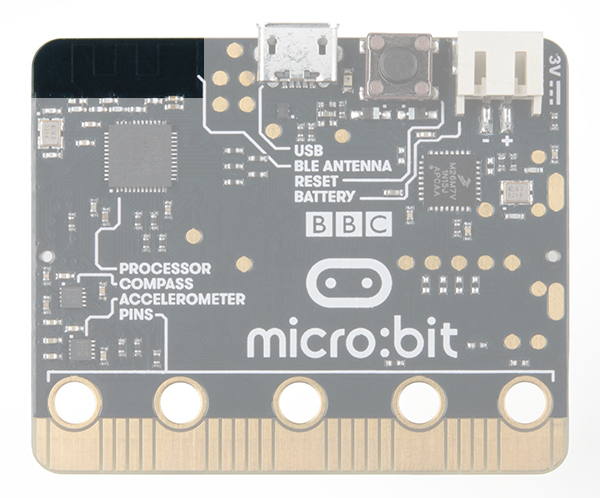
Accelerometer/Compass
The micro:bit has an onboard accelerometer that measures gravitational force, as well as a compass (a.k.a. a magnetometer) that can detect its orientation using Earth's magnetic field.
 |
 |
| Accelerometer and Magnetometer on micro:bit | Accelerometer and Magnetometer on micro:bit v2 |
Bluetooth/Radio
Communication is huge with the micro:bit. You can communicate with your phone or tablet using Bluetooth Low Energy (BLE) or between two or more micro:bits using the standard 2.4GHz "radio". Note that the micro:bit v1 uses BLE Bluetooth v4.0 while micro:bit v2 uses BLE Bluetooth v5.0.
 |
 |
| Bluetooth / Radio Antenna on micro:bit | Bluetooth / Radio Antenna on micro:bit v2 |
Temperature Sensor
No, the drawing is not highlighted incorrectly! The microcontroller doubles as a temperature sensor!
|
|
| Microcontroller as Temperature Sensor on micro:bit | Microcontroller as Temperature Sensor on micro:bit v2 |
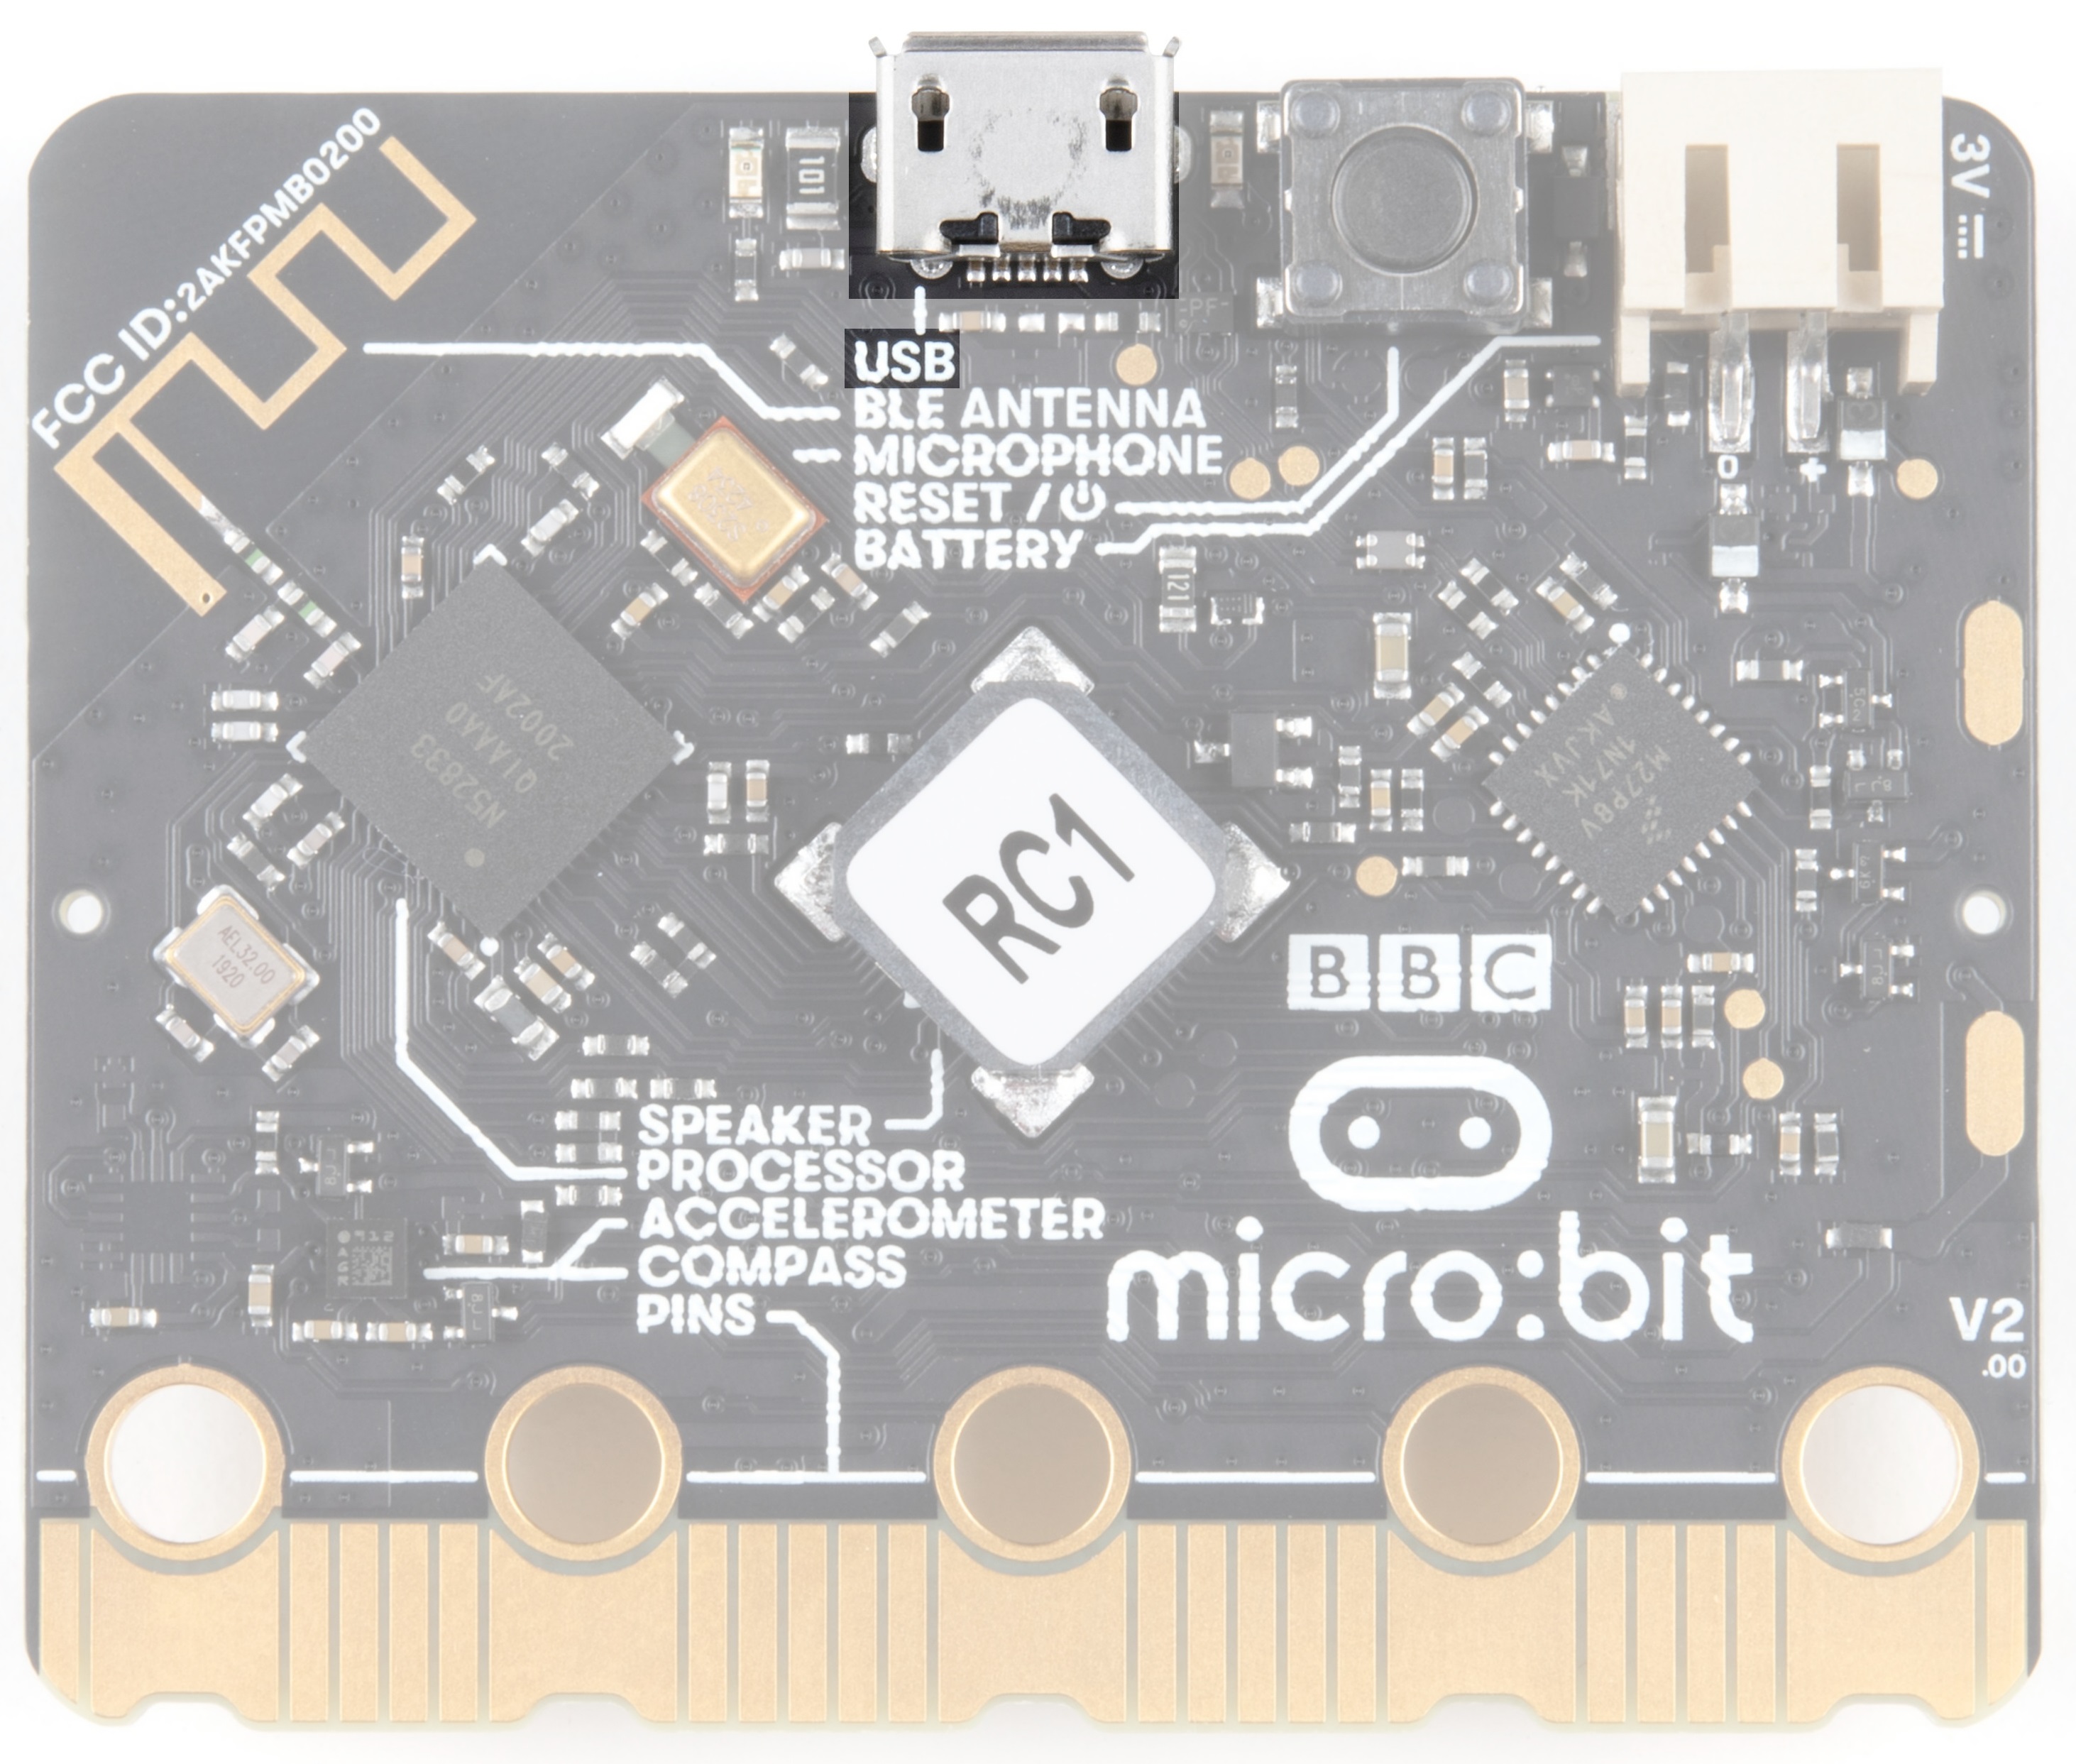
USB Port
Used to upload code to your micro:bit or power from your computer or laptop. You can also send and receive serial data from the MakeCode Serial Console or a Serial Terminal.
 |
 |
| USB Port on micro:bit | USB Port on micro:bit v2 |
USB Activity LED Indicator
When there is activity on the USB pins, the LED on the right will light up.
 |
 |
| USB Activity LED Indicator on micro:bit | USB Activity LED Indicator on micro:bit v2 |
V2 Only - Power LED
V2 of the micro:bit also includes a power LED next to the USB connector to indicate power is available.
Reset Button
A button to reset your micro:bit and start your code over from the beginning.
 |
 |
| Reset Button on micro:bit | Reset/ Power Button on micro:bit v2 |
JST Battery Connector
A connector to hook up an external battery pack to your micro:bit.
 |
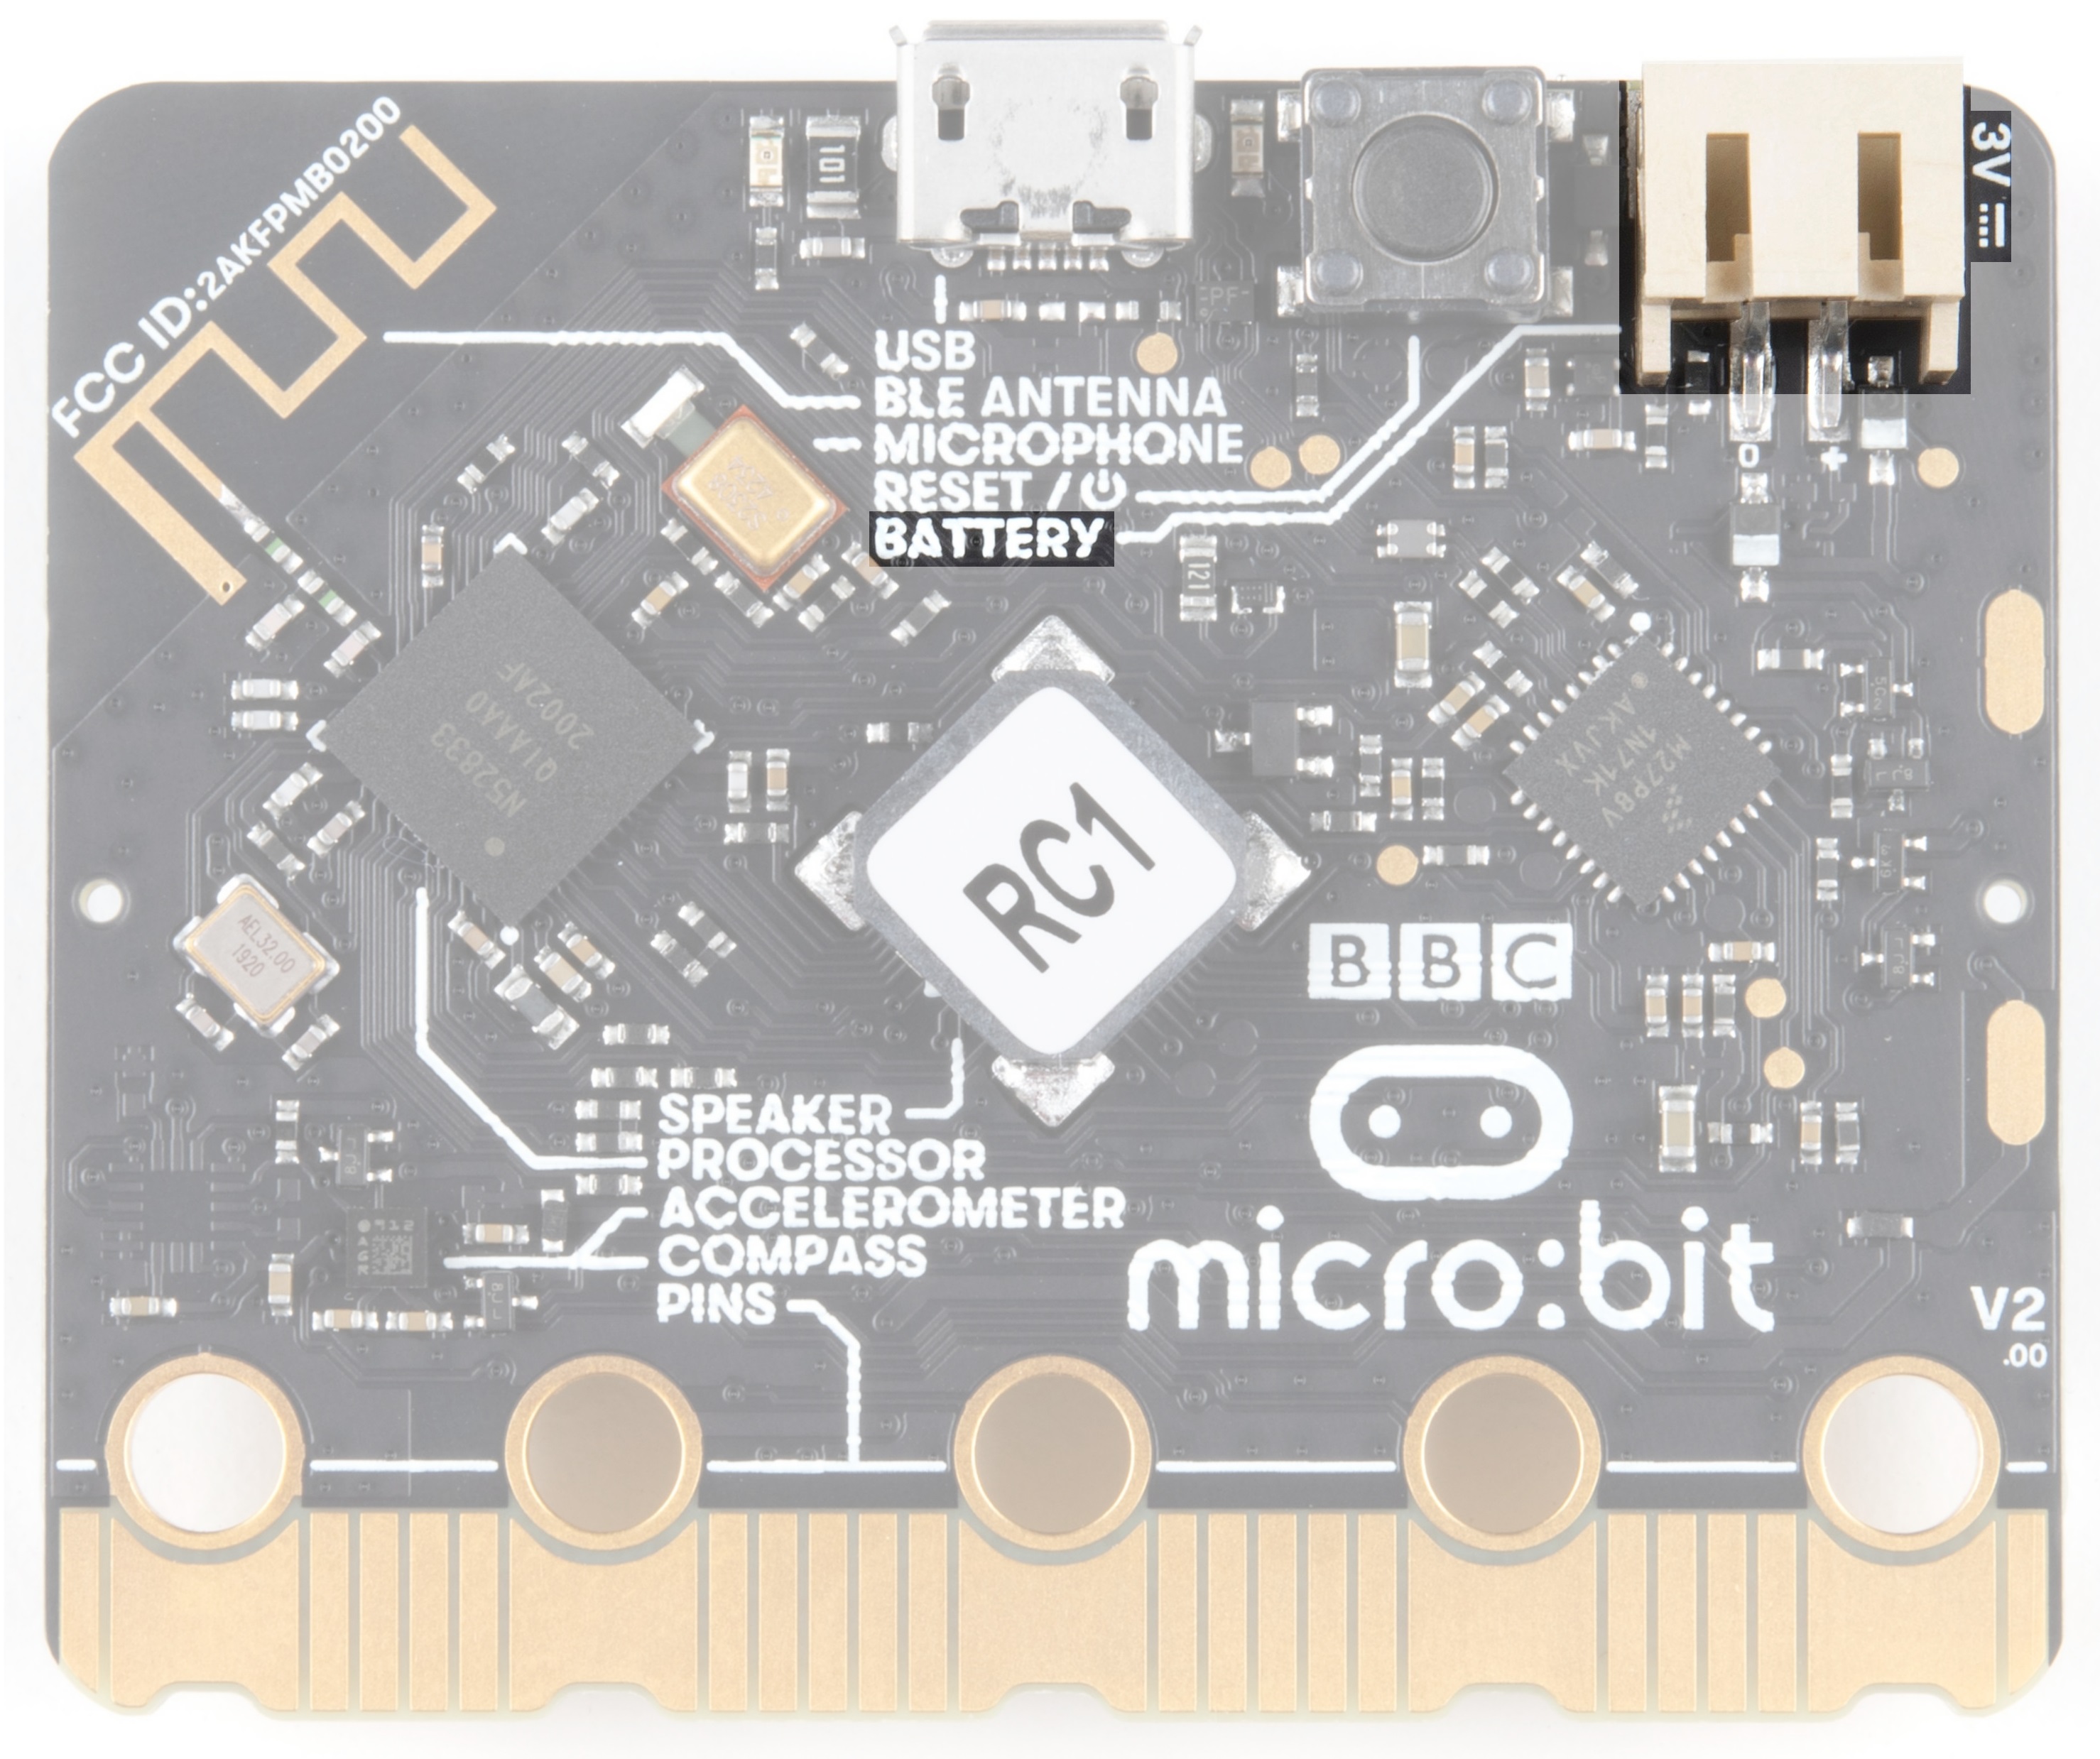 |
| JST Connector on micro:bit | JST Connector on micro:bit v2 |
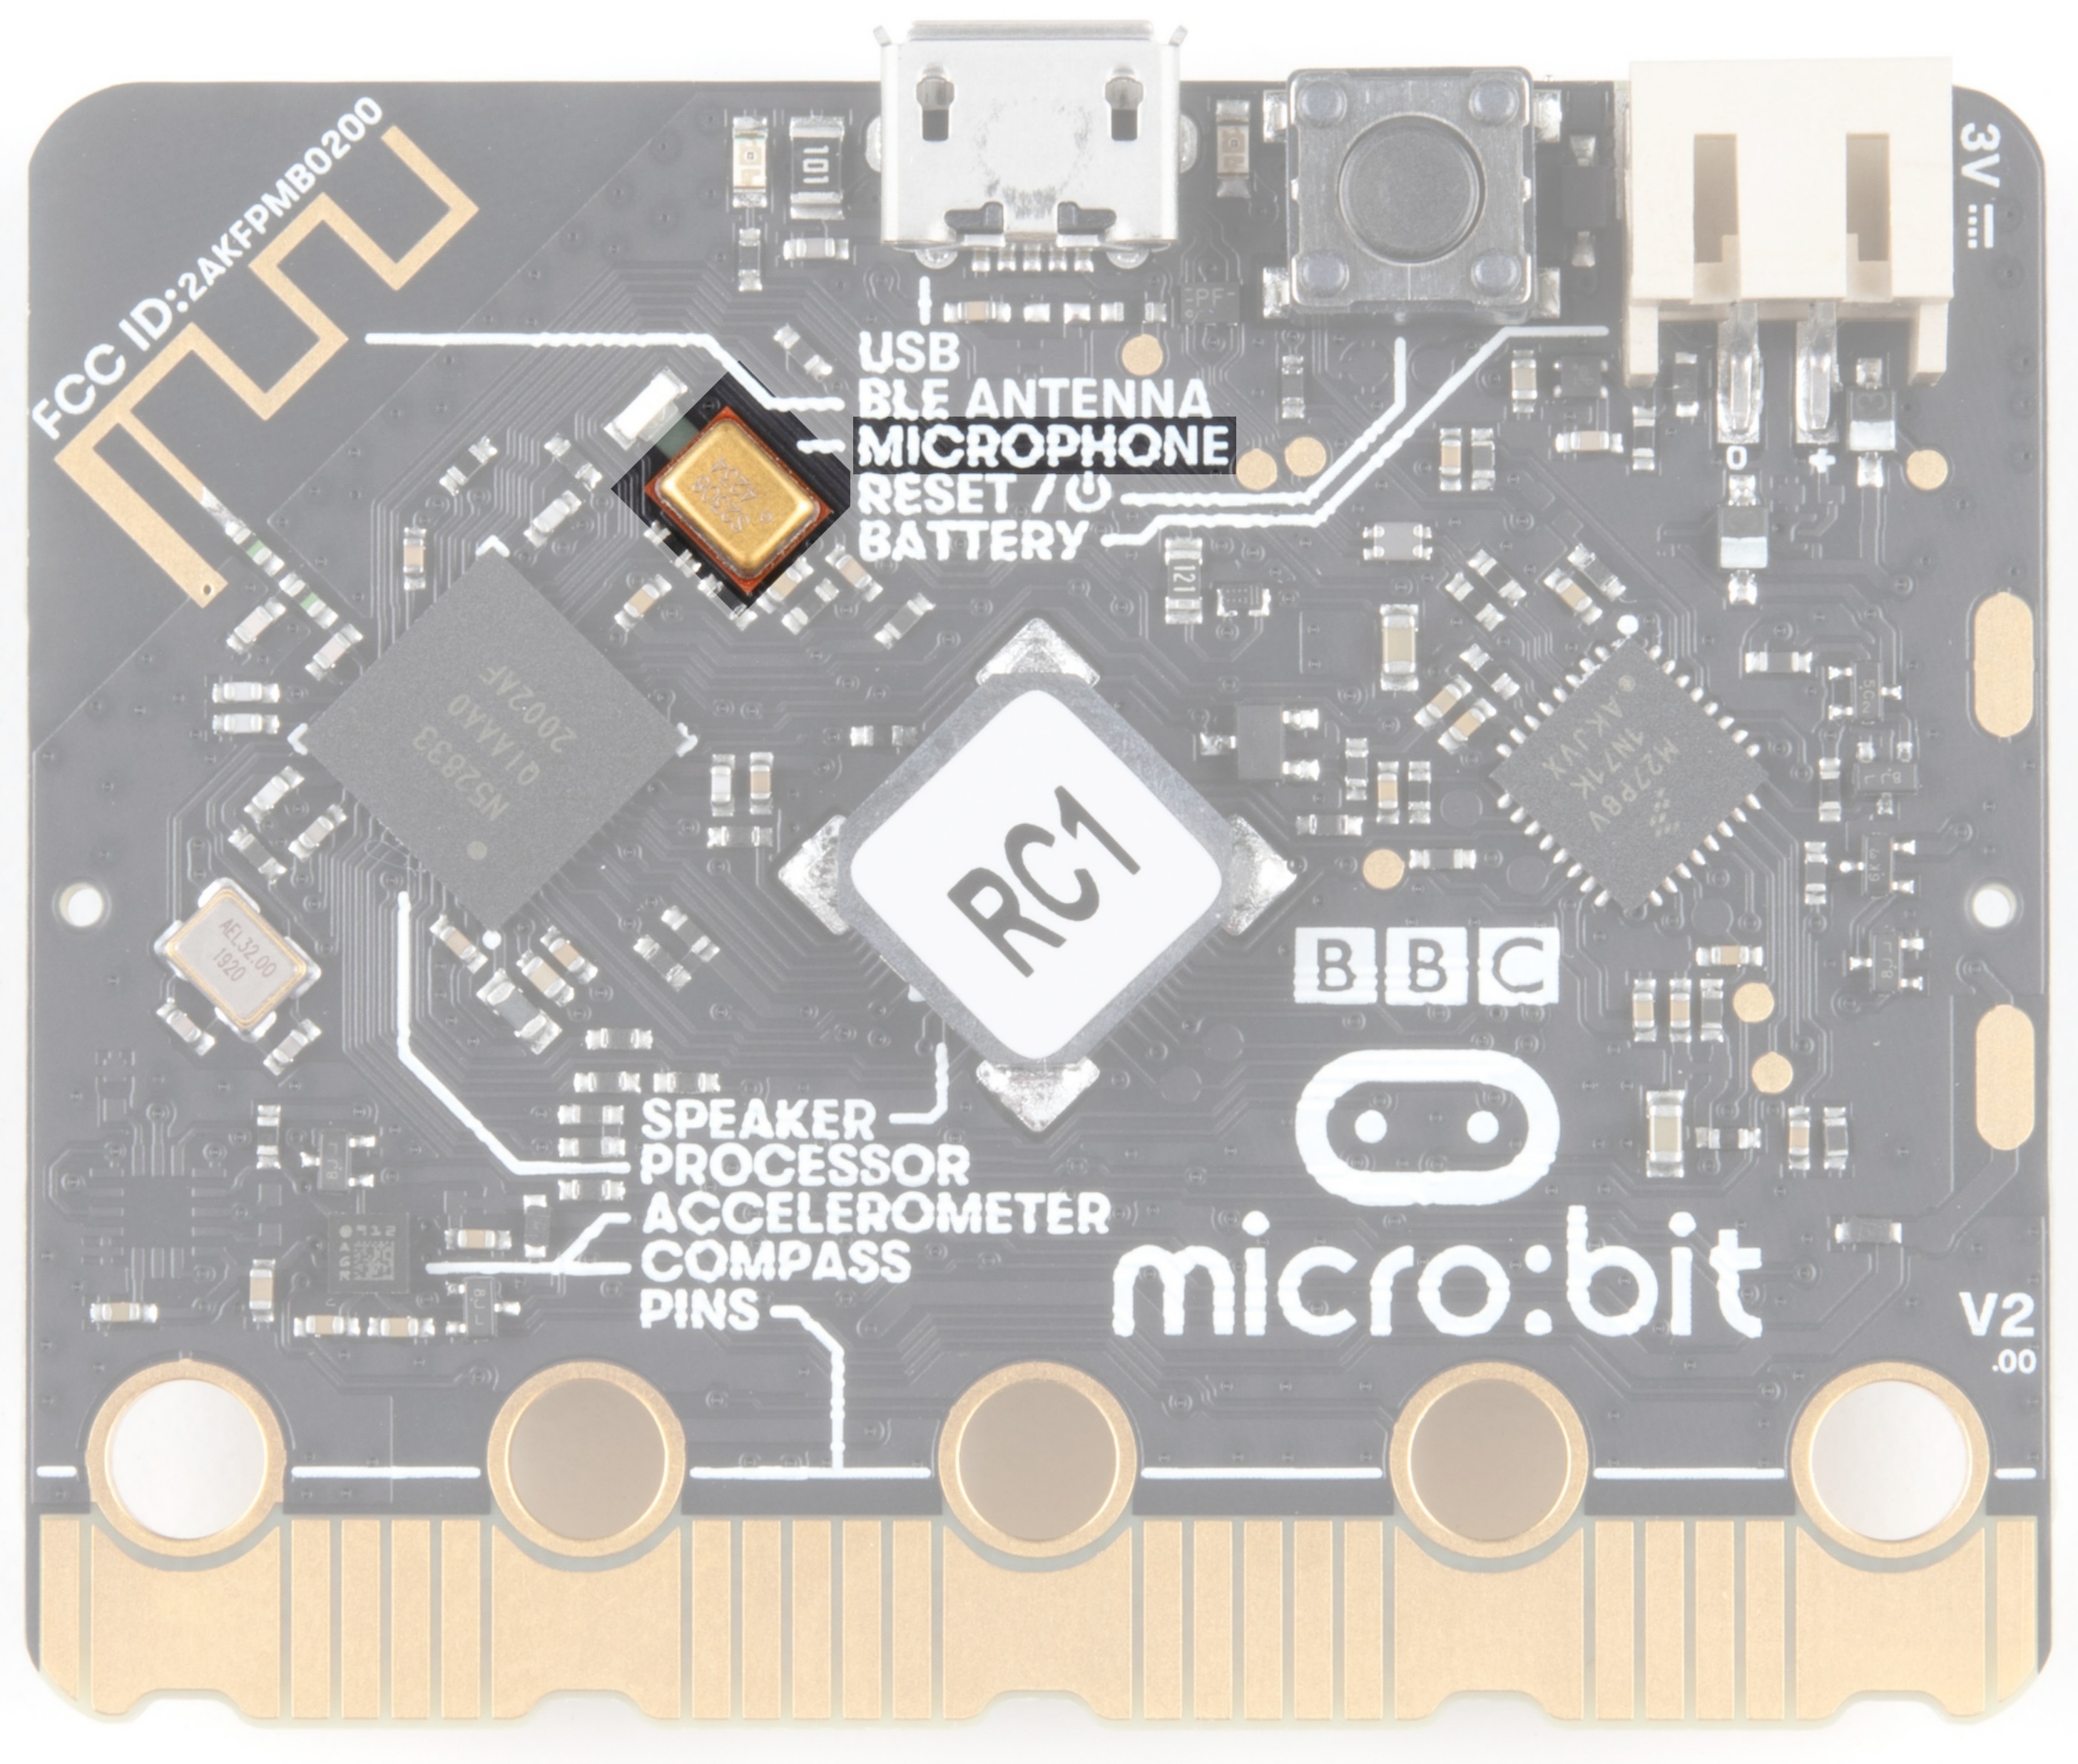
V2 Only - Microphone
V2 of the micro:bit contains a MEMS microphone to allow sound-sensing without the need to attach another device. If you look back at the front of the board, you will notice that the microphone input leads to this component on the back.
V2 Only - Speaker
V2 of the micro:bit also includes a built-in speaker on the back of the board. For users using an external speaker on the edge pins, you will need to configure the built-in speaker in the programming language of your choice.
Phew! That is a lot of bells and whistles...a true Swiss army knife!
Hooking It Up
The micro:bit uses a microUSB cable to hook up to your computer or Chromebook. It is as simple as plugging the cable into your micro:bit and the other end into an open USB port.
Once you plug your board in, you should see the small yellow LED on the back of your micro:bit light up and possibly blink a few times. Then whatever existing program that was put on the micro:bit will start running. If this is your first time plugging your micro:bit in, go ahead and play around with it a bit --- push buttons, shake it, and you will get a bit of an Easter egg.
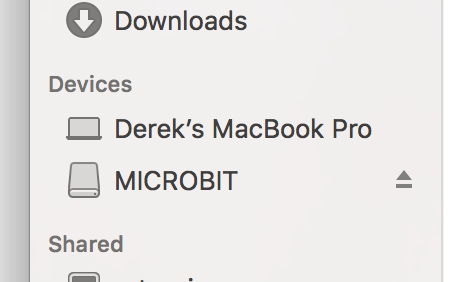
Once your micro:bit boots up, check out your Finder if you are on a Mac, or your My Computer Drives if you are on a PC. The micro:bit should show up as an external storage device with two files stored in it.
If you are on a Chromebook, when you plug your micro:bit in you will be greeted with a dialog box to open the drive. Feel free to do so to make sure it works!
Let's get programming!
Using MakeCode
This guide and most of SparkFun's content around the micro:bit will use MakeCode by Microsoft for programming.
What Is MakeCode?
MakeCode is an open programming environment built by Microsoft for the micro:bit, as well as other boards. You can navigate to MakeCode for the micro:bit by following this link:
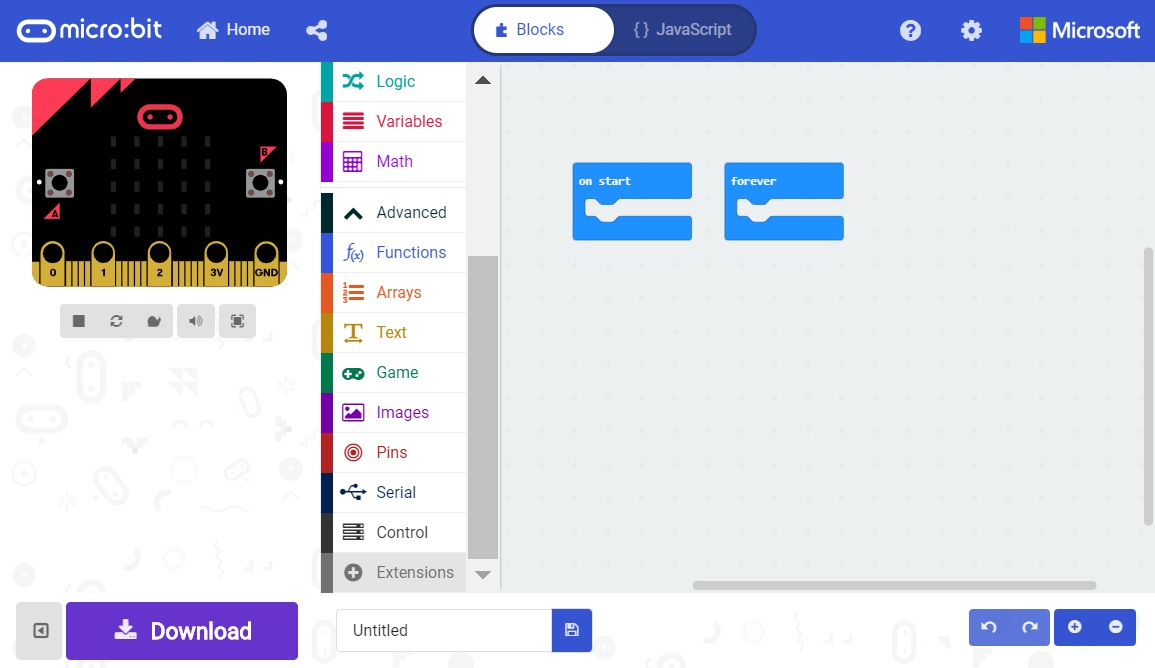
Once you have launched MakeCode, you will be greeted by its basic layout with a simulator on the left and a block-based environment on the right when your browser's window is maximized, as shown here.

Let's take a quick tour and check out what is available to us!
- Projects --- A cloud storage system connected to your computer with no account setup required.
- Share --- Allows you to share your project code in a number of different ways with your friends!
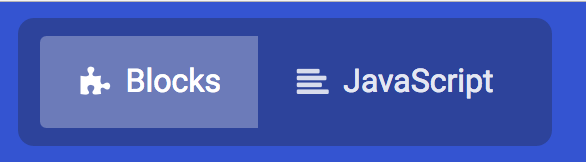
- Blocks/JavaScript/Python --- Choose your own adventure by programming in blocks (default) or in JavaScript. Not shown in the image, Microsoft also eventually added an additional option to use convert the code to MicroPython.
- Program Space --- This is where the magic happens and where you build your program...where you "make code."
- Zoom/Undo-Redo --- Sometimes you need to undo things, or zoom out and look around; these are the buttons for that.
- Name & Save --- Name your program and save it (download it) to your computer.
- Download --- Similar to Save, download your program as a .hex file and drag it into your micro:bit.
- Simulator Hide/Show --- You can hide/show the simulator if you would like.
- Block Library --- All of the options in terms of program building blocks, which are color-coded by function.
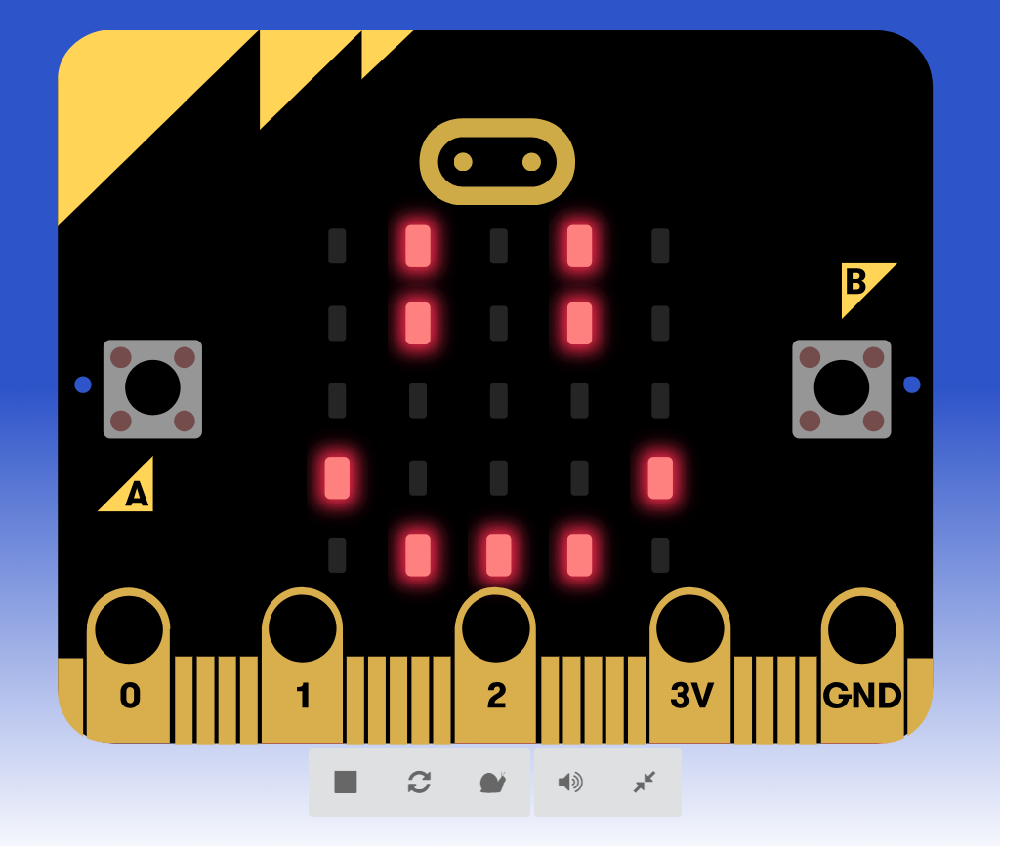
- Simulator --- You don't need hardware! MakeCode has a real-time simulator! As you change your program, you can see what it will do on this virtual micro:bit!
Phew! Now you have a choice - blocks or text-based programming?
Blocks or Text
For this guide and the majority of the content that you will find on SparkFun for the micro:bit, we will be using block-based programming examples.
But, if you so choose there is a JavaScript (and also MicroPython) option to use as well. The choice is yours, and the good news is that you can switch back and forth from one to the other in the same program; one will populate the other, which is really nice if you are new to programming!
Simulator
MakeCode includes a simulator for the micro:bit, meaning if you don't have your micro:bit in hand you can still write code for it. Or if you want to try out an idea before you upload it to your micro:bit, you can do that too!
The simulator will update as you build your code, and if you want to run it from the beginning you can click the stop and run buttons to start it over again!
Speaking of code, let's write a quick program and get it onto your micro:bit!
Hello, World!
Now comes the good stuff --- writing your first program for your micro:bit in the MakeCode programming environment!
"Hello World" is the term we use to define that first program you write in a programming language or on a new piece of hardware. Essentially it is a simple piece of code that gives you a quick win (fingers crossed) and a first step in learning. It also gives you a chance to make sure everything is up and running and A-OK.
For your first "Hello World" we are going to create a simple animation on the LED array that repeats forever. If you just want the complete program, you can see it here. To see a step-by-step explanation of how we built the program, continue reading!
Building 'Hello World'
A "Hello World" on the micro:bit is a little different than on a normal run-of-the-mill microcontroller. The micro:bit has no single LED to blink on its own, as you would find on the Arduino or similar boards. What the micro:bit does have is an LED array! So, the "Hello World" for the micro:bit is to draw something using the LED array!
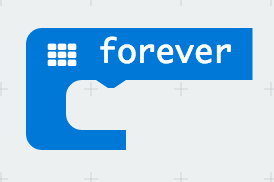
When you open MakeCode you are greeted with two blocks: the On Start block and the forever block. The On Start block is all of your code that will execute at the very beginning of your program and only run once. The forever block is code that will loop over and over again...forever.
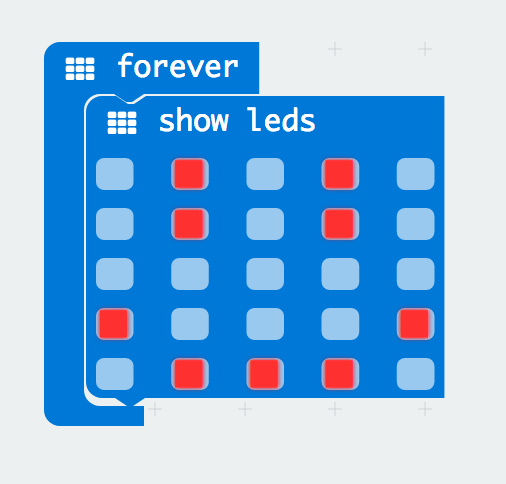
We are going to use the forever block for building this "Hello World." We now need to start adding blocks to forever.
First, click on the Basics category. These blocks are, well, the basic building blocks of a BuildCode program. It will expand into a number of options. Click and drag the show leds block over and place it inside of your forever block. Notice that the block is keyed to fit inside of the forever block, and if you have the volume up on your computer you will hear a satisfying 'click' noise when you let go of the block.
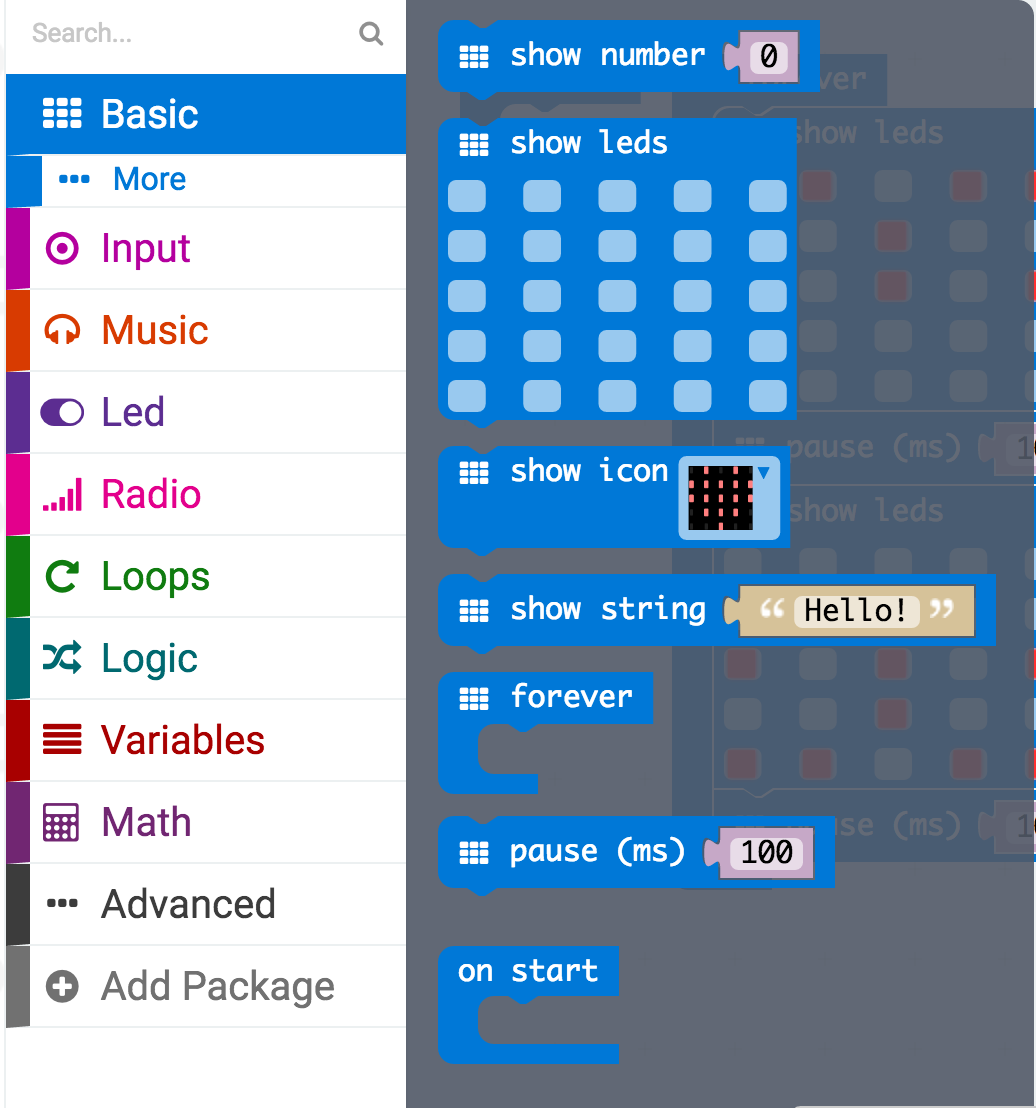
The show leds block has an array of squares that symbolize the LED array. If you click on a square, it will turn red, which means that it is 'on'. Draw a simple pixel art shape by turning different LEDs on or off; you should be able to see the outcome in your simulator on the lefthand side of your window.
To turn this static image into an animation we need another show leds block to place just under the first block. You can then make a second drawing with this set of rectangles. In your simulator you will see the images switching really, really fast. We need to slow this down!
To slow your animation down you will use the pause block, which is under the basic block set. The pause block is just what it says; it tells the micro:bit to pause and wait for a certain amount of time. Place two pause blocks in the program as shown.
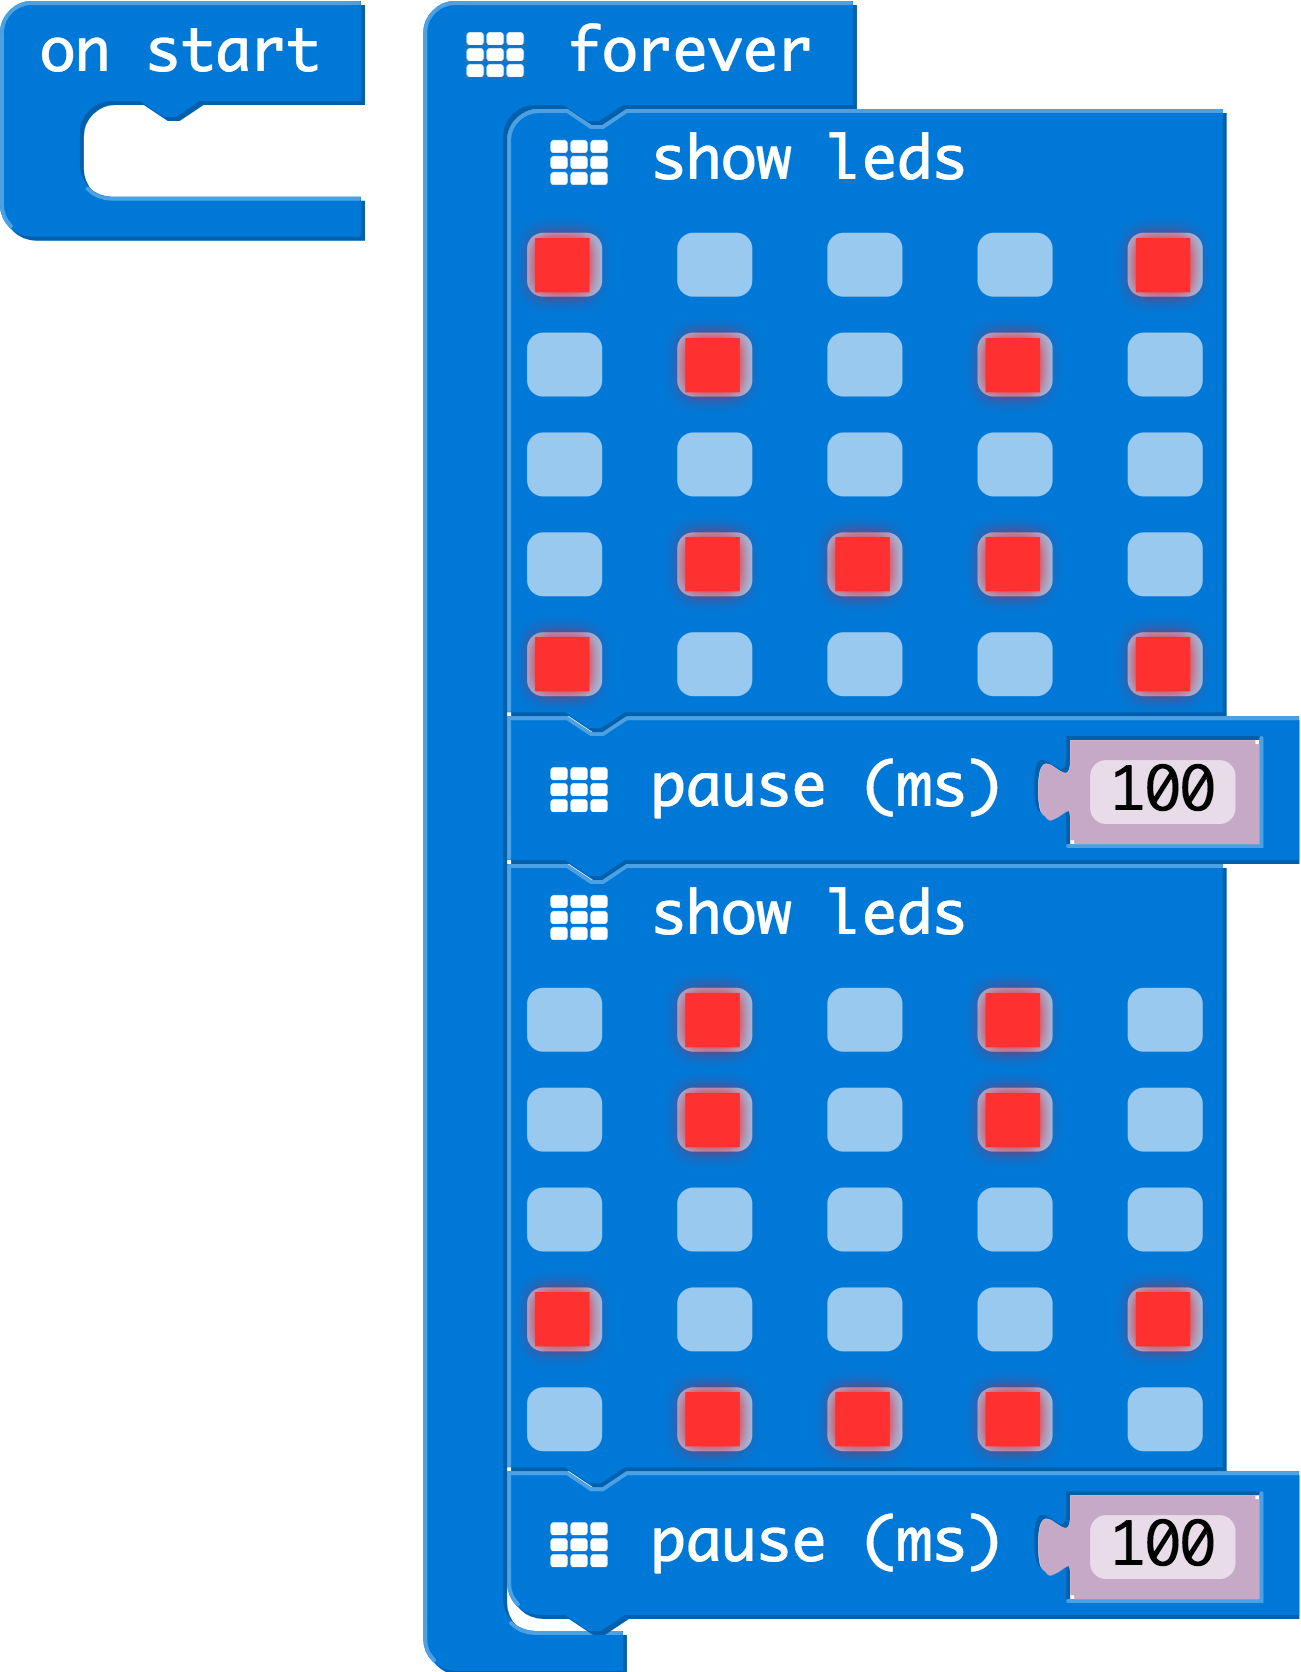
The reason we are using two 'pause' blocks and placing one at the end is that this program is a loop. Without the block at the end, the image in your animation will change really, really fast.
We have built up an example in the next section where you can download the file and try it out on your own micro:bit, or use the simulator. If you want to play around with the code and make some changes, go ahead and click the Edit button in the widget, and it will open a MakeCode editor for you to start hacking "Hello World." Enjoy!
Getting Your Program Onto Your micro:bit
You've built your first program in MakeCode, and it works in your simulator. Now, how do you get it onto your micro:bit?
Download Your Program
Once you are happy with your program, you can click the Download button in MakeCode.
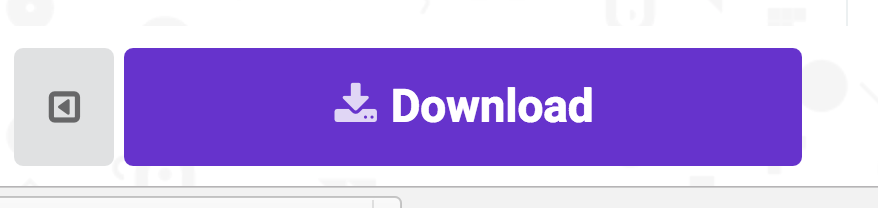
This will download your program file to your standard download location, probably the Downloads folder on your computer, or whatever location you have set in your download preference.
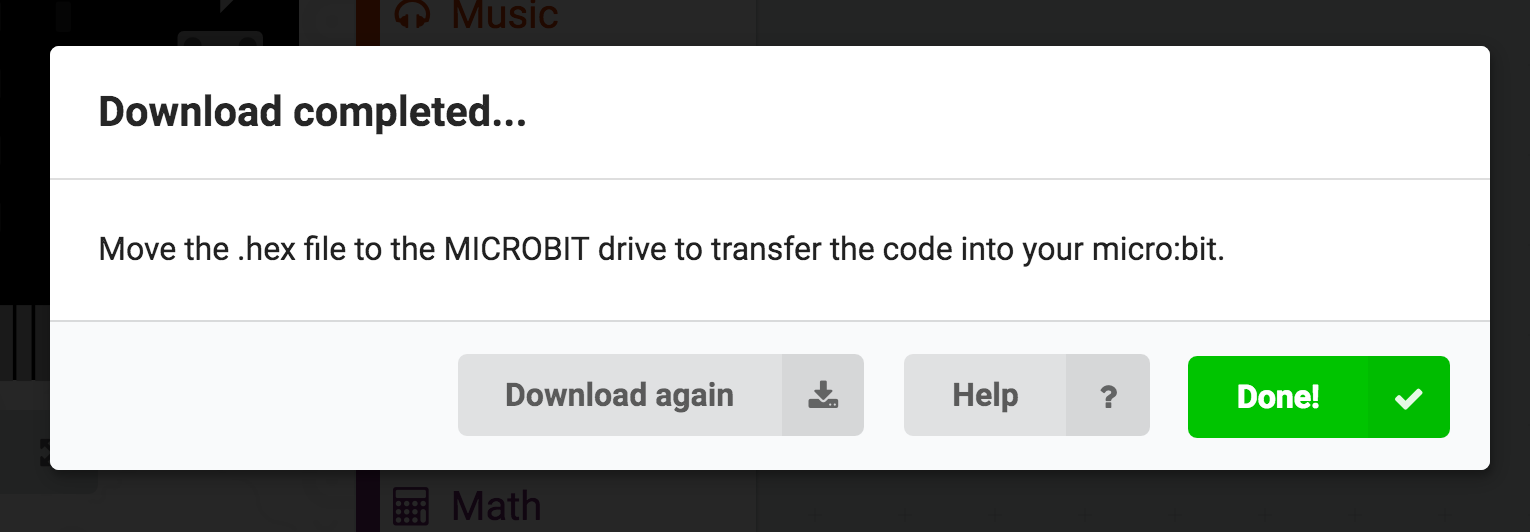
You then simply click and drag your program file from its download location to your micro:bit drive, which shows up as an external device.
That's it!
Your micro:bit will flash for a few seconds, and then your program will start automatically. Yes! Win!
MakeCode Extension
If you have used Arduino before, you probably know about a thing called a library; which is a collection of code that extends the functionality of the core programming language. MakeCode extensions work the same way.
There are some amazing differences between Arduino libraries and MakeCode extensions. One of them is that MakeCode extensions include JavaScript functions, which you can use when programming in text, as well as all of the blocks you need to program using the block method. This makes learning and using new extensions straightforward and shortens the time to awesome when setting out to build the project of your dreams.
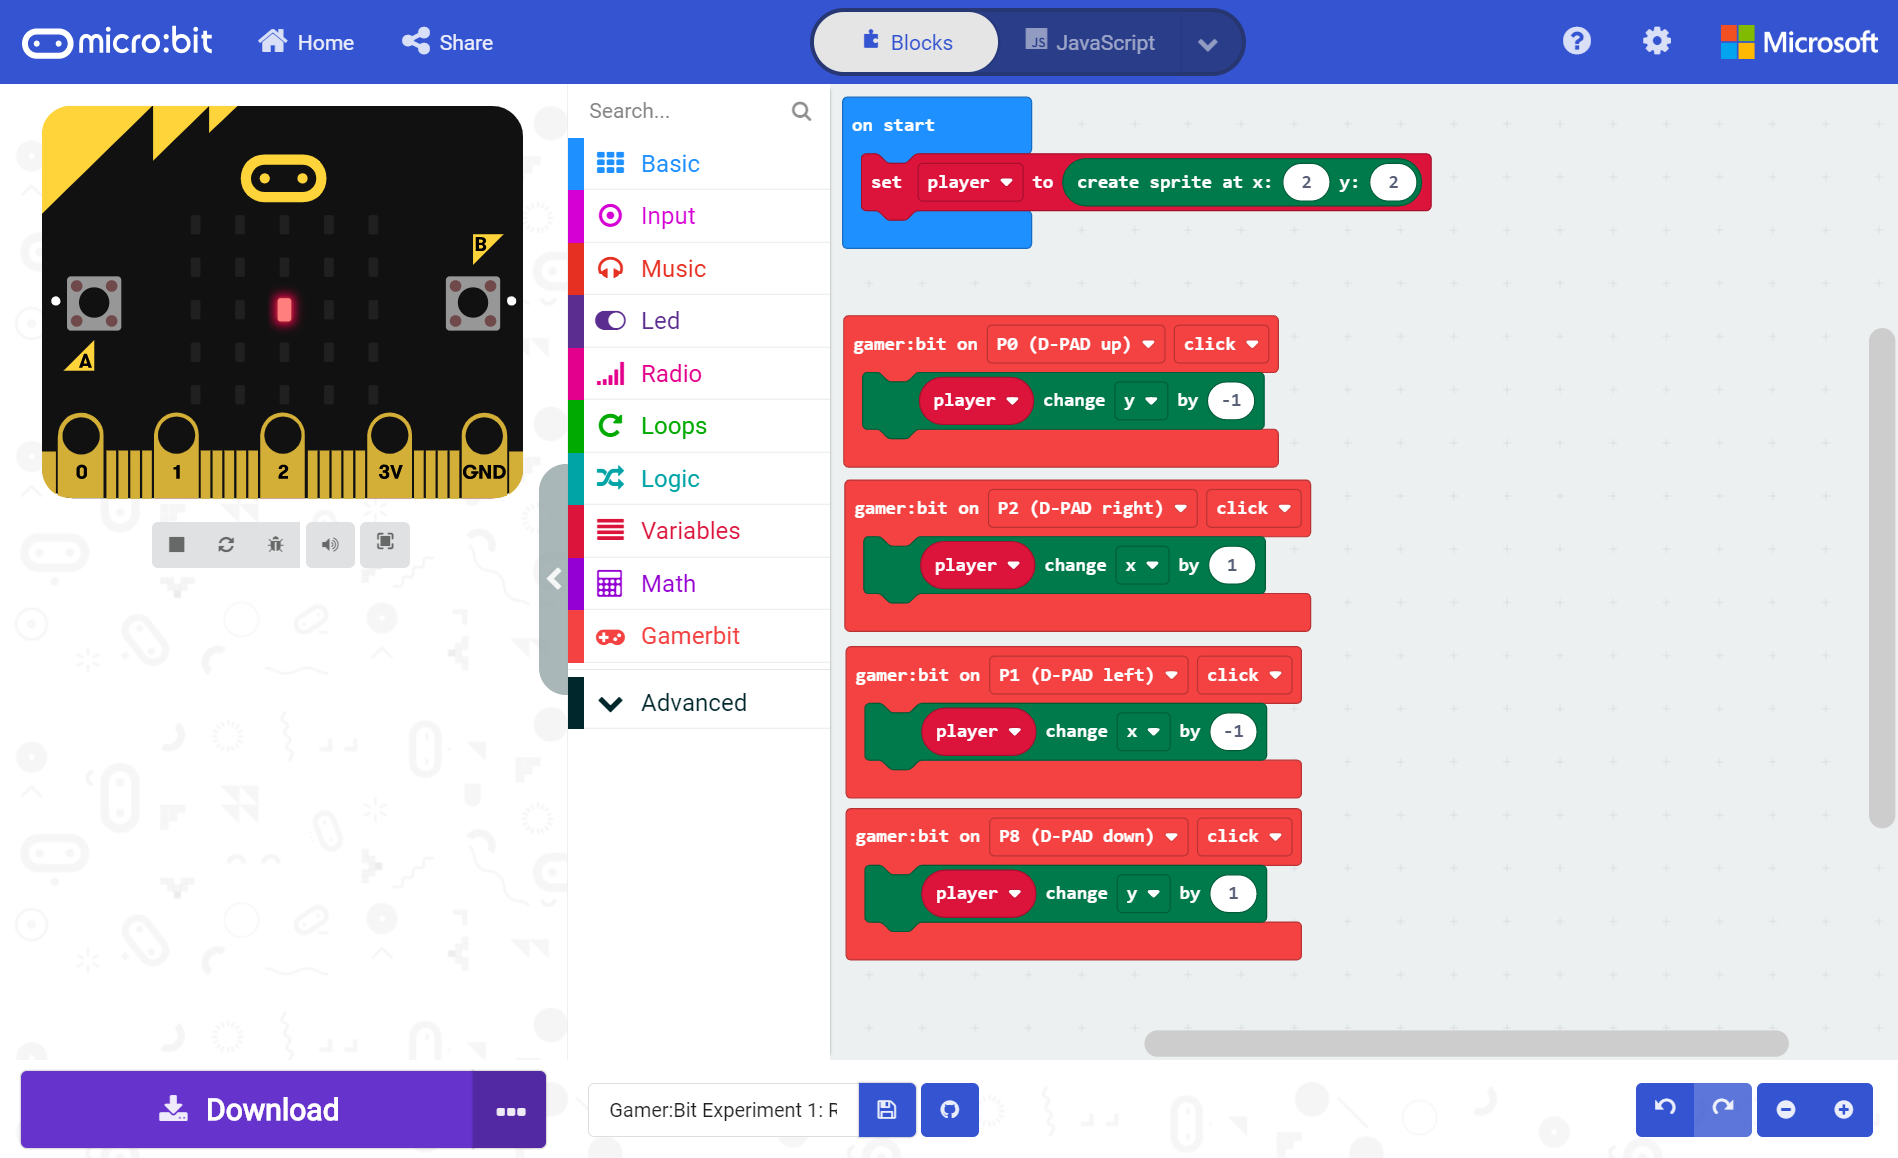
There are several MakeCode extensions that are available. The following instructions takes advantage of the Controller:bit's MakeCode extension but you can follow along to add other extensions as well.
Installing a MakeCode Extension
To install or add a new extension to your MakeCode toolbox (the list of different block groups), click on "Advanced" and then on "Add Extension."
From here you can search for "SparkFun" or "SparkFun gamer-bit," and it should show up as a public extension in the list. Go ahead and click on it.
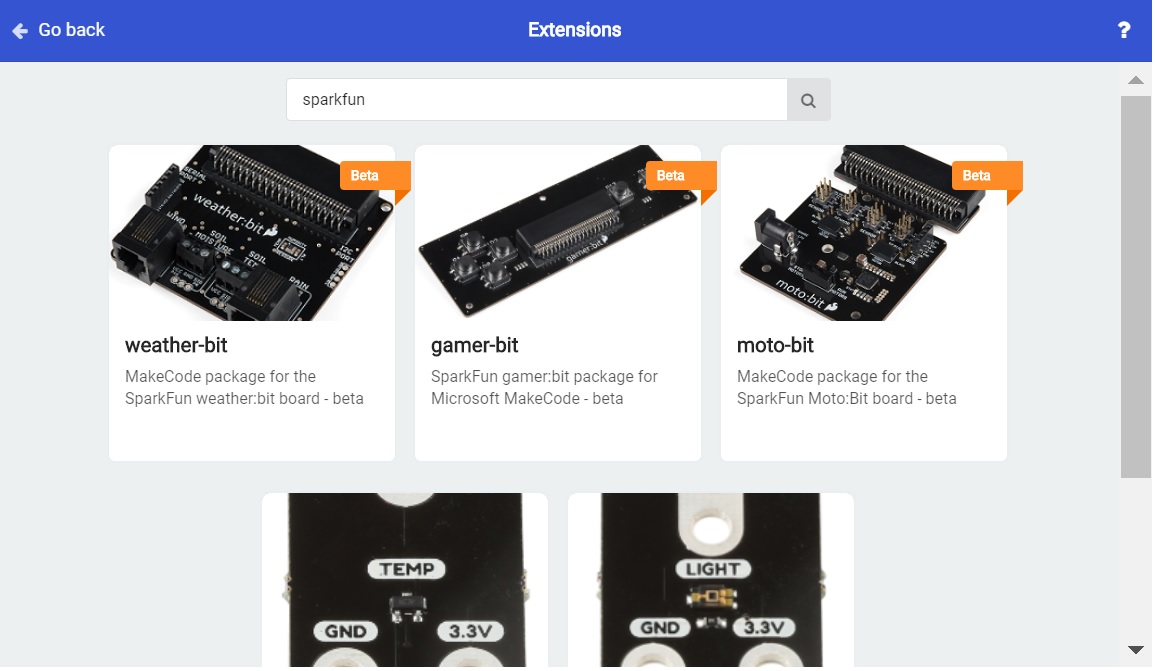
This will add all of the blocks to your toolbox. In general, this is a bit tricky as, depending on how the extension was written, it may either have its own toolbox or just add blocks to the existing ones. Take a look at your toolbox; for the gamer:bit you should see...
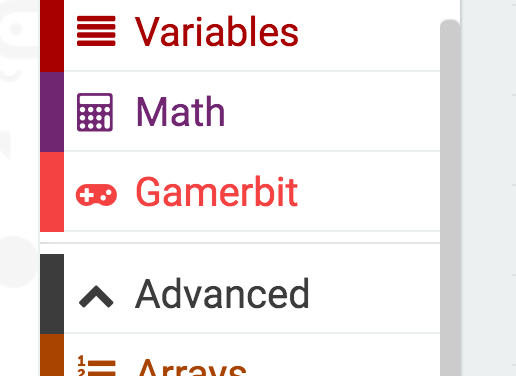
Great! You have now installed the gamer:bit extension! If you bought the micro:arcade kit, you are ready to use the board as well as the components that came in the kit. As a side note, for every new MakeCode project that you make, you will have to load extensions over again. Not a big deal, but noteworthy!
Updating Extensions
Published example codes and *.hex files that are saved use archived versions of extensions. Occasionally, there are updates to either MakeCode editor or the extensions. If you need to update an extension to the latest due to a compile error or new features, there are two methods of updating your extensions. One method is to remove all instances of the blocks provided by the extension and reinstalling the extension as outlined above. This can be tedious if there are several blocks sandwiched together and the length of your code. The second method is to update the version number in the Javascript View. The benefit is that users do not have to manually remove blocks that are sandwiched together.
Below is a published example where a previous gamer:bit extension was able to compile. An update to the MakeCode editor caused an error due to a bug in the gamer:bit extension that was ignored in previous versions of the MakeCode editor. A patch was eventually applied to the gamer:bit extension so we want to update the example to pull in the latest version to fix the error.
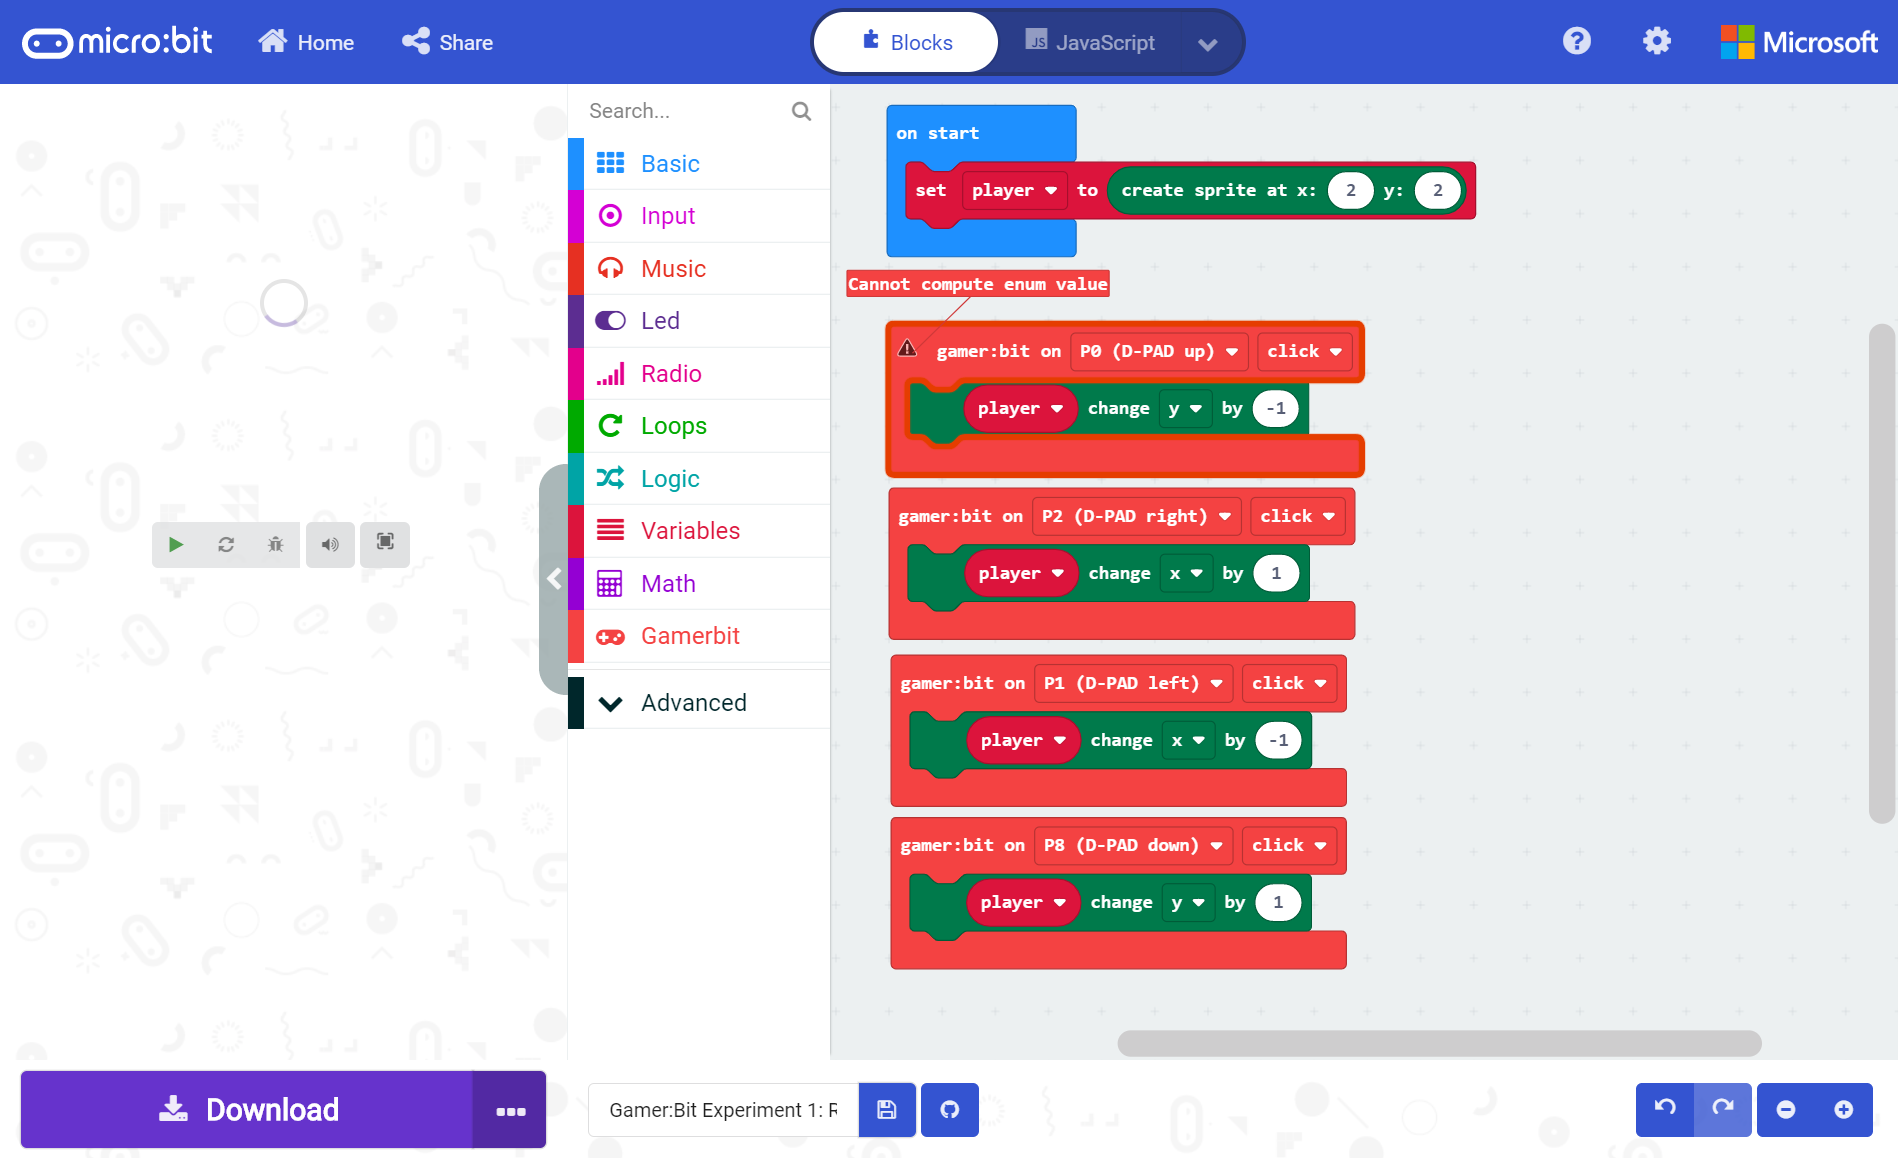
Toggle the JavaScript button at the top to switch to the JavaScript view. On the left hand side, you will notice the Explorer Menu. Click on the arrow to expand the menu.
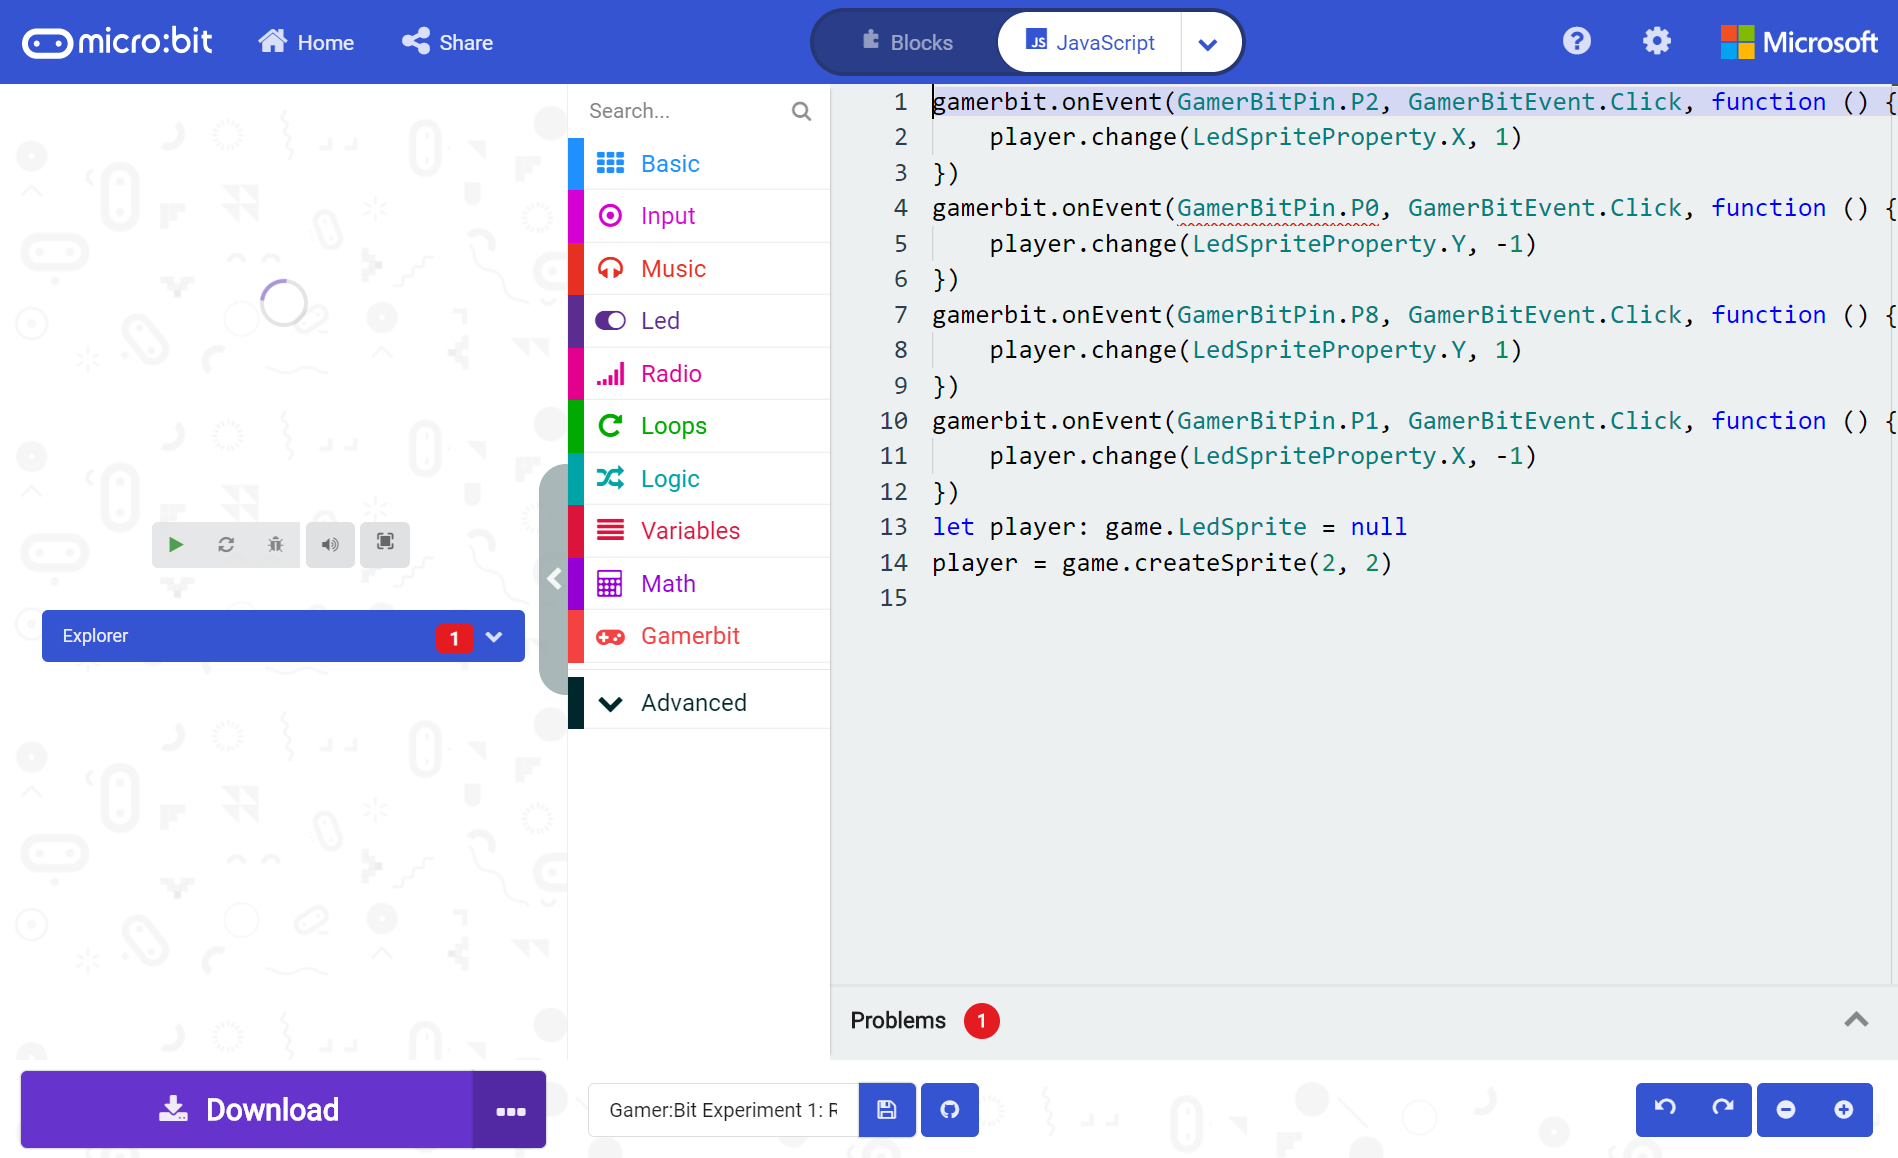
Scroll down to the MakeCode extension's version number. Here you can delete or update the extension version. We'll want to update the version number since the code relies on the gamer:bit extension. Click the button with the refresh symbol and version number.
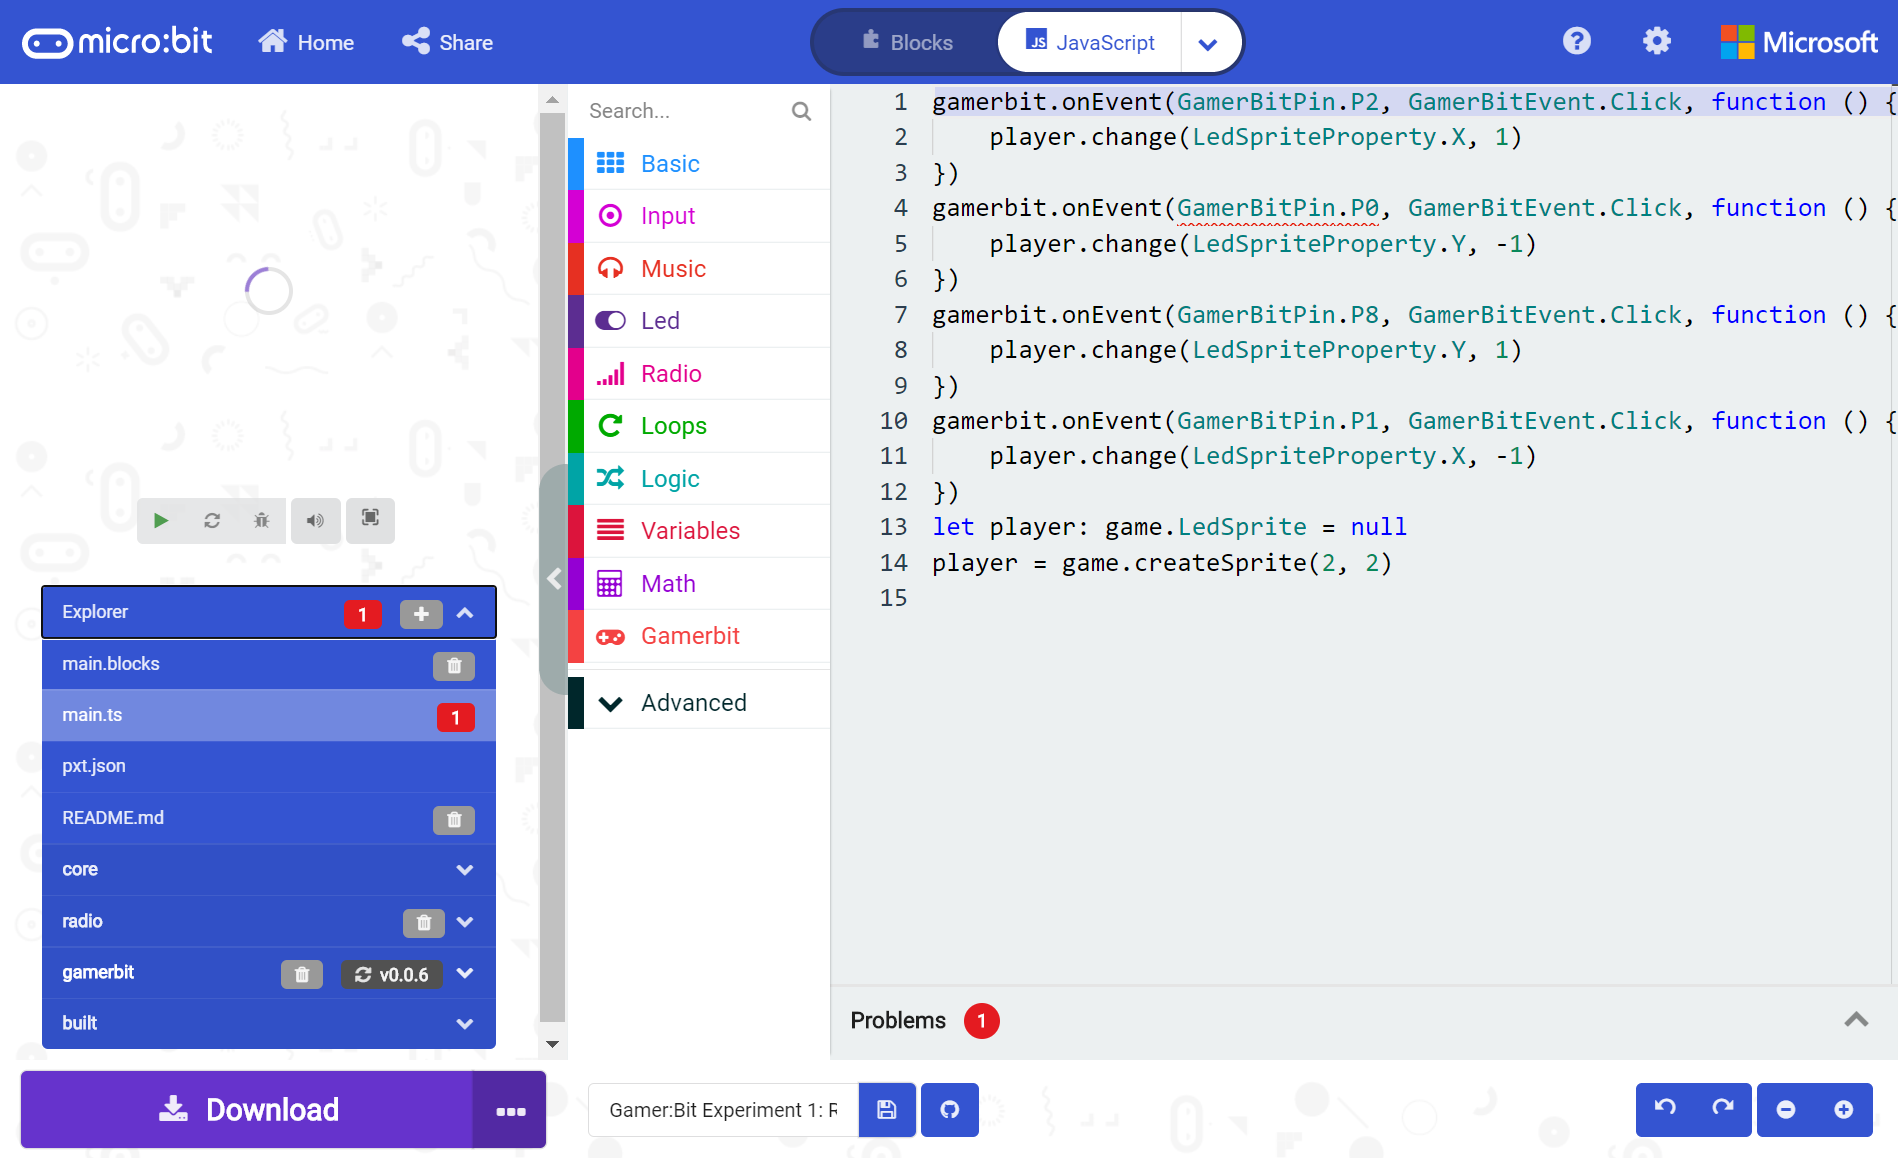
At this point, give it a few seconds to pull in the latest version number from the cloud. Then re-open the Explorer menu. If there was an update, this will refresh the extension and use the latest version. In this case, there was an update so it pulled in version v0.0.8! You'll notice that the red box with the number (which indicates the number of issues with the code) went away as well.
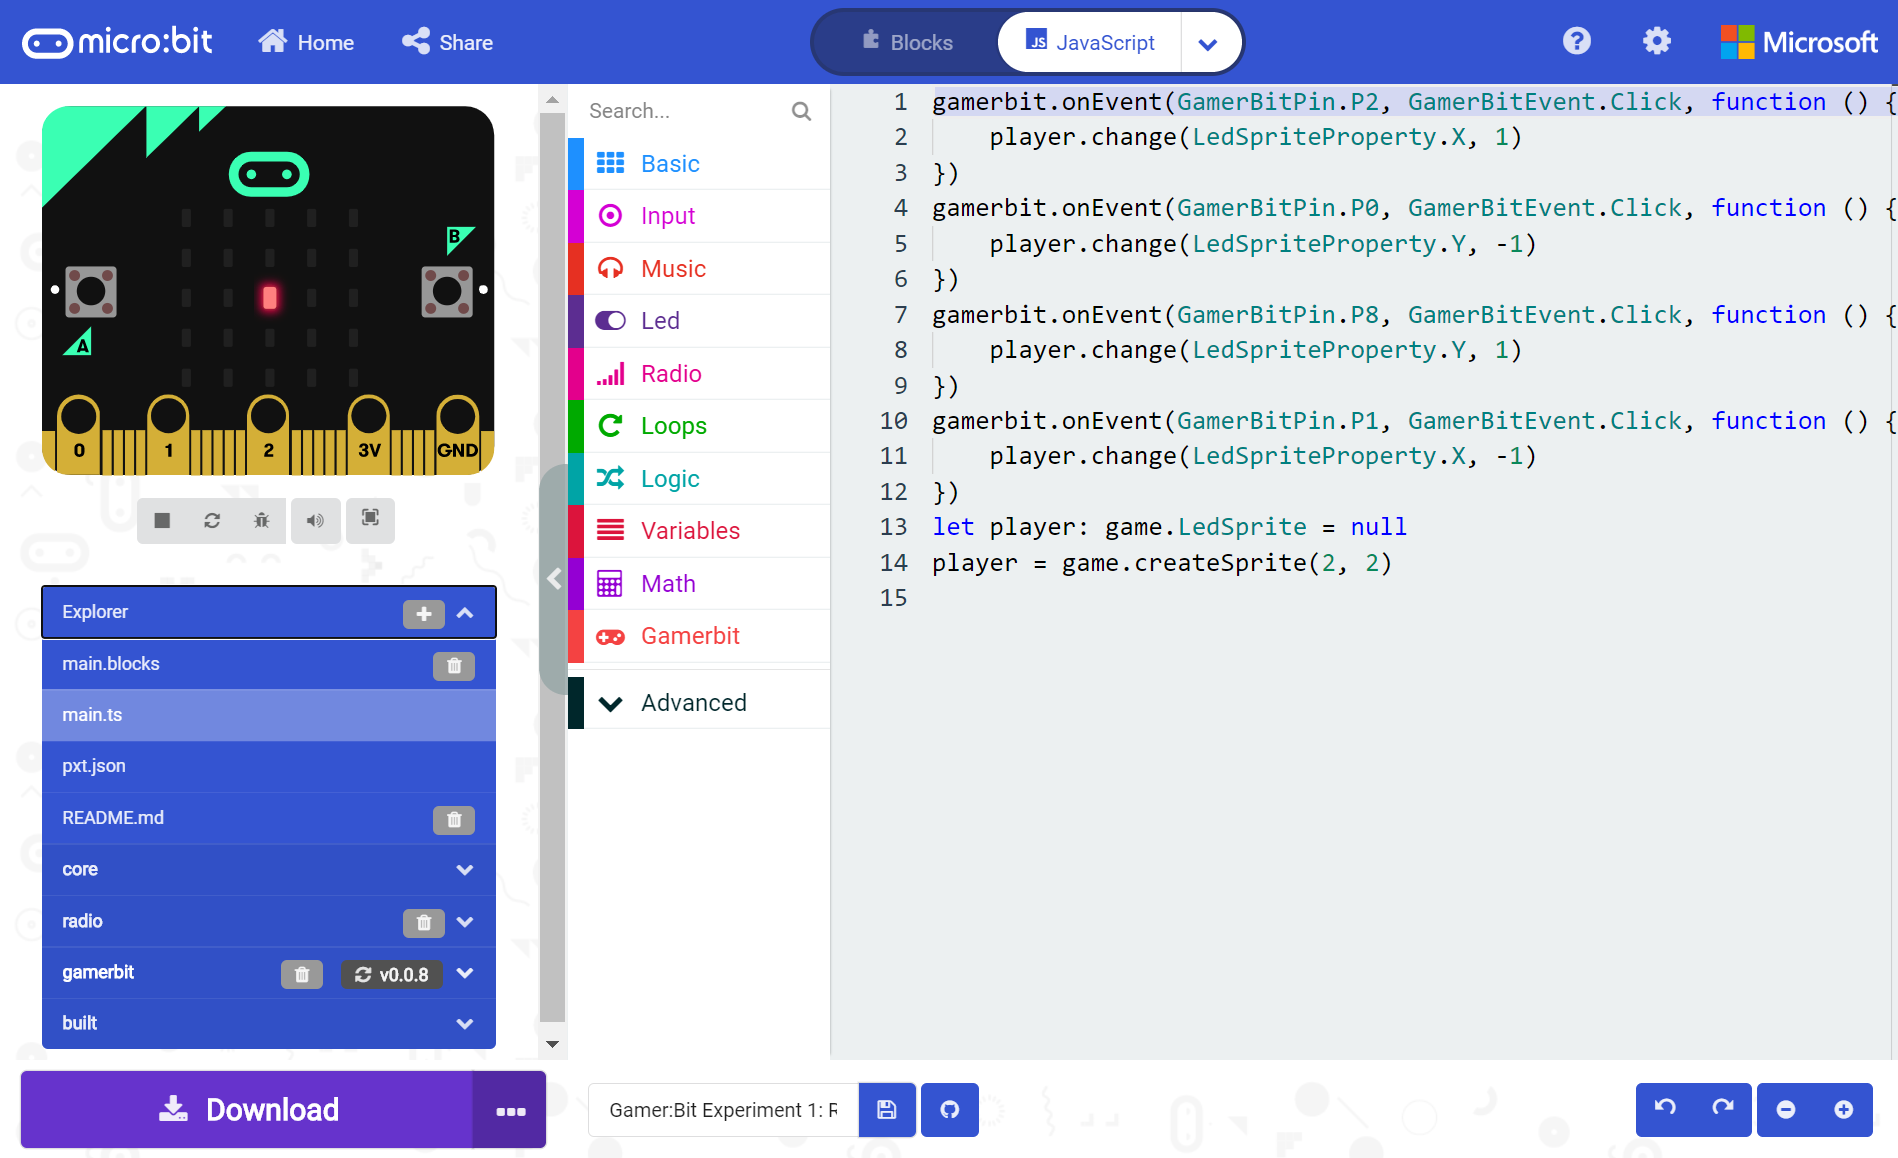
Just to make sure everything is going smoothly. Head back to the Blocks view, the error indicated by a triangle went away. Sweet! We have successfully updated the MakeCode extension so that we can get back to coding!
Making an Extension
For developers and advanced programmers interesting in making your own custom extensions, check out the following tutorial for more information!How to Create a MakeCode Package for Micro:Bit
April 16, 2019
Powering the micro:bit
You have your program running on your micro:bit, but it is still tethered to your computer. There are a number of ways to solve this problem... batteries, batteries and more batteries!
USB Battery Pack
USB battery packs are becoming pretty commonplace out there. You can use one to run your micro:bit project for quite a long time.
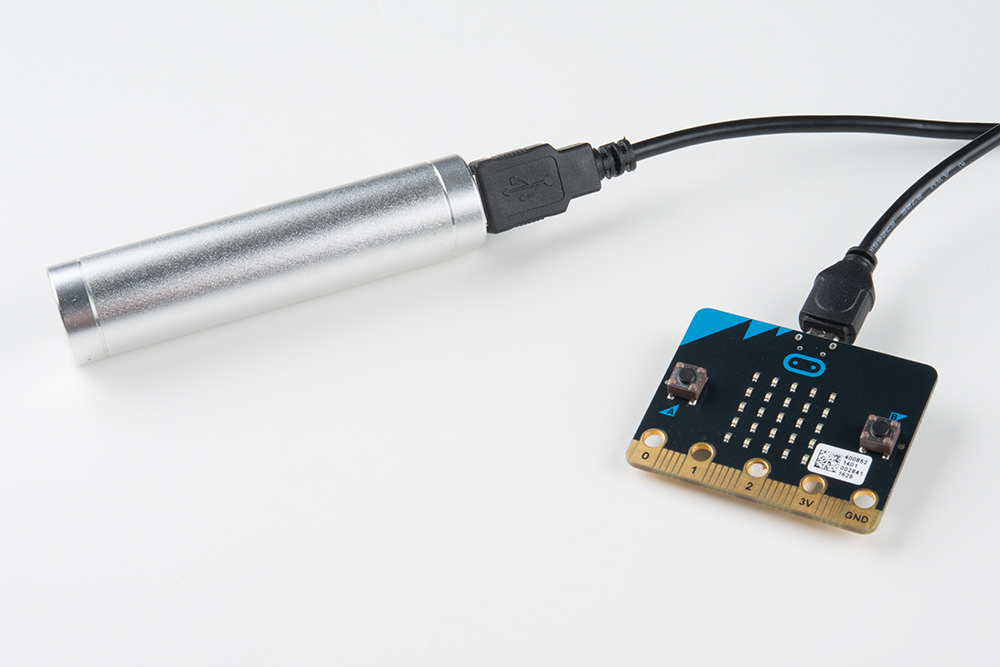
It is handy to have a shorter USB cable to keep from dragging a super-long wire around.
2xAA Battery Pack
The 2xAA battery holder with JST-PH connector is a great solution if you are looking to power a whole lot of micro:bits for a good amount of time, such as in a classroom setting.
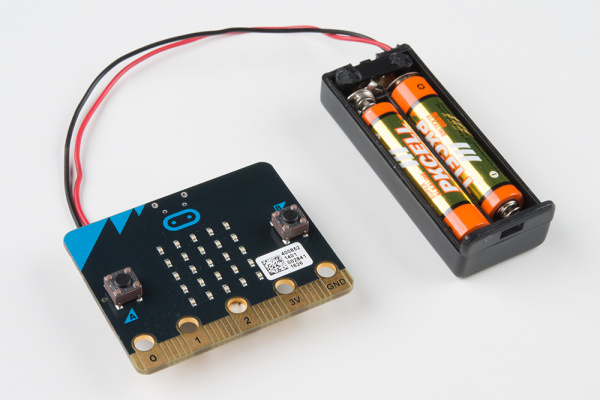
These batteries can be purchased in bulk for pretty cheap.
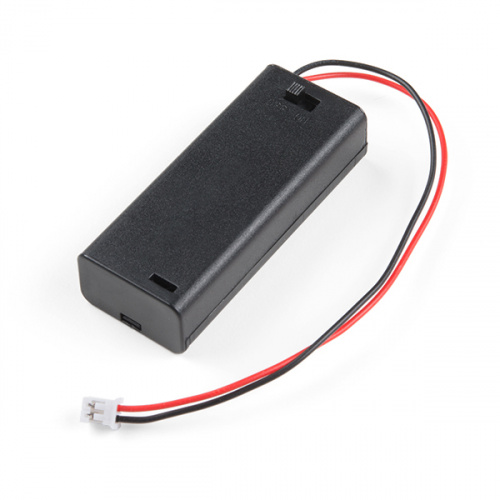
2xAAA Battery Pack
Looking for a smaller battery holder? Try looking at the 2xAAA battery holder with JST-PH connector. There is one that is included in the micro:bit Go bundle!

Or even check out the 2xAAA battery holder with JST-PH connector and power switch! The added switch makes it easy to turn on and off your micro:bit project without the need to wiggle the JST-PH connector off of your micro:bit.
Resources and Going Further
Now that you are familiar with the basics of the micro:bit, check out these additional resources for more inspiration!
- microbit.org
- About micro:bit - Information about the micro:bit foundation.
- Hardware - Technical and compliance information.
- Quickstart Guide - Additional getting started guides from the micro:bit foundation.
- Activities - Projects from the micro:bit website.
- Projects - Projects that you can build with your micro:bit.
- Apps - The micro:bit apps let you send code to your micro:bit wirelessly using Bluetooth. No leads needed! This also includes a list of other programming environments for the micro:bit.
- Educator Teaching Resources - Resources for educators. Classroom oriented activities based on the micro:bit.
- Code Club Activities - 6 activities from Code Club to try out!
- BBC micro:bit - Kitronik University - More micro:bit tutorials.
- Kitronik's Guide to micro:bit vs micro:bit v2
- Fritzing Part - For the red colored Fritzing part used in the tutorials, check out the user contributed part linked in this repository!
- SparkFun micro:bit Landing Page
Looking for additional project ideas using just the micro:bit? Check out micro:climate kit's reading light levels experiment:
 |
| micro:climate Experiment 2 - Reading Light Level |
For additional SparkFun tutorials, check out some of these related micro:bit tutorials:
micro:arcade Kit Experiment Guide
Gator:starter ProtoSnap Hookup Guide
SparkFun gator:environment Hookup Guide
SparkFun gator:log Hookup Guide
Check out Shawn's 4-part video series with the micro:bit. The projects have examples that use the accelerometer, combines the servo and temperature example, and sends a bluetooth message between two micro:bits. There are two additional videos using micro:bit with MicroPython. Or try exploring micro:bit with cardboard circuits!